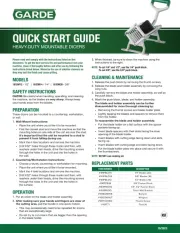
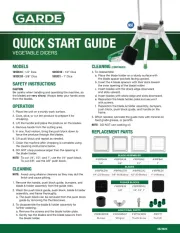
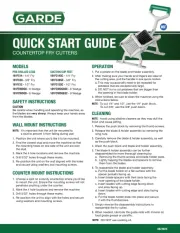
GARDE 181FC14WM Manual

GARDE Skæremaskine 181FC14WM

Læs gratis den danske manual til GARDE 181FC14WM (2 sider) i kategorien Skæremaskine. Denne vejledning er vurderet som hjælpsom af 10 personer og har en gennemsnitlig bedømmelse på 4.6 stjerner ud af 5.5 anmeldelser. Har du et spørgsmål om GARDE 181FC14WM, eller vil du spørge andre brugere om produktet?

Side 1/2
QUICK START GUIDE
WALL-MOUNT FRY CUTTERS
MODELS
181FC14WM - 1/4" Fry
181FC38WM - 3/8" Fry
181FC12WM - 1/2" Fry
181FCWDG6WM - 6 Wedge
181FCWDG8WM - 8 Wedge
SAFETY INSTRUCTIONS
CAUTION
the blades are very sharp. Always keep your hands away
from the blades.
WALL MOUNT INSTRUCTIONS
NOTE: It’s important that the unit be mounted to
a stud to prevent it from falling during use!
1. Position the bracket on the wall where you would
like to mount the unit.
2. Make sure the orientation of the bracket is correct
so that the fry cutter slides in from the top.
3. Find the closest stud and move the bracket so that
the mounting holes on one side of the bracket are
over the stud.
4. Mark the 6 hole locations and remove the machine.
5. Drill 5/32" holes through these marks.
6. Re-position the bracket on the wall aligned with the
holes and secure using washers and mounting screws.
7. Slide the fry cutter into the bracket.
COUNTER MOUNT INSTRUCTIONS
1. Choose a spot on a sturdy countertop where you'd like
to mount the unit. Ensure the mounting screws will not
penetrate anything under the counter.
2. Mark the 4 hole locations and remove the machine.
3. Drill 5/32" holes through these marks.
4. Re-position the unit to align with the holes and secure
using washers and mounting screws.
OPERATION
1. Put a potato on the blade and holder assembly.
2. After making sure your hands and ngers are clear of
the cutting area, pull the handle in one quick motion.
a. This may occasionally need to be repeated for
potatoes that are exceptionally large.
b. DO NOT try to cut potatoes that are bigger than
the opening in the blade holder.
3. When nished, be sure to clean the machine using the
instructions below.
NOTE: To cut 1/4" and 1/2", use the 1/4" push block.
To cut 3/8", use the 3/8" push block.
CLEANING
NOTE: Avoid using alkaline cleaners as they may dull the
nish and cause pitting.
1. Release the push block by removing the thumb screws.
2. Release the blade & holder assembly by removing the
wing nuts.
3. Carefully remove the blade & holder assembly, as well
as the push block.
4. Wash the push block and blade and holder assembly.
5. The blade & holder assembly can be further
disassembled for more thorough cleaning by:
a. Removing the thumb screws and blade holder plate.
b. Lightly tapping the blades and spacers to remove
them from the holder.
6. To reassemble the blade and holder assembly:
a. Put the blade holder on a at surface with the
spacer pockets facing up.
b. Insert blade spacers with their slots facing the
inner opening of the blade holder.
c. Insert blades with cutting edge facing down
and slots facing up.
d. Insert blades with cutting edge and slots facing
down.
e. Put the blade holder plate into place and secure
it with the thumbscrews.
7. Simply reverse the disassembly instructions to
reassemble the fry cutter.
8. When needed, lubricate the guide rods with mineral oil,
food grade grease or parafn.
NOTE: DO NOT use cooking oil.
08/2023


Produkt Specifikationer

Mærke: GARDE
Kategori: Skæremaskine
Model: 181FC14WM

Har du brug for hjælp?

Hvis du har brug for hjælp til GARDE 181FC14WM stil et spørgsmål nedenfor, og andre brugere vil svare dig


Skæremaskine GARDE Manualer

GARDE

GARDE 181DM12SC Manual

15 November 2025
GARDE

GARDE 181DM14SC Manual

13 November 2025
GARDE

GARDE 181DM14 Manual

12 November 2025
GARDE

GARDE 181DM14WM Manual

12 November 2025
GARDE

GARDE 181DM12 Manual

12 November 2025
GARDE

GARDE 181DM12WM Manual

11 November 2025
GARDE

GARDE 181PBLD38 Manual

27 August 2025
GARDE

GARDE 181FC38SC Manual

27 August 2025
GARDE

GARDE 181FC12CTM Manual

26 August 2025
GARDE

GARDE 181CORE8 Manual

26 August 2025

Skæremaskine Manualer

Nyeste Skæremaskine Manualer

Maestro

Maestro MR-590 Manual

8 December 2025
Maestro

Maestro MR-591 Manual

8 December 2025
Omcan

Omcan 11399 Manual

5 December 2025
Vevor

Vevor SK-720L Manual

2 December 2025
Vevor

Vevor PGYHJ3626 Manual

2 December 2025
Lakeland

Lakeland 62167 Manual

2 December 2025
Vevor

Vevor PGYHJ2814 Manual

1 December 2025
Vevor

Vevor PGYHJ2615 Manual

30 November 2025
Sommertal

Sommertal AS170 Manual

30 November 2025