Garden Wind Spinner
Instructions
Please read entire manual before attempting assembly, or usage.
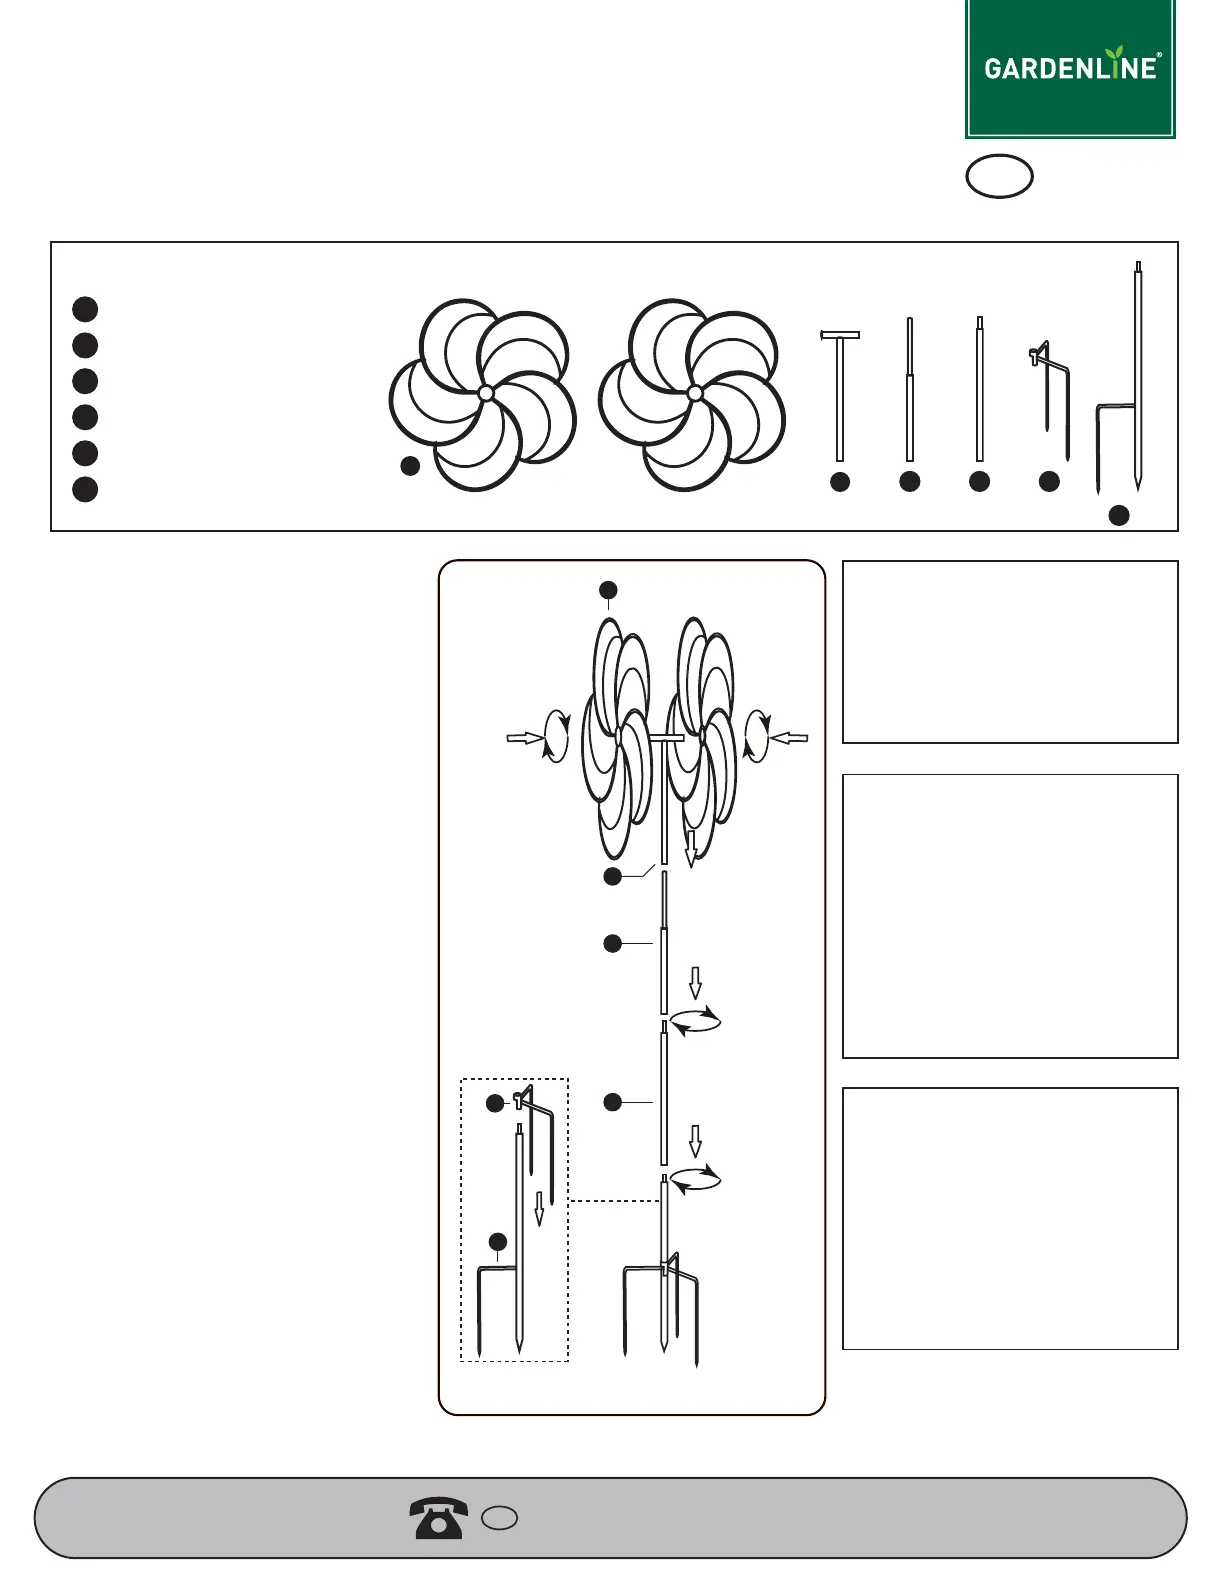
Product components
USA
AFTER SALES SUPPORT
SERVICIO POSVENTA
USA
1 866 231 8893
1 - “T” bar
B
A
2 - Wind spinners
A
1 - Tube
C
1 - Tube
D
1 - Two prong Ground spike
E
1 - “h” base Ground spike
F
Customer support center
Thank you for purchasing your new Garden
Wind Spinner.
Should you encounter problems after
following all the steps herein contained
please contact our
Customer Support:
Call 1-866-231-8893 or
email: info@ctm-inter.com
Kindly provide the model #, place and date
of purchase and a short description of the
problem
Maintenance
The Spinner will naturally oxidize,
resulting in a rusty patina over time. To
maintain the original finish, apply a coat of
polyurethane. If the spinner has slowed
due to oxidation, you may apply a dry
100% silicone spray or vegetable oil to
improve the spinning action.
(Fig 1)
A
F
Limited warranty
This product has one year Limited
Warranty. This warranty is limited to the
replacement of defective parts only. Labor
charges and/or damage incurred during
installation, repair, replacement as well as
incidental and consequential damages
connected with the above are excluded.
Any damage to this product as a result of
neglect, misuse, accident, improper
installation or use other than the purpose
SHALL VOID THIS WARRANTY.
ED
C
F
B
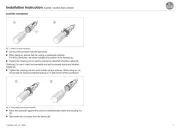
Assembly and operation (Fig 1)
Carefully check all packaging materials before
discarding.
Do not assemble if there are missing pieces.
1. Assemble both spinner fans (part A and B) to the
“T” bar (part B) by screwing cap clockwise.
2. Mount the two prong ground spike
(part E) to the “h” base ground spike (part F).
3. Assemble pole by screwing together the parts
(C) and (D) in the order as shown.
4. Put the stake in the ground.
5. Put the fan assembly onto the pole.
Adjusting the spinner parts
Once the Spinner is assembled, you can carefully
shape the petals to catch the wind. Each petal
should be slightly offset and have a slight twist—
don't over bend.
Give the Spinner a gentle spin to make sure it turns
freely. Place outdoors in an area open to the wind.
The Spinner does not swivel to face changing
winds, so it’s important to take the time to
determine the prevailing winds.
If you find the Spinner doesn’t spin properly after it
is installed, reposition the entire unit to better catch
the prevailing wind.
Locate an area outdoors that receives enough wind
to power the Spinner. The Spinner head will not
pivot on its own to catch the wind. It requires air
movement to set it spinning; for maximum spin
install it in an open area to catch prevailing winds
rather than in an area that is sheltered from the
wind.
If you install the Spinner in a very high-wind area,
or if you have very sandy or loamy soil, we
recommend embedding the Foot Stake in cement to
give added stability.
B
C
E
D
MODEL: JS-C074
PRODUCT CODE: 52699 05/2017