GEM e6 (2012) Manual

GEM var e6 (2012)

Læs gratis den danske manual til GEM e6 (2012) (159 sider) i kategorien var. Denne vejledning er vurderet som hjælpsom af 39 personer og har en gennemsnitlig bedømmelse på 4.5 stjerner ud af 20 anmeldelser. Har du et spørgsmål om GEM e6 (2012), eller vil du spørge andre brugere om produktet?

Side 1/159
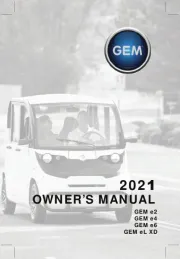
2012 Owner's Manual for Maintenance and Safety
Read this manual carefully.
It contains important safety information.
Global Electric Motorcars by
WARNING
Read, understand, and follow all of the
instructions and safety precautions in this
manual and on all product labels.
Failure to follow the safety precautions could
result in serious injury or death.
The text is printed on 100% recycled
with 40% post-consumer waste (PCW).
For your nearest GEM dealer,
call 855-RIDEGEM (855-743-3436)
or visit www.gemcar.com
Polaris Sales Inc.
2100 Hwy. 55
Medina, MN 55340
Part No. 9923940 Rev 01
Printed in USA
R
Global Electric Motorcars by
1
R
Global Electric Motorcars by
2
The following are registered trademarks of POLARIS Industries Inc.:
Copyright 2011 POLARIS Sales Inc. All information contained within this publication is based on the latest prod-
uct information at the time of publication. Due to constant improvements in the design and quality of production
components, some minor discrepancies may result between the actual vehicle and the information presented in
this publication. Depictions and/or procedures in this publication are intended for reference use only. No liability
can be accepted for omissions or inaccuracies. Any reprinting or reuse of the depictions and/or procedures con-
tained within, whether whole or in part, is expressly prohibited.
Printed in U.S.A.
2012 GEM Owner’s Manual
P/N 9923940
POLARIS®VICTORY®Global Electric Motorcars®GEM®
THE WAY OUT®RANGER®INDIAN®e6®
3
TABLE OF CONTENTS
Introduction. . . . . . . . . . . . . . . . . . . . . . . . . . . . . . . . . . . . . . . . . . . . . . . . . 6
Safety. . . . . . . . . . . . . . . . . . . . . . . . . . . . . . . . . . . . . . . . . . . . . . . . . . . . . 12
Features and Controls . . . . . . . . . . . . . . . . . . . . . . . . . . . . . . . . . . . . . . . 32
Operation. . . . . . . . . . . . . . . . . . . . . . . . . . . . . . . . . . . . . . . . . . . . . . . . . . 88
Maintenance . . . . . . . . . . . . . . . . . . . . . . . . . . . . . . . . . . . . . . . . . . . . . . . 98
Specifications . . . . . . . . . . . . . . . . . . . . . . . . . . . . . . . . . . . . . . . . . . . . . 136
Warranty . . . . . . . . . . . . . . . . . . . . . . . . . . . . . . . . . . . . . . . . . . . . . . . . . 142
Maintenance Log . . . . . . . . . . . . . . . . . . . . . . . . . . . . . . . . . . . . . . . . . . 149
Index . . . . . . . . . . . . . . . . . . . . . . . . . . . . . . . . . . . . . . . . . . . . . . . . . . . . 153
4
WELCOME
Thank you for purchasing a GEM by POLARIS, and welcome to our world-wide POLARIS
family of recreational and utility vehicle owners. We believe POLARIS sets a standard of
excellence for all recreational and utility vehicles manufactured in the world today. With our
many years of experience in design and manufacturing, we proudly bring you only the finest
of vehicles:
• Snowmobiles
All-terrain vehicles (ATVs)
RANGER® utility vehicles
Low emission vehicles (LEVs)
• VICTORY® motorcycles
• INDIAN® motorcycles
• GEM® vehicles
5
WELCOME
For safe and enjoyable operation of your vehicle, be sure to follow the instructions and rec-
ommendations in this owners manual. Your manual contains instructions for minor mainte-
nance, but information about major repairs is outlined in the GEM Service Manual and
should be performed only by an authorized GEM dealer technician.
If questions arise after reading the manual, please contact GEM customer service. Be pre-
pared to provide your Vehicle Identification Number (VIN) and date of purchase.
Your authorized GEM dealer knows your vehicle best and is interested in your total satisfac-
tion. Be sure to return to your dealership for all of your service needs during, and after, the
warranty period.
GEM Customer Service
Phone: 855-RIDEGEM (855-743-3436)
Web: www.gemcar.com
7
INTRODUCTION
Safety Signal Words and Symbols
The following signal words and symbols appear throughout this manual and on your vehicle.
Your safety is involved when these words and symbols are used. Become familiar with their
meanings before reading the manual.
The safety alert symbol indicates a potential
personal injury hazard.
WARNING
A WARNING indicates a hazardous situation
which, if not avoided, may result in death or
serious injury.
CAUTION
A CAUTION indicates a hazardous situation
which, if not avoided, may result in minor or
moderate injury.
NOTICE
A NOTICE indicates a situation that may result in
property damage.
The Prohibition Safety Sign indicates
an action NOT to take in order to avoid
a hazard.
The Mandatory Action Sign indicates
an action that NEEDS to be taken to
avoid a hazard.
8
INTRODUCTION
Failure to follow the warnings contained in this manual can result in severe injury or death.
Special precautions must be followed when owning and operating a battery-powered vehicle. This
vehicle is not a toy and can be hazardous to operate. This vehicle handles differently than other
vehicles. A collision or rollover can occur quickly, even during routine maneuvers, if you fail to take
proper precautions.
Read this owner’s manual. Understand all safety warnings, precautions and operating procedures
before operating the vehicle. Keep this manual with the vehicle.
This vehicle is an ADULT VEHICLE ONLY. NEVER operate this vehicle if you are under age 16 and
NEVER operate without a valid driver’s license.
Never permit a guest to operate this vehicle unless the guest has read this manual and all product
labels.
Operate this vehicle only on public or private roads where speed limits are appropriate for low speed
vehicles. Be familiar with motor vehicle laws in your area of operation. Do not operate this vehicle in
situations where it could become an obstacle or an annoyance for faster-moving traffic.
WARNING
9
INTRODUCTION
Manufacturers Label (Vehicle Information Label)
Record your vehicle's identification numbers and key number in the spaces provided on page
11.
The Vehicle Identification Number (VIN) is on the manufacturers label, located on the left
rear section of the roof panel. The VIN indicates the model year, model type and serial num-
ber of your vehicle. The manufacturers label also contains the Gross Vehicle Weight Rating
(GVWR) and Gross Axle Weight Rating (GAWR) information for your vehicle. Never
exceed the GVWR or the GAWR. See page 22.
To order an extra or replacement key for your vehicle, please contact GEM customer service.
See page 5. Be prepared to provide your key number and VIN.
10
INTRODUCTION
Manufacturers Label (Vehicle Information Label)
Manufacturers
Label
VIN
GVWR
Information
Tire / Wheel Information
GAWR Information
Date of
Manufacture
USA Label EU Label
12
SAFETY
Safety Labels and Locations
Warning labels have been placed on the vehicle for your protection. Read and follow the
instructions of the labels on the vehicle carefully. If any of the labels depicted in this manual
differ from the labels on your vehicle, always read and follow the instructions of the labels
on the vehicle.
If any label becomes illegible or comes off, contact your authorized GEM dealer to purchase
a replacement. Replacement labels are provided at no charge. The part number is safety
printed on the label.
General Warning
WARNING
Read your owner’s manual before operating this vehicle.
Do not operate this vehicle under the influence of alcohol,
drugs or medication.
This vehicle is not intended to be driven at speeds exceeding
25 MPH (40 km/h).
(continued on next page)
General Warning
13
SAFETY
Safety Labels and Locations
General Warning
Although most states prohibit this vehicle from operating on streets having posted speed limits of
more than 35 MPH (56 km/h), state and local rules may vary. Check with your local law enforcement
(city and state officials) for variations in your area.
Never exceed the passenger and cargo limits of this vehicle.
Do not start or operate vehicle until all occupants are seated with seat belts fastened.
Avoid sharp turns an inclines and at high speeds (may cause rollover).
Reduce speed on wet and slippery surfaces and in turns.
Do not leave children unattended in vehicle.
Set handbrake before leaving the vehicle.
Remove key when leaving vehicle unattended.
Stop vehicle before reversing direction.
Be aware of small children and objects behind you before reversing direction.
ALWAYS DRIVE SAFELY. FAILURE TO FOLLOW THESE WARNINGS COULD RESULT IN
SERIOUS OR FATAL INJURY.
14
SAFETY
Safety Labels and Locations
Door/Seat Belt Warning
This label is located near the lower edge of the window on the drivers side door on models
equipped with doors.
WARNING
The doors on this vehicle are designed only for protection against the elements. Do not rely on the
doors to contain occupants within the vehicle or to protect against injury during an accident.
WEAR SEAT BELTS AT ALL TIMES.
15
SAFETY
Safety Labels and Locations
High Voltage Warning
High voltage warning labels are located in two places on your vehicle: near the battery com-
partment and under the hood near the motor controller.
WARNING
HIGH VOLTAGE
You could be seriously or fatally injured by electric shock if you attempt to open, repair,
test, inspect or adjust. Only qualified technicians should open and service. Consult service
manual.
16
SAFETY
Safety Labels and Locations
Cargo Warnings
Cargo warning labels are located in the beds of GEM eL and GEM eL XD models.
CARGO WARNING (eL)
Maximum cargo capacity of this bed should never exceed 700 lbs. (317.5 kg).
Distribute weight equally over axle.
No passengers permitted.
Abuse or noncompliance will void warranty.
CARGO WARNING (eL XD)
Maximum cargo capacity of this bed should never exceed 1100 lbs. (499 kg).
Distribute weight equally over axle.
No passengers permitted.
Abuse or noncompliance will void warranty.
17
SAFETY
Operator Safety
Serious injury or death can result if you do not follow these instructions and procedures, which are
outlined in further detail within your owner's manual.
Read this manual and all labels carefully.
Follow the operating procedures
described.
Never allow anyone under age 16 to oper-
ate this vehicle and never allow anyone
without a valid driver's license to operate
this vehicle.
Never permit a guest to operate this vehi-
cle unless the guest has read this manual
and all product labels.
Always make sure the seat belts are
secured for operator and all passengers
before operating.
Never exceed the maximum occupant
capacity of your vehicle:
WARNING
GEM e2 2 occupants
GEM e4 4 occupants
GEM eS 2 occupants
GEM eL 2 occupants
GEM eL XD 2 occupants
GEM e6®6 occupants
19
SAFETY
Operator Safety
Never carry loads on the roof of the vehi-
cle. Never exceed the stated load capacity
for this vehicle. Cargo should be properly
distributed and securely attached. Reduce
speed and follow the instructions on
cargo warning labels for hauling cargo.
Allow a greater distance for braking.
Always set the park brake and remove the
key when leaving the vehicle unattended.
The voltage in the battery pack is suffi-
cient to cause death by electrocution.
With the exception of battery inspections
and refilling the water in flooded type
batteries, never attempt to perform ser-
vice on the electric drive system, includ-
ing the battery pack, unless you are
properly trained to work on electrical sys-
tems.
20
SAFETY
Operator Safety
Do not carry a passenger until you have at
least two hours of driving experience
with this vehicle.
Always keep arms and legs inside the cab
frame while the vehicle is in motion.
Always keep both hands on the steering
wheel and both feet on the floorboards of
the vehicle during operation.
Never consume alcohol or drugs before
or while operating this vehicle.
Never operate at excessive speeds.
Always travel at a speed proper for the
traffic, visibility and operating
conditions, and your experience.
Never attempt jumps, doughnuts or other
stunts.
Always inspect your vehicle each time
you use it to make sure it's in safe
operating condition. Always follow the
inspection and maintenance procedures
and schedules described in this manual.
21
SAFETY
Operator Safety
Never operate on excessively rough, slip-
pery or loose terrain.
Always follow proper procedures for
turning. Practice turning at slow speeds
before attempting to turn at faster speeds.
Never turn at excessive speeds.
Always have this vehicle checked by an
authorized GEM dealer if it has been
involved in an accident.
Always be alert for obstacles when oper-
ating this vehicle. Never attempt to oper-
ate over obstacles.
Always be careful of skidding or sliding.
On slippery surfaces such as ice, travel
slowly and exercise caution to reduce the
chance of skidding or sliding out of con-
trol.
Never operate this vehicle on steep hills.
22
SAFETY
Operator Safety
Gross Vehicle Weight Rating (GVWR)
WARNING! Exceeding the gross vehicle weight rating of your vehicle can reduce stability and handling
and could cause loss of control. NEVER exceed the GVWR of your vehicle.
The maximum payload capacity of your vehicle is the maximum weight you may add to
your vehicle without exceeding the GVWR. This capacity is determined by calculating the
difference between your vehicles GVWR and wet weight.
Refer to the specification section of this manual or the Manufacturers Label on the vehicle
for model-specific information.
24
SAFETY
Operator Safety
Equipment Modifications
Never install any equipment or make vehicle modifications to increase the speed or power of
the vehicle. Any modifications to the original equipment of the vehicle create a substantial
safety hazard and increase the risk of bodily injury. The warranty on your vehicle is termi-
nated if any equipment has been added to the vehicle, or if any modifications have been
made to the vehicle, that increase its speed or power.
The addition of certain accessories, including (but not limited to) mowers, blades, tires,
sprayers, or large racks, may change the handling characteristics of the vehicle. Use only
GEM-approved accessories, and familiarize yourself with their function and eect on the
vehicle.
26
SAFETY
Operator Safety
Operating Without Instruction
Operating this vehicle
without proper instruction
increases the risk of an
accident. The operator
must understand how to
operate the vehicle
properly in different
situations and on different
types of terrain. All
operators must read and
understand the Owner's Manual and all warning
and instruction labels before operating the
vehicle.
Ventilation When Charging Batteries
Failure to provide adequate ventilation while
charging batteries can result in an explosion.
Volatile hydrogen gas is emitted during charging
and may accumulate in pockets at the ceiling.
• Always ensure a minimum of 5 air changes per
hour in the charging area.
• Always remove any storage covers from the
vehicle and open any cab doors (if equipped)
before charging.
28
SAFETY
Operator Safety
Operating a Damaged Vehicle
Operating a damaged vehicle can result in an
accident. After any overturn or accident, have
your authorized GEM dealer inspect the entire
machine for possible damage, including (but not
limited to) brakes, accelerator, steering system
and electrical system.
Operating at Excessive Speeds
Operating this vehicle at excessive speeds
increases the operator's risk of losing control.
Always operate at a speed that's appropriate for
the traffic, the visibility and operating conditions,
your skills and your passengers’ skills.
Exhibition Driving
Exhibition driving increases the risk of an
accident or overturn. Never attempt wheelies,
jumps, doughnuts or other stunts. Avoid
exhibition driving.
31
SAFETY
Operator Safety
Precautions During Maintenance
WARNING! The voltage in the battery pack is
sufficient to cause death by electrocution. With
the exception of battery inspections and refilling
the water in flooded type batteries, never attempt
to perform service on the electric drive system,
including the battery pack, unless you are
properly trained to work on electrical systems.
WARNING! Do not work in or near the battery
compartment or on any other electrical
component of the vehicle while charging the
batteries. Always turn off the main disconnect
switch before servicing or unplugging any
electrical components. See page 52.
Always follow all safety instructions in the
maintenance portion of this owner’s manual, as
well as the following:
• Make sure the vehicle is properly immobilized
before beginning any maintenance.
• Always block the chassis securely before work-
ing under the vehicle.
• Turn the key off and remove it from the vehicle.
• Insulate any tools used within the battery area
to prevent sparks or battery explosion caused
by shorting the battery terminals or wiring.
Remove the batteries, or cover the exposed ter-
minals with an insulating material.
FOR MORE INFORMATION ABOUT SAFETY
PLEASE CONTACT GEM CUSTOMER SERVICE.
See page 5.
32
FEATURES AND CONTROLS
Console
Trip/Odometer
Switch
Headlight
Switch
Turn Signal
Windshield Wiper
Horn Lever
Direction Switch
Key
Switch
LCD Display
Glove Box
Lock
Cup Holders Instrument Pod Storage Tray
34
FEATURES AND CONTROLS
Console
Key Switch
When the key is turned to the ON position (clockwise), the display will
light up and all electrical accessories can be used.
Leaving the key in the ON position will discharge the batteries. Always
turn the key to the OFF position when not operating. Remove the key
from the ignition to prevent unauthorized use.
When the key is turned to the OFF position, the vehicle will not acceler-
ate, but accessories and lights will remain on for approximately 30 sec-
onds. Turn the key to the OFF position to disable all electrical circuits.
The key can be removed from the switch when it is in the OFF position.
WARNING! Never turn the key to the OFF position while the vehicle is in motion. This could lead to
loss of speed control and loss of vehicle control, which could result in serious injury or death.
Key
ON
Key
OFF
36
FEATURES AND CONTROLS
Console
Turn Signal
The turn signal lever contains the controls for the turn signals, horn, windshield wiper and
windshield washer (if equipped). Check turn signal lamps before each ride. When driving,
activate a turn signal before turning to alert others of your intentions.
Tip: The key must be in the ON position to activate the turn signals.
Move the turn signal lever downward to signal a left turn. The left
turn signal lamp below the front headlight will flash.The left turn
indicator in the LCD display will also flash.
Move the lever upward to signal a right turn. The right signal
lamp and indicator will flash.
Return the lever to the center position to end the signal. If the
operator does not end the signal within 45 seconds, an alert will
sound.
38
FEATURES AND CONTROLS
Console
Trip Meter/Odometer/E-Meter
The trip switch has four functions:
Toggle between the odometer and trip meter.
Reset the trip meter.
Change the function of the speedometer and odometer from miles per hour (MPH) to kilo-
meters per hour (km/h) and miles to kilometers.
Toggle between odometer/trip meter and e-meter to display accumulated power consumed
from grid, shown in kilowatt hours (kWh).
39
FEATURES AND CONTROLS
Console
Trip Meter/Odometer/E-Meter
Trip Switch Operation
Desired Result Press Trip Switch
Toggle between the odometer and trip meter
modes on the display
Press and hold for less than 2 seconds
Reset the trip meter to zero Press and hold for 3-9 seconds while display is in
trip mode (“TRIP” is illuminated, see page 42)
Change the display from standard to metric (MPH
to km/h and miles to kilometers)
Press and hold for 10-12 seconds while display is
in odometer mode
Display consumed power Press and release twice
40
FEATURES AND CONTROLS
Console
Direction Switch
NOTICE: Always bring the vehicle to a complete stop before
changing the position of the direction switch.
1. With the key in the ON position, apply the brakes.
2. Move the direction switch to the desired mode.
3. Release the brakes and gradually depress the accel-
erator pedal to increase speed.
CAUTION! Changing the direction switch position while driving could result in an automatic increase
or decrease in speed without a change to accelerator pedal pressure.
Drive High
Drive Low
Reverse
41
FEATURES AND CONTROLS
Console
Direction Switch
Drive High
The HIGH mode allows operation of the vehicle at speeds of 0-25 MPH (0-40 km/h).
Drive Low
The LOW mode allows operation of the vehicle at speeds of 0-15 MPH (0-24 km/h). When
LOW mode is selected, the rate of acceleration is also limited.
Reverse
A reverse warning alert will automatically sound when the key is on and reverse mode is
selected. Vehicle speed is limited when operating in reverse. See page 92 for safe reverse
operation procedures.
45
FEATURES AND CONTROLS
Console
LCD Display Indicators
Turn Indicators
The corresponding turn signal indicator flashes when a signal is activated.
Brake Warning Indicator
The brake warning illuminates when the park brake is engaged or when a brake sys-
tem failure has occurred. If the brake warning illuminates, check the following
items before operating the vehicle.
WARNING! Worn or damaged brake hoses can cause brake failure. Always have worn or damaged
brake hoses replaced promptly.
Brake System Item Solution
Park brake Release the park brake.
Brake fluid level If low, add brake fluid. See page 100.
Brake system Check hoses for cracks, scuffs and worn spots. If you discover signs of
wear or damage, do not operate the vehicle. See your authorized GEM
dealer for service.
48
FEATURES AND CONTROLS
Console
LCD Display Indicators
State of Charge/Battery Discharge Indicator (BDI)
This indicator contains 8 green bars, a yellow bar and a red bar. It
shows available battery capacity by illuminating one or more bars.
The indicator illuminates when the key is turned on. It also illumi-
nates 8-10 seconds after the charging cord is connected, turning off
when the batteries are 100% charged. To verify a full charge or to
check the state of charge, turn the key on.
As charge is depleted, bars begin to turn off from right to left.
Remaining bars indicate remaining battery charge. See page 49.
Tip: If only red and yellow bars are illuminated, charge is very low. Recharge as soon as possible. A full
recharge cycle (from one red bar to fully charged) may take 8 hours or more for a standard battery
pack, and up to 14 hours for a heavy duty battery pack.
Red
Yellow
Green
54
FEATURES AND CONTROLS
Brake Pedal
The brake pedal is located on the oor to the left of
the accelerator pedal. Push the brake pedal toward
the floor to slow or stop the vehicle. Apply the
brakes before turning the key on.
WARNING! Constant brake use (riding the brakes) can
cause brakes to overheat and fail, which could lead to an
accident resulting in serious injury or death. Do not drive
with your foot resting or riding on the brake pedal.
Accelerator PedalBrake
Pedal
66
FEATURES AND CONTROLS
Batteries
Alternate Battery Charging Method
1. Turn the main disconnect switch off.
2. Set the battery charger to the medium amp setting (10 to 30 amps).
3. Charge each battery for 10-20 minutes.
4. Move quickly from battery to battery, as this is only a residual charge and it will dissi-
pate in a short period of time.
5. After charging the last battery, remove the off-board charger leads, turn the main discon-
nect switch on and plug the vehicle in.
6. If the on-board charger does not recognize the residual charge and activate, repeat the
alternate charging method.


Produkt Specifikationer

Mærke: GEM
Kategori: var
Model: e6 (2012)

Har du brug for hjælp?

Hvis du har brug for hjælp til GEM e6 (2012) stil et spørgsmål nedenfor, og andre brugere vil svare dig