Geovision GV-LPR CAM 20A Manual


Læs gratis den danske manual til Geovision GV-LPR CAM 20A (6 sider) i kategorien Overvågningskamera. Denne vejledning er vurderet som hjælpsom af 3 personer og har en gennemsnitlig bedømmelse på 5.0 stjerner ud af 2 anmeldelser. Har du et spørgsmål om Geovision GV-LPR CAM 20A, eller vil du spørge andre brugere om produktet?

Side 1/6
GV-LPR CAM 20A
Installation Guide V2.0
(Type B Model)
© 2012 Auguest GeoVision Inc. All rights reserved.
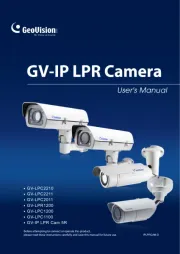
The GV-LPR CAM is available in both EIA and CCIR video format. The camera gives a 570
TVL high-contrast license plate recognition video to the GV-LPR software that identifies license
plates. It features 24 high-efficient LEDs for an illumination range of 15 ~ 25 meters / 49.21 ~
82.02 feet. It also features a weather-sealed, IP66-compliant housing with the heater and
blower inside. This installation guide will take you through the functionality and use of the
GV-LPR CAM.
Models
Packing List
Before attempting to connect or operate this product,
please read these instructions carefully and save this manual for future use.
Note:
The GV-LPR CAM comes with a free GV-LPR Software, and you need to insert the supplied
GV-USB Dongle to the PC to run the software. The free GV-LPR Software is a Trial Edition.
It can only capture the license plate images and does not support the license plate
recognition function.
2012/08
English
LPRCAM20AV20-C
There are hardware types A, B and C for GV-LPR CAM 20A. Your current device is a type B.
You can find this information on your product box.
AC Power Cable (110-125V, 10A) x 1
Power Adapter (100-240V, 12V/5A) x 1
Outdoor Mounting Bracket x 1
GV-LPR Software DVD
GV-USB Dongle
 GV-LPR CAM 10A PAL DC12V
 GV-LPR CAM 10A NTSC DC12V
 GV-LPR CAM 20A PAL DC12V
 GV-LPR CAM 20A NTSC DC12V
A B C
Push the sun shield forward to align with
the back of camera enclosure.
1. Slightly lift the camera module and slide it
out completely.
4.
2.
Pull out the camera module.
Sun Shield
Camera Enclosure Back
Camera Module
Completely slide the camera
module out
Loosen the set screws on the back of the
camera enclosure.
3.
Loosen the screw cap on the left.5.
Installing Camera Module
Insert the video cable through the screw
cap.
6.
Screw Cap
Attach the video cable to the BNC
connector and plug it into the “VIDEO
OUT” jack.
7.
Adjust the length of the video cable and
then tightly screw the cap.
8.
Loosen the screw cap on the right, insert
the power cable through the screw cap.
9.
Remove the terminal block. Plug black
and white wires of the power cable to the
terminal block. Reinsert the terminal
block onto the camera. The white wire is
required to connect to the positive pin (+)
on the camera and the black wire to the
negative pin (-).
10.
VIDEO OUT
Jack
Adjust the length of the cable and then
tightly screw the cap (see Steps 8 for the
picture).
11.


Produkt Specifikationer

Mærke: Geovision
Kategori: Overvågningskamera
Model: GV-LPR CAM 20A

Har du brug for hjælp?

Hvis du har brug for hjælp til Geovision GV-LPR CAM 20A stil et spørgsmål nedenfor, og andre brugere vil svare dig


Overvågningskamera Geovision Manualer

Geovision

Geovision GV-BX12201 Manual

11 September 2025
Geovision

Geovision GV-EBX110 Manual

11 September 2025
Geovision

Geovision UVS-ABD1300 Manual

11 September 2025
Geovision

Geovision GV-TVD8810 Manual

11 September 2025
Geovision

Geovision GV-VS2820 Manual

11 September 2025
Geovision

Geovision GV-BX2500-8F Manual

11 September 2025
Geovision

Geovision GV-SD2300 Manual

11 September 2025
Geovision

Geovision GV-BX1300-0F Manual

11 September 2025
Geovision

Geovision GV-FD320D Manual

11 September 2025

Overvågningskamera Manualer

Nyeste Overvågningskamera Manualer
AVer

AVer TR311V2 Manual

10 September 2025
Bosch

Bosch NDC-265-P Manual

9 September 2025
Emos

Emos H4061 Manual

9 September 2025
Arenti

Arenti DOME 1 Manual

9 September 2025
Arenti

Arenti SP1 Manual

9 September 2025
Bosch

Bosch FLEXIDOME IP Manual

9 September 2025
Arenti

Arenti POWER1 Manual

9 September 2025
Arenti

Arenti OUTDOOR1 Manual

9 September 2025
Arenti

Arenti INDOOR 1 Manual

8 September 2025