Gewiss GW96846 Manual
Gewiss
Ikke kategoriseret
GW96846
Læs gratis den danske manual til Gewiss GW96846 (80 sider) i kategorien Ikke kategoriseret. Denne vejledning er vurderet som hjælpsom af 38 personer og har en gennemsnitlig bedømmelse på 4.8 stjerner ud af 19.5 anmeldelser. Har du et spørgsmål om Gewiss GW96846, eller vil du spørge andre brugere om produktet?
Side 1/80

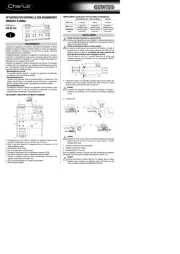
GW 96 846
INTERRUTTORE ORARIO DIGITALE
D I G I TA L T I M E SWITCH - I N T E R R U P T E U R HORAIRE N U M E R I Q U E
I N T E R R U P T O R H O R A R I O D I G I TA L - D I G I TA L E Z E I T S C H A LT E R
90 AM

2
• Il collegamento e il montaggio delle apparecchiature elettriche devono
essere effettuate solamente da un elettricista qualificato.
• Interventi e modifiche sull’apparecchio comportano la cessazione del
diritto di garanzia.
• Osservare le prescrizioni nazionali e le corrispondenti normative sulla
sicurezza.
• I morsetti esterni sono previsti per il collegamento di conduttori rigidi
e flessibili fino a 6 mm
2
• È vietato collegare conduttori flessibili con un diametro del
conduttore ≤ 1 mm
2
.
• I comandi di spegnimento hanno la priorità su quelli di accensione.
• Se l'orologio viene alimentato, i punti tra l'indicazione dell'ora e dei
minuti (SS:MM) vengono visualizzati in modo permanente. I punti
lampeggiano in caso di interruzione dell'alimentazione .
• In caso di mancanza di alimentazione, l'indicatore posizione di
commutazione si spegne dopo 2 minuti.
• L'intero display lampeggia quando è necessario cambiare le pile entro
le successive 2 settimane.
• Il prodotto per il suo corretto funzionamento incorpora una batteria.
In caso di sostituzione, la stessa dovrà essere avviata allo
smaltimento in modo differenziato in accordo con le normative locali
vigenti in materia di rifiuti.
INFORMAZIONI DI SICUREZZA
INFORMAZIONI GENERALI

3
I
T
A
L
I
A
N
O
DESCRIZIONE DEL PRODOTTO
MONTAGGIO SULLA GUIDA DIN
SCHEMA DI COLLEGAMENTO
SOSTITUZIONE DELLA BATTERIA
Attenzione!
• La sostituzione della batteria deve essere effettuata solamente
da un elettricista qualificato!
• Prima della rimozione dell’unità del display è necessario
scollegare lapparecchio dall' alimentazione.
• In occasione del cambio della batteria, verificare la polarità della
batteria.

4
DESCRIZIONE DEL PRODOTTO
• In caso di alimentazione di corrente
interrotta, il timer possiede una
Funzione di sleep che disattiva il
display. Questa funzione viene
attivata dopo 2 minuti senza
premere alcun tasto. Tutte le
programmazioni memorizzate
rimangono inalterate.
Generale
•
La riga di comunicazione
superiore mostra la voce di menu
selezionabile. Questa viene attivata
in caso di conferma con OK.
• I testi o i simboli lampeggianti
richiedono un input.
• Se entro 2 minuti non si verifica
alcuna immissione di dati,
l'orologio ritorna alla modalità
automatica.
12345 6 7
PROGR
14
:
26
AM
PM
FIX
Res Menu ok
Esc
–+
A
B
C
F
E
D
G

Display
A Segnalazione dello stato del canale
= Canale 1 ON
= Canale 1 OFF
B 2 linee di comunicazione per
l’indicazione dell’ora, le opzioni di
menu, le richieste di input, ecc...
C Indicazione del giorno della
settimana
D Indicazione periodo estivo/invernale
E Visualizzazione funzionamento
feriale
F Indicazione AM/PM
G Tensione di funzionamento (punti
permanenti) Funzionamento di
riserva (i punti lampeggiano)
Tasti
+ Scorrere in alto nel menu.
Premere per poco = +1
Premere a lungo (circa 2 sec) = +5
– Scorrere in basso nel menu.
Premere per poco = -1
Premere a lungo (circa 2 sec) = -5
Funzione manuale nel
funzionamento automatico
Res In caso di reset i programmi
vengono memorizzati. Bisogna
impostare di nuovo la data e
l’ora. Azionare il pulsante di
reset con un oggetto spuntato
(penna a sfera).
Menu Abbandono del funzionamento
automatico e accesso alla
modalità di programmazione.
Esc Premere per poco = indietro di
un livello
Premere a lungo (circa 2 sec) =
ritorno al funzionamento
automatico
ok Selezionare una scelta ed
eseguirla.
5
I
T
A
L
I
A
N
O

6
AVVIAMENTO INIZIALE – SCELTA DELLA LINGUA
PROGRAMMAZIONE
PROGR
1
14
:
26
Res Menu ok
Esc
–+
ok
ITALIANOENGLISHLANGUAGE
1
14
:
26
Res Menu ok
Esc
–+
ok
+/-
ok
Informazione
Alla consegna, il timer si trova in modalità automatica con ora, data e lingua
inglese preimpostate. Dopo la selezione della lingua, il timer dopo 4 secondi
passa al modo di programmazione.
English
Deutsch
Francais
Español
Italiano

7
PROGRAMMAZIONE
LIBER O
50
SETTNUOVO
ok ok
ok
5
ON MI N
15 OO
5
ON OR E
OO OO
123 4 567
ON GI O R
ok+/- ok+/- +/-
ok
5
OFF O R E
15 OO
5
OFF G I O R
ok+/- ok+/-
5
OFF M I N
18 OO
+/-
ok
SALVA T O
O1 O2
SETT
Esc
Esempio:
Comando ON alle ore 15:00.
Comando OFF alle ore 18:00.
• Scegliere il programma
NUOVO e confermare con OK.
• Scegliere SETT e confemare
con OK.
• Vengono visualizzate brevemen-
te gli spazi di memoria liberi.
• Scegliere un insieme di giorni
o il singolo giorno (libera crea-
zione di un insieme) e confer-
mare con OK.
• Inserire le ore per il comando
ON (+/-) e confermare con OK.
• Inserire i minuti per il comando
ON (+/-) e confermare con OK.
• Inserire le ore per il comando
OFF (+/-) e confermare con OK.
• Inserire i minuti per il comando
OFF (+/-) e confermare con OK.
• Il programma viene me -
morizzato.
• Il programma passa alla scelta
SETT.
Adesso possono essere creati
altri programmi.
Informazione
Il timer dispone di 50 spazi
di memoria.
Nuovo programma settimanale
I
T
A
L
I
A
N
O

8
PROGRAMMAZIONE
LIBER O
50
VACAN Z ANUOVO
ok
ok ok+/-
A MES E
07 26
DA GI O R
O7 O1
DA ME S E
O1 O1
ok+/- ok+/- +/-
ok
A GIO R
08 01
ok+/-
5
ON
15 OO
5
ON OR E
OO OO
123 4 567
ON GI O R
ok+/- ok+/-
5
OFF G I O R
+/-
ok
ok+/-
SALVA T O
03 04
5
OFF M I N
18 OO
5
OFF O R E
15 OO
ok+/- ok+/-
VACAN Z A
Esc
Informazione
Se non vengono program-
mate alcune modifiche, il
programma feriale viene
realizzato ogni anno.
Nuovo programma di vacanze

9
PROGRAMMAZIONE
I
T
A
L
I
A
N
O
5
P02
18 OO
5
P01
15 OO
MODIFI C A
+/-
ok +/-
ok
5
OFF MI N
19 OO
5
OFF OR E
18 OO
5
OFF GI O R
ok+/- ok+/- +/-
5
P02
19 00
ok
Esc
Controllare il programma, modificare
Informazione
• Con "+/-" si può scorrere nei
passi di programma.
• Premendo OK si può
modificare il corrispondente
programma. La modalità di
procedimento corrisponde
a quella per la creazione di
un programma.

Eliminare i singoli programmi
Eliminare tutti i programmi
10
5
P0 1
15 OO
SE LE ZCA NC EL LA
+/-
ok
SI CU RO
ok
ok
+/-
ok
SI CU ROTU TT OCA NC EL LA
+/-
+/- ok
ok
Informazione
Con la eliminazione dei sin-
goli programmi, verranno
eliminate anche le relative
fasi di programma (es. P01
ON e P02 OFF).
PROGRAMMAZIONE

11
Impostare la data e l’ora
Impostare l’ora da 24 ore o in modalità AM/PM (12 ore)
I
T
A
L
I
A
N
O
24 H
21 57
12 H 24 H
21 57
PR OG R
+/- ok
Esc
AM P M
09 57
PM
ok+/-
AN NO
20 07
DA TA O RAPR OG R
+/- ok
+/-
ok
1
OR E
00 00
DA TA
O7 O1
ME SE
O1 O1
ok+/- ok+/- +/-
ok
MI NU TI
21 00
ok+/-
Informazione
La data e l’ora sono già
preimpostate.
IMPOSTAZIONE CALENDARIO

12
COMMUTAZIONE DEL PERIODO ESTIVO/INVERNALE
NOPROGR
ok
ok
+/-
AUTOPROGR
ok
ok
+/-
INVERNO
10 28
ESTATE
03 25
Informazione
Sono possibili le seguenti impo-
stazioni:
AUTO
preimpostazione in fabbrica
secondo le prescrizioni legali.
Questa viene effettuata automati-
camente sempre per ogni anno.
NO
nessuna commutazione

13
I
T
A
L
I
A
N
O
CALIBRAPROGR
ok
ok
+/-
EST MESE
O3 25
EST GIOR
O3 21
ok+/- +/-
ok
INV MESE
10 28
INV GIOR
10 31
ok+/- +/-
ok
INVERNO
10 31
ESTATE
03 21
CALIBRA
Programmazione. Bisogna inseri-
re la data di inizio del periodo
estivo e di quello invernale.
La preimpostazione di fabbrica
viene sovrascritta. Il periodo
estivo/invernale viene calcolato
automaticamente sempre per
ogni anno.
La commutazione avviene lo stes-
so giorno della settimana inserito
nella stessa settimana del mese.
Esempio
21.03. Inizio periodo estivo
31.10. Inizio periodo invernale
Attenzione
Durante la commutazione da ora
legale a ora solare o viceversa non
devono essere effettuate modifiche
all‘orologio!

14
MODALITÀ DI FUNZIONAMENTO
4
14
:
26
FIX
Res Menu ok
Esc
–+
Informazione
Premere 1 volta = FIX ON = fix on
Premere 2 volte = FIX OFF = fix off
Premere 3 volte = ritorno alla modalità automatica
FIX ON: FIX
FIX OFF: FIX
AUTO:
(nessuna indicazione) tempi di commutazione
programmati

15
DATI TECNICI
Dimensioni H x L x P 45 x 17,5 x 60 mm
Peso in gr. (circa) 90
Tensione di alimentazione vedere la targhetta dell’apparecchio
Consumo di energia 5 VA
Potere di apertura
- carico ohmico 16 A/250 V AC
- carico induttivo cos ϕ 0.6 8 A/250 V AC
- carico della lampada 1000 W
Uscita di commutazione a potenziale zero
Contatto di commutazione 1 contatto di commutazione
Temperatura di funzionamento da -25°C fino a +55°C
Classe di isolamento II
Precisione tipo ±2.5 s/giorno a 20°C
Riserva di carica 3 anni franco stabilimento a +20°C
Tempo di commutazione minimo 1 min.
Spazio di memoria 50
Creazione dell’insieme di giorni
della settimana scelta libera/fissa
Indicazione dello stato
di commutazione si
Piombabile si
I
T
A
L
I
A
N
O


E N G L I S H

18
• The connection and installation of electrical devices may only be car-
ried out by a qualified electrician.
• Interventions in and changes to the device result in the voiding of the
warranty claim.
• Observe your national regulations and the respective safety provi-
sions.
• Fixed and flexible conductors of up to 6 mm
2
may be attached to the
external terminal clips.
• Flexible cables with a cross-section ≤ 1 mm
2
should not be attached.
• Deactivation commands take priority over activation commands.
• If the power supply is correct, the dots shown between the hours and
minutes (HH:MM) are displayed permanently. The dots flash if the
power supply is interrupted.
• If there is no power supply, the position indicator display goes out
after 1 minute (sleep-function).
• The whole display flashes the battery needs to be changed for up to
2 weeks to warn that.
• This appliance requires a battery to function properly. If the battery is
replaced, make sure the old battery is disposed of according to the
waste regulations foreseen by your local authorities.
SAFETY PRECAUTIONS
GENERAL INFORMATION

19
E
N
G
L
I
S
H
PRODUCT DESCRIPTION
INSTALLATION ON DIN RAIL
TERMINAL DIAGRAM
BATTERY CHANGE
Attention!
• The battery change may only be carried out by a qualified elec-
trician!
• Isolate the device before replacing the battery!
• Check battery polarity when replacing.

20
PRODUCT DESCRIPTION
• The time switch has a sleep-func-
tion when not connected to power
supply, that keeps screen blank.
This function is activated after 2
minutes of no key board opera-
tions.All settings saved will
remain in the memory.
General information
• The middle communication line
shows the selectable menu
item. If confirmed with OK, this
item is activated.
• Flashing texts or symbols
require an entry.
• If no entries are made within the
next 2 minutes, the clock reverts
to Auto mode.
12345 6 7
PROGR
14
:
26
AM
PM
FIX
Res Menu ok
Esc
–+
A
B
C
F
E
D
G

E
N
G
L
I
S
H
Display
A Channel status display
= Channel 1 ON
= Channel 1 OFF
B 2 communication lines for time
display, menu items, entry
prompts etc...
C Day-of-week display
D Display of summer/winter time
E Holiday mode display
F Display of AM/PM
G Operating voltage (permanently lit
dots) Reserve power operation
(dots flash)
Buttons
+ Scroll up in menu
Press briefly = +1
Press and hold (approx. 2 sec)
= +5
– Scroll down in menu
Press briefly = -1
Press and hold (approx. 2 sec)
= -5
Manual operation in the auto-
matic mode
Res The programs are retained in
the case of a reset. The date
and time must be set again.
Press reset button with a blunt
object (pen).
Menu Exits the Automatic mode and
enters the Programming mode
Esc Press briefly = one step back
Press and hold (approx. 2 sec)
= return to Automatic mode
ok Make selection and apply
21

22
INITIAL START-UP - SELECTION OF MENU LANGUAGE
PROG.
PROGRA M
1
14
:
26
Res Menu ok
Esc
–+
ok
ENGLIS HLANGUA G E
1
14
:
26
Res Menu ok
Esc
–+
ok
ok
Info
In the delivered state the time switch is in the Auto mode with a preset time,
date and the menu language English. After selecting language, the time switch
jumps automatically to Program mode after 4 seconds.
English
Deutsch
Francais
Español
Italiano

23
FREE
50
WEEKLYNEW
ok ok
ok
5
ON MIN
15 OO
5
ON HOUR
OO OO
123 4 567
ON DAY
ok+/- ok+/- +/-
ok
5
OFF HOUR
15 OO
5
OFF DAY
ok+/- ok+/-
5
OFF MIN
18 OO
+/-
ok
SAVED
O1 O2
WEEKLY
Esc
Example
ON command at 3 pm.
OFF command at 6 pm.
•
Select NEW program and con-
firm with OK.
•
Select WEEKLY program and
confirm with OK.
•
The free memory spaces are
briefly displayed.
•
Select day block or individual
day (block formation as
desired) and confirm with OK.
•
Enter hour for ON command
(+/-) and confirm with OK.
•
Enter minute for ON command
(+/-) and confirm with OK.
•
Enter hour for OFF command
(+/-) and confirm with OK.
•
Enter minute for OFF com-
mand (+/-) and confirm with
OK.
•
Program is saved.
•
Program jumps to selection
WEEKLY.
Now additional programs can be
created.
Info
The time switch has 50
memory spaces.
New weekly program
E
N
G
L
I
S
H
PROG.

24
FREE
50
HOLIDAYNEW
ok
ok ok+/-
TO MON
07 26
FROM DAY
O7 O1
FROM MON
O1 O1
ok+/- ok+/- +/-
ok
TO DAY
08 01
ok+/-
5
ON MIN
15 OO
5
ON HOUR
OO OO
123 4 567
ON DAY
ok+/- ok+/-
5
OFF DAY
+/-
ok
ok+/-
SAVED
03 04
5
OFF MIN
18 OO
5
OFF HOUR
15 OO
ok+/- ok+/-
HOLIDAY
Esc
Info
The holiday program is run
every year unless changes
are programmed in.
New holidays program
PROG.

25
E
N
G
L
I
S
H
5
P02
18 OO
5
P01
15 OO
EDIT
+/-
ok +/-
ok
5
OFF MIN
19 OO
5
OFF HOUR
18 OO
5
OFF DAY
ok+/- ok+/- +/-
5
P02
19 00
ok
Esc
View, edit program
Info
• The program steps can be
scrolled through with "+/-".
• The respective program
can be edited by pressing
OK. The procedure is the
same as when creating a
new program.
PROG.

Delete individual programs
Delete all programs
26
5
P0 1
15 OO
SE LE CTDE LE TE
+/-
ok
CO NF IR M
ok
ok
+/-
ok
CO NF IR MAL LDE LE TE
+/-
+/- ok
ok
Info
When deleting individual
programs, the correspon-
ding program steps are
deleted (e.g. P01 ON and
P02 OFF).
PROG.

27
Set date and time
Set AM/PM (12-hour-) or 24-hour display
E
N
G
L
I
S
H
24 H
21 57
12 H 24 H
21 57
PR OG RA M
+/- ok
Esc
AM P M
09 57
PM
ok+/-
YE AR
20 07
DA TE TI MEPR OG RA M
+/- ok
+/-
ok
1
HO UR
00 00
DA TE
O7 O1
MO NT H
O1 O1
ok+/- ok+/- +/-
ok
MI NU TE
21 00
ok+/-
Info
The date and time are preset
at the factory.
CALENDAR SETTINGS

28
SWITCHOVER FOR SUMMER/WINTER TIME
NOPROGRAMM
ok
ok
+/-
AUTOPROGRAM
ok
ok
+/-
WINTER
10 28
SUMMER
03 25
Info
The following settings are pos-
sible:
AUTO
Factory presetting of the pub-
lished calendar dates.
This is automatically recalculated
for each year.
NO
No switchover

29
E
N
G
L
I
S
H
CALIBRATPROGRAM
ok
ok
+/-
SU MONTH
O3 25
SU DAY
O3 21
ok+/- +/-
ok
WI MONTH
10 28
WI DAY
10 31
ok+/- +/-
ok
WINTER
10 31
SUMMER
03 21
CALIBRAT
Programming. The start date of
the summer time and winter time
must be entered for this purpose.
The factory presetting is overwrit-
ten. The programmed summer /
winter time is automatically recal-
culated for each year.
The changeover takes place on
the same specified day of the
week in the same week of each
month.
Example
03/21 Start summer time
10/31 Start winter time
Attention
Between the switchover it is not
allowed to make settings at the
time switch!

30
OPERATING MODE
4
14
:
26
FIX
Res Menu ok
Esc
–+
Info
Press 1 x = FIX ON = continuous ON
Press 2 x = FIX OFF = continuous OFF
Press 3 x = return to Auto mode
FIX ON: FIX
FIX OFF: FIX
AUTO:
(no display) programmed switching times

31
TECHNICAL DATA
Dimensions H x W x D 45 x 17,5 x 60 mm
Weight g (approx.) 90
Supply voltage see imprint on device
Power consumption 5 VA
Switching capacity
- ohmic load 16 A/250 V AC
- inductive load cos ϕ 0.6 8 A/250 V AC
- Incandescent lamp load 1000 W
Switching output potential-free
Switch contacts 1 changeover contact
Ambient temperature -13°F to 131°F (-25°C to +55°C)
Protection class II
Accuracy typ. ±2.5 s/day at 68°F (20°C)
Reserve power 3 years from factory at +68°F (20°C)
Shortest switching time 1 min.
Memory spaces 50
Block formation of
day of the week scelta libera/fissa
Switching status display yes
Sealable yes
E
N
G
L
I
S
H


F R A N Ç A I S

34
• Le branchement et le montage d’appareils électriques ne peut être
réalisé que par un électricien spécialisé.
• Les interventions et des modifications apportées sans notre aval à
l’appareil entraînent la nullité de la garantie.
• Respectez la réglementation locale en vigueur et observez les
consignes de sécurité spécifiques.
• Les bornes de raccordement extérieures tolèrent le raccordement de
fils conducteurs rigides ou souples de jusqu’à 6 mm
2
de section.
• Ne pas raccorder de conducteurs de section ≤ 1 mm
2
.
• Commandes de déclenchements ont priorité sur les commandes
d’enclenchement.
• Quand l’alimentation est correcte les deux points entre l’affichage de
l’heure et des minutes (hh:min min) appareissent continuellement .
Les points clignotes lors de la disparition de la tension.
• Sans alimentation l’affichage disparait après 2 min.
• Le display complet clignotte quand la batterie doit être remplacée
dans les 2 semaines.
• Pour fonctionner correctement ce produit possède une batterie.
En cas de substitution, il faudra envoyer cette batterie à l’élimination
sélective, conformément aux réglementations locales en vigueur en
matière de déchets.
CONSIGNES DE SÉCURITÉ
CONSIGNE GÉNÉRALE

35
F
R
A
N
Ç
A
I
S
DESCRIPTION DU PRODUIT
MONTAGE SUR UNE BARRE DIN
SCHÉMA DE BRANCHEMENT
CHANGEMENT DE BATTERIE
Attention !
• Le changement de batterie ne peut être réalisé que par un élec-
tricien spécialisé.
• Débrancher l’appareil avant de retirer l’unité d’affichage.
• Contrôler la polarité de la pile quand celle-ci est remplacée.

36
DESCRIPTION DU PRODUIT
•
Si l‘alimentation électrique est inter-
rompue, la minuterie dispose d‘une
fonction veille qui éteint l‘écran.
Cette fonction est activée après 2
minutes sans appuyer sur une
touche. Toutes les programmations
sauvegardées sont conservées.
Généralités
•
La ligne supérieure de communi-
cation affiche le menu à choisir.
Celui-ci est activé avec une confir-
mation par OK.
•
Textes et symboles requièrent une
entrée.
•
Si dans les 2 min il n’y a pas une
entrée de donnés la minuterie se
remets en mode auto.
12345 6 7
PROGR
14
:
26
AM
PM
FIX
Res Menu ok
Esc
–+
A
B
C
F
E
D
G

F
R
A
N
Ç
A
I
S
Affichage
A Affichage de l’état du canal
= Canal 1 ON
= Canal 1 OFF
B 2 lignes de communication pour
l’affichage du temps, points de
menu, demande d’entrée, etc.
C Affichage jour de la semaine
D Affichage heure d’été/d’hiver
E Affichage mode vacances
F Affichage AM/PM
G Tension de service (points perma-
nents).Fonctionnement sur la
réserve (points clignotants)
Touches
+ Monter dans le menu.
Appui court = +1
Appui long (env. 2 s) = +5
– Descendre dans le menu.
Appui court = -1
Appui long (env. 2 s) = -5
Fonction interrupteur à main en
mode automatique
Res La reset conserve les pro-
grammes. Date et heure doi-
vent de nouveau être entrées.
Actionner la touche de reset
avec un objet obtus (stylo bille).
Menu Quitter le mode automatique
pour le mode programmation.
Esc Appui court = un pas en arrière
Appui long (env. 2 s) = retour
au mode automatique
ok Valider le choix.
37

38
PREMIÈRE MISE EN ROUTE – CHOIX DE LA LANGUE
PROG R A M M
1
14
:
26
Res Menu ok
Esc
–+
ok
FRAN C A I SENGL I S HLANG U A G E
1
14
:
26
Res Menu ok
Esc
–+
ok
+/-
ok
Information
Lors de la livraison, l’horloge de commutation est en mode Auto avec heure et
date préréglées, interface utilisateur en anglais. Après avoir sélectionné la
langue, la minuterie passe en mode programmation après 4 secondes.
English
Deutsch
Francais
Español
Italiano
PROG.

39
LIBRE
50
HEBDONOUVEAU
ok ok
ok
5
ON MIN
15 OO
5
ON HEURE
OO OO
123 4 567
ON JOUR
ok+/- ok+/- +/-
ok
5
OFF H
15 OO
5
OFF JOUR
ok+/- ok+/-
5
OFF MIN
18 OO
+/-
ok
SAUVEGAR
O1 O2
HEBDO
Esc
Exemple
Ordre ON à 15h00.
Ordre OFF à 18h00.
• Choisir programme NOUVEAU
et confirmer avec OK.
• Choisir HEBDO et confirmer
avec OK.
•
Les pas de programmation
libres sont brièvement montrés.
•
Choisir un bloc de jours ou un
jour simple (libre formation des
blocs) et confirmer avec
OK
.
• Entrer l’heure pour un ordre
ON (+/-) et confirmer avec OK.
• Entrer la minute pour un ordre
ON (+/-) et confirmer avec OK.
•
Entrer l’heure pour un ordre
OFF
(+/-)
et confirmer avec
OK
.
•
Entrer la minute pour un ordre
OFF
(+/-)
et confirmer avec
OK
.
• Le programme est mémorisé.
• Le programma passe au choix
HEBDO.
De nouveau programmes peu-
vent maintenant être crées.
Information
L’horloge de commutation pos-
sède 50 pas de programme.
Nouveau programme hebdomadaire
F
R
A
N
Ç
A
I
S
PROG.

40
LIBRE
50
VACANCESNOUVEAU
ok
ok ok+/-
A MOIS
07 26
DE JOUR
O7 O1
DE MOIS
O1 O1
ok+/- ok+/- +/-
ok
A JOUR
08 01
ok+/-
5
ON MIN
15 OO
5
ON HEURE
OO OO
123 4 567
ON JOUR
ok+/- ok+/-
5
OFF JOUR
+/-
ok
ok+/-
SAUVEGAR
03 04
5
OFF MIN
18 OO
5
OFF H
15 OO
ok+/- ok+/-
VACANCES
Esc
Information
Le programme de vacances
est exécuté tous les ans si
aucun changement n’est pro-
grammé.
Nouveau programme de vacances
PROG.

41
F
R
A
N
Ç
A
I
S
5
P02
18 OO
5
P01
15 OO
MODIFIER
+/-
ok +/-
ok
5
OFF MIN
19 OO
5
OFF HEURE
18 OO
5
OFF JOUR
ok+/- ok+/- +/-
5
P02
19 00
ok
Esc
Visualiser et modifier un programme
Information
• Il est possible de parcourir
les pas du programme avec
"+/-".
• OK permet de modifier le
programme affiché.
La procédure correspond à
la création d’un nouveau
programme.
PROG.

Effacer des programmes individuels
Effacer tous les programmes
42
5
P0 1
15 OO
SE LE CTSU PP RI M
+/-
ok
CO NF IR M
ok
ok
+/-
ok
CO NF IR MTO UTSU PP RI M
+/-
+/- ok
ok
Information
Quand on efface un program,
tous les pas de programma-
tion de ce programme seront
effacés (p.e. P01 enclenché
et P02 déclenché).
PROG.

43
Réglage de la date et de l’heure
Mode AM/PM (12-heures), resp. 24 heures
F
R
A
N
Ç
A
I
S
24 H
21 57
12 H 24 H
21 57
PR OG RA MM
+/- ok
Esc
AM P M
09 57
PM
ok+/-
AN NE E
20 07
DA TE H MPPR OG RA MM
+/- ok
+/-
ok
1
HE UR ES
00 00
DA TE
O7 O1
MO IS
O1 O1
ok+/- ok+/- +/-
ok
MI NU TE S
21 00
ok+/-
Information
La date et l’heure sont pro-
grammées en usine.
PROGRAMMATION DU CALENDRIER

44
COMMUTATION HEURE D’ÉTÉ/D’HIVER
NO NPR O G R A MM
ok
ok
+/-
AU T OPR O G R A MM
ok
ok
+/-
HI V E R
10 28
ET E
03 25
Information
Les réglages suivants sont pos-
sibles :
AUTO
Programmation au niveau de
l’usine des dates officielles.
Celles-ci sont recalculées automa-
tiquement pour chaque année.
NON
Pas de changement d’heure.

45
F
R
A
N
Ç
A
I
S
CALIBRERPROGRAMM
ok
ok
+/-
ETE MOIS
O3 25
ETE JOUR
O3 21
ok+/- +/-
ok
HIV MOIS
10 28
HIV JOUR
10 31
ok+/- +/-
ok
HIVER
10 31
ETE
03 21
CALIBRER
Programmation. Il faut pour ce
entrer les dates de changement
d’heure pour l’été et l’hiver.
La programmation faite à l’usine
est écrasée. Les heures d’été et
d’hiver sont recalculées automati-
quement pour chaqueannée.
La commutation est réalisée le
même jour de la semaine entrée
dans la même semaine du mois.
Exemple
21.03. Début heure d’été
31.10. Début heure d’hiver
Attention
Ne pas modifier l‘heure lors du
passage de l‘heure d‘été à l‘heure
d‘hiver et inversement.

46
MODE DE FONCTIONNEMENT
4
14
:
26
FIX
Res Menu ok
Esc
–+
Information
Appuyer 1 fois = FIX ON = Continuellement enclenché
Appuyer 2 fois = FIX OFF = Continuellement déclenché
Appuyer 3 fois = retour au mode Auto
FIX ON: FIX
FIX OFF: FIX
AUTO:
(pas d’affichage) Temps de commutation programmés

47
DONNÉES TECHNIQUES
Cotes H x L x P (mm) 45 x 17,5 x 60
Poids g (env.) 90
Tension d’alimentation voir indication sur l’appareil
Puissance consommée 5 VA
Puissance
- charge résistive 16 A/250 V AC
- charge inductive cos ϕ 0.6 8 A/250 V AC
- charge de l’ampoule 1000 W
Sortie de commutation sans potentiel
Contacts de commutation 1 Contact inverseur
Température de fonctionnement de -25°C à +55°C
Catégorie de protection II
Précision de fonctionnement env. ±2.5 s/jour à 20°C
Réserve d’autonomie 3 ans à la sortie d’usine à +20°C
Temps de commutation minimum 1 mn
Pas de programmation 50
Création de blocs de jour choix fixe/libre
Affichage de l’état oui
Plombable oui
F
R
A
N
Ç
A
I
S


E S P A Ñ O L

50
• La instalación y conexión de equipos eléctricos debe llevarse a cabo
únicamente por electricistas profesionales.
• Cualquier manipulación o modificación efectuada en la unidad invali-
dará los derechos de garantía.
• Tenga en cuenta la legislación nacional y las correspondientes dispo-
siciones en seguridad.
• Los bornes externos permiten la conexión de cables rígidos y flexi-
bles de hasta 6 mm
2
.
• No se recomienda la conexión de cables flexibles de sección ≤ 1 mm
2
.
• Los comandos OFF tiene preferencia sobre los comandos ON.
• Si la alimentación de tensión es correcta, los puntos entre hora y
minuto (HH:MM) se muestran permanentemente. Al interrumpirse la
tensión, los puntos parpadean.
• Sin alimentación de tensión, la indicación del modo operativo se
apaga pasados 2 minutos.
• Si parpadea todo el display, significa que será necesario un cambio de
batería en las próximas dos semanas.
• El producto para su correcto funcionamiento incorpora una batería.
En caso de sustitución, esta deberá eliminarse por separado con arre-
glo a las normativas locales vigentes en materia de residuos.
INSTRUCCIONES DE SEGURIDAD
INDICACIONES GENERALES

51
E
S
P
A
Ñ
O
L
DESCRIPCIÓN DEL PRODUCTO
MONTAJE EN CARRIL DIN
ESQUEMA DE CONEXIÓN
CAMBIO DE LA BATERÍA
Atención
• El cambio de la batería debe encargarse a un electricista cualificado.
• El equipo debe descablearse antes de desmontar la pantalla.
• Al cambiarse la batería debe comprobarse la correcta polaridad.

52
DESCRIPCIÓN DEL PRODUCTO
•
El temporizador dispone de una fun-
ción de sleep que apaga la pantalla
automáticamente si se interrumpe la
alimentación.
Esta función se activa transcurridos
dos minutos sin que se haya presio-
nado ninguna tecla.
Todos los programas guardados se
conservan.
Generalidades
•
La línea de texto superior muestra
la opción de menú disponible para
su selección. Si se confirma con
OK, se activa la función.
•
Si un texto o símbolo parpadea,
significa que es necesario introdu-
cir datos.
•
Si no se realiza ninguna entrada
pasados 2 minutos, el reloj vuelve
al modo automático.
12345 6 7
PROGR
14
:
26
AM
PM
FIX
Res Menu ok
Esc
–+
A
B
C
F
E
D
G

E
S
P
A
Ñ
O
L
Pantalla
A Estado de la canale
= Canal 1 ON
= Canal 1 OFF
B 2 líneas de texto para la hora, las
opciones de menú, la entrada de
datos, etc.
C Día de la semana
D Símbolos horario verano/invierno
E Indicación modo de vacaciones
F Indicación AM/PM
G Funcionamiento con red (puntos
fijos) Reserva de marcha (puntos
parpadeando)
Teclas
+
Navegación por el menú (arriba).
Pulsación corta = +1 Pulsación
prolongada (aprox. 2s) = +5
– Navegación por el menú (abajo).
Pulsación corta = -1 Pulsación
prolongada (aprox. 2s) = -5
Función de mando manual en
modo automático
Res Los programas se conservan al
realizar un "reset". Debe ajus-
tarse de nuevo la fecha y la
hora. Accione el pulsador
"reset" con un objeto sin punta
afilada (bolígrafo).
Menu Fin del modo automático e ini-
cio del modo de programación.
Esc Pulsación corta = un paso atrás
Pulsación prolongada (2 s) =
vuelta al modo automático
ok Seleccionar y aceptar la opción.
53

54
PRIMERA PUESTA EN SERVICIO – SELECCIÓN DE IDIOMA
PR OG RA MA
1
14
:
26
Res Menu ok
Esc
–+
ok
ES PA NO LEN GL IS HLA NG UA GE
1
14
:
26
Res Menu ok
Esc
–+
ok
+/-
ok
Nota
El interruptor horario se suministra preajustado en modo automático, fecha,
hora, e idioma de menú inglés. Tras seleccionar el idioma, el temporizador salta
al modo de programación transcurridos 4 segundos.
English
Deutsch
Francais
Español
Italiano
PROG.

55
LIBRES
50
SEMANALNUEVO
ok ok
ok
5
ON MINTS
15 OO
5
ON HORAS
OO OO
123 4 567
ON DIA
ok+/- ok+/- +/-
ok
5
OFF HORAS
15 OO
5
OFF DIA
ok+/- ok+/-
5
OFF MNTS
18 OO
+/-
ok
GUARDADO
O1 O2
SEMANAL
Esc
Ejemplo
Comando ON a las 15:00 h.
Comando OFF a las 18:00 h.
• Seleccione programa NUEVO
y confirme con OK.
• Seleccione SEMANAL y con-
firme con OK.
• La pantalla muestra las posi-
ciones de memoria libres.
• Seleccione varios días o un
solo día (combinación de días
libre) y confirme con OK.
• Introduzca la hora para el
comando ON (+/-) y confirme
con OK.
• Introduzca los minutos para
el comando ON (+/-) y confir-
me con OK.
• Introduzca la hora para el
comando OFF (+/-) y confirme
con OK.
• Introduzca los minutos para
el comando OFF (+/-) y confir-
me con OK.
• El programa se guarda.
• El programa salta a la selec-
ción SEMANAL.
A partir de ahora se pueden crear más.
Nota
El interruptor horario dispone
de 50 posiciones de memoria.
Nuevo programa semanal
E
S
P
A
Ñ
O
L
PROG.

56
LIBRES
50
VACACIONNUEVO
ok
ok ok+/-
FIN MES
07 26
INIC DIA
O7 O1
INIC MES
O1 O1
ok+/- ok+/- +/-
ok
FIN DIA
08 01
ok+/-
5
ON MINTS
15 OO
5
ON HORAS
OO OO
123 4 567
ON DIA
ok+/- ok+/-
5
OFF DIA
+/-
ok
ok+/-
GUARDADO
03 04
5
OFF MNTS
18 OO
5
OFF HORAS
15 OO
ok+/- ok+/-
VACACION
Esc
Nota
El programa de vacaciones
se ejecuta cada año, salvo se
modifique la programación.
Nuevo programa de vacaciones
PROG.

57
E
S
P
A
Ñ
O
L
5
P02
18 OO
5
P01
15 OO
EDITAR
+/-
ok +/-
ok
5
OFF MNTS
19 OO
5
OFF HORAS
18 OO
5
OFF DIA
ok+/- ok+/- +/-
5
P02
19 00
ok
Esc
Visualizar y editar programas
Nota
• Los pasos del programa
pueden ser visualizados
con "+/-".
• Para editar el programa
correspondiente pulse OK.
El procedimiento es el
mismo que en la creación
de un nuevo programa.
PROG.

Borrar programas individuales
Borrar todos los programas
58
5
P0 1
15 OO
SE LE CCBO RR AR
+/-
ok
CO NF IR M
ok
ok
+/-
ok
CO NF IR MTO DOBO RR AR
+/-
+/- ok
ok
Nota
Al eliminar un programa, se
eliminarán todos los pasos
de programa correspondien-
tes (p.ej., P01 ON y P02 OFF).
PROG.

59
Ajuste de fecha/hora
Seleccionar AM/PM- (12 horas) o modo 24 horas
E
S
P
A
Ñ
O
L
24 H
21 57
12 H 24 H
21 57
PR OG RA MA
+/- ok
Esc
AM P M
09 57
PM
ok+/-
AN O
20 07
FE CH H ORPR OG RA MA
+/- ok
+/-
ok
1
HO RA S
00 00
FE CH A
O7 O1
ME S
O1 O1
ok+/- ok+/- +/-
ok
MI NU TO S
21 00
ok+/-
Nota
La fecha y la hora se prea-
justan en fábrica.
PROGRAMACIÓN CALENDARIO

60
CAMBIO DE HORARIO VERANO/INVIERNO
NOPROGRAMA
ok
ok
+/-
AUTOPROGRAMA
ok
ok
+/-
INVIERNO
10 28
VERANO
03 25
Nota
Puede seleccionarse una de las
siguientes opciones:
AUTO
Preajuste de fábrica de acuerdo
con la normativa vigente.
Se recalcula cada año automáti-
camente.
NO
Sin cambio.

61
E
S
P
A
Ñ
O
L
AJUSTARPROGRAMA
ok
ok
+/-
VER MES
O3 25
VER DIA
O3 21
ok+/- +/-
ok
INV MES
10 28
INV DIA
10 31
ok+/- +/-
ok
INVIERNO
10 31
VERANO
03 21
CALIBRAR
Programación. Debe introducirse
la fecha de inicio del horario de
verano y la del horario de invierno.
El preajuste de fábrica se sobrees-
cribe. El horario de verano/invier-
no se recalcula cada año automá-
ticamente.
La conmutación se realiza el
mismo día introducido de la
misma semana del mes.
Ejemplo
21.03. Inicio horario de verano
31.10. Inicio horario de invierno
Atención
Mientras se está efectuando el
cambio del horario de verano al de
invierno o viceversa no debe reali-
zarse ningún ajuste de hora.

62
FUNCIONAMIENTO
4
14
:
26
FIX
Res Menu ok
Esc
–+
Nota
Si se pulsa 1 vez = FIX ON = Encendido permanente
Si se pulsa 2 veces = FIX ON = Apagado permanente
Si se pulsa 3 veces = vuelve al modo Auto
FIX ON: FIX
FIX OFF: FIX
AUTO:
no muestra ningún símbolo) Según horas de
conmutación programados

63
DATOS TÉCNICOS
Dimensiones Al x An x L 45 x 17,5 x 60 mm
Peso aproximado 90 g.
Tensión de alimentación véase impresión del equipo
Consumo de potencia 5 VA
Potencia de corte
- carga óhmica 16 A/250 V AC
- carga inductiva cos ϕ 0.6 8 A/250 V AC
- Carga incandescente 1000 W
Salida libre de potencial
Tipo de contactos 1 conmutador
Temperatura ambiente de -25°C a +55°C
Clase de protección II
Precisión ±2.5 s/día a 20°C
Reserva de marcha 3 años a partir de la salida de fábrica
a +20°C
Maniobra mínima 1 min.
Posiciones de memoria 50
Formación de bloques de días
de la semana fija/libre elección
Visualización estado de canales sí
Precintable sí
E
S
P
A
Ñ
O
L


D E U T S C H

66
• Der Anschluss und die Montage elektrischer Geräte darf nur durch
eine Elektrofachkraft erfolgen.
• Eingriffe und Veränderungen am Gerät führen zum Erlöschen des
Garantieanspruches.
• Beachten Sie Ihre nationalen Vorschriften und die jeweiligen
Sicherheitsbestimmungen.
• Die äusseren Anschlussklemmen lassen den Anschluss von festen
und flexiblen Leitern bis 6 mm
2
zu.
• Es dürfen keine flexiblen Leitungen mit einem Leitungsquerschnitt ≤
1 mm
2
angeschlossen werden.
• Ausschaltbefehle haben Vorrang vor Einschaltbefehlen.
• Bei korrekter Spannungsversorgung werden die Punkte zwischen der
Stunden- und Minutenanzeige (SS:MM) permanent angezeigt. Die
Punkte blinken bei Spannungsunterbrechung.
• Ohne Spannungsversorgung erlischt die Anzeige nach 1 Minute
(Sleep-Funktion).
• Die komplette Displayanzeige blinkt wenn ein Batteriewechsel inner-
halb der nächsten 2 Wochen erforderlich wird.
• Das Produkt verwendet für den korrekten Betrieb eine integrierte
Batterie. Beim Austausch der Batterie muss diese entsprechend der
geltenden lokalen Abfallentsorgungsvorschriften entsorgt werden.
SICHERHEITSHINWEISE
ALLGEMEINE HINWEISE

67
D
E
U
T
S
C
H
PRODUKTBESCHREIBUNG
MONTAGE AUF DIN-SCHIENE
ANSCHLUSSPLAN
BATTERIEWECHSEL
Achtung!
• Der Batteriewechsel darf nur durch eine Elektrofachkraft erfolgen!
• Vor dem Batteriewechsel ist das Gerät freizuschalten!
• Beim Batteriewechsel die Polarität der Batterie überprüfen.

68
PRODUKTBESCHREIBUNG
•
Die Schaltuhr besitzt bei unterbro-
chener Stromzufuhr eine Sleep-
Funktion, die das Display ausschal-
tet. Diese Funktion wird nach 2
Minuten ohne Tastendruck aktiviert.
Alle gespeicherten Programmierungen
bleiben erhalten.
Allgemein
•
Die obere Kommunikationszeile
zeigt den zur Auswahl stehenden
Menüpunkt. Bei einer Bestätigung
mit OK wird dieser aktiviert.
•
Blinkende Texte oder Symbole
erfordern eine Eingabe.
•
Erfolgt innerhalb von 2 Minuten
keine Eingabe kehrt die Uhr in den
Auto-Mode zurück.
12345 6 7
PROGR
14
:
26
AM
PM
FIX
Res Menu ok
Esc
–+
A
B
C
F
E
D
G

D
E
U
T
S
C
H
Display
A Kanalzustandsanzeige
= Kanal 1 EIN
= Kanal 1 AUS
B 2 Kommunikationszeilen für
Zeitanzeige, Menüpunkte,
Eingabeaufforderungen etc.
C Wochentaganzeige
D Anzeige Sommer-/Winterzeit
E Anzeige Ferienbetrieb
F Anzeige AM/PM
G Betriebsspannung (permanente
Punkte) Gangreservebetrieb (Punkte
blinken)
Tasten
+ Im Menü nach oben blättern.
Kurz Drücken = +1
Lang Drücken (ca. 2 sec) = +5
– Im Menü nach unten blättern.
Kurz Drücken = -1
Lang Drücken (ca. 2 sec) = -5
Handschalterfunktion im
Automatikbetrieb
Res Bei einem Reset bleiben die
Programme erhalten. Es muss
Datum und Uhrzeit neu einge-
stellt werden. Resettaste mit
einem stumpfen Gegenstand
(Kugelschreiber) betätigen.
Menu Verlassen des Automatik -
betriebe s und Einstieg in den
Programmiermodus
Esc Kurz Drücken = einen Schritt
zurück Lang Drücken (ca. 2
sec) = Zurück in den
Automatikbetrieb
ok Auswahl treffen und überneh-
men.
69

70
ERSTINBETRIEBNAHME - WAHL DER MENÜSPRACHE
PROG.
PROG R A M M
1
14
:
26
Res Menu ok
Esc
–+
ok
DEUT S C HENGL I S HLANG U A G E
1
14
:
26
Res Menu ok
Esc
–+
ok
+/-
ok
Info
Im Auslieferungszustand befindet sich die Zeitschaltuhr im Auto Mode mit vor-
eingestellter Uhrzeit, Datum und Menüsprache Englisch.
Nach Auswahl der Sprache springt die Zeitschaltuhr nach 4 Sekunden in den
Programmiermodus.
English
Deutsch
Francais
Español
Italiano

71
FREI
50
WOECHENTNEU
ok ok
ok
5
EIN MIN
15 OO
5
EIN STD
OO OO
123 4 567
EIN TAG
ok+/- ok+/- +/-
ok
5
AUS STD
15 OO
5
AUS TAG
ok+/- ok+/-
5
AUS MIN
18 OO
+/-
ok
SICHERN
O1 O2
WOECHENT
Esc
Beispiel
EIN-Befehl um 15.00 Uhr.
AUS-Befehl um 18:00 Uhr.
•
Programm NEU wählen und
mit OK bestätigen.
•
WOECHENT wählen und mit
OK bestätigen.
•
Es werden kurz die freien
Speicherplätze angezeigt.
•
Tagesblock oder Einzeltag
(freie Blockbildung) auswäh-
len und mit OK bestätigen.
•
Stunde für EIN-Befehl eingeben
(+/-) und mit
OK
bestätigen.
•
Minute für EIN-Befehl eingeben
(+/-) und mit
OK
bestätigen.
•
Stunde für AUS-Befehl einge-
ben (+/-) und mit
OK
bestätigen.
•
Minute für AUS-Befehl eingeben
(+/-) und mit
OK
bestätigen.
•
Programm wird gespeichert.
•
Programm springt in die
Auswahl WOECHENT.
Es können nun weitere
Programme erstellt werden.
Info
Die Schaltuhr besitzt 50
Speicherplätze.
Neues Wochenprogramm
D
E
U
T
S
C
H
PROG.

72
FREI
50
FERIENNEU
ok
ok ok+/-
BIS MON
07 26
VON TAG
O7 O1
VON MON
O1 O1
ok+/- ok+/- +/-
ok
BIS TAG
08 01
ok+/-
5
EIN MIN
15 OO
5
EIN STD
OO OO
123 4 567
EIN TAG
ok+/- ok+/-
5
AUS TAG
+/-
ok
ok+/-
SICHERN
03 04
5
AUS MIN
18 OO
5
AUS STD
15 OO
ok+/- ok+/-
FERIEN
Esc
Info
Das Ferienprogramm wird
jedes Jahr ausgeführt wenn
keine Veränderung pro-
grammiert wird.
Neues Ferienprogramm
PROG.

73
D
E
U
T
S
C
H
5
P02
18 OO
5
P01
15 OO
AENDERN
+/-
ok +/-
ok
5
AUS MIN
19 OO
5
AUS STD
18 OO
5
AUS TAG
ok+/- ok+/- +/-
5
P02
19 00
ok
Esc
Programm anschauen, bearbeiten
Info
• Mit "+/-" kann durch die
Programmschritte geblät-
tert werden.
• Durch Drücken von OK
ka nn d as j ew ei li ge
Programm bearbeitet wer-
den. Die Vorgehensweise
entspricht dem Anlegen
eines neuen Programmes.
PROG.

Einzelne Programme löschen
Alle Programme löschen
74
5
P0 1
15 OO
AU SW AH LLO ES CH EN
+/-
ok
SI CH ER
ok
ok
+/-
ok
SI CH ERAL LELO ES CH EN
+/-
+/- ok
ok
Info
Beim Löschen einzelner
Programme werden alle dazu-
gehörigen Programmschritte
gelöscht (z.B. P01 EIN und
P02 AUS).
PROG.

75
Datum und Uhrzeit einstellen
AM/PM- (12-Stunden-) bzw. 24-Stunden-Anzeige einstellen
D
E
U
T
S
C
H
24 H
21 57
12 H 24 H
21 57
PR OG RA MM
+/- ok
Esc
AM P M
09 57
PM
ok+/-
JA HR
20 07
DA T/ ZE ITPR OG RA MM
+/- ok
+/-
ok
1
ST UN DE N
00 00
DA TU M
O7 O1
MO NA T
O1 O1
ok+/- ok+/- +/-
ok
MI NU TE N
21 00
ok+/-
Info
Datum und Uhrzeit sind
werksseitig voreingestellt.
KALENDEREINSTELLUNG

76
UMSCHALTUNG SOMMER-/WINTERZEIT
NEINPROGRAMM
ok
ok
+/-
AUTOPROGRAMM
ok
ok
+/-
WINTER
10 28
SOMMER
03 25
Informazione
Folgende Einstellungen sind
möglich:
AUTO
werksseitige Voreinstellung der
gesetzlichen Vorgabe. Diese wird
automatisch für jedes Jahr neu
berechnet.
NEIN
keine Umschaltung

77
D
E
U
T
S
C
H
KALPROGRAMM
ok
ok
+/-
SO MONAT
O3 25
SO TAG
O3 21
ok+/- +/-
ok
WI MONAT
10 28
WI TAG
10 31
ok+/- +/-
ok
WINTER
10 31
SOMMER
03 21
KAL
Programmierung. Dazumuss das
Startdatum der Sommerzeit und
der Winterzeit eingegeben werden.
Die werksseitige Voreinstellung
wird überschrieben.
Die programmierte Sommer-
/Winterzeit wird automatisch für
jedes Jahr neu berechnet.
Die Umschaltung erfolgt am glei-
chen eingegebenen Wochentag in
der gleichen Woche des Monats.
Beispiel
21.03. Start Sommerzeit
31.10. Start Winterzeit
Achtung
Während der Umschaltung von
Sommer- zu Winterzeit bzw.
umge-
kehrt dürfen keine Veränderungen
an der Uhr vorgenommen werden!

78
BETRIEBSART
4
14
:
26
FIX
Res Menu ok
Esc
–+
Info
1 x Drücken = FIX ON = Dauer EIN
2 x Drücken = FIX OFF = Dauer AUS
3 x Drücken = zurück in Auto Mode
FIX ON: FIX
FIX OFF: FIX
AUTO:
(keine Anzeige) programmierte Schaltzeiten

79
TECHNISCHE DATEN
Maße H x B x T (mm) 45 x 17,5 x 60
Gewicht g (ca.) 90
Anschlußspannung siehe Geräteaufdruck
Leistungsaufnahme 5 VA
Schaltleistung
- ohmsche Last 16 A/250 V AC
- induktive Last cos ϕ 0.6 8 A/250 V AC
- Glühlampenlast 1000 W
Schaltausgang potentialfrei
Schaltkontakte 1 Wechsler
Umgebungstemperatur -25°C bis +55°C
Schutzklasse II
Ganggenauigkeit typ. ±2.5 s/Tag bei 20°C
Gangreserve 3 Jahre ab Werk bei +20°C
Kürzeste Schaltzeit 1 Min.
Speicherplätze 50
Blockbildung von Wochentagen feste/freie Wahl
Schaltzustandsanzeige ja
Plombierbar ja
D
E
U
T
S
C
H

cod. 7.42.8.774.9
ULTIMA REVISIONE 07/2011
+39 035 946 111
8.30 - 12.30 / 14.00 - 18.00
lunedì ÷ venerdì - monday ÷ friday
+39 035 946 260
sat@gewiss.com
www.gewiss.com
24h
Ai sensi dell’articolo 9 comma 2 della Direttiva Europea 2004/108/CE e dell’articolo R2 comma 6 della Decisione 768/2008/EC si informa che responsabile
dell’immissione del prodotto sul mercato Comunitario è:
According to article 9 paragraph 2 of the European Directive 2004/108/EC and to article R2 paragraph 6 of the Decision 768/2008/EC, the responsi-
ble for placing the apparatus on the Community market is:
GEWISS S.p.A Via A. Volta, 1 - 24069 Cenate Sotto (BG) Italy Tel: +39 035 946 111 Fax: +39 035 945 270 E-mail: qualitymarks@gewiss.com
Produkt Specifikationer
Mærke: | Gewiss |
Kategori: | Ikke kategoriseret |
Model: | GW96846 |
Vekselstrømsindgangsspænding: | 230 V |
Produktfarve: | Hvid |
Kontroltype: | Knapper |
Antal kanaler: | 1 kanaler |
Har du brug for hjælp?
Hvis du har brug for hjælp til Gewiss GW96846 stil et spørgsmål nedenfor, og andre brugere vil svare dig
Ikke kategoriseret Gewiss Manualer
6 Juli 2025
5 Juli 2025
5 Juli 2025
5 Juli 2025
5 Juli 2025
5 Juli 2025
5 Juli 2025
5 Juli 2025
5 Juli 2025
5 Juli 2025
Ikke kategoriseret Manualer
- Herma
- Trumeter
- Body Solid
- Traxxas
- Life On Products
- De Buyer
- Contour
- Momo Design
- Lenco
- Musser
- Tumbleweed
- Junkers
- Leen Bakker
- MTM
- ZTE
Nyeste Ikke kategoriseret Manualer

1 September 2025
1 September 2025
1 September 2025
1 September 2025
1 September 2025
1 September 2025
1 September 2025
1 September 2025
1 September 2025
1 September 2025