Godex RT200i Manual
Godex
Etiketprinter
RT200i
Læs gratis den danske manual til Godex RT200i (69 sider) i kategorien Etiketprinter. Denne vejledning er vurderet som hjælpsom af 39 personer og har en gennemsnitlig bedømmelse på 5.0 stjerner ud af 20 anmeldelser. Har du et spørgsmål om Godex RT200i, eller vil du spørge andre brugere om produktet?
Side 1/69

RT200i/RT230i BARCODE PRINTER
USER MANUAL
User Manual
Version
Issue Date
P/N
: RT200i series
: Rev. 2.2
: 2021.11.17
: 920-014511-00

RT200i/RT230i USER MANUAL
CONTENTS
1 Barcode Printer 001
1.1
1.2
Box Content
Getting to Know Your Printer
001
002
2 Printer Setup 005
2.1
2.2
2.3
2.4
2.5
Open the Printer
Loading the Ribbon
Loading the Label Roll Module
Connecting the Printer to the Host Computer
Installing Printer Driver and QLabel with Super
Wizard CD
005
006
010
013
015
3 Setting and Control for Operation Panel 020
3.1
3.2
3.3
3.4
3.5
3.6
Operation Panel
LCD Interface Introduction
LCD Interface Function
Label Calibration and Self Test
Error Alerts
USB Host
020
021
026
030
032
034
4
NetSetting for Ethernet
036
4.1
4.2
Installing the NetSetting Software
The Interface of NetSetting
036
037
5
Accessories
044
5.1
5.2
5.3
Preparation Steps
Installing the Label Dispenser
Installing the Cutter
044
046
052
6 Maintenance and Adjustment 056
6.1
6.2
Cleaning the Print Head
Troubleshooting
056
057
Appendix
Product Specifications
Interface
File Manipulation When Using USB Stick
3.7 Dump Mode Begin

Declaration
RT200i/RT230i USER MANUAL
FCC COMPLIANCE STATEMENT
FOR AMERICAN USERS
This equipment has been tested and found to comply with the limits for a CLASS A digital device,
pursuant to Part 15 of the FCC Rules. These limits are designed to provide reasonable protection
against harmful interference when the equipment is operated in a commercial environment. This
equipment generates, uses, and can radiate radio frequency energy and, if not installed and used
in accordance with the instructions, may cause harmful interference to radio communications.
Operation of this equipment in a residential area is likely to cause harmful interference in which case
the user will be required to correct the interference at own expense.
EMS AND EMI COMPLIANCE STATEMENT
FOR EUROPEAN USERS
This equipment has been tested and passed with the requirements relating to electromagnetic
compatibility based on the standards EN 55022:1998+A1:2000+A2:2003, CISPR 22,
Class A EN 55024: 1998+A1: 2001+A2: 2003, IEC 61000-4 Series EN 61000-3-2/2000&EN 61000-3-3/1995.
The equipment also tested and passed in accordance with the European Standard EN55022 for the
both Radiated and Conducted emissions limits.
RT200i SERIES
TO WHICH THIS DECLARATION RELATES
IS IN CONFORMITY WITH THE FOLLOWING STANDARDS
IEC 62368-1:2014, IEC 60950-1:2005(2nd Edition)+Am 1:2009 Am 2:2013, GB4943.1-2011 GB9254-2008(Class A)
GB17625.1-2013, EN55032:2012/AC:2013 Class A, EN 61000-3-2:2006/A2:2009, EN 61000-3-3:2008
and EN55024:2010 , IEC 61000-4-2:2008 series, UL 60950-1, 2nd Edition, 2011-12-19, CSA C22.2 No.
60950-1-07, 2nd Edition, 2011-12, CFR 47, Part 15 Subpart B
* Danger of explosion if battery is incorrectly replaced. Replace only with the equivalent type recommended by ***
the manufacturer.
** Dispose of used batteries according to the manufacturer’s instructions.**
*** Only use with designated power supply adapter model.*
**** Changes or modifications not expressly approved by the party responsible for compliance could void the user's
authority to operate the equipment.
Caution

RT200i/RT230i USER MANUAL
SAFETY INSTRUCTIONS
Please read the following instructions carefully.
1. Keep the equipment away from humidity.
2. Before you connect the equipment to the power outlet, please
check the voltage of the power source.
3. Make sure the printer is off before plugging the power connector
into the power jack.
4. It is recommended that you connect the printer to a surge
protector to prevent possible transient overvoltage damage.
5. Be careful not to get liquid on the equipment to avoid electrical
shock.
6. For safety and warranty reasons, ONLY qualified service personnel
should open the equipment.
7. Do not repair or adjust energized equipment under any
circumstances.
* Danger of explosion if battery is incorrectly replaced. Replace only with the equivalent type recommended by ***
the manufacturer.
** Dispose of used batteries according to the manufacturer’s instructions.**
*** Only use with designated power supply adapter model.*
**** Changes or modifications not expressly approved by the party responsible for compliance could void the user's
authority to operate the equipment.
Specifications are subject to change without notice.
Caution

RT200i/RT230i Barcode Printer
1 Barcode Printer
1.1 Box Content
Please check that all of the following items are included with your printer.
001
USB Cable
Power Adapter
Power Cord
AC Adapter
RT200i/RT230i Quick Guide
Label Stock
Ribbon Module
Empty Ribbon Core
Ribbon
RT200/RT200i Series
* Package content may vary per region.

2
Front View
1 Barcode Printer
1.2 Getting to Know Your Printer
Device Overview
Rear View
COVER RELEASE CATCHES
Pull catches for opening the printer cover
OPERATION PANEL
FRONT COVER
FEED BUTTON
POWER BUTTON
LCD SCREEN
DIRECTION KEY
ETHERNET PORT
SERIAL PORT
POWER JACK
USB PORT
CALIBRATION BUTTON
USB HOST
FAN-FOLD LABEL INSERT
Feed slot for continuous labels

3
Bottom View
1 Barcode Printer
COVER OF THE MODULE CONNECTION JACKS
* *** Cut-outs are not intended for wall-mount use.

4
1 Barcode Printer
The Internal View of Printer
RELEASE CATCH
Release catch for closing
the printer cover
TOP COVER
LABEL SUPPLY MODULE
LABEL SENSOR MODULE
LABEL SENSOR
GUIDE TRACK
PAPER PRESS BAR
LABEL SUPPLY HUB
LABEL GUIDES
PLATEN MODULE
PLATEN
PLATEN LOCKERS
RELEASE CATCH
Release catch for opening
the label supply hub
The Printing Mechanism
RIBBON SUPPLY WHEEL
PRINT HEAD
RIBBON REWIND MECHANISM
RIBBON SUPPLY MECHANISM
HOLDER OF RIBBON SUPPLY CORE
RIBBON REWIND WHEEL
HOLDER OF RIBBON REWIND CORE

5
2 Printer Setup
2.1 Open the Printer
Open the Printer Cover and the Printing Mechanism
Place the printer on a flat surface. Open the printer cover by pulling the release catches on both sides of the printer
and lift the cover.
Pull the catches toward the direction
COVER RELEASE CATCHES
Pull the catches for opening the printer cover
Pull the catches toward the direction
Lift the printer cover backward
The printing mechanism is lifted up
with the printer cover

6
2 Printer Setup
2.2 Loading the Ribbon
A New Ribbon Module Installation
1. Attach the ribbon to the empty ribbon core with the adhesive strip at the end of the ribbon.
2. Wind the ribbon around the empty ribbon core for 2 to 3 circles.
3. A ribbon module is assembled as below.
EMPTY RIBBON COREA NEW RIBBON
Stick on empty ribbon core
Notch on left side
Wind the ribbon around the core
A NEW RIBBON MODULE
RIBBON SUPPLY
RIBBON REWIND

7
2 Printer Setup
2. Then place the left-hand side of the ribbon.
Load the Ribbon on the Printer
For Ribbon Supply Module
1. Place the right-hand side of ribbon first.
Right side
Push the ribbon to tighten
the spring of the holder
Align the ribbon core
to the holder
SPRING OF HOLDER
Left side
Align the notch of the ribbon core to the spoke
NOTCH OF RIBBON CORE
SPOKE
RIBBON SUPPLY MODULE

8
2 Printer Setup
3. The ribbon supply module loading is completed.
Load the Ribbon on the Printer
For Ribbon Rewind Module
1. Pass the ribbon to round the print head.
RIBBON REWIND MODULE
Move the empty ribbon core upward
to ribbon rewind mechanism

9
2 Printer Setup
2. Place the right-hand side of empty ribbon core first.
Right side
Push the empty ribbon core
to tighten the spring of the holder
SPRING OF HOLDER
Align the empty ribbon core to the holder
3. Then place the left-hand side of the empty ribbon core.
Turn the ribbon wheel to align the notch of empty ribbon core to the spoke.
Left side
SPOKE
NOTCH OF RIBBON CORE
Align the notch of empty ribbon core
to the spoke
Rotate backward
4. Turn the ribbon rewind wheel to tighten the ribbon until it has no wrinkles.
The ribbon loading is completed once the ribbon supply module and ribbon rewind module are assembled
correctly.
RIBBON REWIND WHEEL
Rotate backward

10
2 Printer Setup
2.3 Loading the Label Roll Module
A New Label Supply Module Loading
1. Unlock the release catch to lift the label supply hub.
LABEL STOCK
LABEL SUPPLY HUB
2
1Push rightward
Lift the label supply hub upward
2. Place the label stock on the label supply hub.
Place on the label supply hub

11
2 Printer Setup
3. Push the label supply module downward and close the release catch.
Push downward to fix the module
4. A new label supply module is completed.
Loading the Label Roll Module on the Printer
1. Feed the Label through the label guides and adjust the label guides to the label width. The label guides will help
to prevent the label swaying.
Through the label guides
Adjust the label guides

12
2 Printer Setup
2
Close the printer cover 1Push the release catch
2. Unlock the release catch to close the printer cover.
3. Press the FEED key and make sure the label is fed smoothly. The label loading is completed now.
* *** Please keeps the rack gear clean to ensure the smoothness of label holder.

13
2 Printer Setup
2.4 Connecting the Printer to the Host Computer
1. Please make sure that the printer is switched off.
2. Connect the power cord to the AC adapter.
AC ADAPTER
POWER CORD
Connect the jack of the power adapter to the printer and connect the plug of the power adapter to the socket
of the wall.
RT200i/RT230i BARCODE PRINTER
POWER ADAPTER
THE WALL
SOCKET
SLOT
JACK
PLUG

14
2 Printer Setup
3. Connect the USB/serial cable to the printer and host computer.
4. Pressing the POWER button. The LCD screen should now lights up.
Pressing the POWER button
OPERATION PANEL
POWER BUTTON
LCD SCREEN
RT200i/RT230i BARCODE PRINTER
USB CABLE
PC
USB PORT
PLUG
PLUG

15
2 Printer Setup
2.5 Installing Printer Driver and GoLabel with Super Wizard CD
1. Insert the Super Wizard CD in the CD/DVD drive of the host computer and the program should pop up
automatically. You will see the Welcome screen first. On the Welcome screen, choose “Standard Installation”.
2. The wizard will then ask you to make sure your USB and power cables are connected and that the power is
turned on. Make sure that is done and then click “Next”.
3. The next screen you will see is, “Install the GoLabel Software and Windows driver”. Click “Next” to continue.
* If the Super Wizard program did not run automatically, you can either turn on the “Auto-run” setting for your ***
CD/DVD driver or double-click the icon of CD/DVD driver to run the program.

16
2 Printer Setup
4. As the printer driver and GoLabel are installing, a screen will display a progress bar.
6. As the optional steps, you can also print a test label or register your printer during the “Standard Installation”
procedure.
5. Once the installation is complete, you can start to make and print labels with GoLabel or throug the printer driver.
* If you need more resources, tools or reference documents, you can also find them on Super Wizard CD. Just click***
“Other Choices” on Welcome Screen to access the files.

17
2 Printer Setup
1. Insert the product CD in the CD/DVD drive of the host computer and open the "Seagull Drivers" folder on the CD.
Select the icon for the driver file and click it to start the installation.
2. Follow the instructions on the screen. The Driver Wizard guides you through the installation procedure.
Select "Install printer drivers".
3. Specify your printer model.
Godex RT200i
Installing Printer Driver Directly From CD Folder

18
2 Printer Setup
4. Specify the port used to connect the printer to the host computer.
6. Once the installation is complete, a summary of the printer settings is displayed.
Check whether the printer settings are correct and click "Finish" to start copying the driver files.
Wait until copying is complete, then finish the installation.
5. Enter a printer name and assign the appropriate rights.
Godex RT200i
Godex RT200i
Godex RT200i
Godex RT200i

19
2 Printer Setup
7. Once the driver installation is complete, the new printer should appear in the "Printers and Faxes" folder.
Godex RT200i
Godex RT200i

20
3 Setting and Control for Operation Panel
3.1 Operation Panel
FEED Button
When you press the FEED button, the printer moves the label to the defined stop position.
If you are using continuous labels, pressing the FEED button will move label stock until you release the button again.
If you are using individual labels, pressing the FEED button will move only one label.
If the label does not stop at the correct position, you need to run the auto-detection function on the label stock, please see Section 3.4 Label
Calibration and Self Test.
Operation Panel Introduction
POWER Button
Press the POWER button to turn on the printer, and the START UP SCREEN appears. The printer is on “ready to print”
status, the LCD screen should display the message “READY“ on the screen.
When printer is turned on, keep pressing the POWER button for 3 second will turn the printer off.
FEED BUTTON
DIRECTION KEY
OPERATION PANEL
POWER BUTTON
LCD SCREEN

21
3 Setting and Control for Operation Panel
3.2 LCD Interface Introduction
Getting Started
Press the POWER button to turn on the printer, and the START UP SCREEN appears.
If the printer is on “ready to print” status, the LCD screen should display the message “Ready“ on the screen.
Please keep pressing
button and wait for the timer to be filled, then the LCD interface will enter into the MAIN
PAGE for SETTING MODE. You can make various setting functions in SETTING MODE.
Power on
Enter Main page

22
3 Setting and Control for Operation Panel
Operations on Setting Page
On MAIN PAGE, press or button to move the cursor and select the functions.
Select a designated function and press FEED button, you will enter the SETTING PAGES for the function.
orSelect
Enter
On SETTING PAGES, press or button to select the setting items.
Select a designated function and press FEED button, you will enter the SETTING VALUE PAGES for the function.
orSelect
Enter

23
3 Setting and Control for Operation Panel
Press FEED button will apply the setting value you just selected, and the red tick will appear to mark the value.
On SETTING VALUE PAGES, press or button to change the setting values.
orSelect
Apply
* *** The blue arrow indicates the value you are selected.
** ** The red tick indicates that the selected value is applied now.

24
3 Setting and Control for Operation Panel
On SETTING PAGES, press button will go back to the MAIN PAGE screen.
Exit from Current Page to Ready Status
The icon on top-left corner displays the capture of upper level screen and also guides you back to upper level with
left or up arrow.
NAVIGATION ICON
On SETTING VALUE PAGES, press button will go back to the upper level screen.
Back to the Setting page
Back to the Main page

25
3 Setting and Control for Operation Panel
On MAIN PAGE, select the “EXIT” icon and press the FEED button to exit from SETTING MODE and the printer goes
back to READY status.
or
EXIT from Setting Mode
Back to the Ready status

26
3 Setting and Control for Operation Panel
3.3 LAN Setting
Operations on Setting Page
On MAIN PAGE,press or button to move the cursor and select the functions.
Select a designated function and press FEED button, you will enter the SETTING PAGES for the function.
Device
orSelect Device
Enter LAN Setting
On LAN Setting PAGE,press or button to select the setting items.
Select DHCP and press FEED button, you will be able to setup DHCP function
or
Select a
designated funcition
Produkt Specifikationer
Mærke: | Godex |
Kategori: | Etiketprinter |
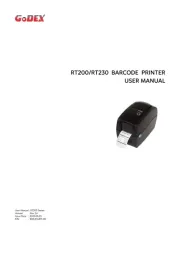
Model: | RT200i |
Har du brug for hjælp?
Hvis du har brug for hjælp til Godex RT200i stil et spørgsmål nedenfor, og andre brugere vil svare dig
Etiketprinter Godex Manualer
11 Januar 2025
11 Januar 2025
19 August 2024
17 August 2024
16 August 2024
16 August 2024
15 August 2024
15 August 2024
15 August 2024
14 August 2024
Etiketprinter Manualer
- Honeywell
- Zebra
- Brady
- Datamax-O'neil
- Argox
- Star Micronics
- Primera
- Dymo
- Start International
- Panduit
- Toshiba
- Citizen
- Olympia
- Phoenix
- Leitz
Nyeste Etiketprinter Manualer
12 August 2025
12 August 2025
12 August 2025
12 August 2025
12 August 2025
12 August 2025
8 August 2025
5 August 2025
31 Juli 2025
31 Juli 2025