Gre LAGP8 Manual


Læs gratis den danske manual til Gre LAGP8 (36 sider) i kategorien Ikke kategoriseret. Denne vejledning er vurderet som hjælpsom af 103 personer og har en gennemsnitlig bedømmelse på 4.0 stjerner ud af 52 anmeldelser. Har du et spørgsmål om Gre LAGP8, eller vil du spørge andre brugere om produktet?

Side 1/36
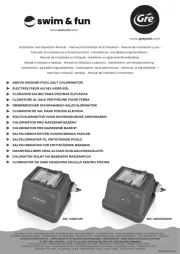
INSTALLATION AND MAINTENANCE MANUAL
MANUAL DE INSTALACIÓN Y MANTENIMIENTO
MANUEL D’INSTALLATION ET D’ENTRETIEN
MANUALE DI INSTALAZIONE E MANUTENZIONE
INSTALLATIONS- UND WARTUNGSHANDBUCH
HANDLEIDING VOOR INSTALLATIE EN ONDERHOUD
MANUAL DE INSTALAÇÃO E MANUTENÇÃO
INSTRUKCJA INSTALACJI I KONSERWACJI
NÁVOD NA INŠTALÁCIU A ÚDRŽBU
NÁVOD PRO INSTALACI A ÚDRŽBU
INSTALLATIONS- OCH UNDERHÅLLSHANDBOK
MANUAL DE INSTALARE ȘI ÎNTREȚINERE
LED SPOTLIGHT FOR POOL
FOCO-LUZ LED PARA PISCINA
PROJECTEUR LED POUR PISCINE
FARETTO-LUCE LED PER PISCINA
LED-STRAHLER FÜR POOL
LEDSPOT VOOR ZWEMBADEN
FOCO DE LUZ LED PARA PISCINA
LAMPA LED DO BASENU
BODOVÉ LED SVIETIDLO PRE BAZÉNY
BODO LED SVĚTLO PRO BAZÉNY
LED SPOTLIGHT FÖR POOL
REFLECTOR LED PENTRU PISCINA
GB
E
FR
I
D
NL
P
PO
SK
CZ
SU
RO
Ref. LAGP8
2
ENGLISH
NOTE: This instruction manual contains essential information on the safety measures to be adopted for ins-
tallation and start-up. Therefore, the installer as well as the user must read the instructions before beginning
installation and start-up.
Keep this manual for future reference about how this device works.
Please follow the instructions below to achieve the best performance from the LAGP8 model projector for above-ground pools.
1. CHECK THE CONTENT OF THE PACKAGING
You will find the following accessories inside the packaging:
• Projector unit for above-ground pools with a 7-m cable + Projector bracket arm unit (the two units are delivered assem-
bled) + Driver set up to be fed by a 230 V 50/60 Hz power supply. Driver output of 24 V DC
• Bag with decking anchor bolt “Playa”
• Hook support
• Instruction manual
2. GENERAL FEATURES
This projector has been principally designed for use in above-ground pools. It is a class III electrical appliance with a safe
extra-low voltage power supply (24 V DC).
In order for the projector to work, it must be completely submerged underwater.
The projector complies with the IP68 protection rating standard (withstands the ingress of dust, solid foreign objects and
liquids) if submerged at a nominal depth of 2 m.
This projector complies with international lighting safety standards, in particular with standard EN 60598-2-18:
LUMINAIRES - PART 2: PARTICULAR REQUIREMENTS - SECTION 18: LUMINAIRES FOR SWIMMING POOLS AND
SIMILAR APPLICATIONS.
Under no circumstances may the manufacturer be held liable for the assembly, installation or start-up of any electrical
components that have not already been installed in your facility.
3. INSTALLATION
• The projector should be fitted vertically to the pool and fastened to its edge (Fig. 6).
• The driver should be fed by a 230 V AC 50/60 Hz power supply. The driver output of 24 V DC should be connected to
a 7-m cable that feeds the projector. It is important to keep to the safety distances described in the section “Safety
warnings”.
• For best results, it is recommended that a pool be lit up with one projector per 10 m² of water surface.
• In order to avoid glare, the projectors should be fitted so that they face the opposite direction to the home or any other
poolside building used as living quarters.
• The luminaire is not portable and must be installed as per the assembly instructions.
4. ASSEMBLY
This projector has been principally designed for assembly in above-ground pools. The projector comes in two parts: the
projector unit with the transformer and corresponding cable, and the projector bracket arm unit. There are three ways of
fitting the projector in a pool:
1. Standard mount
Fig. 1. Check that the bracket arm unit is firmly attached to the body of the above-ground pool projector.
Fig. 2. Feed the cable through the groove on the bracket arm unit until it is in the right position on the outside of the pool.
Fig. 3. Fasten the bracket arm unit to the edge of the above-ground pool using the screws and corresponding nuts.
2. Deck mount “Playa”
How to adapt the plastic bracket arm to pools with a metal profile (“Playa”).
Fig. 1. Check that the bracket arm unit is firmly attached to the body of the above-ground pool projector.
Fig. 5. Attach the metal plate (no. 20) to the plastic bracket arm (no. 13) using the plastic rivets (no. 22). To hammer them
in, use the wooden peg (no. 24) with the help of the small mallet (no. 25). Screw the screw (no. 21) to the metal plate
Fig. 6. Attach the bracket to one of the PVC profiles found under the pool’s decking using a screw (no. 21). Before the screw
reaches as far as it will go against the pools sheeting, place the rubber stopper (no.23) between the screw and the wall.
Thread the transformer’s power cable (no. 18) over the profile and put the decking in its right position; this will ensure
that the cable is protected.


Produkt Specifikationer

Mærke: Gre
Kategori: Ikke kategoriseret
Model: LAGP8
Antal: 1
Nem at installere: Ja
Nem at rengøre: Ja
Nem at bruge: Ja

Har du brug for hjælp?

Hvis du har brug for hjælp til Gre LAGP8 stil et spørgsmål nedenfor, og andre brugere vil svare dig


Ikke kategoriseret Gre Manualer
Gre

Gre ES1100 Manual

8 Oktober 2024
Gre

Gre CIKPCOR60 Manual

4 Oktober 2024
Gre

Gre CV790204 Manual

29 September 2024
Gre

Gre CI790203 Manual

8 September 2024
Gre

Gre CI800007 Manual

27 August 2024
Gre

Gre KPEOV6059 Manual

24 August 2024
Gre

Gre KPE300NPNE Manual

16 August 2024
Gre

Gre CV800009 Manual

15 August 2024
Gre

Gre KPEOV7027 Manual

14 August 2024
Gre

Gre K4200NPNE Manual

14 August 2024

Ikke kategoriseret Manualer

Nyeste Ikke kategoriseret Manualer

Rival

Rival CN753-W Manual

15 Juni 2025
Acopa

Acopa 553WSMKE Manual

15 Juni 2025
Atosa

Atosa RDCS-35 Manual

15 Juni 2025
Gourmia

Gourmia GAF692 Manual

15 Juni 2025
Taylor

Taylor 5315856 Manual

15 Juni 2025
Watts

Watts LF8B Manual

15 Juni 2025
Watts

Watts PLT-5 Manual

15 Juni 2025
ToiToiKids

ToiToiKids Fay Manual

15 Juni 2025
Aiphone

Aiphone JP-8Z Manual

15 Juni 2025