Grundig 55 GHU 7970 B Manual
Læs gratis den danske manual til Grundig 55 GHU 7970 B (123 sider) i kategorien televisión. Denne vejledning er vurderet som hjælpsom af 12 personer og har en gennemsnitlig bedømmelse på 4.6 stjerner ud af 6.5 anmeldelser.
Har du et spørgsmål om Grundig 55 GHU 7970 B, eller vil du spørge andre brugere om produktet?
Produkt Specifikationer
| Mærke: | Grundig |
| Kategori: | televisión |
| Model: | 55 GHU 7970 B |
| Vekselstrømsindgangsspænding: | 220 - 240 V |
| Vekselstrømsindgangsfrekvens: | 50/60 Hz |
| Produktfarve: | Sort |
| Skærm diagonal: | 55 " |
| Skærmopløsning: | 3840 x 2160 pixel |
| Wi-Fi: | Ja |
| Bluetooth: | Ja |
| HD-type: | 4K Ultra HD |
| Skærmteknologi: | LED |
| Skærmens lysstyrke: | - cd/m² |
| Responstid: | - ms |
| Skærm form: | Flad |
| Skærm diagonal (metrisk): | 139 cm |
| Tuner type: | Digital |
| Format til analogt signal: | Ikke understøttet |
| System for digitalt signalformat: | DVB-C, DVB-S2, DVB-T2 |
| Smart TV: | Ja |
| Hybrid broadband TV udsendelse (HbbTV): | Ja |
| Antal højttalere: | 2 |
| Udgangseffekt (RMS): | 20 W |
| Automatisk lydstyrkejustering: | Ja |
| Lyddekodere: | Dolby Digital |
| Antal HDMI-porte: | 3 |
| Antal USB 2.0-porte: | 2 |
| Ethernet LAN: | Ja |
| Processorkerner: | 4 |
| VESA montering: | Ja |
| Panel montering grænseflade: | 200 x 200 mm |
| Strømforbrug (standby): | - W |
| Strømforbrug (typisk): | - W |
| Bredde (med stativ): | 1122.9 mm |
| Dybde (med stativ): | 291 mm |
| Højde (med stativ): | 774 mm |
| Vægt (med stativ): | 11500 g |
| Oprindelig opdateringshastighed: | 50 Hz |
| Operativsystem installeret: | Google TV |
| Audio Return Channel (ARC): | Ja |
| Fælles grænseflade (CI): | Ja |
| High Dynamic Range (HDR) understøttet: | Ja |
| HDR-teknologi (High Dynamic Range): | Dolby Vision, HDR 10+ |
| USB-optagelse: | Ja |
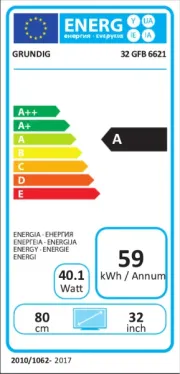
| Energiforbrug (SDR) pr. 1000 timer: | 77 kWh |
| Børnesikring: | Ja |
| Strømforbrug (maks.): | 145 W |
| Energieffektivitetsklasse (SDR): | F |
| Energieffektivitetsklasse (HDR): | G |
| Energiforbrug (HDR) pr. 1000 timer: | 115 kWh |
| Energieffektivitetsskala: | A til G |
| Sensor for omgivende lys: | Ja |
| Video komprimeringsformater: | H.265, HEVC |
| HDMI-version: | 2.1 |
| Rullevisning: | Ingen |
| Forbedret lydreturkanal (eARC): | Ja |
| Introduktionsår: | 2023 |
| Indbygget Chromecast: | Ja |
Har du brug for hjælp?
Hvis du har brug for hjælp til Grundig 55 GHU 7970 B stil et spørgsmål nedenfor, og andre brugere vil svare dig
televisión Grundig Manualer


televisión Manualer
- Polaroid
- Pyle
- ITT
- Vision Plus
- Peerless-AV
- XD Enjoy
- Teac
- Schneider
- Vestel
- Intenso
- AKAI
- ECG
- Toshiba
- Belson
- Panasonic
Nyeste televisión Manualer