Hager TYM620D Manual


Læs gratis den danske manual til Hager TYM620D (4 sider) i kategorien Ikke kategoriseret. Denne vejledning er vurderet som hjælpsom af 12 personer og har en gennemsnitlig bedømmelse på 4.5 stjerner ud af 6.5 anmeldelser. Har du et spørgsmål om Hager TYM620D, eller vil du spørge andre brugere om produktet?

Side 1/4
1
6LE002518A
TYM6..
Output 16A C-Load adapted /
shutter/blind
TXM6..
Output 16A C-Load adapted /
shutter/blind
z
Safety instructions
Electrical equipment may only be installed and
-
ance with the relevant installation standards,
guidelines, regulations, directives, safety and
accident prevention regulations of the country.
Failure to comply with these installation
instructions may result in damage to the

-

-
ous voltages to the device or load.

suited for safe disconnection of the mains
supply.



Connect one motor per output only.


switches for correct adjustment. Observe

get damaged.

device could get damaged.
Observe the motor manufacturer's data regard-
ing change-over time and max. switch-on time


of the product and must be retained by the end
user.

auto 1
auto 2
1
2
C1/C9 C3/C11 C5 /C13 C7/C15
C2/C10 C4 /C12 C6/C1 4 C8/C16
(1)
(2) (3)
(3)
(4)
(5)
(6)
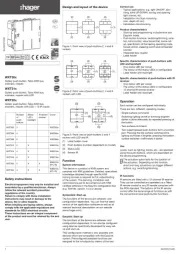
Fig. 1: Example device variant 16/8gang
(1) Slide switch / 1/ 2
(2) KNX bus connection terminal
(3) Connections of loads
(4) Labelling eld
(5) Illuminated programming button
(6) Operation button for manual operation for
each pair of outputs with status LED
With variants 20/10gang the basic design corre-
sponds to the 16/8gang device variant.
Function
System information
This device is a product of KNX system and corre-
sponds to the KNX guidelines. Detailed specialised
knowledge obtained from KNX training courses
is required for understanding. The planning,
installation and commissioning of the device is
carried out with the help of KNX-certied software.
P

The function of the device is software-depend-
ent. The software is to be taken from the product
database. You can nd the latest version of the
product database, technical descriptions as well as
conversion and additional support programmes on
our website.

The function of the device is conguration-de-
pendent. The conguration can also be done using
devices developed specially for simple setting and
start-up.
This type of conguration is only possible with
devices of the easylink system. Easylink stands for
easy, visually supported start-up. Precongured
standard functions are assigned to the in/outputs
by means of a service module.
Functional description
The device receives telegrams from sensors or
other controllers via the KNX installation bus and
switches electrical loads with its independent relay
contacts. The devices are particularly suitable for
capacitive loads and are designed for high making
currents.
Correct use
- Switch electrical loads of 230 V AC with poten-
tial-free contacts.
- Switching electrically operated motors of 230 V
AC for blinds, shutters, awnings and similar
hangings.
- Mounting on DIN rail according to DIN EN
60715 in the distribution box.

- manual activation of the outputs on the device
possible, building site operation
- Status display of the outputs on the device
- Scene function
- Forced position by higher-level controller
- Connection of various external conductors
possible.
Functions in switch operation:
- Time switching functions
Functions in roller shutter/blind operation:
- Position can be started directly
- Slat position directly controllable
- Feedback of operating state, shutter position
and slat adjustment
- 3 Alarms
Operation

Bus voltage supply is present.
zPush switch (1) to position 1/ 2.
Manual operation is switched on, the outputs
can be controlled using the operation buttons
(6) independently of each other.
1 activates the control of the outputs
C1 C8 C1 C10 .. (16gang) resp. .. (20gang).
activates the control of the outputs
C9 C16 .. (16gang) resp. C11 ..  (20gang).
During manual operation, the controller is deac-
tivated via the KNX bus.
Systemlink commissioning:
Depending on the programming, the manual
operation is activated permanently or for a time
period congured via the application software.
If the manual operation is blocked via the appli-
cation software, no activation takes place.
Or:
zMove switch (1) to position .
The manual operation is switched off. Operation
takes place solely via the KNX bus. The output
P
P
z
Bn,.:
M
`
adopts the position predened by the bus con-
troller. The switching status is displayed via the
status LED of the operation button (6).
auto 1 C1 displays the status of the outputs ..
C8 C1 C10 auto (16gang) resp. .. (20gang).
displays the status of the outputs .. C9 C16
(16gang) resp. .. (20gang).C11 
Operating outputs in manual operation
Operation takes place per output by briey press-
ing the operation button repeatedly (table1).

-


when the motor is in unprogrammed

Motors, hangings and the device may

Always only press one button in man-
ual operation for unprogrammed
devices.
Status Behaviour when

Switching operation
Load is switched
off. Status LED of
the button (6) is off.
Switch ON the connected
load. Status LED of button
(6) lights up.
Load is switched
on, status LED
of the button (6)
lights up.
Switch OFF the connected
load. LED goes out.
Roller shutter/blind operation
Output is in stand-
by, status LED of
the button (6) is off.
Movement operation starts.
Status LED of the button (6)
lights up.
If the roller shutter/blind
is in nal position, the
button opposite must
be pressed to move the
shutter/blind.
Output active,
status LED of the
button (6) lights
up.
Movement operation stops,
LED goes out.
Table 1: Manual operation













may get damaged in the connection



P

-

Final position switches could fuse
together. Motors, hangings and the

Only connect one motor per


Observe temperature range. Provide sufcient
cooling.
zMount device onto DIN rail in accordance with
DIN EN 60715.
Connect device
auto 1
auto 2
1
2
C1/C9 C3/ C11 C5/C13 C7 /C15
C2/C10 C4/ C12 C6/C14 C8/C1 6
L3
L2
L1
N
Fig 2: Device connection
zConnect bus cable via connecting terminal (2).
Connecting loads to be switched
The output is congured as switching output.
zConnect load to the outputs of the device ac-
cording to gure (gure 2).
Connecting blind drives
The two adjacent relay outputs / /C1 , C3 C4, ..
each form a blind output for blind drives. Each left
relay output , , , is designated for the UP C1 C3 C5 ..
direction, and each right relay output , ,  C4 C6 ..
is designated for the DOWN direction. In manual
operation, the blind is moved UP and DOWN using
the corresponding operation buttons.
Two outputs are congured as blind output.
zConnect drives according to gure (gure 2).
While doing so, use the same phase (external
conductors).
Start-up

application software
The switch for manual operation (1) is in position
.
zSwitch on bus voltage.
zPress programming button (5).
The button lights up.
If the button does not light up, no bus voltage is
present.
zLoad the physical address into the device.
Status LED of the button goes out.
zLoad application software.
zNote down the physical address on the labelling
eld (4).
P
P

Information on the system conguration can be
taken from the extensive description of the service
module easylink.
Start up the device.
zSwitch on mains voltage on the outputs.

time
In blind/roller shutter operation, the operation time
for positioning the sunshade is important. The posi-
tion is calculated based on the operation time. The
slat adjusting time for slat blinds, determined by
the design, is part of the total operation time. The
opening angle of the slats is therefore set as oper-
ation time between opened and closed position.
The operation time for UP is normally longer
than the operation time for DOWN and must be
measured separately if necessary
zMeasure UP and DOWN operation time of the
hanging.
zMeasure slat adjusting time between OPEN
and CLOSED.
zEnter measured values into the parameter
setting – ... or .running time slat step time
Functional test
The functionality of the outputs is displayed via the
status LED of the operation button (6).
1 auto 1 / displays the status of the outputs
C1 C8 C1 C10 .. (16gang) resp. .. (20gang).
 / displays the status of the outputs
C9 C16 .. (16gang) resp. C11 ..  (20gang).
P
P


Produkt Specifikationer

Mærke: Hager
Kategori: Ikke kategoriseret
Model: TYM620D

Har du brug for hjælp?

Hvis du har brug for hjælp til Hager TYM620D stil et spørgsmål nedenfor, og andre brugere vil svare dig


Ikke kategoriseret Hager Manualer
Hager

Hager CEA225U Manual

10 Juni 2025
Hager

Hager CFA263U Manual

10 Juni 2025
Hager

Hager ADZ366C Manual

10 Juni 2025
Hager

Hager LLD100 Manual

12 Januar 2025
Hager

Hager GS11019016 Manual

30 December 2025
Hager

Hager EG203 Manual

30 December 2025
Hager

Hager MZN131 Manual

30 December 2025
Hager

Hager FN097E Manual

30 December 2025
Hager

Hager FN117E Manual

30 December 2025

Ikke kategoriseret Manualer

Nyeste Ikke kategoriseret Manualer