Hager VM110 Manual


Læs gratis den danske manual til Hager VM110 (4 sider) i kategorien Ikke kategoriseret. Denne vejledning er vurderet som hjælpsom af 12 personer og har en gennemsnitlig bedømmelse på 4.5 stjerner ud af 6.5 anmeldelser. Har du et spørgsmål om Hager VM110, eller vil du spørge andre brugere om produktet?

Side 1/4
Design 30 Consumer Unit
Instructions/Data Sheet
This Consumer Unit and Hager devices conform with the following standards:
Consumer Unit: BS EN 61439-3 including Annex ZB.
Switch-disconnectors: BS EN 60947-3.
Residual Current Circuit Breaker (RCCB): BS EN 61008-1
Residual current operated circuit breaker with integral overload (RCBO): BS EN 61009-1
Miniature Circuit Breaker (MCB): BS EN 60898-1
Installation Instructions:
All product(s) must be installed by a suitably competent electrician
Giving consideration to their intended use and in accordance with the
current edition of BS 7671 (IET Wiring Regulations).
The Electricity at Work regulations and the Health and Safety at Work Act
shall be complied with.
Only equipment and arrangements specied in Hager’s technical
documentation / catalogue shall be used.
Install in the horizontal plane only.
For guidance when making connections in a consumer unit electrical
safety rst /BEAMA document “Guidance for installers when making
connections in consumer units” is available from hager.co.uk/63026.htm
Important notice:
To prevent potential overheating from loose connections the installer
shall check connections are tight to the torque levels stated in these
instructions prior to energizing this board. This check should include
factory made connections which may have loosened in transit.
Good workmanship and proper materials must be applied by the installer.
The cable entry method shall, as far as reasonably practical, maintain the
non-combustable arrangement of the enclosure. Account shall be taken of
these instructions.
Easy t front cover assembly allows the cover to be located at the
top of the board and locked Into place that enables the cover to stay
secure when replacing or removing during an installation. The units have multiple xing points that will suit No.8 & No.10 screws
Where Electrical Knockouts are provided for top or bottom cable entry
are sized and positioned to suit standard trunking i.e 100x50mm,
50x50mm & 40x25mm, grommet strip is provide to protect the cables
when entering the board.
Rear cable entries shall enter thorough selected rear Knockout; once
the Knockout is removed the cable protector bracket can be tted
to allow safe installation of the cables. Grommet strip lengths: Small
EKO – 79mm, – 127mm – 255mmLarge EKO Rear EKO
Note: Only BASEC approved cable should be used
1.0mm2 to 16mm2 for outgoing cables
Up to 35.0mm2 for incoming live cables
Single conductors below 1.5mm² need to be doubled back in the
terminal bar.
Removal of front
cover:
Wall Fixing:
Cable entry facilities:
Additional Extras
Accessory Ref.
Cable protector plate
Can be used on the rear knockouts to smooth any
sharp edges
Insulated:
VM02CE
Metal:
VM01CE
GB
1 ZD0821 - Issue 4 9-16
ZD0821ZD0821
Incoming meter tails can be safely secured using the cable clamp
system eliminating stress within the switch terminal.
Rear cable entries shall enter thorough selected rear knockout; once
the knockout is removed the cable protector frame can be tted in
order to avoid any damage to the cable insulation or sheath during
installation.
Guidance Notes:
The total load must not exceed the rating of the incoming device or the assigned assembly rating (InA) whichever is the lower. Each neutral and earth
connection must correspond numerically to its outgoing way. Additional blanks (ref. JK01B) are available to cover spare ways.
A pack is provided to label this consumer unit, please consult us for spares or replacements.
Operating Instruction leaet is provided overleaf. This leaet should be left for the end user.
Single conductors below 1.5mm² need to be doubled back in the terminal bar.
Consumer Units incorporating RCDs in TT systems should incorporate an S type (time Delayed) RCCB, e.g. 100 mA s-type RCCB . Alternatively a main
switch with RCBO protection on all outgoing circuits should be used.
Precautions need to be taken to prevent faults to earth on the supply side of the RCD (as per BS7671 regulation 531.4.1)
Cable Access:
Cable access into the metal consumer unit must maintain the integrity of the non-combustable consumer unit so far as reasonably practicable. This can
generally be achieved by the installer ensuring that cable access holes they make in the enclosure do not to leave gaps greater than:
· 1.0 mm for the horizontal top surface and
· 2.5 mm for all other surfaces of the enclosure that are accessible after installation.
For rear cable access, the minimum number of knockout(s) shall be removed and a cable protector tted; see illustration above.
Tests on hager consumer units have indicated that there is no specic need for external re rated cable glands or intumescent sealing in addition to the
guidance below, with respect to achieving a non-combustible enclosure. However this does not preclude the designer/installer from using re rated cable
glands or external intumescent sealing should they consider necessary. Internal intumescent pads shall not be used.
Warranty
This distribution board is offered with a 24 month warranty against defective material or manufacture. If a warranty claim is necessary, please call the
technical support number given at the bottom of the page and we will be pleased to help.
For dimensional information and weights please consult the Hager catalogue. Hager Technical Help Line: 01952 675 689
Hager Technical Fax: 01952 675 557
Hager Technical E-mail: technical@hager.co.uk
Website: www.hager.co.uk
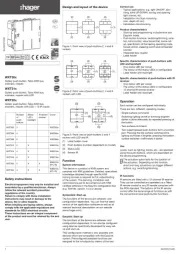
Fitting Hager MCBs and RCBOs:
Only equipment and arrangements specied in Hager’s technical
documentation / catalogue shall be used.
1. Isolate the electrical supply from the consumer unit.
2. Remove the front cover.
3. Fully slacken the lower terminal of the device.
4. Fully open the bottom device clip (g 1.)
5. Locate the device onto the din rail, and busbar. Ensure that the
busbar tooth is within the device terminal cage.
6. Close the bottom device clip.
7. While holding the device rmly onto the busbar, fully tighten the lower
terminal screw.
8. After tting all outgoing devices and connecting all outgoing cables,
please check the tightness of all cable connections. This should
include all factory made connections, which may have loosened
during installation or transit.
g 1.
Click!
2 ZD0821 - Issue 4 9-16
ZD0821 ZD0821
2.5mm
2.5mm
2.5mm
1mm
1mm


Produkt Specifikationer

Mærke: Hager
Kategori: Ikke kategoriseret
Model: VM110

Har du brug for hjælp?

Hvis du har brug for hjælp til Hager VM110 stil et spørgsmål nedenfor, og andre brugere vil svare dig


Ikke kategoriseret Hager Manualer
Hager

Hager CEA225U Manual

10 Juni 2025
Hager

Hager CFA263U Manual

10 Juni 2025
Hager

Hager ADZ366C Manual

10 Juni 2025
Hager

Hager LLD100 Manual

12 Januar 2025
Hager

Hager GS11019016 Manual

30 December 2025
Hager

Hager EG203 Manual

30 December 2025
Hager

Hager MZN131 Manual

30 December 2025
Hager

Hager FN097E Manual

30 December 2025
Hager

Hager FN117E Manual

30 December 2025

Ikke kategoriseret Manualer

Nyeste Ikke kategoriseret Manualer