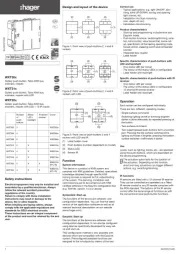
Hager WST314 Manual


Læs gratis den danske manual til Hager WST314 (2 sider) i kategorien Ikke kategoriseret. Denne vejledning er vurderet som hjælpsom af 18 personer og har en gennemsnitlig bedømmelse på 4.9 stjerner ud af 9.5 anmeldelser. Har du et spørgsmål om Hager WST314, eller vil du spørge andre brugere om produktet?

Side 1/2
1
6LE000442B
WST30x
Systo push-button, tebis KNX
bus, x inputs
Sensore a tasti KNX a x pulsanti
s-/e-link, con accoppiatore bus
integrato
WST31x
Systo push-button, tebis KNX
bus, x inputs with LED and
backlight
Sensore a tasti con LED a x pul-
santi s-/e-link, con accoppiatore
bus integrato
WST32x
Systo push-button, tebis KNX
bus x inputs with LED,backlight
and IR receiver
Sensore a tasti infrarossi con
LED a x pulsanti s-/e-link, con
accoppiatore bus integrato
z
y
6LE000442Bwww.hager.com - 01.09.2014 -
Bn,.:
M
`
Number of
push-buttons
Status LED +
backlight
IR remote
receiver
Numero
pulsanti
LED di stato +
sfondo illumi-
nato
Ricevitore IR
WST302 2
WST304 4
WST306 6
WST312 2 X
WST314 4 X
WST316 6 X
WST322 2 X X
WST324 4 X X
Safety instructions z
Electrical equipment may only be installed and
assembled by a qualifi ed electrician. Always
follow the relevant accident prevention regula-
tions of the country.
Failure to comply with these installation in-
structions may result in damage to the device,
re or other hazards.
When installing and laying cables, always com-
ply with the applicable regulations and stan-
dards for SELV electrical circuits.
These instructions are an integral component
of the product and must be retained by the end
user.
Design and layout of the device
(2)
(2)
(1)
Figure 1: Front view of push-button 6 inputs
(3)
(3)
(1)
(2)
Figure 2: Front view of push-button 6 inputs with
LED and backlight with or without IR receiver
(1) Labelling fi eld inlay with backlighting
(2) Buttons (number dependent on the variant)
(3) Status LED
Function
System information
This device is a product of KNX system and corre-
sponds to the KNX guidelines. Detailed specialised
knowledge obtained from KNX training courses is
required for understanding. The planning, installati-
on and commissioning are carried out with the help
of KNX-certifi ed software.
Systemlink start-up
The function of the device is software-dependent.
The software is to be taken from the product
database. You can fi nd the latest version of the
product database, technical descriptions as well as
conversion and additional support programmes on
our website.
Easylink start-up
The function of the device is con guration-depen-
dent. The confi guration can also be done using
devices developed specially for simple setting and
start-up.
This type of confi guration is only possible with
devices of the easylink system. Easylink stands for
easy, visually supported start-up. Preconfi gured
standard functions are assigned to the in/outputs
by means of a service module.
Correct use
- Typical application, e.g. light on/off, dimming,
blind up/down, saving and opening light scenes,
etc.
- Installation into wall box adepth 40mm
- Installation into truncking
Product characteristics push-button without
LED
- Start-up and programming in S-mode and E-
mode
- Push-button functions: switching/dimming, blind
control, value transmitter, scene call-up, speci -
cation of the heating operating mode, forced
control, stepping switch and comparator func-
tion
- Integrated bus coupling unit
- Labelling fi eld
Additional product characteristics push-button
with LED and backlight
- One status LED per push-button
- Function and colour of the status LEDs confi gu-
rable for the device
- illuminated labeling led
Additional product characteristics push-button
with LED, backlight and IR receiver
- One status LED per push-button
- Function and colour of the status LEDs confi gu-
rable for the device
- IR interface with 12 IR channels
- illuminated labeling led
Operation
The functions of the buttons, their operation and
the activation of the loads can be adjusted individu-
allay for each device.
There are two operating modes:
- Single-surface operation:
Switching lighting on/off or dimming brighter/
darker is carried out alternately by repeated
pressing of the button.
- Two-surface operation:
Two superimposed push-buttons form a func-
tion pair. For example, pressing the top surface
switches/dims lighting on/makes it brighter,
pressing the bottom surface switches it off/
makes it darker.
Operating a function or load
Loads, such as lighting, blinds, etc., are operated
using the push-button, which are dependent on the
device programming.
Press a push-button.
The stored function is executed.
The actuation pulse lasts for the duration of the
actuation. Depending on the function, short and
long touches can trigger different actions, e.g.
switching/dimming.
Function infrared receiver
The infrared devices are fi tted with a 12 channel
IR receiver. They can be controled an operated via
a Tebis IR remote control or IR remotes compliant
with RC6 standard The buttons of the IR remote
control allow the same scope of functions as with
the conventional local push-button functions.
P
Information for electricians
Installation and electrical connection
DANGER!
Touching live parts in the installation
environment can result in an electric
shock!
An electric shock can be lethal!
Disconnect the connecting cables
before working on the device and
cover all live parts in the area!
ç
Connecting and installing the device (fi gure 3)
Mounting in a wall box:
Mount fi xation frame (7) to a wall box in the
correct position. Note marking .TOP
Circuit bus connection cable to push-button
(4.1, 4.2).(4.1, 4.2).
Mount push-button (4.1, 4.2) with design plate (6)
on the supporting frame (7). Note marking TOP.
Mount labelling fi eld cover (1.1) and labelling fi eld
inlay (1.2, 1.3 ) onto the push-button (4.1 , 4.2).
Put the design plate (6) onto the push-button (4.1,
4.2).
Dismantling
Remove the design plate (6) from the push-
button (4.1, 4.2).
Release cover of labelling fi eld (1.1) and labelling
eld inlay (1.2, 1.3) from push-button (4.1, 4.2).
Remove push-button (4.1,4.2) from the trun-
cking. Hold on to the design plate (if existing).
Disconnect bus line from push-button (4.1,4.2).
Mounting in trunking:
Guide bus connection cable from truncking.
Circuit bus connection cable to push-button
(4.1, 4.2).(4.1, 4.2).
Mount push-button (4.1 4.2) directly in truncking
until it locks into place. Note marking .TOP
Mount labelling fi eld cover (1.1) and labelling fi eld
inlay (1.2, 1.3) onto the push-button (4.1 , 4.2).
Dismantling
Release cover of labelling fi eld (1.1) and labelling
eld inlay (1.2, 1.3) from push-button (4.1, 4.2).
Remove push-button (4.1 4.2) from the trun-
cking.
Disconnect bus line from push-button (4.1,4.2).
Start-up
Systemlink - Loading the physical address and
application software
The physical address is only ever assigned
for one device. Only one device can ever be in
programming mode.
Remove labelling eld (1.2, 1.3) with labelling
eld cover (1.1) via programming button (1.1) if
there is one.
Switch on bus voltage.
Press programming button (5).
The programming LED (5) lights up.
If the programming LED does not light up, no
bus voltage is present.
Load the physical address into the device.
The programming LED (5) goes out.
Load application software. Note down the phy-
sical address on the labelling fi eld.
The loading of non-compatible application software
is indicated by ashing of the status LEDs (3).
P
P
P
Reattach labelling (1.2, 1.3) with labelling eld
cover (1.1).
Easylink
The device must be mounted on the bus cou-
pling unit for the E mode start-up.
Information on the system con guration can be
taken from the extensive description of the service
module easylink.
Appendix
Technical data
KNX Medium TP 1
Start-up mode systemlink, easylink
Rated voltage KNX DC 21 … 32 V SELV
Current consumption KNX type 20 mA
Connection mode KNX bus connecting terminals
Dimensions (W x H x D) 45 x 45 x 17 mm
Degree of protection IP 20
Protection class III
Operating temperature -5 … +45 °C
Storage/transport temperature -20 ... +70 °C
Standards EN 60669-2-1, EN 60669-1
EN 50428
Troubleshooting
Bus operation is not possible.
Cause: Bus voltage is not present.
Check bus connection terminals for correct
polarity.
Check bus voltage by briefl y pressing the
programming button (5), red programming LED
lights up if bus voltage is present.
All status LEDs fl ashing
Cause: The loaded application program and appli-
cation module are not compatible.
Install new application program or mount suita-
ble application module.
Accessories
Sheet of labels for labelling fi eld WST900
Bus connector TG008
P
(1.1)
(4.1)
(5)
(7 )
(6 )
(1.2)
(1.3)
(4.2)
(5)
Figure 3: Assembly of the device
(1.1) Labelling led cover
(1.2) Labelling eld inlay for push-button and push-button with or without LED
(1.3) Labelling eld inlay for IR push-button
(4.1) Push-button module
(4.2) Push-button module without LED
(5) Illuminated programming button
(6) Design plate (not within scope of delivery)
(7) Supporting frame
2 6LE000442B www.hager.com - 01.09.2014 -
Indicazioni di sicurezza y
L‘incasso e il montaggio degli apparecchi elett-
rici devono essere eseguiti solo da un elettrici-
sta qualifi cato. Allo scopo devono essere os-
servate le norme antinfortunistiche vigenti nel
rispettivo Paese.
Il mancato rispetto delle istruzioni per
l‘installazione può provocare danni
all‘apparecchio, incendi o altri pericoli.
Per l‘installazione e la posa dei cavi, attenersi
alle direttive e alle norme vigenti per i circuiti
elettrici di bassa tensione.
Queste istruzioni per l‘uso sono parte inte-
grante del prodotto e devono restare in posses-
so dell‘utilizzatore fi nale.
Struttura dell‘apparecchio
(2)
(2)
(1)
Figura 1: vista frontale pulsante 6 pulsanti
(3)
(3)
(1)
(2)
Figura 2: vista frontale pulsante 6 pulsanti con LED e
sfondo illuminato, con o senza ricevitore IR
(1) Campo di scrittura con sfondo illuminato
(2) Pulsanti (numero dipendente dalla variante)
(3) LED di stato
Funzione
Informazioni sul sistema
Questo apparecchio è un prodotto del sistema KNX
ed è conforme agli standard KNX. Per la comprensi-
one si presuppongono competenze tecniche dettagli-
ate fornite dai corsi di formazione di KNX. Pianifi ca-
zione, installazione e messa in funzione vengono
effettuate con l‘ausilio di un software certi cato KNX.
Messa in funzione systemlink
La funzione dell‘apparecchio dipende dal software
utilizzato. Il software p essere scaricato dalla banca
dati dei prodotti. La banca dati dei prodotti, le descrizi-
oni tecniche co come i programmi di conversione e
altri programmi ausiliari sono disponibili sul nostro sito
Internet in versione costantemente aggiornata.
Messa in funzione easylink
La funzione dell‘apparecchio dipende dalla confi gura-
zione. La con gurazione può essere effettuata anche
con l‘ausilio di dispositivi appositamente sviluppati
per facilitare l‘impostazione e la messa in funzione.
Questo tipo di confi gurazione è possibile solo con
dispositivi del sistema easylink. Easylink è sinoni-
mo di messa in funzione semplifi cata e visualizzata
a display. Easylink permette di assegnare funzioni
standard precon gurate agli ingressi e alle uscite
con l‘ausilio di un modulo di servizio.
Uso conforme alle indicazioni
- Comando di utenti, per es. luce ON/OFF, rego-
lazione della luce, veneziana SU/GIÙ, salva e
richiamo scenari di luce ecc.
- Montaggio in scatola da incasso 40 mm profondità
- Montaggio in canalina cavi
Caratteristiche del prodotto
- Messa in funzione e programmazione in moda-
lità S e modalità E
- Funzioni pulsante: commutazione/regolazione
della luce, comando per veneziane, datore va-
lore, richiamo scenari, impostazione della mo-
dalità di riscaldamento, comando forzato, inter-
ruttore a livelli e funzione comparatore
- Accoppiatore bus integrato
- Campo di scrittura
Caratteristiche aggiuntive del prodotto del
pulsante con LED e sfondo illuminato
- Un LED di stato per ogni pulsante
- LED di stato per l‘apparecchio parametrizzabili
in base alla funzione e al colore
- Campo di scrittura illuminabile
Caratteristiche aggiuntive del prodotto del
pulsante infrarosso con LED
- Un LED di stato per ogni pulsante
- LED di stato per l‘apparecchio parametrizzabili
in base alla funzione e al colore
- Interfaccia a infrarossi con 12 canali infrarossi
- Campo di scrittura illuminabile
Utilizzo
La funzione dei pulsanti, il relativo utilizzo e il
comando da parte dell‘utente sono impostabili
singolarmente per ciascun apparecchio.
Due tipi di comando sono consueti:
- Comando a un tasto:
L‘accensione/spegnimento o regolazione luce
chiaro/scuro p.es. di una illuminazione viene
effettuata, premendo ripetutamente la superfi ce
di un pulsante.
- Comando a due tasti:
Le due pulsanti formano una coppia funzionale.
Ad es. premendo in alto accende/aumenta
l´illuminazione, in basso spegne/diminuisce.
Comando di funzione o di utenze
Il comando di utenze quali illuminazione, venezi-
ane ecc., avviene tramite la superfi cie dei tasti e
dipende dalla programmazione dell‘apparecchio.
Premere il pulsante.
La funzione depositato viene eseguita.
L‘impulso di azionamento dura per il periodo di
tempo di contatto. A seconda della funzione, è
possibile eseguire azionamenti brevi e lunghi di
diverse azioni, per es. commutazione/regolazio-
ne della luce.
Funzione ricevitore infrarossi
Gli apparecchi a infrarossi sono dotati di un ricevi-
tore a infrarossi a 12 canali. Essi possono essere
comandati e azionati tramite un telecomando a
distanza a infrarossi tebis. I pulsanti del telecoman-
do a infrarossi consentono la stessa quantità di
funzioni delle normali funzioni tasto locali.
P
Informazioni per gli elettricisti
Montaggio e collegamento elettrico
PERICOLO!
Il contatto con parti in tensione
nell'impianto può risultare in una
scossa elettrica.
Le scosse elettriche possono
provocare la morte!
Prima di svolgere i lavori
sull'apparecchio disinserire le linee di
allacciamento e coprire i componenti
sotto tensione nella zona circostante!
ç
Collegare e montare l‘apparecchio (fi gura 3)
Montaggio in scatola da incasso:
Montare l‘anello di supporto (7) in posizione
corretta sulla scatola da incasso. Prestare
attenzione alla dicitura .SOPRA/TOP
Collegare il cavo di collegamento bus al pul-
sante (4.1, 4.2).
Inserire il pulsante (4.1, 4.2) con copertura
design (6) nel anello di supporto (7). Prestare
attenzione alla dicitura SOPRA/TOP
Inserire la copertura del campo di scrittura (1.1)
e l‘inserto per campo di scrittura (1.2, 1.3) nel
pulsante (4.1, 4.2).
Inserire il copertura design (6).
Smontaggio
Rimuovere la copertura design (6).
Rimuovere la copertura del campo di scrittura
(1.1) e l‘inserto per campo di scrittura (1.2, 1.3)
dal pulsante (4.1, 4.2).
Rimuovere il pulsante (4.1, 4.2) dal anello di
supporto (7) Durante questa operazione, tenere
ferma la copertura design.
Staccare il cavo bus dal pulsante (4.1, 4.2).
Montaggio in canalina cavi
Collegare il cavo di collegamento bus al pul-
sante (4.1, 4.2).
Inserire il pulsante (4.1, 4.2) ) con coperchio
di canalina cavi no a farla scattare. Prestare
attenzione alla dicitura .SOPRA/TOP
Inserire la copertura del campo di scrittura (1.1)
e l‘inserto per campo di scrittura (1.2, 1.3) nel
pulsante (4.1, 4.2).
Smontaggio
Rimuovere la copertura del campo di scrittura
(1.1) e l‘inserto per campo di scrittura (1.2, 1.3)
dal pulsante (4.1, 4.2).
Estrarre il pulsante (4.1, 4.2) del coperchio
canalina cavi.
Staccare il cavo bus dal pulsante (4.1, 4.2).
Messa in funzione
Systemlink - Caricare l‘indirizzo fi sico e il
software di applicazione
L‘indirizzo fi sico viene sempre assegnato solo
per un apparecchio. Solo un apparecchio alla
volta può trovarsi in modalità di programmazio-
ne.
Se già presente, rimuovere il campo di scrittura
(1.2, 1.3) con la copertura del campo di scrittura
(1.1) davanti il pulsante di programmazione (5).
Avviare la tensione bus.
Premere il pulsante di programmazione (5).
Il LED di programmazione (5) si accende.
Se il LED di programmazione non si illumina,
non è presente la tensione sul bus.
P
P
Caricare l‘indirizzo sico nell‘apparecchio.
Compare il LED di programmazione (5).
Caricare il software di applicazione. Annotare
l‘indirizzo fi sico nel campo di scrittura.
La carica di un software di applicazione non
compatibile viene visualizzata tramite lampeg-
giamento dei LED di stato (3).
Inserire nuovamente il campo di scrittura (1.2,
1.3) con la copertura del campo di scrittura (1.1).
Easylink
Per la messa in funzione della Modali-
tà E, l‘apparecchio deve essere montato
nell‘accoppiatore bus.
Informazioni sulla confi gurazione del sistema pos-
sono essere desunte dalla descrizione completa
del modulo di servizio easylink.
Allegato
Dati tecnici
Mezzo KNX TP 1
Modalità di
messa in funzione systemlink, easylink
Tensione nominale KNX DC 21…32 V SELV
Corrente assorbita tipo KNX. 20 mA
Tipo di
collegamento KNX Morsetto di connessione bus
Dimensione (P x L x A) 45 x 45 x 17 mm
Grado di protezione IP 20
Classe di protezione III
Temperatura d’esercizio -5 … +45 °C
Temperatura di
magazzino/trasporto -20 … +70 °C
Norme EN 60669-2-1, EN 60669-1
EN 50428
Assistenza in caso di problemi
Funzionamento bus impossibile.
Causa: tensione sul bus assente.
Verifi care la corretta polarità dei morsetti di
collegamento del bus.
Premendo brevemente il pulsante di program-
mazione (5) controllare la tensione sul bus, il
LED di programmazione rosso si illumina se sul
bus è presente la tensione.
Lampeggiamento di tutti i LED di stato
Causa: il programma di applicazione e il modulo di
applicazione caricati non sono compatibili.
Eseguire il nuovo programma di applicazione o
inserire il modulo di applicazione adatto.
Accessori
Fogli del campo di scrittura WST900
Morsetti di connessione bus TG008
P
P
(1.1)
(4.1)
(5)
(7 )
(6 )
(1.2)
(1.3)
(4.2)
(5)
Figura 3: montaggio apparecchio
(1.1) Copertura del campo di scrittura
(1.2) Inserto per campo di scrittura per pulsante e pulsante con LED
(1.3) Inserto per campo di scrittura per pulsante infrarossi
(4.1) Pulsante con LED
(4.2) Pulsante senza LED
(5) Pulsante di programmazione illuminabile
(6) Cornice design (non compresa nella fornitura)
(7) Anello di supporto


Produkt Specifikationer

Mærke: Hager
Kategori: Ikke kategoriseret
Model: WST314

Har du brug for hjælp?

Hvis du har brug for hjælp til Hager WST314 stil et spørgsmål nedenfor, og andre brugere vil svare dig


Ikke kategoriseret Hager Manualer
Hager

Hager CEA225U Manual

10 Juni 2025
Hager

Hager CFA263U Manual

10 Juni 2025
Hager

Hager ADZ366C Manual

10 Juni 2025
Hager

Hager LLD100 Manual

12 Januar 2025
Hager

Hager GS11019016 Manual

30 December 2025
Hager

Hager EG203 Manual

30 December 2025
Hager

Hager MZN131 Manual

30 December 2025
Hager

Hager FN097E Manual

30 December 2025
Hager

Hager FN117E Manual

30 December 2025

Ikke kategoriseret Manualer

Nyeste Ikke kategoriseret Manualer