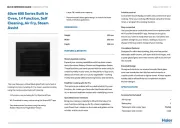
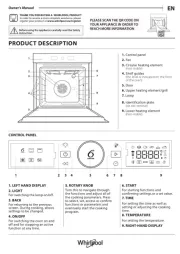
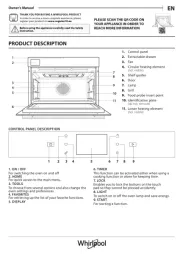
Hotpoint FA2 841 JH BL HA Manual
| Mærke: | Hotpoint |
| Kategori: | Ovn |
| Model: | FA2 841 JH BL HA |
| Vekselstrømsindgangsspænding: | 220 - 240 V |
| Vekselstrømsindgangsfrekvens: | 50 - 60 Hz |
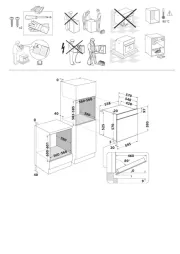
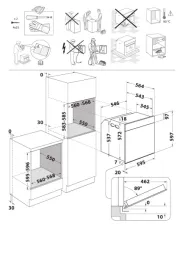
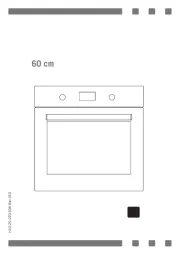
| Bredde: | 595 mm |
| Dybde: | 551 mm |
| Højde: | 595 mm |
| Vægt: | 27100 g |
| Produktfarve: | Sort |
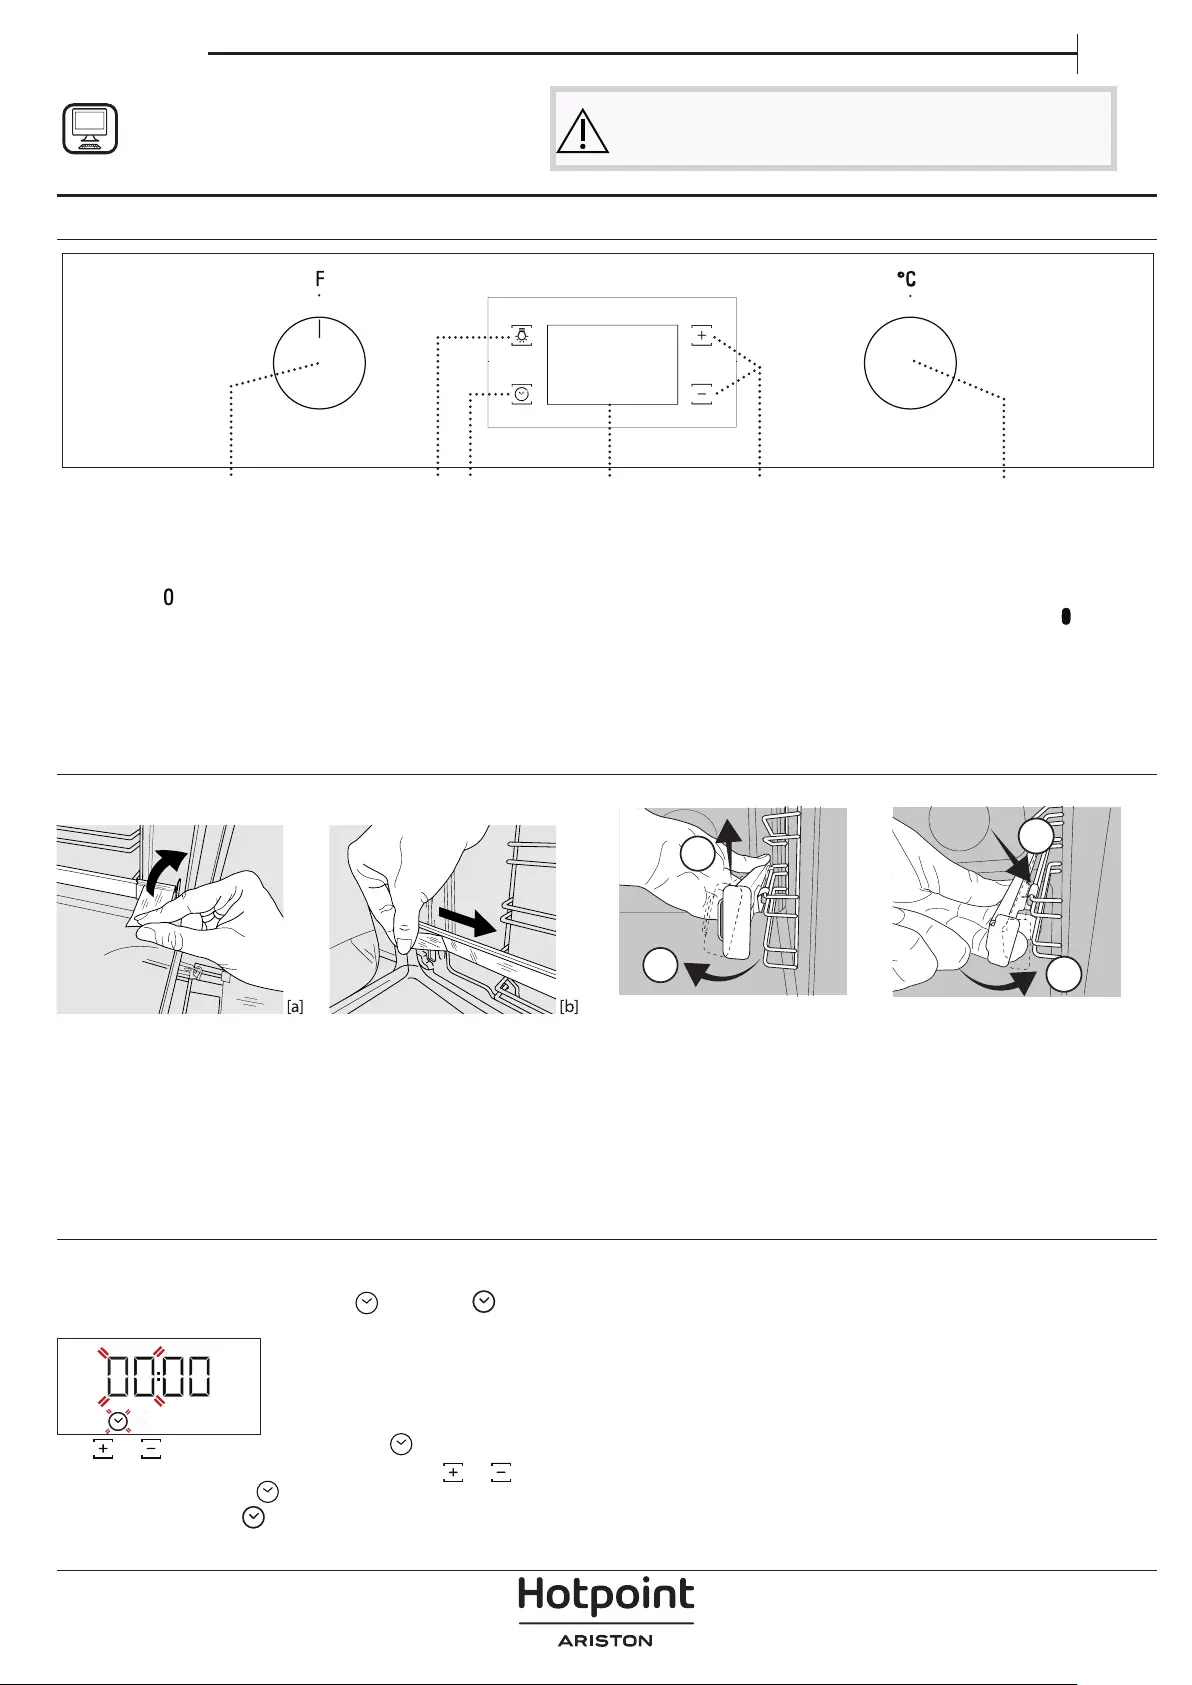
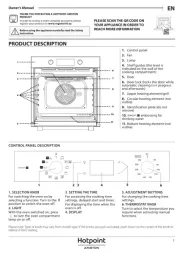
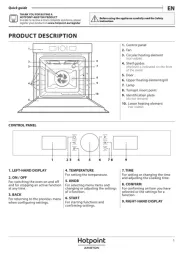
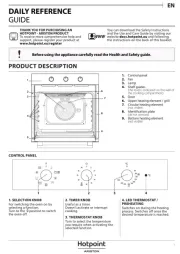
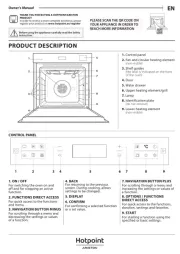
| Kontroltype: | Rotary, Buttons |
| Indbygget skærm: | Ja |
| Strøm: | 13 A |
| Placering af apparat: | Indbygget |
| Indvendig belysning: | Ja |
| Installationsrum bredde: | 568 mm |
| Installationsrum dybde: | 560 mm |
| Installationsrum højde: | 601 mm |
| Genopvarmningsfunktion: | Ingen |
| Grill: | Ja |
| Konvektion madlavning: | Ja |
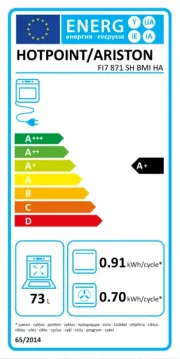
| Energieffektivitetsskala: | A+++ til D |
| Selvrensende: | Ja |
| Installationsrum højde (min.): | 600 mm |
| Kontrolposition: | Front / Top front |
| Wi-Fi kontrolleret: | Ingen |
| Rengøringstype: | Hydrolytisk |
| ECO-tilstand: | Ja |
| Ovn - størrelse: | Medium |
| Ovntype: | Elektrisk ovn |
| Samlet indvendig ovn kapacitet: | - L |
| Strøm for samtlige ovne: | 2900 W |
| Antal ovne: | 1 |
| Ovn nettokapacitet: | 71 L |
| Pizza fremstillingsfunktion: | Ja |
| Energiforbrug (konventionel): | 0.89 kWh |
| Energiforbrug (tvungen konvektion): | 0.69 kWh |
| Udtrækkelige drejeknapper: | Ja |
| Rengøringsteknologi: | Hydrolytisk |
| Brødfremstilling kapacitet: | Ja |
| Installationsrum bredde (min.): | 560 mm |
| Programmer til at forberede brød & dej: | Surdej |
Har du brug for hjælp?
Hvis du har brug for hjælp til Hotpoint FA2 841 JH BL HA stil et spørgsmål nedenfor, og andre brugere vil svare dig
Ovn Hotpoint Manualer
8 Oktober 2025
13 August 2025
13 August 2025

12 August 2025
12 August 2025
1 August 2025

1 August 2025
1 August 2025
1 August 2025
30 Juli 2025
Ovn Manualer
- Cosmo
- PKM
- High One
- Freggia
- Hoover
- RCA
- Signature
- H.Koenig
- Sunpentown
- Arthur Martin-Electrolux
- CDA
- Hansa
- Viva
- Fisher & Paykel
- Axis
Nyeste Ovn Manualer

2 November 2025
1 November 2025

1 November 2025
1 November 2025
31 Oktober 2025
31 Oktober 2025

31 Oktober 2025

31 Oktober 2025

31 Oktober 2025
31 Oktober 2025