I-Tec C31DUALKVMDOCKPD Manual
Læs gratis den danske manual til I-Tec C31DUALKVMDOCKPD (190 sider) i kategorien Ikke kategoriseret. Denne vejledning er vurderet som hjælpsom af 11 personer og har en gennemsnitlig bedømmelse på 4.8 stjerner ud af 6 anmeldelser.
Har du et spørgsmål om I-Tec C31DUALKVMDOCKPD, eller vil du spørge andre brugere om produktet?

Produkt Specifikationer
| Mærke: | I-Tec |
| Kategori: | Ikke kategoriseret |
| Model: | C31DUALKVMDOCKPD |
| Tænd-/slukkontakt: | Ja |
| Bredde: | 185 mm |
| Dybde: | 79 mm |
| Højde: | 28 mm |
| Vægt: | 265 g |
| Produktfarve: | Sort |
| Pakkedybde: | 205 mm |
| Pakkebredde: | 250 mm |
| Pakkehøjde: | 50 mm |
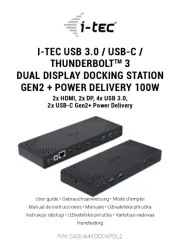
| HD-type: | 4K Ultra HD |
| Antal HDMI-porte: | 1 |
| Ethernet LAN-porte (RJ-45): | 1 |
| Antal USB 3.2 Gen 1 (3.1 Gen 1) type-A-porte: | 3 |
| Ethernet LAN: | Ja |
| Ethernet LAN-datahastigheder: | 10,1000,100 Mbit/s |
| Hurtig start guide: | Ja |
| Forbindelsesteknologi: | Ledningsført |
| DC-in-stik: | Ja |
| LED-indikatorer: | Ja |
| Indbygget kortlæser: | Ingen |
| Harmoniseret systemkode (HS): | 84733020 |
| Slot til kabellås: | Ja |
| Understøttede Windows-operativsystemer: | Ja |
| Understøttede Mac-operativsystemer: | Ja |
| Understøttede Linux-operativsystemer: | Ja |
| Andre understøttede operativsystemer: | Android, iOS |
| Værtsgrænseflade: | USB 3.2 Gen 1 (3.1 Gen 1) Type-C |
| Tilslutning af hovedtelefoner: | 3,5 mm |
| Maksimal opdateringshastighed: | 60 Hz |
| Antal DisplayPorts: | 1 |
| Kabellåseslids type: | Kensington |
| Antal USB 3.2 Gen 1 (3.1 Gen 1) type-C-porte: | 5 |
| Kombineret hovedtelefon/mikrofon-port: | Ja |
| USB strømforsyning: | Ja |
| USB strømforsyning op til: | 100 W |
Har du brug for hjælp?
Hvis du har brug for hjælp til I-Tec C31DUALKVMDOCKPD stil et spørgsmål nedenfor, og andre brugere vil svare dig
Ikke kategoriseret I-Tec Manualer

Ikke kategoriseret Manualer
- S.M.S.L
- Spektrum
- Intesis
- Playmobil
- Escort
- Interlogix
- Taurus
- Blaser
- DLO
- Max
- Pigtronix
- Kruidvat
- Ansco
- AG Neovo
- Portsmith
Nyeste Ikke kategoriseret Manualer