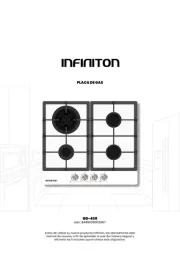
Infiniton GG-320 Manual


Læs gratis den danske manual til Infiniton GG-320 (52 sider) i kategorien Ikke kategoriseret. Denne vejledning er vurderet som hjælpsom af 13 personer og har en gennemsnitlig bedømmelse på 4.7 stjerner ud af 7 anmeldelser. Har du et spørgsmål om Infiniton GG-320, eller vil du spørge andre brugere om produktet?

Side 1/52
1
Instruction Manual
Built-In Gas Hob
Please read this manual before the operation, and keep this manual for future use.
ENGLISH
GG-319
GG-320
2
Contents
1. Close-up View......................................................................................03
2. How to Use Your Gas hob.................................................................09
3. How to Keep Your Gas hob in Shape...............................................10
4. Practical Advice..................................................................................11
5. Is there a problem?............................................................................11
6. Installation Instructions for built-in..................................................12
7. Table1 Burners and Nozzle Specications .....................................17
8. Table2 How to convert gas source...................................................18
9. Table3 Adapting to dierent types of gas .......................................19
10. Table4 Gas source and national comparison table.......................20
11. NOTICE ..........................................................................................21
4
On those models tted with a safety device
The knob must be pressed for about 6 seconds until the flame is lighted and warm ed up.
On those models tted with an igniter
The electric ignition button, identied by the symbol, must be pressed rst, then the corresponding knob
is pushed and turned in the counter-clockwise direction to the "High” setting.
To light a burner: Simply press the corresponding knob and turn it in the counter-clockwise direction to
the High setting, keep press until the burne is light . r ed
Caution: If the ame goes out accidentally, turn off the gas with the control knob and try to light it again at
least 1 minute later.
To turn off a burner: Turn the knob in the clockwise direction until it is stopped (it should be on the "·"
setting).
How to Keep Your Gas hob in Shape
Before cleaning or performing maintenance on your gas hob, disconnect it from the electrical power supply
(included battery power).
To extend the lifespan of the gas hob, it is absolutely indispensable that it cleaned carefully, thoroughly is
and usually, please keep in mind to the following:
The enameled parts and the glass top, must be washed with warm water without using abrasive
powders or corrosive substances which could ruin them;
The removable parts of the burners should be washed usually with warm water and soap, make sure to
remove caked-on substances;
Automatic igniter pin, the end must be cleaned carefully and usually, make sure ignition keep working
normally.
Stainless steel top plate and other steel parts can be stained if keep touch with high concentration
calcareous water or corrosive detergents (containing phosphorus). To extend the life we advisespan,
these parts be rinsed thoroughly with water and dry them by blowing, It is a good idea to clean up any
spills too.
After glass hob working, the surface must be cleaned by a damp cloth to remove dust or food residues.
Glass surface should be cleaned regularly with warm water and non-corrosive detergent.
First, remove all food residues or greases with a cleaning scraper, e.g. to
Cleaning scraper (not supplied) (Fig. 1 ).
While the cooking surface is warm, clean it with a suitable cleaning product and paper towels, then rub
with a damp cloth and dry surface Such as aluminum foil, plastic items, objects made of synthetic .
material, sugar or foods with a high sugar content that have melted onto the surface, it must be been
removed immediat y. el
While the cooking surface is still hot, clean it with a scraper a transparent protective lm which and
prevent to make more dirt. This also protect the surface from damage caused by food with a high sugar
content.
6
The burner cannot be light or the ame is not uniform around the burner. ed
Check to make sure that:
The gas holes on the burner are not clogged;
All of the movable parts of burners are xed correctly;
There is no air ow around the cooking surface.
The ame do not keep lighting to the burner with thermocouple. es
Check to make sure that:
You press the knob all the way;
You keep pressing the knob for enough time to activate the thermocouple.
The gas holes are not clogged in the area corresponding to the thermocouple.
The ame goes out while turning knob to "Low" setting.
Check to make sure tha t:
The gas holes are not clogged.
There is no air ow around the cooking surface.
T minimum has been adjusted correctly (see the section entitled "Minimum Regulation").he
The cookware is not stable.
Check to make sure that:
The bottom of the cookware is perfectly at.
The cookware is centered correctly on the burner.
The support grids have not been inverted.
After checked all of these the gas hob still do not work properly, please call the Customer Service Center , es
and inform them of:
--Tile type of problem.
--The gas hob model number (Mod as indicated on t packing carton. el....) he
Never call the technicians who is not authorized by your supplier, and refuse to use the spare parts which
are not from manufacturer.
Installation Instructions for built- in
The following instructions are directed at the qualied installer, so the installation and maintenance
procedures may be followed in the most professional and expert manner.
Important: Unplug the electrical connection before performing any maintenance or regular upkeep
work.
Positioning for gas hob
Important: this unit may be installed and used only in permanently ventilated rooms.
The following requirements must be observed:
a) The room must be tted with a ventilation system which ventilates smoke and gases from combustion to
the outside of rooms.
This must be done by hood or electric ventilator.
9
f) In the event the gas hob is not installed on a built-in oven, a wood panel must be inserted for insulation.en
This panel must be placed at least 20 mm distance from the bottom of hob.
lmportant: When installing the hob a built-in oven, the oven should be placed on two wooden strips; in on
the case of a joining cabinet surface, remember to leave a space of 45 x 560 mm at least from the back
side..
When install on a built-in oven without forced ventilation, ensure that have r inlets and outlets to hob ai
ventilate the interior of the cabinet adequately.
Gas connection for gas hob
The gas hob should be connected to the gas-supply by a register installer. During installation it is ed
essential to t an approved gas tap to isolate the supply from the hob for the convenience of any
subsequent removal or servicing. Connect the hob to the gas mains or liquid gas, it must be carried out
according to the prescribed regulation in force, and only after it is ascertained that it is adaptable to the type
of gas to be used. If not, follow the instructions indicated in the paragraph headed "Adaptation to different
gas types". In the case of connection to liquid gas by tank, use pressure regulators that conform to the
regulation in force.
Important: For safety, for the correct regulation of gas use and long life of the hob, ensure that the gas
pressure conforms to the indications given in table 1 "Burners and Nozzle Specications ".
Connection to non-exible tube
(copper or steel)
Connection to the gas source must be done in such a way as to not create any stress points at any part of
the gas hob.
The hob is fitted with an adjustable "L" shape connector and a gasket to the gas supply.
The connector should be dismounted an the gasket must be replaced. d
The feeding connector of the gas to the hob is threaded 1/2 gas cylinder.
Connection to exible steel tube
The gas feed connector to the is threaded, 1/2" connector for round gas pipe. Only use pipes and hob
sealing gaskets that conform to the standards currently in force. The maximum length of the exible pipes
must not exceed 2000 mm. Once the connection has been made, ensure that the flexible metal tube does
not touch any moving parts and not crushed. be
12
TABLE2: How to Convert Gas Source
Adjustment of the reduced valve ow
Burners
Flame
Converting the
hob from LPG
to natural gas
Converting the
hob from natural gas
Gas to LPG
Regular burners
Full ame
Replace the burner
Nozzle according
To the guidelines in
table 1
Replace the burner
Nozzle according
to the guidelines in
table 1
Saving ame
Loosen the adjustment
Spindle (see g.7 below )
And adjust the ame
Loosen the adjustment
Spindle (see g.7 below )
And adjust the ame
Valve adjustment
Valve adjustment should be done with the control knob set at Burner ON saving ame position.
Remove the knob, and adjust the ame with a tiny screwdriver (see g.7 below).
Fig.7
To check the adjusted ame: heat the burner at full open position for 10 minutes. Then turn the knob into the
saving setting. The ame should not extinguish nor move to the nozzle. If it extinguish or moves to the
nozzle, readjust the valves.
Flame selection
As the burners are adjusted correctly, the ame should be light blue, and the inner flame should be clear.
The size of ame depends on the position of the related control knob.
-Burner ON large ame -Burner ON small ame saving mode -Burner OFF, , ( )
Fig.8
See g.8 for various operating options (ame size selection); the burner should be set at a large ame
during the initial phase of cooking, it make food boil quickly. Then should turn knob to the saving ame
11
Cuando instale sobre un horno empotrado sin ventilador forzado, asegúrese que en el interior del
gabinete hay entradas y salidas de aire.
CONEXIÓN DE GAS PARA LA UNIDAD
Conexión de gas para cocinar con gas
La unidad debe ser conectada al suministro de gas por un instalador certificado. Durante la instalación
de este producto es esencial adaptar un grifo de gas aprobado para aislar el suministro del aparato con
el n de facilitar cualquier posterior remoción o mantenimiento. La conexión de la unidad a la red de gas
o gas quido debe ser llevada a cabo de acuerdo con la regulación que este actualmente en vigor, y
lo después de que se determine que es adaptable al tipo de gas a utilizar. Si no es así, siga las
instrucciones indicadas en el rrafo "Adaptación a los distintos tipos de gas". En el caso de conexión
para gas líquido, por tanque, utilice reguladores de presión que se ajusten a la normativa vigente.
Importante!
Por razones de seguridad, para la correcta regulación del uso del gas y para alargar la vida útil de la
unidad, asegúrese que la presión del gas se ajusta a las indicaciones dadas en la tabla 1
"Especicación de los quemadores y boquillas".
CONEXIÓN AL TUBO NO FLEXIBLE
(Cobre o acero)
La conexión a la fuente de gas debe hacerse de tal manera que no cree ningún punto de tensión en
cualquier parte de la unidad.
Esta unidad está equipada con un conector ajustable en forma de "L" y una junta para la jación al
suministro de gas.
En caso de que este conector tenga que ser convertido, debe ser reemplazada la junta (suministrada
con el aparato).
El conector de alimentación de gas al aparato es un cilindro macho de gas de ½ roscado.


Produkt Specifikationer

Mærke: Infiniton
Kategori: Ikke kategoriseret
Model: GG-320
Bredde: 500 mm
Dybde: 584 mm
Højde: 100 mm
Produktfarve: Hvid
Kontroltype: Dreje
Automatisk slukning: Ja
Placering af apparat: Indbygget
Børnesikring: Ingen
Komfurtype: Gaskomfur
Antal kogeplader / madlavningsområde: 3
Gastype: propan/butan

Har du brug for hjælp?

Hvis du har brug for hjælp til Infiniton GG-320 stil et spørgsmål nedenfor, og andre brugere vil svare dig


Ikke kategoriseret Infiniton Manualer

Ikke kategoriseret Manualer

Nyeste Ikke kategoriseret Manualer