KitchenAid KES6504 Manual


Læs nedenfor 📖 manual på dansk for KitchenAid KES6504 (80 sider) i kategorien Kaffemaskine. Denne guide var nyttig for 49 personer og blev bedømt med 4.6 stjerner i gennemsnit af 25 brugere

Side 1/80
KES6404, KES6504
2
PARTS AND FEATURES
1Water tank (Capacity: 47 ounces)
2Water tank handle
3Water tank lid
4Cup warmer
5Drip tray plate
6Drip tray
7Main power On/Off switch
8Steam wand
9Steam wand release button
10 Portafilter (58 mm)
11 Mode button : Espresso
: Steam
: Hot Water
12 Dose button : (1 shot) 1
: (2 shot)2
13 Clean cycle button
14 Start/Cancel button
15 Empty drip tray indicator
16 Group head
 
1
2
5
6
10
12 13 14
16
15
8
Milk
Pitcher
Coffee
Scoop
Tamper Single wall
1 shot
Single wall
2 shot
Double wall
1 shot
Double wall
2 shot
ESPRESSO MACHINE
ENGLISH
3
PARTS AND FEATURES
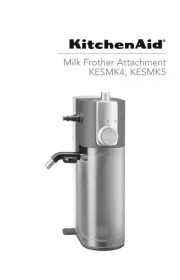
MILK FROTHER ATTACHMENT
1Storage container
2Milk dispenser tube
3Function knob
4Steam port
5Froth level adjustment knob
6Brush
7Milk tank lid
8Milk hose
9Milk tank
10 Milk hose connector
11 Milk hose clip
12 Hot water function
13 Hot milk function
14 Froth milk function
1
4
2
7
9
8
10
6
ENGLISH
5
PRODUCT SAFETY
16. Damage to delicate surfaces can occur after contact with the descaling solution.
Remove any splashes immediately.
17. WARNING: To avoid the risk of injury, do not open the brew chamber during the
brew process.
18. Turn the Espresso Machine OFF (and detach the Milk Frother Attachment from
the Espresso Machine) before cleaning. Make sure the steam/water ow stops
completely before disassembling.
19. This appliance is not intended for use by persons (including children) with
reduced physical, sensory, or mental capabilities, or lack of experience or
knowledge, unless they are closely supervised and instructed concerning use
of the appliance by a person responsible for their safety. Close supervision is
necessary when any appliance is used by or near children. Children should be
supervised to ensure that they do not play with the appliance.
SAVE THESE INSTRUCTIONS
This product is designed for household use only.
ELECTRICAL REQUIREMENTS
Voltage: 120 V~
Frequency: 60 Hz
Wattage: 1460 W
NOTE: If the plug does not fit in the outlet,
contact a qualified electrician or service
person. Do not modify the plug in any way.
Do not use an adapter.
Do not use an extension cord. If the power
supply cord is too short, have a qualified
electrician or service person to install an
outlet near the appliance.
The cord should be arranged so that it will
not drape over the countertop or tabletop
where it can be pulled on by children or
tripped over unintentionally.
6
Plug into a grounded 3 prong outlet.
Press the Main power switch to “ON (-)”.
3
The machine automatically pumps water
into the heater and starts heating. When
lights stop blinking, the Espresso Machine
is ready for use.
4
WARNING
Electrical Shock Hazard
Plug into a grounded 3 prong outlet.
Do not remove ground prong.
Do not use an adapter.
Do not use an extension cord.
Failure to follow these instructions can result in death, fire, or
electrical shock.
GETTING STARTED
First, clean all parts and accessories (See “Care and Cleaning” section).
Place the Espresso Machine on a dry, flat, level surface such as a countertop or table.
MAX
Fill the Water tank with fresh water
(max. 47 ounces). Replace the Water tank lid.
1
Insert the Steam wand until you hear a click.
2
IMPORTANT: Distilled water or mineral water can damage the Espresso Machine.
Do not use either to brew espresso.
ENGLISH
7
GETTING STARTED
PRODUCT USAGE
BREWING ESPRESSO
Select desired Filter basket (see Basket
selection chart). Press the Filter basket into
the Portafilter until it clicks into place.
1
Fill the Filter basket with fine Espresso
coffee grounds (see Basket selection chart
for dosing recommendations).
2
Basket type Shot Dose (gram) Use for
Single wall 1 shot 10 - 12 Freshly ground whole bean coffee
Single wall 2 shot 18 - 20 Freshly ground whole bean coffee
Double wall 1 shot 10 - 12 Pre-ground coffee
Double wall 2 shot 18 - 20 Pre-ground coffee
BASKET SELECTION CHART
To rinse the Steam wand, direct the Steam
wand towards the Drip tray or into a cup.
Then, toggle the Mode button to select
Hot Water and press button to start.
Allow water to flow for 3 to 5 seconds
then, press button to stop.
6
To rinse the Group head, place a container
under the Group head. Toggle the Mode
button to select Espresso. Toggle Dose
button to and press button. 1
The machine will flush water through the
Group head and automatically stop when
the cycle is complete.
5
8
Tap the Portafilter to level the ground
coffee bed and rest on a flat surface.
Use the Tamper to tamp down the ground
coffee. Sweep excess coffee grinds from
the rim.
3
Position the Portafilter under the Group
head with the handle align to unlock.
Raise the Portafilter into the Group head
and twist to the right side to lock.
4
PRODUCT USAGE
1 2
1 2
Toggle the Mode button to select Espresso.
Toggle the Dose button to select desired
number of shots 1 (~ 1 ounce) or
2 (~ 2 ounces).
5
Press button to run selected Espresso
cycle.
6
NOTE: Do not remove the Portafilter when brewing.
TIP: Shot duration should be between 20-30 seconds for 1 and 2 shot selections.
- If less than 20 seconds: decrease grind size and/or increase tamp pressure.
- If more than 30 seconds: increase grind size and/or reduce tamp pressure.
ENGLISH
9
PRODUCT USAGE
USING THE STEAM MODE FOR MILK
Toggle the Mode button to select Steam.
The machine will automatically start
heating, indicated by the flashing Steam
light. The Steam light will go solid when
machine is ready for steaming.
1
Fill the Milk pitcher with desired amount of
cold milk.
TIP: Fill to bottom of the pour spout.
2
Adjust the Steam wand to desirable
position. Submerge the tip of the Steam
wand just below the surface of milk in the
Milk pitcher.
4
Angle the Steam wand towards the Drip
tray or into a cup. Press button to
start. Once water turns to steam, press
button to stop.
3
Press button to initiate the steam.
Froth until desired level of foam and
temperature is reached. To stop the steam,
press button again.
To avoid splattering, wait until the steam
stops before removing the Steam wand
from the milk.
5
10
PRODUCT USAGE
USING HOT WATER FEATURE
The Steam wand can also dispense hot water which is great for an americano, tea, hot
chocolate, etc. You can also use hot water to pre-heat cups.
1 2
Toggle the Mode button to select Water.
Place a cup under the Steam wand.
1
1 2
Press Dose button to select the volume of
water 1 (~ 4 ounces) or 2 (~ 6 ounces).
Press button to start water cycle.
Water flows out from the Steam wand.
2
NOTE: You can pause the cycle by pressing button to stop the flow of water
before the cycle complete.
PROGRAMING FUNCTION
The Espresso Machine is equipped with programing functionality. Any customized settings will
be saved even in the event power is lost to the machine.
PROGRAMING THE ESPRESSO AND HOT WATER AMOUNT
1 2
To change pre-programmed Espresso
Volume for 1 or 2: Toggle the Mode
button to select Espresso. Select the dose
you desire to program (1 or 2). Press and
hold button until desired espresso
amount is reached in your cup.
While programing your selected dose, the
dose and the button lights will blink.
Lights will stop blinking when programing
is complete.
1
1 2
To change pre-programmed Water
Volume for 1 or 2: Toggle the Mode
button to select Water. Select the dose
you desire to program (1 or 2). Press
and hold button until desired water
amount is reached in your cup.
While programing your selected dose, the
dose and the button light will blink.
Lights will stop blinking when programing
is complete.
2
ENGLISH
11
PROGRAMING THE WATER TEMPERATURE AND WATER HARDNESS
1 2
To change pre-programmed Water
Temperature: Toggle the Mode button
to select Espresso, press and hold for 3
seconds.
The indicator lights will show the default
factory setting or previous saved setting
(see Indicator light chart for reference).
Toggle the Mode button between Low-Mid-
High to select desired temperature.
To save your selection, press button or
wait for 10 seconds.
1
1 2
To change pre-programmed Water
Hardness: Toggle the Mode button to
Water, Press and hold for 3 seconds.
The indicator lights will show the default
factory setting or previous saved setting
(see Indicator light chart for reference).
Toggle the Mode button between Low-
Mid-High to select desired water hardness.
To save your selection, press button
or wait for 10 seconds.
2
INDICATOR LIGHT CHART
TIP: To restore all factory settings, Press and Hold “Dose button” for 3 seconds.
All indicator lights will blink indicating that all settings are restored.
Water Temperature or Water Hardness
Low
Medium
High
NOTE: Water Hardness - Low: 0 to 60 ppm
Medium: 60 to 120 ppm
High: more than 120 ppm
PROGRAMING FUNCTION
TIP: To restore all factory settings, Press and Hold “Dose button” for 3 seconds.
Changing the factory default Espresso or Water Volumes may impact the intended
performance of the machine.
12
Wipe the Espresso Machine housing and
Group head with a clean soft damp cloth.
2
For best results, regularly clean the Espresso Machine and accessories.
CARE AND CLEANING
When the Drip tray indicator rises and
becomes visible above the surface of the
Drip tray plate, empty the Drip tray and
rinse with warm water.
1
IMPORTANT: Unplug the Espresso Machine before cleaning. Allow the Espresso
Machine and accessories to cool down.
NOTE: Do not use abrasive cleansers or scouring pads when cleaning the Espresso
Machine, parts, or accessories. Do not immerse the Espresso Machine or cord in water
or other liquids.
Wash the Drip tray, Portafilter, Filter
baskets, Milk pitcher, and Drip tray plate
in warm, soapy water and rinse with clean
water. Dry with a soft cloth.
3
Clean the Steam wand after every use.
Toggle the Mode button to select Water.
Position the Steam wand over Drip tray or
into a cup. Press button, wait 3 to 5
seconds.
Press button to stop. Wipe down
Steam wand exterior with a soft damp cloth.
4
NOTE: To remove the Steam wand press the Steam wand release button.


Produkt Specifikationer

Mærke: KitchenAid
Kategori: Kaffemaskine
Model: KES6504

Har du brug for hjælp?

Hvis du har brug for hjælp til KitchenAid KES6504 stil et spørgsmål nedenfor, og andre brugere vil svare dig