Kramer VP-772T Manual


Læs gratis den danske manual til Kramer VP-772T (4 sider) i kategorien Trådløs oplægsholder. Denne vejledning er vurderet som hjælpsom af 44 personer og har en gennemsnitlig bedømmelse på 4.7 stjerner ud af 22.5 anmeldelser. Har du et spørgsmål om Kramer VP-772T, eller vil du spørge andre brugere om produktet?

Side 1/4
VP
- 772T Quick Start (P/N: 2900-300875QS REV 1)
P/N:
2900- 300875QS
Rev:
1
Scan for full manual
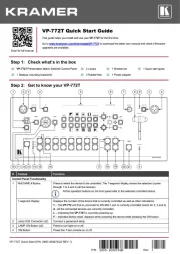
VP- 772T Quick Start Guide
This guide helps you install and use your VP-772T for the first time.
Go to www.kramerav.com/downloads/VP-772T to download the latest user manual and check if firmware
upgrades are available.
Step 1: Check w b hat’s in the ox
VP-772T Presentation Matrix Switcher Control Panel 2 Lamps 1 Bracket set 1 Quick start guide
1 Desktop mounting bracket kit 4 Rubber feet 1 Power adapter
Step 2: VP-Get to know your 772T
# Feature Function
Control Panel Functionality
1 -MACHINE # Button Press to select the device to be controlled. The 7 segment display shows the selection (cycles
through 1 to 4 and A ( ll the devices).a
All the operation buttons on the front panel refer to the controlled device.selected
7-segment Display Displays the number of the device that is currently controlled as well as other indications :
1 The VP-772 unit that is connected to RS-485-1 port is currently controlled (same for 2, 3 and 4 ).
AAll the connected devices are currently controlled.
L Indicating that VP- 772T is currently powering up.
F Indicates factory reset powering the device pressing the ON button. . Appears when while
2 . Lamp XLR Connector (x2) Connect a gooseneck lamp
3
LAMP ON Button (x2)
Press to turn light on or off.
4
ON Button
Power the T- bar console on or off.
# Feature Function
5 EFFECT Buttons Press to select one of 11 effects or press RANDOM to randomly select an effect each time a
transition is implemented.
6
WIPE DIRECTION Buttons
Select the direction of the transition (for example, inwards/outwards, left/right, up/down) .
7 SPEED Potentiometer Turn to set the speed of the transition when using the TAKE button to implement a transition.
When turned completely to the left, a click sound indicates that level is at its default valuethe speed
set in the
VP-772
.
8 T-Bar Control Stick Move to implement a transition manually.
9 - PREVIEW LEDs Located on both sides of the T bar control stick.
A PREVIEW LED lights to indicate the for moving the preview output to the transition direction
program output. Moving the T bar control stick towards the lit PREVIEW LED moves the preview -
output to the program output, completing the transition.
Once a transition is complete, the PREVIEW
LED on the T-bar control stick side turns off and PREVIEW LED on the opposite side lights, the
indicating the direction next transition.for the
Switcher Functionality
10 MENU Button Press to access/exit the OSD menu on the selected VP-772 . device When browsing the Program
OSD menu, a long press on the MENU button to the Preview menu and vice versaswitches .
11
Navigation
Buttons
// VOLUME
Press to move to the previous level in the OSD screen When not within the OSD menu: in the .
transition mode, press to decrease the Audio OUT 2 Program volume. In the Overlay mode, press
to decrease the general volume.
// VOLUME Press to move up the menu list values and to increase numerical values. When in the transition
mode and not within the OSD menu mode, press to increase the Audio OUT 1 Preview volume.
// VOLUME Press to move down the menu list and to decrease numerical values. When in the transition mode
and not within the OSD menu mode, press to decrease the Audio OUT 1 Preview volume .
// VOLUME
Press to move to the next level in the OSD screen. When not within the OSD menu: in the transition
mode, increase the Audio OUT 2 Program volume. In the Overlay mode, press to increase the
general volume.
ENTER Press to enter sub menu items, and save. When in the transition mode and not within the OSD -
menu, performs as the TAKE button.
12
OSD Button
Press to lock the menu buttons (button illuminates again to unlock the menu buttons. ). Press
13
MODE Button
Select the operation mode: AFV (audio follow video), ideo or audiov .
14 . Mode LED Indicators Indicate the operation mode, as selected via the MODE button
15 . PREVIEW Buttons Press to select the input (from 1 to 8) to switch to the PREVIEW output
16
PROGRAM Buttons
Press to select the input (from 1 to 8) to switch to the PROGRAM output.
17
PROGRAM FREEZE Button
Press to freeze/unfreeze the PROGRAM output video image.
18 . PREVIEW FREEZE Button Press to freeze/unfreeze the PREVIEW output video image
19 PREVIEW BLACK Button Press to toggle between a blank screen (black) and the PREVIEW display.
20
PROGRAM BLACK Button
Press to toggle between a blank screen (black) and the PROGRAM display.
21
TAKE
Press to a transitionperform .
# Feature Function
22 -RS 485- -1 (G B A) 3 pin Terminal Block Connector Connects to the RS 485 port on the VP 772 which is recognized as - -
machine # 1 (from 1 to 4).
23 -RS 232 (G, Rx, Tx) 3-pin Terminal Block Connector Connect to the PC or other serial controller .
24
12V DC
12V DC connector for powering the unit.
25
Ethernet RJ-45 Connector
Connect to the PC or other Controller through computer networking.


Produkt Specifikationer

Mærke: Kramer
Kategori: Trådløs oplægsholder
Model: VP-772T

Har du brug for hjælp?

Hvis du har brug for hjælp til Kramer VP-772T stil et spørgsmål nedenfor, og andre brugere vil svare dig


Trådløs oplægsholder Kramer Manualer
Kramer

Kramer VP-772T Manual

19 December 2024
Kramer

Kramer VP-772 Manual

19 December 2024

Trådløs oplægsholder Manualer

Nyeste Trådløs oplægsholder Manualer