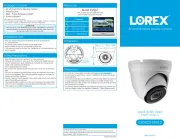
Lorex LW2711AC1 Manual


Læs gratis den danske manual til Lorex LW2711AC1 (2 sider) i kategorien Overvågningskamera. Denne vejledning er vurderet som hjælpsom af 4 personer og har en gennemsnitlig bedømmelse på 5.0 stjerner ud af 2.5 anmeldelser. Har du et spørgsmål om Lorex LW2711AC1, eller vil du spørge andre brugere om produktet?

Side 1/2
www.lorextechnology.com
LW2711AC1 Series Quick Start Guide_R1 Page 1
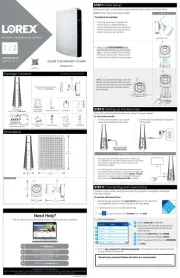
CONTENTS:
Quick Start Guide
Camera with Stand
eless Antenna
for camera
Power Adaptor
• Mount the camera indoors or outdoors. For outdoor
installation, mount it in a sheltered place where it is not
directly exposed to rain or snow.
• Aim the Cameras to best optimize the viewing area:
Select a location for the camera that provides a clear
view of the area you want to monitor, which is free from
dust, and is not in line-of-sight to a strong light source or
direct sunlight.
• Avoid installing the cameras where there are thick
walls, obstructions, or interference (i.e. transformers,
microwave ovens or other electrical equipment) between
the Cameras and the Receiver.
• Select a location for the camera that has an ambient
temperature between 14°F~122°F (-10°C~50°C)
• Before starting permanent installation, have another
person hold the camera for you while you verify its
performance by observing the image on a monitor.
INSTALLING THE CAMERA
Before you install the camera, carefully plan where and
how it will be positioned, and where you will route the
cable that connects the camera to the power adaptor.
INSTALLATION WARNINGS
1. Carefully unpack the Camera.
2. Mount the stand to the wall or
ceiling (for ceiling mounting you
may need to move the antenna
sightly down):
Mark the position of the screw holes
on the wall/ceiling.
Drill holes and insert the drywall
plugs as needed.
Firmly attach the stand to the wall
using the provided screws.
3. Screw on the Antenna to the
Camera prior to mounting.
4. Screw the camera to the stand by
attaching it either at the bottom or
back of the camera. For ceiling
mounting attach to the back thread.
Loosen the thumbscrews to adjust
position of the camera and tighten
to fix position.
*May not be exactly as shown
NOTE: AVOID INSTALLING IN A
LOCATION WHICH REQUIRES
THE WIRELESS SIGNAL TO
PASS THROUGH CEMENT,
CONCRETE AND METAL
STRUCTURES. THIS WILL REDUCE
THE TRANSMISSION RANGE.
Mounting
Hardware Kit
DIGITAL WIRELESS INDOOR/OUTDOOR
ACCESSORY MOTION CAMERA
LW2711AC1 SERIES - QUICK START GUIDE
CAMERA OVERVIEW
1. Passive IR motion sensor for more accurate PIR Sensor:
motion detection.
2. Built-in microphone for listening in.Microphone:
3. Camera Lens
4. For viewing in complete darkness.Night Vision IRs:
5. For two-way audio.Speaker:
6. See manual for more details.Pairing Button:
7. Detachable antenna.Antenna:
8. Power Cable
SIMPLY AWARE
7
8
5
6
4
1
2
3
www.lorextechnology.com
LW2711AC1 Series Quick Start Guide_R1 Page 2
CONNECTING CAMERA POWER ADAPTOR
Connect one end of the camera Power Adaptor to the camera and the other end to an electrical outlet.
It’s all on the Web
For detailed setup information,
please refer to your User’s Manual.
For additional information, please
visit our website
www.lorextechnology.com
1. Press on the wireless receiver or remote control.MENU
2. From the Main Menu, select and press the Pairing
Enter button.
3. Select an camera channel and press the empty Enter/
OK button.
NOTE: If you selected a preassigned camera channel, the
new camera will take the place of the existing camera.
You will need to repeat the pairing process for the existing
camera to pair it back to the system.
4. Following the on-screen prompt, press the Pair button
on the rear panel of the camera. You have 30 seconds
to press the PAIR button on the camera. Once paired,
the camera will be immediately displayed on-screen.
NOTE: If you do press the Pair button on the camera during
the 30 second pairing window, repeat steps 1~5 to try the
pairing process again.
ADDING THE ACCESSORY CAMERA TO YOUR SYSTEM
The Pairing Function assigns each camera to a different
channel on the wireless receiver (connect up to 4
Cameras), and is necessary for configuring additional
cameras. By default the cameras that came with the system
are preassigned to channel no. 1 for camera 1 etc.
NOTE: It is recommended to pair the Accessory Camera to
the Receiver before permanently mounting the camera. For
detailed information, please check the owners manual for
the complete system available at www.lorextechnology.com
Connect power adaptor to
local 120V AC power outlet
DIGITAL WIRELESS INDOOR/OUTDOOR
ACCESSORY MOTION CAMERA
LW2711AC1 SERIES - QUICK START GUIDE
SIMPLY AWARE
ATTENTION: This camera includes an Auto
Mechanical IR Cut Filter. When the camera
changes between Day/Night Lighting, an
audible clicking noise may be heard coming
from the camera. This clicking is normal, and
indicates that the camera filter is working.
Pairing Button


Produkt Specifikationer

Mærke: Lorex
Kategori: Overvågningskamera
Model: LW2711AC1

Har du brug for hjælp?

Hvis du har brug for hjælp til Lorex LW2711AC1 stil et spørgsmål nedenfor, og andre brugere vil svare dig


Overvågningskamera Lorex Manualer

Lorex

Lorex E842CDWP Manual

11 September 2025
Lorex

Lorex LWB3801 Manual

13 August 2025
Lorex

Lorex F861ASB-AA Manual

13 August 2025
Lorex

Lorex U222AAW Manual

12 August 2025
Lorex

Lorex LNZ44P12 Manual

11 August 2025
Lorex

Lorex LNB9383 Manual

9 August 2025
Lorex

Lorex C831CD Manual

9 August 2025
Lorex

Lorex C861XC-E Manual

9 August 2025

Overvågningskamera Manualer

Nyeste Overvågningskamera Manualer

Intellinet

Intellinet 524421 Manual

13 September 2025
3xLOGIC

3xLOGIC VISIX Manual

13 September 2025
Intellinet

Intellinet NFC30 Manual

13 September 2025
3xLOGIC

3xLOGIC VX-4V-OD-RI Manual

12 September 2025
EZVIZ

EZVIZ C7 Dual Manual

12 September 2025
3xLOGIC

3xLOGIC VX-SMBK-D Manual

12 September 2025
3xLOGIC

3xLOGIC VISIX V Manual

12 September 2025
3xLOGIC

3xLOGIC VX-2S-OP-30X Manual

12 September 2025
Geovision

Geovision GV-VS2401 Manual

12 September 2025