Lorex Vantage CVC6930PK4RB Manual

Lorex Overvågningskamera Vantage CVC6930PK4RB

Læs gratis den danske manual til Lorex Vantage CVC6930PK4RB (2 sider) i kategorien Overvågningskamera. Denne vejledning er vurderet som hjælpsom af 8 personer og har en gennemsnitlig bedømmelse på 4.4 stjerner ud af 4.5 anmeldelser. Har du et spørgsmål om Lorex Vantage CVC6930PK4RB, eller vil du spørge andre brugere om produktet?

Side 1/2
Product Information
User Manuals
Quick Start Guides
Specification Sheets
Software Upgrades
Firmware Upgrades
VISIT
www.lorextechnology.com
Lorex Technologies Inc.
Copyright © 2010 Lorex Technologies Inc.
As our products are subject to continuous
improvement, Lorex reserves the right to
modify product design, specifications and
prices, without notice and without incurring
any obligation. E&OE
IT’S ALL ON THE WEB!
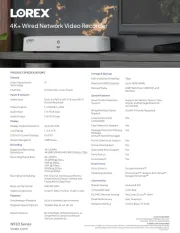
Camera Specifications
INDOOR / OUTDOOR
COLOR CAMERA
with Night Vision
Dimensions
Image Sensor 1/4” Color
Lens / Lens Mount
Video Format / Pixels
Horizontal Resolution
Minimum Illumination
Termination
IR / Night Vision Range
FOV (diagonal)
S/N Ratio
Sync. & Scan. Systems
Video Output
Power Consumption
NTSC: 640(H) x 480 (V)
420 TVL
0 LUX (IR LEDs on)
Video: BNC Female
Power: Barrel Female
18 IR LED/40 ft. / 12 m
64 Degrees
> 48dB
Internal; 2:1 Interlace
Comp. 1.0 Vpp @ 75ohm
170 mA or 2W max
Operating Temp.
Dimensions
WxLxH
(with stand)
-14°F ~ 122°F
(-10°C ~ 50°C)
2.6" x 4.2"" x 5.2"
66 mm x 107 mm x 132 mm
3.6 mm F1.8/ Fixed
Iris & Shutter Speed AES; 1/30 ~ 1/62,500 sec.
Power Requirement 12V DC ±10%
Weight (with stand) 0.6 lbs. / 0.26 kg
MODEL: CVC6930 SERIES
English Version 2.0
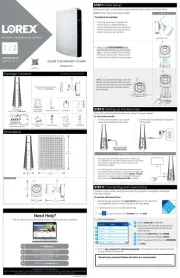
4. Connect the BNC end of the 60ft Extension Cable
to the DVR / Observation System or to a TV/VCR:
NOTE: Connect a BNC-to-RCA Adapter (optional, Lorex
model # BNCB) as needed to allow for proper
connectivity.
5. Connect the A/C Power Adapter to the 60ft
Extension cable (Black connector). Plug the Power
adapter to a wall outlet.
Figure 3.0 Connect the BNC cable to a DVR, CCTV, monitor or TV
ATTENTION: This camera includes a Auto Mechanical IR Cut
Filter. When the camera changes between Day/Night Lighting, an
audible clicking noise may be heard coming from the camera.
This clicking is normal, and indicates that the camera filter is
working.
Figure 4.0 Connect an AC power adapter
AC Power Adapter
4-in-1 Power Adapter
(optional)
Contents Installing the camera
60 ft. BNC/Power
Extension Cable*
Indoor / Outdoor Color
Camera with Night Vision*
To install the camera:
1. Mount the camera stand to the desired mounting
surface.
2. Attach the camera to the stand at either of the two
connection points.
3. Connect the 60ft Extension cable to the camera:
ATTENTION - Test the camera prior to selecting a permanent
mounting location by temporarily connecting the cameras and
cables to a DVR, or Observation System.
Figure 1.0 Use the stand for ceiling, table, or wall mounting.
Wall Mount
Ceiling Mount
Table Mount
BNC (VIDEO)
(Yellow Connector)
POWER
(Black Connector)
To Camera:
Connect the BNC and power
connectors to the camera.
Figure 2.0 Connect the BNC and power ends of the extension cable
Connect the BNC connector
to the video input of the
monitor/DVR, and connect
the power connector to a
power adapter.
To Monitor/DVR:
Features
Auto Mechanical IR Cut Filter ensures accurate color
reproduction in all lighting conditions
Special IR LED's do not glow red in the dark for covert
night vision operation
Enhanced Night Vision Capability - up to 40 ft. / 12 m†
Weatherproof Indoor/Outdoor camera (IP66)‡
Ceiling or wall mountable
IR illumination range of 40 ft. (12 m) under ideal conditions. Actual range and clarity may
vary depending on scene/object reflection and camera application.
‡ Not intended for submersion in water. Installation in a sheltered location
recommended.
Mounting Stand*
Connecting the camera
Setup Diagram:
AC Power Adapter**
* Model CVC6930PK4 is a 4-pack that includes four of the listed items.
** A "4-in-1" Power Adapter that provides power to four cameras may be
substituted for four individual power adapters, depending on product
configuration.
WARNING - A REGULATED UL/CSA APPROVED 12V DC 300mA power
supply is REQUIRED for use with this camera. Use of a non-regulated,
non-conforming power supply can damage this product and will void
the warranty.


Produkt Specifikationer

Mærke: Lorex
Kategori: Overvågningskamera
Model: Vantage CVC6930PK4RB

Har du brug for hjælp?

Hvis du har brug for hjælp til Lorex Vantage CVC6930PK4RB stil et spørgsmål nedenfor, og andre brugere vil svare dig


Overvågningskamera Lorex Manualer

Lorex

Lorex E842CDWP Manual

11 September 2025
Lorex

Lorex LWB3801 Manual

13 August 2025
Lorex

Lorex F861ASB-AA Manual

13 August 2025
Lorex

Lorex U222AAW Manual

12 August 2025
Lorex

Lorex LNZ44P12 Manual

11 August 2025
Lorex

Lorex LNB9383 Manual

9 August 2025
Lorex

Lorex C831CD Manual

9 August 2025
Lorex

Lorex C861XC-E Manual

9 August 2025

Overvågningskamera Manualer

Nyeste Overvågningskamera Manualer

Intellinet

Intellinet 524421 Manual

13 September 2025
3xLOGIC

3xLOGIC VISIX Manual

13 September 2025
Intellinet

Intellinet NFC30 Manual

13 September 2025
3xLOGIC

3xLOGIC VX-4V-OD-RI Manual

12 September 2025
EZVIZ

EZVIZ C7 Dual Manual

12 September 2025
3xLOGIC

3xLOGIC VX-SMBK-D Manual

12 September 2025
3xLOGIC

3xLOGIC VISIX V Manual

12 September 2025
3xLOGIC

3xLOGIC VX-2S-OP-30X Manual

12 September 2025
Geovision

Geovision GV-VS2401 Manual

12 September 2025