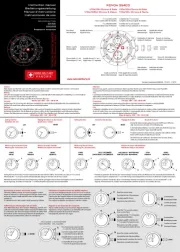
Lorus NX02 Manual

Lorus Ur NX02

Læs gratis den danske manual til Lorus NX02 (4 sider) i kategorien Ur. Denne vejledning er vurderet som hjælpsom af 84 personer og har en gennemsnitlig bedømmelse på 4.8 stjerner ud af 42.5 anmeldelser. Har du et spørgsmål om Lorus NX02, eller vil du spørge andre brugere om produktet?

Side 1/4
I MNSTRUCTION ANUAL
CAL. NX02 (RZ1 SERIES)
CAL. NX03 (RB5 SERIES)
NRENX03C 05-00
HOW TO SET THE TIME/CALENDAR
[Digital Time/Calendar Setting]
• Before setting the analogue time, be sure
to set the dig ital tim e.
Day
B C
Date
D
Seconds
Minu te s
Hour
A
PM mark
1. Press button “A” to show the TIME/CALENDAR
mode.
2 . Pr e s s b u t to n A f o r 2 to 3 se c o n d s t o
sho w the time / c a l endar sett i n g di s p lay.
A beep sounds for 1 second, and the second
digits start flashing.
3. Selection of the digits to be adjusted (flashing)
is made in the following order by pressing
button “C”.
Date M on th
Year
Hour
Minutes
Seconds
12-/24-hour
indication
→ →
4. Press button D to set the flashing digits.
One digit i s adv an ce d wit h each press o f
button “D”. Digits except seconds and 12-
/24-hour indication move quickly by keeping
button “D” pressed.
5. Aft e r al l th e adj ust ment s ar e com ple ted ,
press button “A” to return to the TIME/
CALENDAR mode. A beep sounds for 1
second.
Seconds setting
When the seconds digits are flashing, press
button D in accordance with a time si gnal.
The seconds are reset to “00” and start immediately.
When the s e conds c o u n t a n y n u m b e r f r o m
“30” to “59” and button “D” is pressed, one
minute is added and the seconds are immediately
reset to 00 .
12- / 2 4-ho u r i n dica t i on sett i n g
Changeover between 12- and 24-hour indications
is made alternately with each press of button
D.
Notes:
1. W h en s e t ting t h e h o u r di g i t s i n th e 1 2-
hour indication, check that AM/PM is properly
s e t . O n l y m a r k i s d i s p l a y e d a n dP M
there i s no indicati on for the AM s etting.
In the 24-hour indication, is displayed.24H
2. Once the year, month and date have been
set, the day of the week is set automatically.
A
A
A
S T O P W A T C H
mode
TIME/CALENDAR
mode
T I M E R
mode
REGULAR ALARM
mode
A
By pressing button in the TIME/CALEN-“ ”C
DAR mode, the SINGLE-TIME ALARM mode is
shown.
TIME/CALENDAR
mode
SINGLE-TIME
A L A R M m o d e
C
With each press of button in the TIME/“ ”D
CALENDAR mode, the display changes over in
the following order.
D
T i m e / c a l e n d a r
display
Calendar
display
Blank display
DD
CHARACTERISTICS
1. Time/c ale nda r display:
Analogue display: Hour, minutes and seconds.
Digital display : Hour, minutes, seconds,
date and day of the week.
Fully automatic calendar: Calendar adjusts
automatically for odd and even months including
February of leap years from the year 1998 to
the end of 2048.
Time i n d i c a t i o n : Changeover between
12- and 24-hour indications is possible.
2 . S t o p w a t c h : Measures up to 23 hours, 59
minutes and 59 seconds in 1/100 second increments
for the first hour and in 1-second increments
thereafter.
3. C ou ntd ow n time r: Up to 9 hours and 59
minutes can be set in minute increments.
4. Sin gl e- time a la rm: The single-time alarm
can be set to ring only once at the designated
time. As it rings, it is automatically disengaged.
5. R e gul ar a lar m : The regular alarm can be
set to ring on a 24-hour basis.
Hou r l y t i m e s i g n a l : Can be set to ring
every hour on the hour.
6. Demo n s t r a tion fu n c t i o n: Each mode is
displayed for 2 seconds in order.
7. Illuminating light: The light evenly illuminates
the display for easy viewing in the dark.
Hour hand Minute hand
Date
C
Day
B
PM
mark
A
Crow n
Second
hand
Minu te s
Hourly time
signal mark
Alarm
mark
Hour S ec on ds
D
* The design of the liquid crystal panel differs
depending on the model, though the functions
and method of opera tion are the sam e.
1-AL
P M
24
BC
DA
PM
mark Crow n
Hour
hand
Day Date
Hourly time
signal mark
Minute
hand
Second
hand
Minu te s
Hour S ec on ds
Alarm mark
The selection of the mode can be made in the
following order with each press of button “ ”A .
CROWN/BUTTONS AND DISPLAYS
Second hand
[Analogue Time Setting]
Hour hand Minute hand
Crow n
a b
a: Normal position
b: Extended position
1. Pull out the crown when the second hand
is at the 12 o clock position.
2. Turn the crown to set the hour and minute
hands.
3. Push the crown back in to the normal position
when t he second digits count i n the00
digital display.
S t a r t S t o p
R e s t a r t
Stop
Accumulated elapsed time measurement
C C CC D
Reset
Accumulate repeatedly by
pressing button “ ”C .
Stopwatch Operation
HOW TO USE THE COUNTDOWN TIMER
The timer can be set up to 9 hours and 59
minutes in minute increments.
The remaining time is displayed in seconds.
* If the time set previously remains displayed,
press button to reset the digits to “ ”D0:00'oo
before setting the desired time.
* Even if the TIMER mode is changed to another
while the measurement is in progress, it
continues counting properly. After the timer
is used, however, be sure to reset it as the
battery energy is consumed enormously to
shorten the battery life.
Pr ess b utto n to show t h e STO PWA TCH“ ”A
mode.
Seconds
Tim e r s e ttin g
STOPWATCH
mode mark
C
D
B
A
Minu te s Seco nd s 1/100 seconds
C
D
B
A
Hour
Minutes
Time-up
Stop
R e s t a r t
Warning
soun d
beeps.
S t a r t
Res tart and stop of the
tim er can be repeated by
pressing button “ ”C .
CC C
Press th e button in the following order.
Timer operation
4. Press but t on t o se t the dig i ts. On e“ ”D
digit is advanced with each press of the
button. The digits move quickly by keeping
the button pressed.
5. After all the adjustments are completed, press
button “ ”A to return to the TIMER mode. A
beep sounds for 1 second.
Hour Minu te s
1. Press button to show the TIMER mode.“ ”A
2 . P r e s s b u t t o n f o r 2 t o 3 s e c o n d s t o“ ”A
show the timer setting display. A beep
sounds for 1 second, and the hour digit
starts flashing.
3. Selection of the digits to be adjusted (flashing)
is made in the following order by pressing
button “ ”C .
* Whe n the set t ime i s up, a war nin g sou nd
beeps for 10 seconds. To stop it manually,
press any of the buttons.
HOW TO SET THE SINGLE-TIME ALARM
C
D
B
A
Hour Minu te s
Current timePM mark
Sing le -t ime
alarm mark
1. Press button in the TIME/CALENDAR“ ”C
mode to show the SINGLE-TIME ALARM
mode.
2. Press button or to set the desired“ ”C“ ”D
alarm time.
The single-time alarm mark is displayed1-AL
and the alarm is automa tically engage d.
* One minute is advanced or moved back
with each press o f b u t t o n o r “ ”C“ ”D ,
re s pec t ive ly. Th e d igi t s mov e quic kly
by keeping the respective buttons pressed.
3. To return to the TIME/CALENDAR mode,
press button “ ”A .
To cancel the alarm time you have set,
press buttons and at the same time,“ ”C“ ”D
or press button or to set the alarm“ ”C“ ”D
time to the current time.
The alarm rings at the designated time for
20 seconds. To stop it manually, press any
of the buttons.
HOW TO SET THE REGULAR ALARM
REGULAR ALARM
mode mark
B
A
C
D
PM
mark
Hour Minu te s
Alarm mark
Hourly time
signal mark
HOW TO USE THE STOPWATCH
The stopwatch can measure up to 23 hours,
59 minutes and 59 seconds in 1/100 second
increments for the first hour and in second
increm en ts th er ea fter.
* Even if the STOPWATCH mode is changed
to another while the measurement is in progress,
it continues counting properly. After the
stopwatch is used, however, be sure to reset
it as the battery energy is consumed enormously
to shorten the battery life.
TI ME R
mode mark
The single-time alarm can be set to ring
onl y o n c e a t th e d e s i g n a t e d t i m e . A s it
rings, it is automatically disengaged.
The alarm time can be set in minute increments
starting from the current time.


Produkt Specifikationer

Mærke: Lorus
Kategori: Ur
Model: NX02

Har du brug for hjælp?

Hvis du har brug for hjælp til Lorus NX02 stil et spørgsmål nedenfor, og andre brugere vil svare dig