Lorus Y704B Manual

Lorus Ur Y704B

Læs gratis den danske manual til Lorus Y704B (4 sider) i kategorien Ur. Denne vejledning er vurderet som hjælpsom af 49 personer og har en gennemsnitlig bedømmelse på 4.5 stjerner ud af 25 anmeldelser. Har du et spørgsmål om Lorus Y704B, eller vil du spørge andre brugere om produktet?

Side 1/4
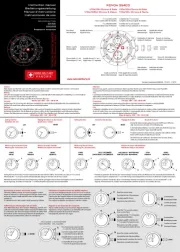
HOW TO USE THE S T OPWATCH
The stopwatch can measure up to 9 hours,
59 minute s, 59 sec onds and 99 in 1 100/
seconds.
* Even if the stopwatch display is changed
to another while the measurement is in
progress, it continues counting properly.
After the stopwatch is used, however, be
sure to reset it as the battery energy is
consumed enormously to shorten the battery
life.
CHA R ACTE RIS T ICS
1 . S t op w a t c h : Measures up to 9 hours, 59
minu tes, 59 se conds a nd 99 with 1 100/
second readout.
L a p t i m e m e a s u r e m e n t : Up to 9 lap
times can be measured. The lap time
difference and the fastest lap time are
c al cul ated a nd disp la y ed du r in g the
measurement.
2. T ime /cale n dar displa y : Hour, minutes,
seconds, month, date and day of the week.
Automatic calendar adjustment: Calendar
adjusts automatically for odd and even
months including February of leap years,
but not for February of common years.
Tim e i n dic a t ion: Changeover between
12- and 24-hour indications is possible.
3 . D a i l y a l a r m : The alarm ca n be set to
ring on a 24-hour basis.
4. D u al time: Time of a different time zone
can be set and displayed.
5 . S t r o k e fu n c t i o n : The watch can be set
to beep at a selected rate to serve as a
pacemaker in jogging, etc.
6 . C o u n t d o w n t i m e r : Up to 9 hou rs 59
minutes and 59 seconds can be set in seconds.
L a p t i m e me a su r e m e n t
Lap time refers to an elapsed time required
to cover a given section of the whole distance.
1. At the start of the activity, depress button
D to start the stopwatch.
2. At the end of the first lap, depress button
B.
The first lap time and lap number are dis-
played, though the second lap time is be-
ing measured internally.
3. Depress button B to release the lap time
before the end of the second lap. The first
lap time and lap number disappear, and
the measurement in progress and 0 are
displayed in place of the lap time and lap
number, respectively.
4. At the end of the second lap, depress but-
tonB . T he secon d lap tim e and lap
number are displayed, though the third
lap time is being measured internally.
5. Measurement and release of the lap time
can be repeated by depressing button B.
6. At the end of the activity, follow either of
the two methods below.
a. To display the final lap time, depress
button B. Then, depress button B
to release the lap time, and depress button
D to stop the measurement.
* The time displayed when button D
is depressed is not the total elapsed
time of the activity, that is, the time
that elapsed from the start until the
end of the activity but the time that
elapsed from the start until the stop of
the measurement.
b. To display the total elapsed time of the
activity, depress button D to stop the
measurement.
7. Depress button C to reset the stopwatch.
Sto p w a tch op erat i o n
Month (Day) Date
A
* A flashing display mark indicates that the
corresponding function is in use.
T i m e r
d i s p l a y
A
D u a l t i me
d i s p l a y
A
S t r o k e
d i s p l a y
BUT T ONS AND DISP LAYS
C
R e s e t
S t a r t S t o p
R e s t a r t
S t o p
Accumulate repeatedly by
depressing button D.
Accumulated elapsed time measurement
D D DC
Depress button A to show the stopwatch
display.
N o t e s :
1. When a lap time measured is the fastest
among the lap times previously measured,
a short beep rings to signal that the memory
has been updated with the new fastest lap
time.
2. The lap number counts up to 9. After
9, the number returns to 1.
The selection of the display can be made in
the following order with each depression of
button A.
S t o p w a t c h
d i s p l a y
T i m e / c a l e n d a r
d i s p l a y
A
A l a r m
d i s p l a y
A
A
D
Stopwatch display
mark
C
INSTRUCTION MANUAL
CAL. Y704 (R23 SERIES)
NREY704B 10-98
Minutes
Hour
PM
mark
BD
A
Seconds
DB
Seconds
Minutes 1/100 second
A
Hour
Alarm
mark
While a lap time is being displayed, de-
press button C. With each depression of
the button, the difference between the dis-
played lap time and the previous lap time is
displayed in the following order.
Lap tim e d i f f e rence and the fast e st la p ti me
Lap time difference
Latest lap time
Fastest lap time
To return to the measurement in progress,
depress button B.
The lap time difference is displayed without
a plus or minus sign. Instead, the lap number
of the faster lap time is always displayed at
the right of the mark.
Ex.)
The display should be read as Lap 2 is 5
seconds 87 faster than Lap 3.
N o t e s :
1. While the measurement in progress
is shown on the display, the lap time
difference and the fastest lap time
cannot be shown by depressing button“C”.
2. While the latest lap time, lap time
difference or the fastest lap time is
shown on the display, the display
can not be cha nged to another b y
depressing button A.
HOW TO SE T THE TI M E/CALE N D AR
* With each depression of button B, month
and day are displayed alternately.
* With each d epression of buttonD, the
display changes over between the 12- and
24-hour indications.
DateMonth (Day)
PM mark
1. Depress buttonA to show the time/calendar
display.
2. Depress buttonC to show the time/calendar
setting display. The second digits start
flashing.
3. Selection of the digits to be adjusted (flashing)
is made in the following order by depressing
button D.
Seconds
DateDay Month
Hour
4. Depress button B to se t the flashing
digits. One digit is advanced with each
depression of button B. Digits except
seconds move quickly by keeping button
B depressed.
5. After all the adjustments are completed,
depress button A to return to the time/
calendar display.
Seco n ds setting
When the seconds digits are flashing, depress
button B in accordance with a time signal.
The seconds are reset to 00 and start immediately.
N o t e : When settin g the hour digits in the
12-hour ind ication, check that AM/
PM is properly set. OnlyPM is displayed
and there is no indication for the AM
setting. In the 24-hour indication, there
is no indication.
HOW TO SET THE ALARM
Current
time
Alarm
mark
1. Depress buttonA to show the alarm display.
2. Depress button C to show the alarm setting
display. The hour digits start flashing.
3. Depress button D to select the digits to
be adjusted (flashing).
Hour
Minutes
(tens digit) Minutes
(units digit)
4. Depress button B to set the digits. One
digit is advanced with each depression of
the button. The digits move quickly by
keeping the button depressed.
5. After all the adjustments are completed,
depress button A to return to the alarm
display.
N o t e s :
1. When the time function is displayed in the
24-hour indication, the alarm is also displayed
in the 24-hour indication.
2. When setting the hour digits in the 12-
hour indication, check that AM/PM is properly
set.
Only PM is displayed and there is no
indication for the AM setting. In the 24-
hour indication, there is no indication.
E n g a g e men t/d i s e n g a g e m e n t o f t h e
alarm
With each depression of button D in the
alarm display, the alarm is eng aged and
disengaged alternately.
Alarm disengaged
Alarm engaged
The alarm rings at the designated time for
18 seconds and stops. To stop it manually,
depress button A, B, C or D.
HOW TO SET THE DUAL TIME
Time of a different time zone can be set and
displayed together with the time you have set
in HOW TO SET THE TIME/CALENDAR.
1. Depress button A to show the dual time
display.
2. For dual time setting, refer to HOW TO
SET THE TIME/CALENDAR.
Dual time display
mark
D
BC
Seconds
MinutesHour A
MinutesHour
C
BD
A
PM mark
Alarm display
mark
C
SecondsMinutesHour
A
D
B
PM mark
Minutes
(units digit)
Minutes
(tens digit)


Produkt Specifikationer

Mærke: Lorus
Kategori: Ur
Model: Y704B

Har du brug for hjælp?

Hvis du har brug for hjælp til Lorus Y704B stil et spørgsmål nedenfor, og andre brugere vil svare dig