Lorus YK36 Manual

Lorus Ur YK36

Læs nedenfor 📖 manual på dansk for Lorus YK36 (2 sider) i kategorien Ur. Denne guide var nyttig for 16 personer og blev bedømt med 4.5 stjerner i gennemsnit af 2 brugere

Side 1/2
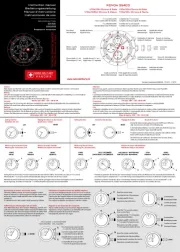
H OW T O S ET T H E TI M E/CAL END A R
The setting sequence is shown below.
1. Press Button C three times to enter the Time
Set t i ng m o d e . T h e seco n d d i g it s st a rt
flashing.
The 2 appears on the display to indicate
that the watch is in the Time Setting mode.
C H A R A C T E R I S T I C S
1. T i m e / C a l endar d i s p l a y : Hour, m inut e ,
second, date, day of the week and month
are displayed.
2. Stopwatch: The stopwatch can measure up
to 24 hours in 1/100-second increments for
t h e first 3 0 m i nut e s , a n d i n 1 - s e c o n d
i n c r e m e n t s t h e r e a f t e r . L a p t i m e
measurement is available.
3. Alarm: The alarm can be set to ring at a
designated time.
4. Electro Luminescent Backlight: The built-in
electro luminescent backlight illuminates the
display for easy viewing in the darkness.
Normal
Time
Display
A
BC
D
To show the date,
press Button
To turn the backlight on,
press Button or
To change mode,
press Button
To show the alarm time,
press Button
Button operation from normal Time Display
E
D I S P L AY A N D B UTT ON O P ERATI O N
Second Hour
Minute
DateMonth
Day of
the week
Day o f t h e w eek
A
B
C
D
E
ST/STP
RESET
MODE LIGHT
Hour M i nut e
Seco n d
ST/STP
RESET
MODE LIGHT
A
B
C
* When the second digits are counting any
number between 30 and 59 and Button
A is pressed, the second digits are reset to
zero and one minute is added.
3. Press Button B to confirm the second setting
and move on to the minut e setting. T he
minute digits start flashing.
4. Press Button A to adjust the minute digits.
* Keep Button A pressed to forward the digits
rapidly.
5. Press Button B to confirm the minute setting
and move on to the hour setting. The hour
digits start flashing.
6. Press Button A to adjust the hour digits.
* When setting the hour, make sure that am/
pm is set correctly.
7. Press Button B to confirm the hour setting and
move on to the date setting.
8. Repeat the same procedures for all other
settings; press Button A to adjust digits and
press Button B to confirm the setting and
move on to the nest setting.
9. After all the adjustments are completed,
press Button C to return to the Time display.
H OW T O USE T H E S T O P W AT C H
The stopwatch can measure up to 24 hours in
1/100-second increments for the first 30 minutes,
and in 1-second increments thereafter.
ST/STP
RESET
MODE LIGHT
A
BC
* T h e r e is n o Button E f or Cal . YK36.
2. Press Button A simultaneously with a time
signal to reset the second digits to zero. The
second digits instantly start counting.
NREYK35C 3-2005
CAL. YK35, YK36 (R23 SERIES)
Standard Measurement
1. Press Button C to enter the Stopwatch mode.
2. Press Button A to start timing.
3. Press Button A to stop.
4. Press Button B to reset the stopwatch to zero.
5. To exit the Stopwatch mode and return to
the Time display, press Button C.
Lap Time Measurement
1. Press Button C to enter the Stopwatch mode.
2. Press Button A to start timing.
3. To view lap time, press Button B while the
stopwatch is counting. Lap time is shown on
the display while the stopwatch continues to
count internally.
4. Press Button B again to go back to the display
of the measurement in progress.
5. Press Button A to stop timing.
6. Press Button B to reset the stopwatch to zero.
7. To exit the Stopwatch mode and return to
the Time display, press Button C.
* Lap time reading s can be repeated by
pressing Button B.
* For Cal. YK36, different indicators appear
on display.


Produkt Specifikationer

Mærke: Lorus
Kategori: Ur
Model: YK36

Har du brug for hjælp?

Hvis du har brug for hjælp til Lorus YK36 stil et spørgsmål nedenfor, og andre brugere vil svare dig