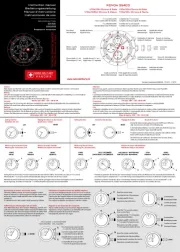
Lorus Z025 Manual

Lorus Ur Z025

Læs nedenfor 📖 manual på dansk for Lorus Z025 (2 sider) i kategorien Ur. Denne guide var nyttig for 8 personer og blev bedømt med 4.5 stjerner i gennemsnit af 2 brugere

Side 1/2
C H A R A C T E R I S T I C S
1. Time/calendar display: Hour, minute,
second, month, date and day of the week
2. Time indication: 12-hour display format
with PM indicator and 24-hour display
format are available.
3. Stopwatch: The stopwatch can measure
up to 23 hours 59 minutes and 59 seconds
in 1/100 -second increments. Sp lit time
measurement is available.
4. Alarm: The alarm can be set to sound at
the designated time on a 24-hour basis.
5. Chime: The chime can be set to sound
every hour on the hour with a single beep.
6. Countdown timer: T he countdown timer
can be set up to 23 hours 59 minutes and
59 seconds.
7. Illuminating light: The built-in electro-
luminescent (EL) light evenly illuminates
the display for easy viewing in darkness.
B UT T O N S A N D D I S P L AY S
NREZ025 10-2018
CAL. Z025 (R23 SERIES)
H O W T O U S E T H E C H R O N O G R A P H
Press But ton D to go to t he CHRONOGR APH
mode. T he CHRONOGR APH mode ind icator
appears on the display.
C H R O N O G R A P H
mo d e i nd i c a t o r
H o u r
M i n u t e
S e c o n d
1/10 0 S e c on d
* Measurement and release of split time can
be repeated by pressing Button C.
During t he measu rement, the outer second
markers keeps flashing.
Press Button D to return to the TIME/CALENDAR
mode.
C h r o no g r a p h o pe r a t i on
S t a n d a r d M e a s u r e m e nt
S pl i t T i m e M e a s u r e me n t
B C C B C
Start Split Reset
Split
Release Stop
BB
C
Start Stop Reset
O u t e r s e c o n d
m a r ke r s
H O W T O U S E T I M E R
Press Button D t wice to go to the T IMER mode.
Th e TI MER m od e indi ca tor a pp ea rs o n th e
display.
1. Press But ton A for 2 seconds. T he second
digits start flashing.
2. Press But ton B to set the second digits.
One digit (flashing) is advanced with each
pre ss of Button B and reversed with each
pre ss of Button C. T he digits are advanced
or reversed quickly by keeping Button B
(advance) or C (reverse) pressed.
3. Press But ton D to confirm t he second
setting and move on to the minute setting.
The minute digits start flashing.
4. Press But ton B or C to set the minute digits
in t he same manner as the second set ting.
5. Press But ton D to confirm the minute
setting and move on to the hour set ting.
The hour digit s start flashing.
6. Press But ton B or C to set the hour digits
in t he same manner as the second and
minute setting.
7. Press But ton A to complete the time r
setting.
T I M E R
mo d e i nd i c a t o r
C u r r e nt t i m e
( H o u r / M i n u t e )
D
B
C
T I M E R T im e
( h ou r & min ut e )
A
Th e ti me d is p lay f orm at i n ei t h er 12- h ou r
indicat ion or in 24-hour indicatio n can be
selected alternately by pressing Button B or
C. Under the 12-hour indication format, PM
mark a ppea rs in the afte rnoo n, but no AM
mark appears in the morning. Under the 24-
hour indication format, no mark appears on
the display.
Ho u r l y c hi me is O FF Ho u r l y c hi me is O N
C
C h oi c e o f 1 2-H o u r / 2 4 - Ho u r f or m a t
How t o s e t t h e hou r l y c h im e
C u r r e nt t i m e
(O u t e r s e c on d
m ar ker )
In the TIME/CALENDAR mode, press Button
C to turn ON or OFF the hourly chime.
T i m e r o p er a t i on
B B
C
Start Stop Reset
1. Press But ton B in the TIMER mode to start
the countdown timer.
2. Press But ton B to stop the countdown timer.
3. To reset the t imer, press Button C.
Press Button D to return to the TIME/CALENDAR mode.
D
B
C
PM
i n d i c a t o r
H o u r
Da y o f t h e week
C h i m e
Da t e M i n u t e
S e c o n d
A l a r m
( S T A R T / S T O P )
( S E T/ L I G HT )
( M O D E )
( S P L I T/ R E S E T )
M o nt h
The display mode changes in the following order
by pressing Button D.
TIME CHRONOGRAPH TIMER
ALARM
SECOND TIME
ZONE
A B
CD
D
H O W TO S E T T H E T I M E / C A L E N D A R
1. Press But ton A for 2 seconds. T he second
digits start flashing.
2. Selection of the digits to be adjusted
(flashing) is made in t he following order by
pressing Button D.
SECO NDS
DAT E
12 / 2 4 -H O U R
FO R M A T M O N T H
MINUTESHO U R S
D
D
D
DD
D D
Y E A R
3. One digit (flashing) is advanced with
each press of But ton B, and reversed with
each press of But ton C. T he digit s except
seconds are advanced or reversed quickly
by keeping But ton B (advance) or C
(reverse) pressed.
A
Pre ss A for
2 seconds
Pre ss B or C
to set second
Pre ss B or C
to set hour
Pre ss B or C
to set
minute
Pre ss B or C
to set
year
Pre ss B or C
to set month
Pre ss B or C
to set date
Pre ss B or C
to se t 12/24 H format
4. After all the adjustments are completed,
pre ss Button A to return to the T IME/CALEN-
DAR mode.
Second set ting
Press Button B in accordance
with a t ime signal. The second
digits are reset to “0 0 and
start counting immediately.
When t he second digit s count
any number from “3 0 to 59
and But ton B is pressed, one
minute is added and t he
seconds are immediately reset
to “00.”
D D
D
D
D D
D
A
B
C
TIME/CALENDAR
Mode TIMER Mode
Pre ss D
Twice
Pre ss B or C
to set minute
Pre ss A for
2 seconds
AB
C
D
D A
D
Pre ss B or C
to set second
Pre ss B or C
to set hour
Pre ss A to
comp lete setti ng
A
D
LORUS Z025_800.indd 1 2018/06/08 9:


Produkt Specifikationer

Mærke: Lorus
Kategori: Ur
Model: Z025

Har du brug for hjælp?

Hvis du har brug for hjælp til Lorus Z025 stil et spørgsmål nedenfor, og andre brugere vil svare dig