MeldaProduction MAutoVolume Manual
MeldaProduction
Audio Software
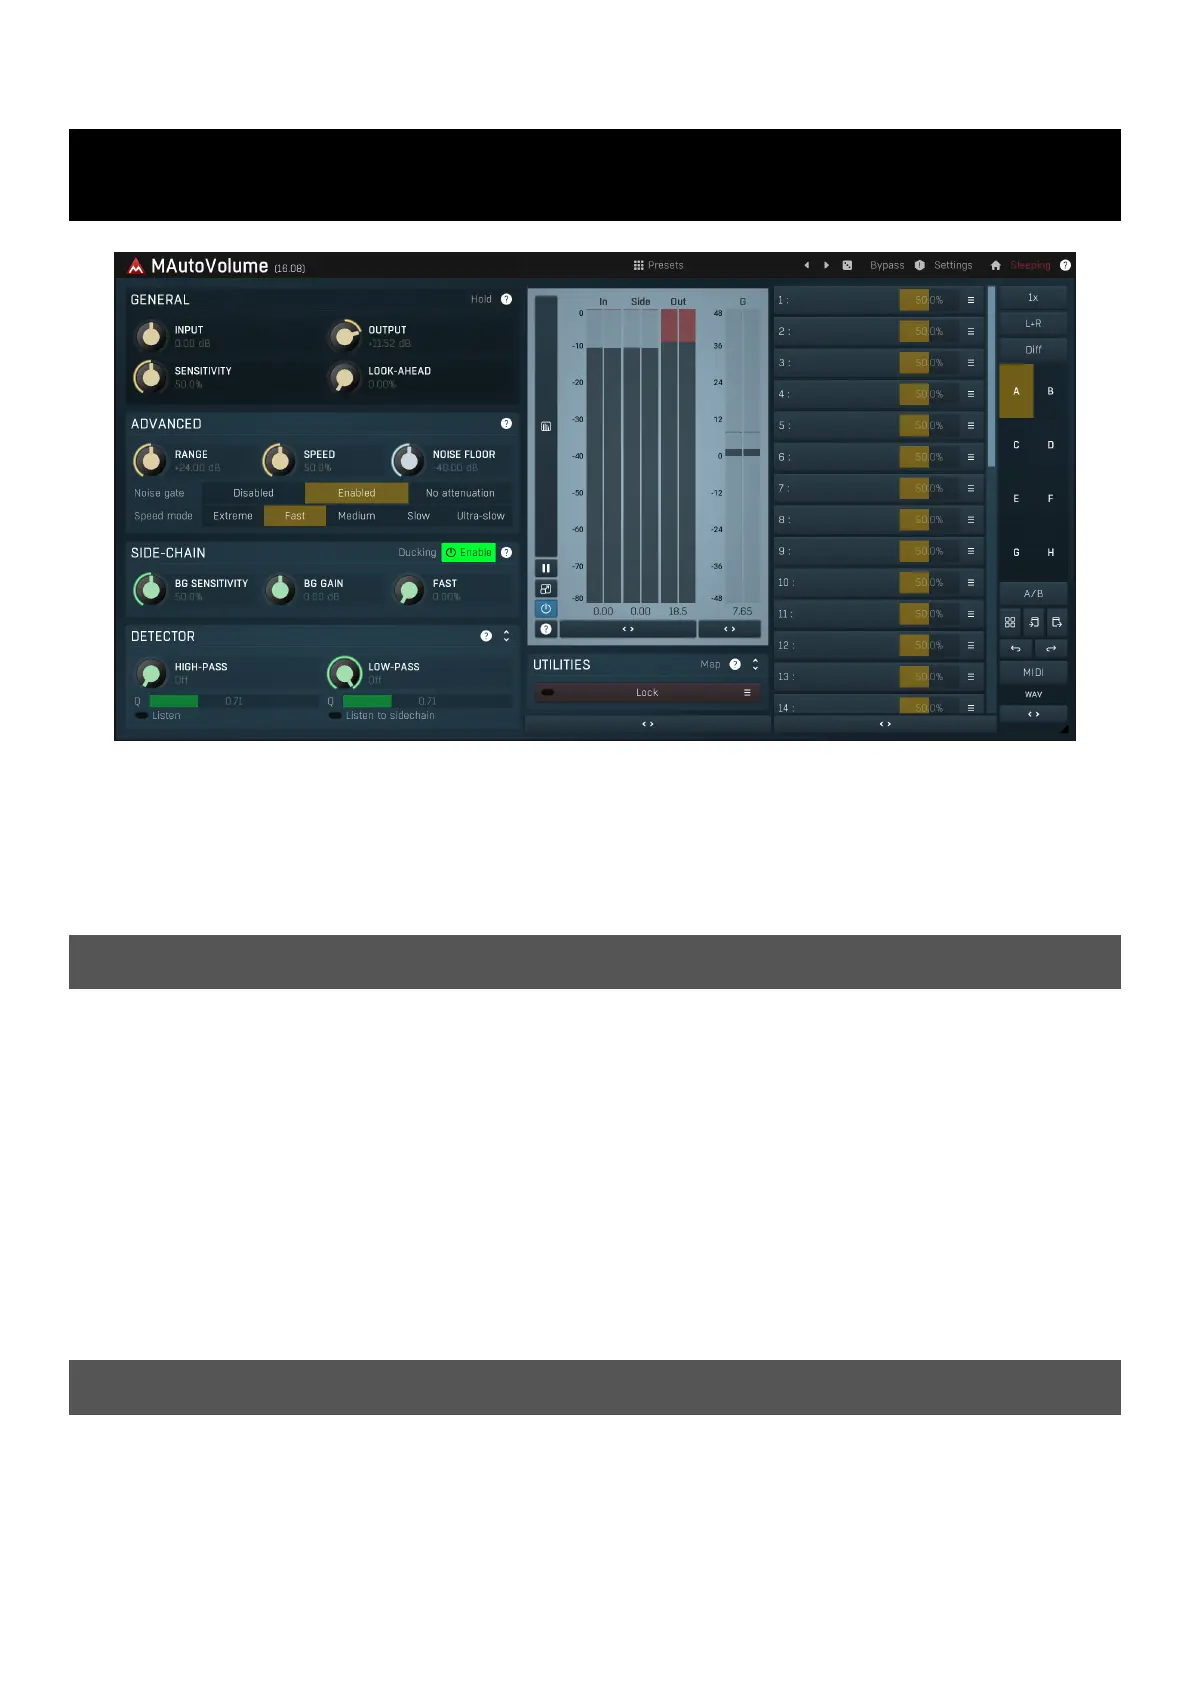
MAutoVolume
| Mærke: | MeldaProduction |
| Kategori: | Audio Software |
| Model: | MAutoVolume |
Har du brug for hjælp?
Hvis du har brug for hjælp til MeldaProduction MAutoVolume stil et spørgsmål nedenfor, og andre brugere vil svare dig
Audio Software MeldaProduction Manualer

16 November 2025

10 November 2025
9 November 2025

8 November 2025
8 November 2025

1 November 2025

27 Oktober 2025
27 Oktober 2025
27 Oktober 2025
29 August 2025
Audio Software Manualer
- Blue Cat Audio
- Chocolate Audio
- Honest Technology
- Best Service
- PreSonus
- Native Instruments
- Motu
- Eventide
- Nomad
- Heritage Audio
- Celemony
- SONORIS
- Tek'it Audio
- Cherry Audio
- Waves
Nyeste Audio Software Manualer

8 December 2025

26 November 2025

11 November 2025

10 November 2025

8 November 2025

8 November 2025
7 November 2025

7 November 2025
6 November 2025

6 November 2025