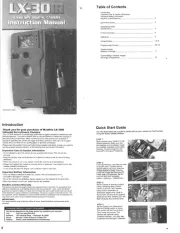
Please take a few minutes
to read and understand these
instructions before using.
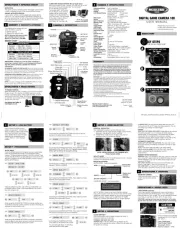
Your digital game camera can be used two ways.
1) Automatic mode records images using infrared (AUTO)
detection. Use default or custom settings.
2) mode records images using manual (HANDHELD)
operation when circumstances warrant.
NOTE: NEVER OPERATE THE CAMERA WITH
Press the button to scroll between modes. Choose (MODE)
between two operational modes.
(AUTO MODE) - Automatic operation.
(HANDHELD MODE) - Manual operation.
(SETUP MODE) - Used to set Game Camera settings
This screen appears when the camera enters SETUP mode.
Additional menu screens appear as you move through the
SETUP functions. Please refer to (SETTING UP GAME
CAMERA) to identify the different SETUP screen displays.
(TURNING OFF) The unit saves all setup data and turns OFF.
Turning the unit ON & OFF resets the internal systems. This will
not change your settings or erase images.
(MULTIPLE PICTURES PER EVENT) Depending on user settings
the camera may take 1, 2 or 3 pictures per event spaced
approximately 15 seconds apart. If the camera fails to detect
motion after the first detection the camera will still take
subsequent pictures. When capture mode is set to video or the
camera is in mode this setting is ignored.(HANDHELD)
(LOW LIGHT OR NIGHT SITUATIONS) The video clip function
will be automatically switched to still photos in low light or night
NOTE: First still in video will reflect user setup setting.
(DELAY STATUS MENU)During mode, when delay (AUTO)
mode is activated it will be indicated on the LCD
(MEMORY FULL) Turn off the unit; then turn it back on; when the
unit is turned on it goes directly to t ode; Go to the he (SETUP) m
(ERASE MEMORY) menu item to delete all the images from the
(SD CARD LOCKED) Turn the unit off; remove the SD card;
unlock it; then insert it; then turn the unit back on.
(SD CARD BAD) Turn the unit off; remove the SD card; insert
a new SD card or clean the contacts; turn the unit back on.
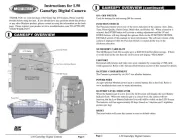
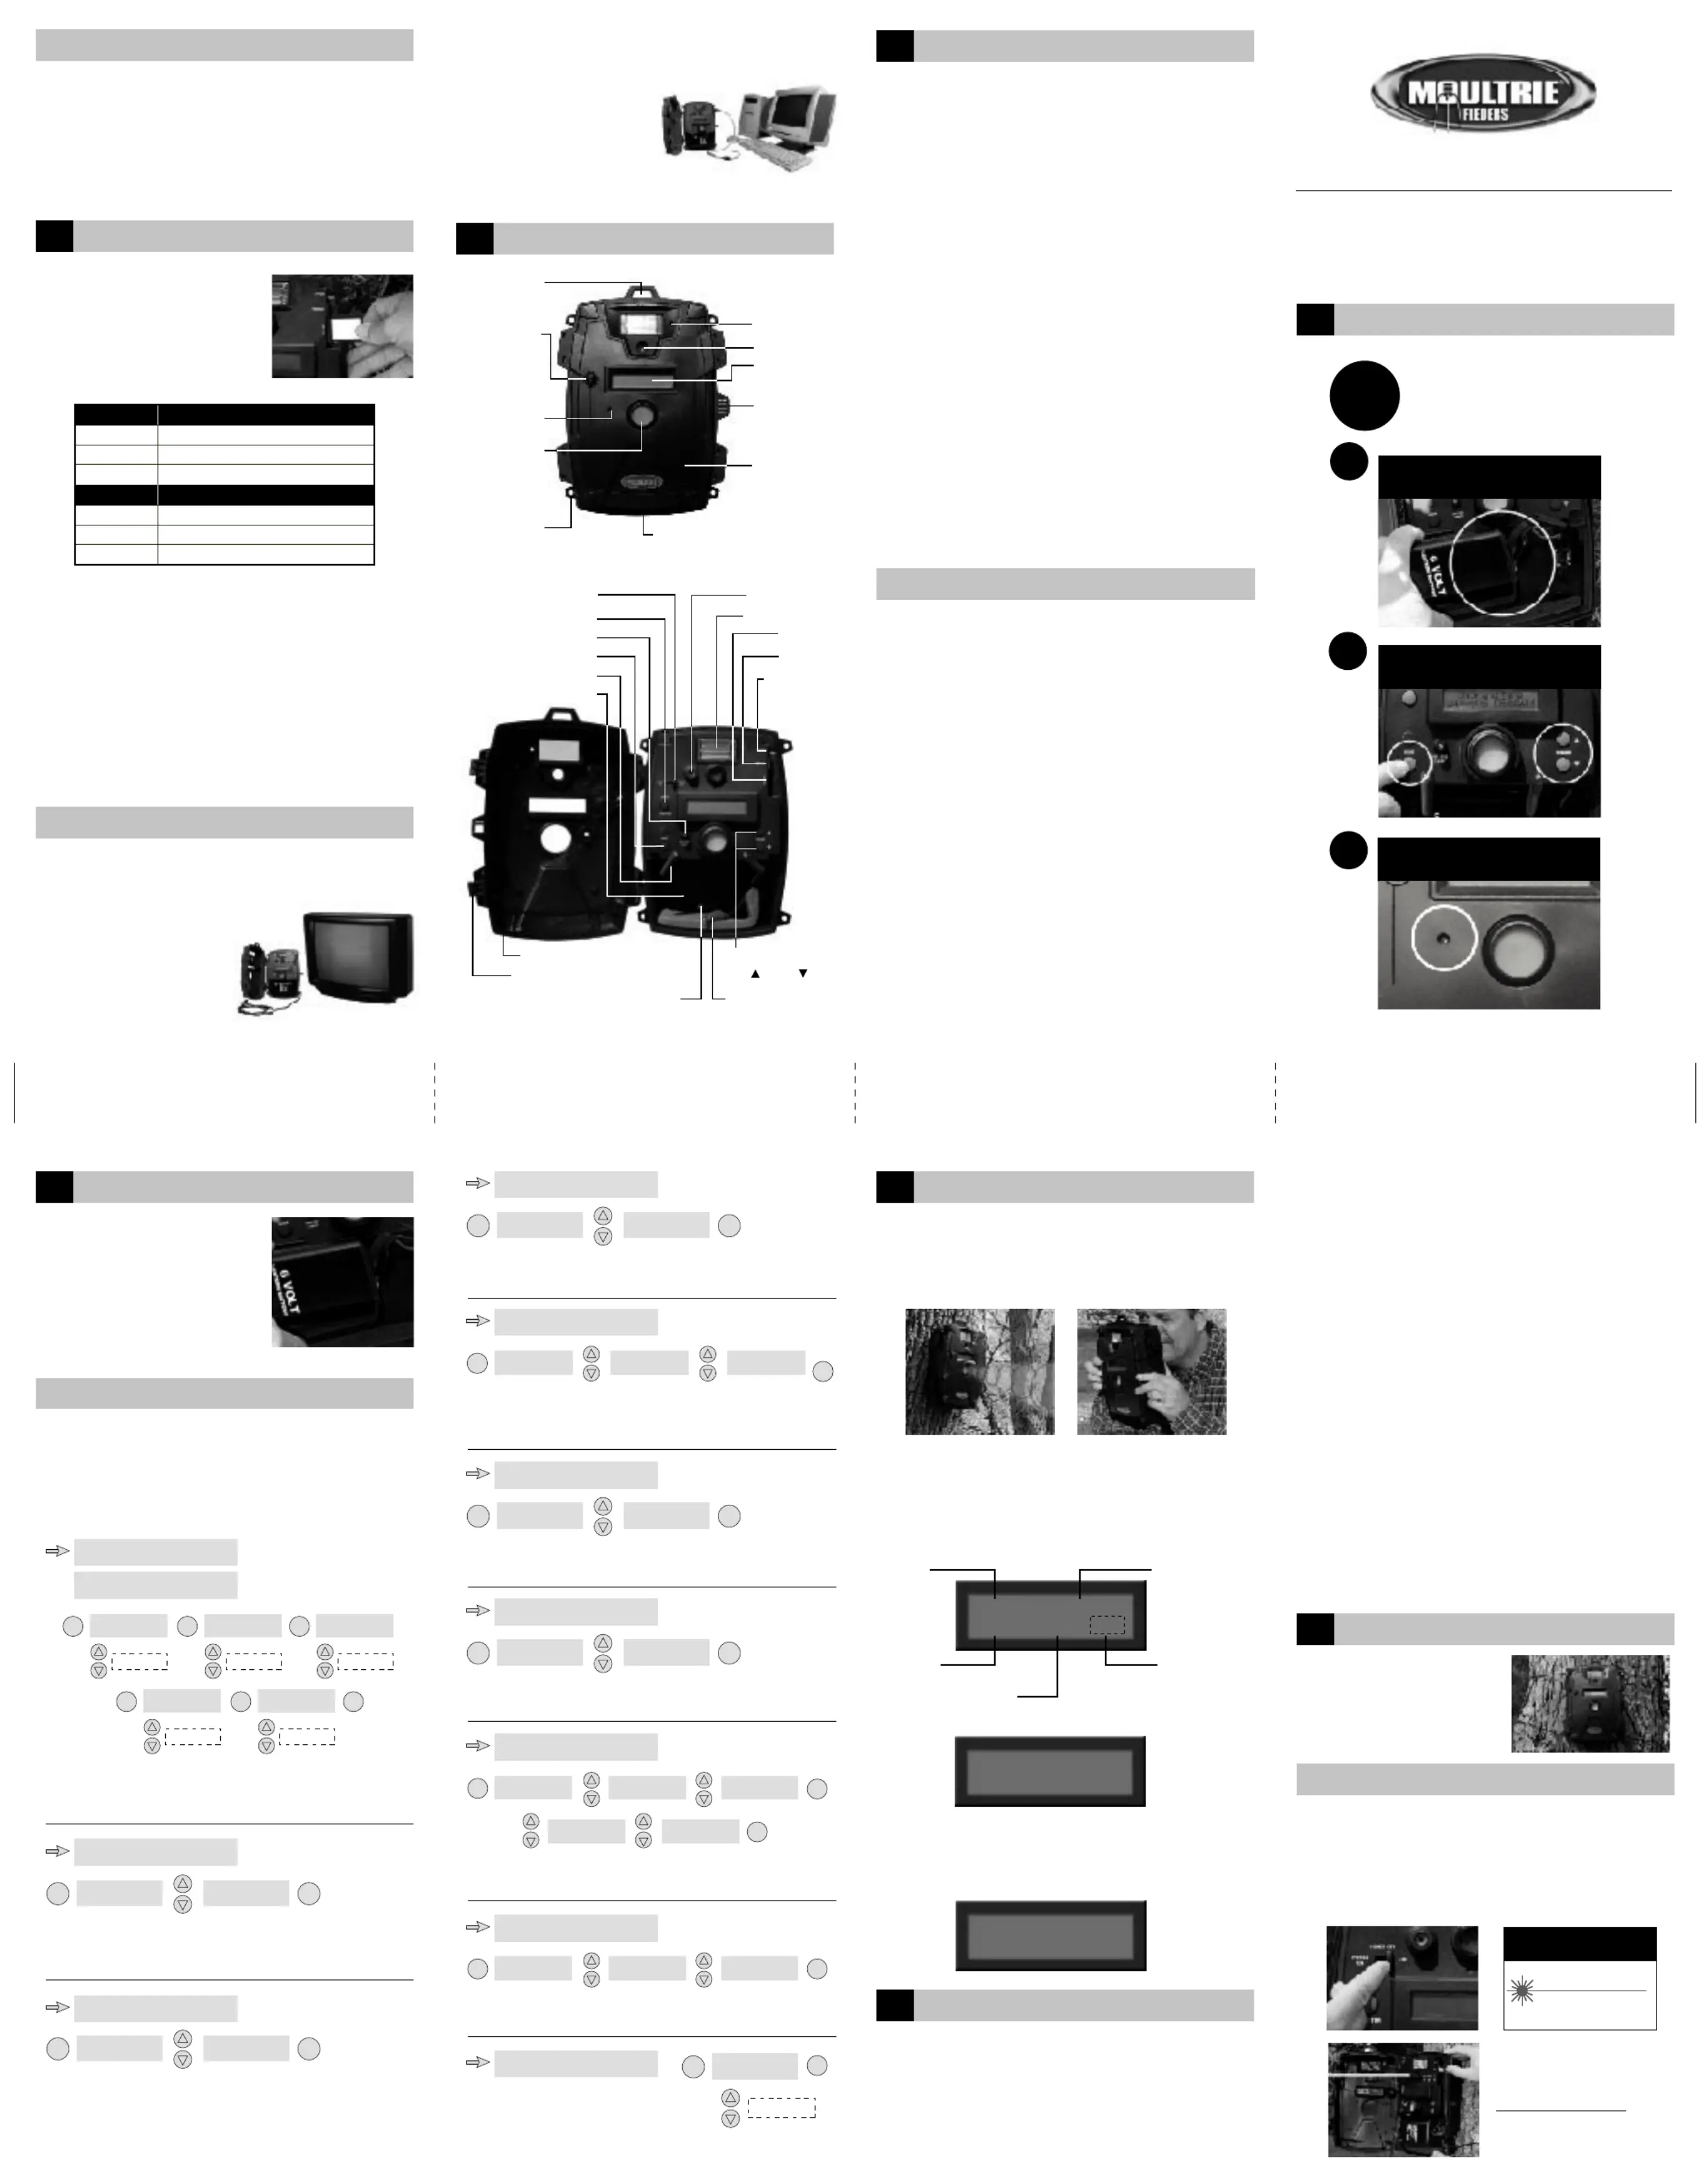
Using mounting straps, mount the
system securely in the desired
If your Game camera is equipped with a laser aiming device,
slide the Switch to the position. (POWER ON/OFF/AIM) (AIM)
Using the laser aim your camera. The red dot indicates the target
area. Note you can also do "Walk" aim in the auto mode.
CAUTION: Looking into laser may be hazardous to the eyes.
Do not stare into beam or aim at other people unnecessarily.
The game camera's infrared sensor will trigger camera when
motion is detected infront of the camera infrared sensor.
If your Game camera is not equipped with a laser aiming
device you can use the systems to (INFRARED SENSOR)
aim your camera. Walk in front of the camera and the Status
Light will flash when you enter the field of view. This
indicates Infrared activation.
Your digital game camera has two
types of memory capacity.
2)Optional SD memory card.
NOTE: Optional SD memory card
will override internal memory.
Maximum card size is 256 MB.
IMPORTANT: Always turn unit off when inserting or
removing a memory card to avoid damage and ensure
that the camera properly updates the memory
SD MEMORY CARD NOT INSTALLED: When the camera is turned
on and an SD memory card is not present, pictures are automatically
stored in the on-board camera memory. The stored images may only
be viewed on a computer or TV connected to the unit.
INSERTING AN SD MEMORY CARD: When an SD memory card is
inserted, any pictures stored in the camera on-board memory
become inaccessible, but are not lost. The user can access these
pictures via the camera USB port when the SD memory card is not
NOTE: If you get a message Your card (CHECK MEMORY CARD)
may be locked, full or defective and will not work.
Move the Switch to . Connect unit TV OUT to a VIDEO (ON)
IN jack on your TV. Use the buttons to scroll (CHANGE)
through recorded images. Video cable included. TV OUT
works only in mode. All pictures (SETUP)
on memory card can be printed or edited
The small CR2025 button battery powers the clock. It
should be replaced as required.
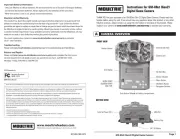
TURNING THE UNIT ON / OFF
(POWER ON)In the Auto Mode the led flashes for 30
seconds before arming the system. When the LED goes out
Insert a fresh 6Volt/6ah lantern
battery or equivalent. Connect the
Red(+) & Black(-) clips to the battery
and lower the battery hold down
arms. Battery life is about 20 days
depending on temperature and
usage. When B = 20% Replace
Press the button on the game camera to enter setup. (MODE)
Press the to scroll between setting (CHANGE BUTTONS)
choices. The feature setting will flash in the LCD until set. Press
the to accept settings and move to the next (SELECT BUTTON)
selection. Programming will rotate between functions until you
Press the button, LCD will show month , use (SELECT) (MM)
(CHANGE) (SELECT) buttons to set month, press to move to
Scroll using the to choose whether you (CHANGE BUTTONS)
would like to reset the number of events counted. Choosing yes
will reset the events back to .(00)
Scroll using the to choose to erase any (CHANGE BUTTONS)
stored images on your game camera or optional memory card.
Choosing will reset the events back to .YES (00)
Operational Mode Auto or Handheld
Housing Weather-resistant and lockable
Display Liquid Crystal Display (LCD)
LCD Status Display Operating Mode Pictures taken
Pictures left Events
Battery Strength Camera status
Status LED Camera, Flash or IR activity
Built-in Memory Stores pictures or video
Memory Card Up to 256 MB SD card (optional)
Format JPEG - Still pictures, AVI - Video clips
Image Output USB OUT, TV OUT, SD Card
USB Output Requires PC / Windows 2000/ME/XP.
Picture Delay Variable 1 Minute - 60 Minutes
Sequential Delay 15 Seconds between still pictures
Lens Multi element, 10.2mm, F:2.8
Infrared Sensor Passive
Flash On, Auto or Off ( Security)
Power Supply 6 Volt Lantern Battery or equivalent
Duty Cycle 20 day average with 6 volt/6 ah battery
Power Connection Alligator clips, red = (+) / black = (-)
Battery Hold Downs Holds battery in place
Clock Battery 3 Volt battery powers LCD Time/Date
Laser Aim (optional) Class 2
Size 7" X 10.25" X 3.5"
Accessories Rechargeable battery, Memory Cards.
COMPUTER IMAGE VIEWING (Setup Mode Only)
Move the Switch to (ON). Connect unit USB OUT to a USB
jack on the computer.Double click "My Computer"
on the desktop and browse
"removable disk". USB works
only in SETUP mode. All your
images will be stored inside.
Images can be downloaded to
your hard drive. The first image
in the video mode is still and
information for the video clip.
Moultrie Customer Service
(205) 664-6700 or (800) 653-3334
This product has been thoroughly tested and inspected before shipment. It is
guaranteed from defects in material and workmanship from the date of
purchase for 1 year. Under this limited guarantee we agree to replace or
repair free of charge any part or parts which have been found to be defective
in original material or workmanship. Should you require in-warranty service,
call our Customer Service Department. If your problem cannot be addressed
over the telephone, we may need you to send us your defective product plus
IMPORTANT: This equipment has been tested and found to comply with the limits
for a Class B digital device, pursuant to part 15 of the FCC Rules. These limits are
designed to provide reasonable protection against harmful interference in a
residential installation. This equipment generates, uses and can radiate radio
frequency energy and, if not installed and used in accordance with the instructions,
may cause harmful interference to radio communications. However, there is no
guarantee that interference will not occur in a particular installation. If this
equipment does cause harmful interference to radio or television reception, which
can be determined by turning the equipment off and on, the user is encouraged to
try to correct the interference by one or more of the following measures:
Reorient or relocate the receiving antenna.
Increase the separation between the equipment and receiver.
Connect the equipment into an outlet on a circuit different from that to which
the receiver is connected.
Consult the dealer or an experienced radio/TV technician for help.
Use optional card reader to
Scroll using the if you wish to set the (CHANGE BUTTONS)
camera to its default factory settings.
Scroll using the , Press select to choose (CHANGE BUTTONS)
flash setting: , OR . (ON), (AUTO) (OFF) Security mode = (OFF):
Status light will remain off during this setting.
Scroll using the . Press select to choose (CHANGE BUTTONS)
between: , or .(STILL) (VIDEO)
Scroll using the . Press select to choose (CHANGE BUTTONS)
between the image quality choices.
Scroll using the . Press select to choose (CHANGE BUTTONS)
between the image quality choices.
Scroll using the . Press select to choose (CHANGE BUTTONS)
the number of pictures to be shot in sequence.
Scroll using the . (CHANGE BUTTONS)
Press select to set camera's ID number.
You are done with setup. To exit setup,
press the button again.(MODE)
Product complies with applicable
requirements of 21 CFR 1040.10
Image Optional 256 MB Card
Standard 640 x 480 = 2,320 pics.
High Res 1280 x 1024 = 608 pics
Video Clips 10 frames per sec. = 288
Standard 640 x 480 = 100 pics.
High Res 1280 x 1024 = 24 pics
Video Clips 10 frames per sec. = 9
EASY STEPS
EASY STEPS
EASY STEPS
EASY STEPSEASY STEPSEASY STEPS
MFHDGC_INSTRUCTIONS_INSIDE SPREAD_8.26.05
Image capacity is based on average use and will vary.