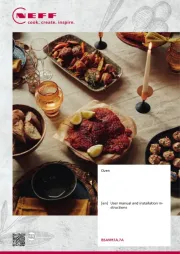
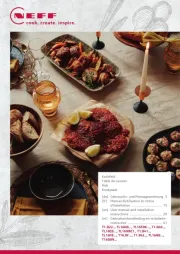
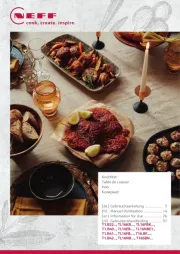
Neff B5AVM7HH0B Manual
Læs nedenfor 📖 manual på dansk for Neff B5AVM7HH0B (52 sider) i kategorien Ovn. Denne guide var nyttig for 22 personer og blev bedømt med 4.5 stjerner i gennemsnit af 2 brugere
Side 1/52

[en] INSTRUCTION MANUAL
BUILT-IN OVEN
B5AVM7HH0B

en
3
Table of contents
[ en ] I NSTRUCTI ON MANUAL
8Intended use. . . . . . . . . . . . . . . . . . . . . . . . . . . . . 4
(Important safety information . . . . . . . . . . . . . . . 5
General information . . . . . . . . . . . . . . . . . . . . . . . . . . . 5
Halogen lamp. . . . . . . . . . . . . . . . . . . . . . . . . . . . . . . . 5
Meat thermometer . . . . . . . . . . . . . . . . . . . . . . . . . . . . 6
Steam. . . . . . . . . . . . . . . . . . . . . . . . . . . . . . . . . . . . . . 6
Cleaning function . . . . . . . . . . . . . . . . . . . . . . . . . . . . . 6
]Causes of damage . . . . . . . . . . . . . . . . . . . . . . . . 7
General information . . . . . . . . . . . . . . . . . . . . . . . . . . . 7
Steam. . . . . . . . . . . . . . . . . . . . . . . . . . . . . . . . . . . . . . 7
7Environmental protection . . . . . . . . . . . . . . . . . . 8
Saving energy . . . . . . . . . . . . . . . . . . . . . . . . . . . . . . . 8
Environmentally-friendly disposal . . . . . . . . . . . . . . . . . 8
*Getting to know your appliance . . . . . . . . . . . . . 9
Control panel . . . . . . . . . . . . . . . . . . . . . . . . . . . . . . . . 9
Buttons and display . . . . . . . . . . . . . . . . . . . . . . . . . . . 9
Types of heating and functions . . . . . . . . . . . . . . . . .10
Temperature. . . . . . . . . . . . . . . . . . . . . . . . . . . . . . . . 11
Cooking compartment . . . . . . . . . . . . . . . . . . . . . . . . 11
_Accessories . . . . . . . . . . . . . . . . . . . . . . . . . . . . 11
Control accessories . . . . . . . . . . . . . . . . . . . . . . . . . . 11
Inserting accessories . . . . . . . . . . . . . . . . . . . . . . . . . 12
Optional accessories . . . . . . . . . . . . . . . . . . . . . . . . . 12
KBefore using for the first time. . . . . . . . . . . . . . 13
Before using for the first time . . . . . . . . . . . . . . . . . . . 13
Initial use . . . . . . . . . . . . . . . . . . . . . . . . . . . . . . . . . . 13
Cleaning the cooking compartment . . . . . . . . . . . . . . 13
Cleaning the accessories. . . . . . . . . . . . . . . . . . . . . . 14
1Operating the appliance . . . . . . . . . . . . . . . . . . 14
Switching the appliance on and off . . . . . . . . . . . . . . 14
Setting the type of heating and temperature . . . . . . . 14
Temperature display. . . . . . . . . . . . . . . . . . . . . . . . . . 14
Rapid heating. . . . . . . . . . . . . . . . . . . . . . . . . . . . . . . 15
`Steam . . . . . . . . . . . . . . . . . . . . . . . . . . . . . . . . . 15
Steam-assisted cooking . . . . . . . . . . . . . . . . . . . . . . . 15
Reheating. . . . . . . . . . . . . . . . . . . . . . . . . . . . . . . . . . 15
Filling the water tank . . . . . . . . . . . . . . . . . . . . . . . . . 15
After every steam operation . . . . . . . . . . . . . . . . . . . . 16
OTime-setting options . . . . . . . . . . . . . . . . . . . . . 17
Setting the timer . . . . . . . . . . . . . . . . . . . . . . . . . . . . .17
Setting the cooking time . . . . . . . . . . . . . . . . . . . . . . 17
Setting the end time . . . . . . . . . . . . . . . . . . . . . . . . . . 17
Setting the time . . . . . . . . . . . . . . . . . . . . . . . . . . . . . 18
Checking, changing or deleting settings . . . . . . . . . . 18
AChildproof lock. . . . . . . . . . . . . . . . . . . . . . . . . . 18
Automatic childproof lock . . . . . . . . . . . . . . . . . . . . . .18
One-time childproof lock. . . . . . . . . . . . . . . . . . . . . . .18
QBasic settings. . . . . . . . . . . . . . . . . . . . . . . . . . . 18
List of basic settings. . . . . . . . . . . . . . . . . . . . . . . . . .18
Changing the basic settings . . . . . . . . . . . . . . . . . . . .19
@Meat thermometer . . . . . . . . . . . . . . . . . . . . . . . 19
Types of heating . . . . . . . . . . . . . . . . . . . . . . . . . . . . .19
Inserting the meat probe into the food . . . . . . . . . . . .19
Core temperatures of different foods . . . . . . . . . . . . .20
Setting the core temperature . . . . . . . . . . . . . . . . . . .20
PProgrammes . . . . . . . . . . . . . . . . . . . . . . . . . . . . 21
Information on the settings . . . . . . . . . . . . . . . . . . . . .21
Selecting a dish . . . . . . . . . . . . . . . . . . . . . . . . . . . . .21
Setting a program. . . . . . . . . . . . . . . . . . . . . . . . . . . .22
FSabbath mode . . . . . . . . . . . . . . . . . . . . . . . . . . 22
Starting Sabbath mode. . . . . . . . . . . . . . . . . . . . . . . .22
oHome Connect . . . . . . . . . . . . . . . . . . . . . . . . . . 23
Setting up . . . . . . . . . . . . . . . . . . . . . . . . . . . . . . . . . .23
Remote Start. . . . . . . . . . . . . . . . . . . . . . . . . . . . . . . .23
Home Connect settings . . . . . . . . . . . . . . . . . . . . . . .23
Remote diagnostics . . . . . . . . . . . . . . . . . . . . . . . . . .24
About data protection . . . . . . . . . . . . . . . . . . . . . . . . .24
Declaration of Conformity . . . . . . . . . . . . . . . . . . . . . .24
DCleaning agent . . . . . . . . . . . . . . . . . . . . . . . . . . 24
Suitable cleaning agents . . . . . . . . . . . . . . . . . . . . . .24
Keeping the appliance clean . . . . . . . . . . . . . . . . . . .25
.Cleaning function. . . . . . . . . . . . . . . . . . . . . . . . 26
Self-cleaning . . . . . . . . . . . . . . . . . . . . . . . . . . . . . . . .26
EasyClean . . . . . . . . . . . . . . . . . . . . . . . . . . . . . . . . .27
Descaling . . . . . . . . . . . . . . . . . . . . . . . . . . . . . . . . . .27
pRails. . . . . . . . . . . . . . . . . . . . . . . . . . . . . . . . . . . 29
Detaching and refitting the rails . . . . . . . . . . . . . . . . .29
Fitting and removing the pull-out rails. . . . . . . . . . . . .29
qAppliance door. . . . . . . . . . . . . . . . . . . . . . . . . . 31
Removing and fitting the appliance door . . . . . . . . . .31
Removing and installing the door panels . . . . . . . . . .32
3Trouble shooting . . . . . . . . . . . . . . . . . . . . . . . . 34
Rectifying faults yourself . . . . . . . . . . . . . . . . . . . . . . .34
Maximum operating time . . . . . . . . . . . . . . . . . . . . . .35
Replacing the bulb in the top of the cooking
compartment . . . . . . . . . . . . . . . . . . . . . . . . . . . . . . .35

en Intended use
4
4Customer service. . . . . . . . . . . . . . . . . . . . . . . . 36
E number and FD number . . . . . . . . . . . . . . . . . . . . .36
JTested for you in our cooking studio. . . . . . . . 36
General information . . . . . . . . . . . . . . . . . . . . . . . . . .36
Baking . . . . . . . . . . . . . . . . . . . . . . . . . . . . . . . . . . . .37
Roasting, braising and grilling . . . . . . . . . . . . . . . . . .39
Ready meals . . . . . . . . . . . . . . . . . . . . . . . . . . . . . . . 44
Desserts . . . . . . . . . . . . . . . . . . . . . . . . . . . . . . . . . . .45
Acrylamide in foodstuffs. . . . . . . . . . . . . . . . . . . . . . . 45
Drying. . . . . . . . . . . . . . . . . . . . . . . . . . . . . . . . . . . . .45
Preserving . . . . . . . . . . . . . . . . . . . . . . . . . . . . . . . . .46
Prove dough. . . . . . . . . . . . . . . . . . . . . . . . . . . . . . . . 47
Defrosting. . . . . . . . . . . . . . . . . . . . . . . . . . . . . . . . . .47
Keeping warm . . . . . . . . . . . . . . . . . . . . . . . . . . . . . .48
Test dishes . . . . . . . . . . . . . . . . . . . . . . . . . . . . . . . . .48
Produktinfo
Additional information on products, accessories,
replacement parts and services can be found at
www.neff-international.com and in the online shop
www.neff-eshop.com
8Intended use
I nt ende d us e
Read these instructions carefully. Only then
will you be able to operate your appliance
safely and correctly. Retain the instruction
manual and installation instructions for future
use or for subsequent owners.
This appliance is only intended to be fully fitted
in a kitchen. Observe the special installation
instructions.
Check the appliance for damage after
unpacking it. Do not connect the appliance if it
has been damaged in transport.
Only a licensed professional may connect
appliances without plugs. Damage caused by
incorrect connection is not covered under
warranty.
This appliance is intended for domestic use
only. The appliance must only be used for the
preparation of food and drink. The appliance
must be supervised during operation. Only
use this appliance indoors.
This appliance is intended for use up to a
maximum height of 4000 metres above sea
level.
This appliance may be used by children over
the age of 8 years old and by persons with
reduced physical, sensory or mental
capabilities or by persons with a lack of
experience or knowledge if they are
supervised or are instructed by a person
responsible for their safety how to use the
appliance safely and have understood the
associated hazards.
Children must not play with, on, or around the
appliance. Children must not clean the
appliance or carry out general maintenance
unless they are at least 15 years old and are
being supervised.
Keep children below the age of 8 years old at
a safe distance from the appliance and power
cable.
Always slide accessories into the cooking
compartment the right way round.
~ "Accessories" on page 11

Important safety information en
5
(Important safety
information
I mpor t ant sa f et y i nf or mat i on
General information
:Warning – Risk of fire!
■Combustible items stored in the cooking
compartment may catch fire. Never store
combustible items in the cooking
compartment. Never open the appliance
door if there is smoke inside. Switch off the
appliance and unplug it from the mains or
switch off the circuit breaker in the fuse box.
Risk of fire!
■Loose food remnants, fat and meat juices
may catch fire. Before using the appliance,
remove the worst of the food remnants from
the cooking compartment, heating elements
and accessories.
Risk of fire!
■A draught is created when the appliance
door is opened. Greaseproof paper may
come into contact with the heating element
and catch fire. Do not place greaseproof
paper loosely over accessories during
preheating. Always weight down the
greaseproof paper with a dish or a baking
tin. Only cover the surface required with
greaseproof paper. Greaseproof paper
must not protrude over the accessories.
:Warning – Risk of burns!
■The appliance becomes very hot. Never
touch the interior surfaces of the cooking
compartment or the heating elements.
Always allow the appliance to cool down.
Keep children at a safe distance.
Risk of serious burns!
■Accessories and ovenware become very
hot. Always use oven gloves to remove
accessories or ovenware from the cooking
compartment.
Risk of burns!
■Alcoholic vapours may catch fire in the hot
cooking compartment. Never prepare food
containing large quantities of drinks with a
high alcohol content. Only use small
quantities of drinks with a high alcohol
content. Open the appliance door with care.
:Warning – Risk of scalding!
■The accessible parts become hot during
operation. Never touch the hot parts. Keep
children at a safe distance.
Risk of scalding!
■When you open the appliance door, hot
steam can escape. Steam may not be
visible, depending on its temperature. When
opening, do not stand too close to the
appliance. Open the appliance door
carefully. Keep children away.
Risk of scalding!
■Water in a hot cooking compartment may
create hot steam. Never pour water into the
cooking compartment when the cooking
compartment is hot.
:Warning – Risk of injury!
■Scratched glass in the appliance door may
develop into a crack. Do not use a glass
scraper, sharp or abrasive cleaning aids or
detergents.
Risk of injury!
■The hinges on the appliance door move
when opening and closing the door, and
you may be trapped. Keep your hands away
from the hinges.
Risk of injury!
■Components inside the appliance door may
have sharp edges. Wear protective gloves.
:Warning – Risk of electric shock!
■Incorrect repairs are dangerous. Repairs
may only be carried out and damaged
power cables replaced by one of our
trained after-sales technicians. If the
appliance is defective, unplug the appliance
from the mains or switch off the circuit
breaker in the fuse box. Contact the after-
sales service.
Risk of electric shock and serious injury!
■The cable insulation on electrical
appliances may melt when touching hot
parts of the appliance. Never bring
electrical appliance cables into contact with
hot parts of the appliance.
Risk of electric shock!
■Do not use any high-pressure cleaners or
steam cleaners, which can result in an
electric shock.
Risk of electric shock!
■A defective appliance may cause electric
shock. Never switch on a defective
appliance. Unplug the appliance from the
mains or switch off the circuit breaker in the
fuse box. Contact the after-sales service.
:Warning – Hazard due to magnetism!
Permanent magnets are used in the control
panel or in the control elements. They may
affect electronic implants, e.g. heart
pacemakers or insulin pumps. Wearers of
electronic implants must stay at least 10 cm
away from the control panel.
Halogen lamp
:Warning – Risk of burns!
The bulbs in the cooking compartment
become very hot. There is still a risk of burning
your skin for some time after they have been
switched off. Do not touch the glass cover.
Avoid contact with your skin when cleaning.

en Important safety information
6
:Warning – Risk of electric shock!
When replacing the cooking compartment
bulb, the bulb socket contacts are live. Before
replacing the bulb, unplug the appliance from
the mains or switch off the circuit breaker in
the fuse box.
Meat thermometer
:Warning – Risk of electric shock!
The insulation of an incompatible meat
thermometer may be damaged. Only use the
meat thermometer which is recommended for
this appliance.
Steam
:Warning – Risk of scalding!
■The water in the water tank may become
very hot if you continue to operate the
appliance. Empty the water tank after every
operation with steam.
Risk of scalding!
■Hot steam is generated in the cooking
compartment. Do not reach into the
cooking compartment during any operation
with steam.
Risk of scalding!
■Hot liquid may spill over the sides of the
accessory when it is removed from the
cooking compartment. Remove hot
accessories with care and always wear
oven gloves.
:Warning – Risk of injury and risk of fire!
Flammable liquids can catch fire in the
cooking compartment when it is hot
(explosion). Do not fill the water tank with any
flammable fluids (e.g. alcoholic drinks). Only
fill the water tank with water or with the
descaling solution that is recommended by us.
Cleaning function
:Warning – Risk of fire!
■Loose food remnants, fat and meat juices
may catch fire when the cleaning function is
in progress. Before you start the cleaning
function, always remove the worst of the
food residues and remnants from the
cooking compartment.Do not use the
cleaning function for cleaning accessories.
Risk of fire!
■The appliance will become very hot on the
outside during the cleaning function. Never
hang combustible objects, e.g. tea towels,
on the door handle. Do not place anything
against the front of the appliance. Keep
children away from the appliance.
Risk of fire!
■If the door seal is damaged, a large amount
of heat will be generated around the door.
Do not scrub or remove the seal. Never
operate the appliance if the seal is
damaged or missing.
:Warning – Risk of serious harm to health!
The appliance becomes very hot when the
cleaning function is in progress. The non-stick
coating on baking trays and tins is destroyed
and noxious gases are released. Never clean
non-stick baking trays or baking tins using the
cleaning function. In general, you must not use
the cleaning function for cleaning accessories.
:Warning – Risk of harm to health!
The cleaning function heats up the cooking
compartment to a very high temperature so
that food remnants left over from roasting,
grilling and baking will burn off.This process
releases vapours, which can irritate the
mucous membranes. While the cleaning
function is running, keep the kitchen well
ventilated. Do not remain in the room for long
periods. Keep children and pets away. Follow
the instructions even when using the Delayed
start function with a delayed end time.
:Warning – Risk of burns!
■The cooking compartment becomes
extremely hot during the cleaning function.
Never open the appliance door. Allow the
appliance to cool down. Keep children
away from the appliance.
Risk of burns!
■; The appliance becomes very hot on the
outside during the cleaning function. Never
touch the appliance door. Allow the
appliance to cool down. Keep children at a
safe distance.

Causes of damage en
7
]Causes of damage
Cause s of damage
General information
Caution!
■Accessories, foil, greaseproof paper or ovenware on
the cooking compartment floor: do not place
accessories on the cooking compartment floor. Do
not cover the cooking compartment floor with any
sort of foil or greaseproof paper. Do not place
ovenware on the cooking compartment floor if a
temperature of over 50 ºC has been set. This will
cause heat to accumulate. The baking and roasting
times will no longer be correct and the enamel will
be damaged.
■Aluminium foil: Aluminium foil in the cooking
compartment must not come into contact with the
door glass. This could cause permanent
discolouration of the door glass.
■Water in a hot cooking compartment: do not pour
water into the cooking compartment when it is hot.
This will cause steam. The temperature change can
cause damage to the enamel.
■Moisture in the cooking compartment: Over an
extended period of time, moisture in the cooking
compartment may lead to corrosion. Allow the
cooking compartment to dry after use. Do not keep
moist food in the closed cooking compartment for
extended periods of time. Do not store food in the
cooking compartment.
■Cooling with the appliance door open: Following
operation at high temperatures, only allow the
cooking compartment to cool down with the door
closed. Do not trap anything in the appliance door.
Even if the door is only left open a crack, the front of
nearby furniture may become damaged over time.
Only leave the cooking compartment to dry with the
door open if a lot of moisture was produced whilst
the oven was operating.
■Fruit juice: when baking particularly juicy fruit pies,
do not pack the baking tray too generously. Fruit
juice dripping from the baking tray leaves stains that
cannot be removed. If possible, use the deeper
universal pan.
■Extremely dirty seal: If the seal is very dirty, the
appliance door will no longer close properly during
operation. The fronts of adjacent units could be
damaged. Always keep the seal clean. Never
operate the appliance if the seal is damaged or
missing.
■Appliance door as a seat, shelf or worktop: Do not
sit on the appliance door, or place or hang anything
on it. Do not place any cookware or accessories on
the appliance door.
■Inserting accessories: depending on the appliance
model, accessories can scratch the door panel
when closing the appliance door. Always insert the
accessories into the cooking compartment as far as
they will go.
■Carrying the appliance: do not carry or hold the
appliance by the door handle. The door handle
cannot support the weight of the appliance and
could break.
Steam
Caution!
■Baking tins: Ovenware must be heat and steam
resistant. Silicone baking tins are not suitable for
combined operation with steam.
■Ovenware with areas of rust: Do not use any
ovenware which displays areas of rust. Even the
smallest spots of rust can lead to corrosion in the
cooking compartment.
■Hot water in the water tank: Hot water may damage
the steam system. Only fill the water tank with cold
water.
■Enamel damage: Do not start any operations when
there is water on the cooking compartment floor.
Before operation, wipe away the water from the
cooking compartment floor.
■Descaling solution: Do not allow any descaling
solution to come into contact with the control panel
or other surfaces on the appliance. This damages
the surfaces. If this does happen, remove the
descaling solution immediately with water.
■Cleaning the water tank: Do not clean the water tank
in the dishwasher. Otherwise, the water tank will be
damaged. Clean the water tank with a soft cloth and
standard washing-up liquid.

en Environmental protection
8
7Environmental protection
Envi r onment al pr ot ec t i o n
Your new appliance is particularly energy-efficient.
Here you can find tips on how to save even more
energy when using the appliance, and how to dispose
of your appliance properly.
Saving energy
■Only preheat the appliance if this is specified in the
recipe or in the tables in the operating instructions.
■Leave frozen food to defrost before placing it in the
cooking compartment.
■Use baking tins that are dark-coloured, painted black
or have an enamel coating. These absorb the heat
particularly well.
■Remove any unnecessary accessories from the
cooking compartment.
■Open the appliance door as infrequently as possible
when the appliance is in use.
■It is best to bake several cakes one after the other.
The cooking compartment stays warm. This reduces
the baking time for the second cake. You can place
two cake tins next to each other in the cooking
compartment.
■For longer cooking times, you can switch the
appliance off 10 minutes before the end of the
cooking time and use the residual heat to finish
cooking.
Environmentally-friendly disposal
Dispose of packaging in an environmentally-friendly
manner.
This appliance is labelled in accordance with
European Directive 2012/19/EU concerning
used electrical and electronic appliances
(waste electrical and electronic equipment -
WEEE). The guideline determines the
framework for the return and recycling of used
appliances as applicable throughout the EU.

Getting to know your appliance en
9
*Getting to know your
appliance
Ge t t i ng t o k n ow y o ur ap pl i an ce
In this section, we will explain the indicators and
controls. You will also find out about the various
functions of your appliance.
Note: Depending on the appliance model, individual
details and colours may differ.
Control panel
You can set your appliance's various functions on the
control panel. Below, you will see an overview of the
control panel and the layout of the controls.
Note: On some appliances, the control knobs can be
pushed in. To push the control knob in and engage it or
to release it again, turn it to the "Off" position.
Buttons and display
You can use the buttons to set various additional
functions on your appliance. You will be able to see the
values for these on the display.
--------
Ö
Ö
Ö
ÖÖ
)
#
(Buttons and display
The buttons are touch keys with sensors
underneath. Simply touch a symbol to select the
function.
The display shows symbols for active functions
and the time-setting options.
0Function selector
Use the function selector to set the heating
function or other functions.
You can turn the function selector clockwise or
anti-clockwise from the "Off" position.
8Temperature selector
Use the temperature selector to set the
temperature for the heating function or select the
setting for other functions.
You can also turn the temperature selector
clockwise or anti-clockwise. It does not have an
"Off" position.
@Water tank
Filling and emptying the water tank ~ "Filling the
water tank" on page 15
Symbol Meaning
Buttons
vTime-setting options Tap the symbol repeatedly to select
the time , timer , duration vUx
and end time .y
(
)
Minus
Plus
Reduce setting values.
Increase setting values.
ŽSteam-assisted cook-
ing
Switching on steam-assisted cooking
°Rapid heating Starts or cancels rapid heating for the
cooking compartment.
!Information Displays current temperature in the
cooking compartment.
Basic settings Basic settings e.g. activate child
safety lock.
Display
´ * Empty water tank Prompt to empty the water tank
³ * Fill water tank Prompt to fill the water tank
, * Descale Descale the appliance
* Symbol appears on the display, depending on the situation

Accessories en
11
--------
Temperature
Use the temperature selector to set the temperature in
the cooking compartment. It can also be used to select
the grill and cleaning settings, for example.
The settings appear in the display.
Notes
■The temperature can be set in 1-degree increments
up to 100 °C, and in 5-degree increments thereafter.
■For temperature settings above 275 °C for the Grill
type of heating, the appliance reduces the
temperature to approx. 250 °C after approx.
20 minutes.
Cooking compartment
Various functions in the cooking compartment make
your appliance easier to use. For example, the cooking
compartment is well lit and a cooling fan prevents the
appliance from overheating.
Opening the appliance door
If you open the appliance door when the appliance is in
operation, the appliance will continue to operate as
before.
Interior lighting
With most heating functions and other functions, the
interior lighting in the cooking compartment will remain
lit while the oven is in operation. When the function
selector is turned to bring operation to an end, the
lighting will go out.
By turning the function selector to the interior lighting
setting, you can switch on the lighting without heating
the oven. This makes it easier to clean your appliance,
for example.
Cooling fan
The cooling fan switches on and off as required. The
hot air escapes above the door.
Caution!
Do not cover the ventilation slots. Otherwise, the
appliance may overheat.
So that the cooking compartment cools down more
quickly after operation, the cooling fan continues to run
for a certain period afterwards.
_Accessories
Ac c e s s o r i e s
Your appliance is accompanied by a range of
accessories. Here, you can find an overview of the
accessories included and information on how to use
them correctly.
Control accessories
The accessories supplied may differ depending on the
appliance model.
--------
Only use original accessories. They are specially
adapted for your appliance.
You can buy accessories from the after-sales service,
from specialist retailers or online.
Note: The accessories may deform when they become
hot. This does not affect their function. Once they have
cooled down again, they regain their original shape.
©Programs For many types of food, the appliance has preprogrammed setting values that you can
use.
~ "Programmes" on page 21
Wire rack
For ovenware, cake tins and ovenproof
dishes.
For roasts, grilled items and frozen
meals.
Universal pan
For moist cakes, pastries, frozen meals
and large roasts.
It can be used to catch dripping fat when
you are grilling directly on the wire rack.
Meat thermometer
Enables precision roasting to your exact
requirements.
Its use is described in the relevant sec-
tion. ~ "Meat thermometer"
on page 19

en Accessories
12
Inserting accessories
The cooking compartment has four shelf positions. The
shelf positions are numbered from bottom to top.
Depending on the appliance model, your cooking
compartment will have one or more pull-out rails and a
clip-on pull-out rail.The pull-out rails are fixed in place
and cannot be removed.The clip-on pull-out rail can be
fitted as required to shelf supports that are not currently
being used.
Always insert accessories between the two guide rods
for the shelf position.
Accessories can be pulled out approximately halfway
without tipping. You can use the pull-out rails to pull the
accessories out further.
Make sure that the accessory is placed behind the lug
‚ on the pull-out rail.
Example in the picture: universal pan
The pull-out rails lock in place when they are fully pulled
out. This makes it easy to place the accessories in
position. To unlock the pull-out rails, use a little force to
push them back into the cooking compartment.
Notes
■Make sure that you always insert the accessories
into the cooking compartment the right way round.
■Always insert the accessories fully into the cooking
compartment so that they do not touch the appliance
door.
■Take any accessories that you will not be using out
of the cooking compartment.
■The shelf supports can be taken out of the cooking
compartment for cleaning. ~ Page 29
Locking function
The accessories can be pulled out approximately
halfway until they lock in place. The locking function
prevents the accessories from tilting when they are
pulled out. The accessories must be inserted into the
cooking compartment correctly for the tilt protection to
work properly.
When inserting the wire rack, ensure that the lug ‚ is at
the rear and is facing downwards. The open side must
be facing the appliance door and the curvature must be
facing downwards .¾
When inserting the baking tray or the universal pan,
ensure that the lug ƒ is at the rear and is facing
downwards. The sloping edge of the accessory must „
be facing towards the appliance door.
Combining accessories
You can insert the wire rack and the universal pan at
the same time to catch drops of liquid.
When inserting the wire rack, ensure that both spacers
‚ are at the rear edge. When the universal pan is
inserted, the wire rack is on top of the upper guide rod
of the shelf position.
Optional accessories
You can purchase optional accessories from the after-
sales service and specialist retailers, or on the Internet.
You will find a comprehensive range of products for
your appliance in our brochures and on the Internet.
Both availability and whether it is possible to order
online differ between countries. Please see your sales
documents for more details.
Note: Not all optional accessories are suitable for every
appliance. When purchasing, please always quote the
exact designation (E no.) of your appliance.
~ "Customer service" on page 36
D
D
D
E
E
F
D
D
D

Before using for the first time en
13
--------
KBefore using for the first
time
Be f o r e usi n g f o r t he f i r st t i me
Before you can use your new appliance, you must
make some settings. You must also clean the cooking
compartment and accessories.
Before using for the first time
Before using the appliance for the first time, ask your
water supplier about the hardness of your tap water.
Caution!
■Damage to the appliance caused by the water
hardness being set incorrectly. The appliance cannot
remind you to descale it at the right time. Ensure that
the water hardness is set correctly.
■Using unsuitable liquids may damage the appliance.
Do not use distilled water, highly chlorinated tap
water (>40 mg/l) or other liquids.
Only use cold, fresh tap water, softened water or
non-carbonated mineral water.
Notes
■If your water is very hard, we recommend that you
use softened water.
■If you only use softened water, you can set the water
hardness range to "softened".
■If you use mineral water, set the water hardness
range to "very hard".
■If you use mineral water, you must only use non-
carbonated mineral water.
Initial use
As soon as the appliance is connected to the power
supply, ‚ƒ:‹‹ flashes in the display.
Setting the time
Use the or buttons to set the current time.( )
After a few seconds, the time that has been set is
adopted.
Changing the time
1. Press the v button repeatedly until the v symbol
lights up.
2. Use the or button to change the time.( )
After a few seconds, the time that has been set is
adopted.
Setting the water hardness
Set the water hardness in the basic settings. ~ "Basic
settings" on page 18
Cleaning the cooking compartment
To eliminate the new-appliance smell, heat up the
cooking compartment without anything in it and with the
oven door closed.
1. Remove the accessories from the cooking
compartment.
2. Remove any leftover packaging, such as polystyrene
pellets, from the cooking compartment.
3. Before heating the appliance, wipe the smooth
surfaces in the cooking compartment with a soft,
damp cloth.
4. Fill the water tank. ~ "Filling the water tank"
on page 15
5. Set the specified type of heating and temperature for
steam-assisted heating. ~ "Operating the
appliance" on page 14 ~ "Steam" on page 15
6. After heating up the appliance with steam
assistance, heat it without steam assistance.
7. Set the specified type of heating and temperature for
heating without steam assistance.
Accessories
Baking and roasting shelf
Baking tray
Universal pan
Baking tray, non-stick
Universal pan, non-stick
Extra-deep pan
Steaming set for ovens
Profi pan
Lid for the Profi pan
Pizza tray
Grill tray
Ceramic brick
Glass roasting dish, 5.1 litres
Glass pan
ComfortFlex rail (1 level)*
3 x fully extendable pull-out rack*
*Accessory does not fit in every appliance, quote the E no. when order-
ing
Setting Water hardness range
mmol/l German
(°dH) French (°fH)
™‚‚ ‹ = softened - - -
™‚‚ ‚ = soft Up to 1.3 Up to 7.3 Up to 13
™‚‚ ƒ = medium 1.3–2.5 7.3–14 13–25
™‚‚ „ = hard 2.5–3.8 14–21.3 25–38
™‚‚ … = very hard Above 3.8 Above 21.3 Above 38
Steam-assisted heating
Type of heating CircoTherm steam-assisted programme ‚
¥
Temperature 200 °C
Cooking time 30 minutes
Heating without steam assistance
Type of heating Top/bottom heating ƒ

en Operating the appliance
14
8. Keep the kitchen ventilated while the appliance is
heating.
9. Switch off the appliance after the specified cooking
time.
10. Wait until the cooking compartment has cooled
down.
11. Clean the smooth surfaces with soapy water and a
dish cloth.
12. Empty the water tank and dry the cooking
compartment. ~ "After every steam operation"
on page 16
Cleaning the accessories
Clean the accessories thoroughly using soapy water
and a dish cloth or soft brush.
1Operating the appliance
Op er a t i ng t he appl i anc e
You have already learnt about the controls and how
they work. Now we will explain how to apply settings on
your appliance.
Switching the appliance on and off
Use the function selector to switch the appliance on or
off. Turning the function selector to any position other
than the "Off" position switches on the appliance. To
switch off the appliance, always turn the function
selector to the "Off" position.
Setting the type of heating and temperature
It is very easy to use the function and temperature
selector to make settings for your appliance. To find out
which type of heating is best for which type of food,
refer to the beginning of the instruction manual.
~ "Getting to know your appliance" on page 9
Example in the picture: CircoTherm Hot Air at ‚
160 °C.
1. Use the function selector to set the type of heating.
2. Use the temperature selector to set the temperature
or grill setting.
The appliance starts to heat up after a few seconds.
Note: If flashes in the display, the temperature in the œ
cooking compartment is too high for the selected
operating mode. Switch the appliance off, wait until it
has cooled down and then switch it back on again.
Once your food is cooked, turn the function selector to
the "Off" position to switch the appliance off.
Note: You can set both a cooking time and an end time
on the appliance. ~ "Time-setting options" on page 17
Changing
The heating function and temperature can be changed
at any time using the relevant selector.
If you change the heating function, the temperature will
be changed to the corresponding default value.
Temperature display
As soon as the appliance heats up, the / symbol
appears in the display. The lines are filled from the
bottom to the top as the cooking compartment heats
up.
When you are preheating the appliance, the optimal
time to place your food in the cooking compartment is
when the / symbol first goes out.
■Appliance heats up (fig. )!
■Temperature has been reached (fig. )"
Residual heat
When the appliance is switched off, the temperature
indicator shows the residual heat in the cooking
compartment. The lower the temperature drops, the
less the indicator is filled.
Notes
■The temperature indicator only shows the increasing
temperature for types of heating for which a
temperature is set. With cleaning functions, for
example, it is filled immediately.
■Due to thermal inertia, the temperature displayed
may be slightly different to the actual temperature
inside the cooking compartment.
Temperature 240 °C
Cooking time 30 minutes
Heating without steam assistance
&
21

Steam en
15
Rapid heating
With Rapid heating, you can shorten the heat-up time.
Suitable heating functions include:
■‚ CircoTherm hot air
■… Bread-baking setting
■ƒ Top/bottom heating
Only use rapid heating when a temperature of over
100 °C has been selected.
To achieve an even cooking result, do not place your
food into the cooking compartment until rapid heating is
complete.
1. Set the type of heating and temperature.
2. Touch the ° button.
The / symbol appears in the display, and the
% arrows are filled from the bottom to the top.
The oven starts to heat up after a few seconds.
Once rapid heating is complete, an audible signal
sounds and the ° symbol goes out. Place your food in
the cooking compartment.
`Steam
St e a m
Cook food with steam assistance.
:Warning – Risk of scalding!
When you open the appliance door, hot steam can
escape. Steam may not be visible, depending on its
temperature. When opening, do not stand too close to
the appliance. Open the appliance door carefully. Keep
children away.
:Warning – Risk of scalding!
The water tank may heat up while the appliance is in
operation. Allow the water tank to cool down before
emptying it.
Steam-assisted cooking
When you cook with steam assistance, steam is
introduced into the cooking compartment at various
intervals and with varying degrees of intensity. This
gives you a better cooking result.
Your food
■Becomes crispy on the outside
■Develops a glossy surface
■Is succulent and tender on the inside
■Only undergoes a minimal reduction in volume
Use the settings in the tables.~ "Tested for you in our
cooking studio" on page 36~ "Programmes"
on page 21
Steam intensity
Different intensity levels are available for steam-assisted
cooking:
■low = ™
■high = ¥
Suitable heating functions
You can switch on steam assistance for the following
heating functions:
■CircoTherm hot air ‚
■Top/bottom heating ƒ
■Circo-roasting ‡
■Bread-baking setting …
Starting
1. Fill the water tank.
2. Set the type of heating and temperature.
Note: When you cook with steam, the appliance can
be set to between 80 and 240 °C.
3. Touch the Ž button to switch on the steam intensity
you require.
The appliance starts.
Cancelling steam addition
To switch off the added steam function early, touch the
Ž button repeatedly until the steam intensity has been
deactivated.
Note: The appliance will continue to operate, but steam
will not be injected into the cooking compartment.
Finishing
To switch off the appliance, turn the function selector to
the "Off" position. ~ "After every steam operation"
on page 16
Reheating
With the "Reheat" heating function , you can gently ¿
reheat food that has already been cooked or crisp up
day-old baked goods. The added steam function is
activated automatically.
Starting
1. Wait until the cooking compartment has cooled
down.
2. Fill the water tank.
3. Use the function selector to set "Reheating ".¿
4. Use the temperature selector to set the temperature.
The appliance starts.
Finishing
To switch off the appliance, turn the function selector to
the "Off" position. ~ "After every steam operation"
on page 16
Filling the water tank
Make that you have set the correct water hardness
range. ~ "Basic settings" on page 18
:Warning – Risk of injury and risk of fire!
Only fill the water tank with water or with the descaling
solution that is recommended by us. Do not pour any
flammable liquids (e.g. alcoholic drinks) into the water
tank. Due to hot surfaces, vapours from flammable
liquids may catch fire in the cooking compartment
(explosion). The appliance door may spring open. Hot
steam and jets of flame may escape.

Time-setting options en
17
2. Pull out the water tank.
3. Unscrew the lid on the water tank.
4. Empty the water tank, clean it with detergent and
then rinse it thoroughly with clean water.
5. Dry all parts with a soft cloth.
6. Rub the seal on the lid until dry.
7. Leave the water tank to dry with the lid off.
8. Place the lid on the water tank and screw it on.
9. Put the water tank in.
Drying the cooking compartment by hand
1. Allow the appliance to cool down.
2. Remove any food remnants from the walls of the
cooking compartment.
3. Dry the cooking compartment with a sponge.
4. Leave the appliance door open for 1 hour so that the
cooking compartment dries completely.
OTime-setting options
Ti me - s e t t i ng opt i on s
Your appliance has different time-setting options.
An audible signal sounds once the cooking time or
timer duration has elapsed. You can cancel the audible
signal early by pressing the 0 button.
Note: You can change how long the audible signal
sounds for in the basic settings. ~ "Basic settings"
on page 18
Note: If you have set a time-setting option, the time
interval increases if you set a higher value. Example:
You can set a cooking time of up to one hour in one-
minute increments; for cooking times over one hour,
you can set a cooking time in five-minute increments.
Setting the timer
The timer can be set when the appliance is switched on
or off. It has its own audible signal so that you can tell
whether it is the timer duration or a cooking time that
has elapsed.
Tip: If the set timer duration is the duration for which
you want to cook your food, use the cooking time. The
appliance then switches off automatically.
1. Press the 0 button repeatedly until the Q symbol is
selected.
2. Use the and buttons to set the timer duration.( )
– Default value for the ( button = 5 minutes
– Default value for the ) button = 10 minutes
The setting is applied
automatically. The timer duration starts to count
down after a few seconds.
Note: When the set time has elapsed, a signal sounds.
To end the timer, press the 0 button.
Setting the cooking time
Once the set cooking time has elapsed, the appliance
switches off automatically. The function can only be
used in combination with a type of heating.
1. Set the type of heating and temperature.
2. Press the 0 button repeatedly until the x symbol is
selected.
3. Use the and ( ) buttons to set the cooking time.
– Default value for the ( button = 10 minutes
– Default value for the ) button = 30 minutes
The setting is applied automatically. The appliance
starts heating after a few seconds. The duration
counts down in the display.
Once the cooking time has elapsed, an audible signal
sounds and the appliance brings the operating mode to
an end automatically.
To switch off, turn the function selector back to the "Off"
position.
Setting the end time
You can delay the time at which cooking is due to
finish. You can, for example, put your food in the
cooking compartment in the morning and set the
cooking time so that it is ready at lunch time.
Notes
■Ensure that food is not left in the cooking
compartment for too long as it may spoil.
■Do not adjust the end time once the appliance is
already in operation. Otherwise the cooking result
would no longer be satisfactory.
1. Place the food onto the appropriate accessory in the
cooking compartment and close the appliance door.
2. Set the type of heating and temperature.
3. Press the 0 button repeatedly until the x symbol is
selected.
4. Use the and ( ) buttons to set the cooking time.
5. Press the 0 button repeatedly until the y symbol is
selected.
Time-setting option Use
Q Timer The timer functions like an egg timer. It runs
independently of the appliance when it is
heating and of other time-setting options, and
does not affect the appliance.
x Cooking time Once the set cooking time has elapsed, the
appliance automatically stops heating.
y End time Enter a cooking time and the required end
time. The appliance starts up automatically so
that it finishes cooking at the required time.
0 Time Set the time, e.g. after a power cut, or change
it, e.g. from summer time to winter time.

en Childproof lock
18
6. Use the and buttons to set the end time.( )
The appliance applies the settings after a few
seconds. The end time is shown in the display. Once
the appliance starts, the time begins counting down.
As soon as the end time has been reached, an audible
signal sounds and the appliance ends the operation
automatically.
To switch off, turn the function selector back to the "Off"
position.
Setting the time
You can only change the time when no other time-
setting option is active and the function selector is at
the "Off" position.
1. Press the 0 button repeatedly until the 0 symbol is
selected.
2. Use the or button to change the time.( )
The appliance applies the time after a few seconds.
Note: You can go to the basic settings to specify
whether or not the time should be shown in the display.
Checking, changing or deleting settings
1. Press the 0 button repeatedly until the appropriate
symbol is selected.
2. If required, use the or button to change the ( )
setting. To delete a time-setting option, set : .‹‹ ‹‹
The setting is applied automatically.
AChildproof lock
Chi l d pr oof l ock
Your appliance is equipped with a childproof lock so
that children cannot switch it on accidentally or change
any settings.
Notes
■You can go to the basic settings to specify whether
you want the option to set the childproof lock.
~ "Basic settings" on page 18
■If a hob is connected, it will not be affected by the
childproof lock on the oven.
Automatic childproof lock
The control panel is locked so that the appliance cannot
be switched on. To switch it on, the automatic
childproof lock must be interrupted. After the appliance
operation, the control panel is locked automatically.
To set or interrupt the automatic childproof lock, the
function selector must be in the "Off" position.
1. Press and hold the ! button for approx.
four seconds.
™‹‹ ™‹‹ or ‹ ‚ appears in the display.
2. Use the temperature selector to change the setting
as required.
– = deactivate‹
– = activate‚
3. When you have finished, press and hold the ! button
again for approx. four seconds to confirm the
settings.
The basic setting is applied.
Cancelling
1. Press and hold the v button until the 1 symbol
goes out in the display.
2. Set the type of heating and temperature.
As soon as the appliance is switched off, the automatic
childproof lock is reactivated.
One-time childproof lock
The control panel is locked so that the appliance cannot
be switched on. To switch it on, the one-time childproof
lock must be deactivated. After the appliance is
switched off, the control panel is no longer locked.
To set, activate or deactivate the one-time childproof
lock, the function selector must be at the "Off" position.
Activating
Press and hold the v button until the 1 symbol
appears in the display.
Deactivating
Press and hold the v button until the 1 symbol goes
out in the display.
QBasic settings
Ba s i c s et t i n gs
There are various settings available to you in order to
help use your appliance effectively and simply. You can
change these settings as required.
List of basic settings
Depending on the features of your appliance, not all
basic settings will be available.
Basic setting Options
™‹‹ Automatic childproof lock = no*‹
‚ = yes
™‹‚ Audible signal duration upon
completion of a cooking time
or timer duration
‚ = approx. 10 seconds
ƒ = approx. 30 seconds*
„ = approx. 2 minutes
™‹ƒ Amount of time until a setting
is applied
‚ = approx. 3 seconds*
ƒ = approx. 6 seconds
„ = approx. 10 seconds
™‹„ Button tone that sounds when
a button is touched
‹ = off
‚ = on*
™‹… Brightness of the display illu-
mination
‚ = dark
ƒ = medium*
„ = bright
™‹† Display time of day = hide the time‹
‚ = display the time*

Meat thermometer en
19
--------
Note: If your appliance is equipped with the Home
Connect function, you will find the Home Connect
settings at the end of the basic settings for your
appliance. ~ Page 23
The Home Connect settings begin with .•’
Changing the basic settings
The function selector must be set to the "Off" position.
1. Press and hold the ! button for approx.
four seconds.
The first basic setting appears in the display,
e.g. .™‹‹ ‹
2. Use the temperature selector to change the setting
as required.
3. Use the or button to continue going through all ) (
the basic settings, and use the temperature selector
if you want to change any of these settings.
4. When you have finished, press and hold the ! button
again for approx. four seconds to confirm the
settings.
This applies all of the basic settings.
You can change the basic settings again at any time.
@Meat thermometer
Mea t t her mo met e r
The meat thermometer makes precise cooking
possible. It measures the temperature inside the food.
Once the set temperature has been reached, the
appliance automatically switches itself off.
Types of heating
Not all types of heating are suitable for operation with
the meat probe.
Suitable heating functions include:
■‚ CircoTherm hot air
■¼ CircoTherm gentle
■„ Pizza setting
■‡ Circo-roasting
■ƒ Top/bottom heating
Note: If the meat probe is being used and you select an
unsuitable type of heating, a signal will sound.
Temperature
The meat thermometer measures the temperature on
the inside of the food between 30 °C and 99 °C. You
can set the desired core temperature in the display.
Inserting the meat probe into the food
Insert the meat probe into the food before placing your
dish in the cooking compartment.
Use only the meat probe supplied. You can purchase
one as a spare part from our after-sales service.
:Warning – Risk of electric shock!
The insulation of an incompatible meat thermometer
may be damaged. Only use the meat thermometer
which is recommended for this appliance.
Insertion
Insert the meat probe into the thickest part of the meat.
Make sure that the end of the probe is roughly in the
centre of the meat. It must not be inserted in the fat or
be touching the ovenware or bones.
Place the meat (preferably in an item of cookware) in
the centre of the wire shelf.
Caution!
Ensure that the meat probe's cable does not become
trapped.
To prevent the meat probe from being damaged by
excessive heat, there must be a gap of a few
centimetres between the grill element and the meat
™‹‡ Enable childproof lock activa-
tion?
‹ = no
‚ = yes*
ƒ = yes, with locked door**
™‹ˆ Interior lighting on when
appliance in operation?
‹ = no
‚ = yes*
™‹‰ Cooling fan run-on time = short‚
ƒ = medium*
„ = long
… = extra long
™‹Š Telescopic rails retrofitted?** = no* (for rails and single ‹
pull-out system)
‚ = yes (for double and triple
pull-out systems)
™‚‹ Sabbath mode available? = no*‹
‚ = yes
™‚‚ Water hardness** = softened‹
‚ = soft (up to 1.3 mmol/l)
ƒ = medium (1.3 - 2.5 mmol/
l)
„ = hard (2.5 - 3.8 mmol/l)
… = very hard* (above
3.8 mmol/l)
™‚ƒ Reset all values to factory set-
tings?
‹ = no*
‚ = yes
* Factory setting (factory settings may vary depending on the appli-
ance model)
** Not available for all appliance types.

en Meat thermometer
20
probe. The meat may expand during the cooking
process.
Turning the food
If you want to turn the food, do not remove the meat
probe. Once you have turned the food, check that the
meat probe is correctly positioned in the food.
If you remove the meat probe while the food is cooking,
all the settings will be reset and you will have to
configure them again.
Core temperatures of different foods
Do not use frozen food. The figures in the table are
given as a guide. They will depend on the quality and
composition of the food.
You can find detailed information on types of heating
and temperatures at the end of this instruction manual.
~ "Tested for you in our cooking studio" on page 36
Setting the core temperature
If you have placed your dish with the meat probe in the
cooking compartment, you can set the core
temperature.
:Warning – Risk of burns!
The cooking compartment, accessories and meat
thermometer become very hot. Always use oven gloves
to remove hot accessories and the meat thermometer
from the cooking compartment.
1. Insert the meat thermometer into the socket on the
left-hand side of the cooking compartment.
2. Close the appliance door.
Caution!
When doing so, ensure that the meat thermometer's
cable is not trapped in the appliance door. It may be
damaged.
3. Use the function selector to set an appropriate type
of heating.
The / symbol is highlighted and "--/-- °C" appears
in the display.
Note: The current core temperature of the meat is
shown on the left, while the set core temperature is
shown on the right, e.g. 15/75 °C. The current core
temperature is displayed on the left only once it
reaches 10 °C.
4. Use the or button to set the core temperature.( )
5. Use the temperature selector to set the temperature
of the cooking compartment.
Note: The set cooking compartment temperature
must be at least 10 °C higher than the core
temperature.
Caution!
Do not set the cooking compartment temperature to
higher than 250 °C. Otherwise, the meat
thermometer may become damaged.
The appliance starts heating after a few seconds.
Once the set core temperature has been reached, a
signal sounds and the appliance stops the operation
automatically. The current core temperature in the
display is the same as the set temperature, e.g.
75 °C|75 °C.
Switch the appliance off by turning the function selector
to the "Off" position. Use an oven glove to unplug the
meat thermometer from the socket in the cooking
compartment.
Changing and cancelling
You can use the or button to change the core ( )
temperature at any time. The change is applied after a
few seconds.
If you want to cancel the process, use an oven glove to
remove the meat probe from the socket and the food.
The appliance continues to heat up without a core
temperature setting.
The type of heating and the temperature of the cooking
compartment can be changed at any time using the
relevant selector. The core temperature setting is
retained.
Food Core temperature in
°C
Pork
Shoulder of pork 85-90
Fillet of pork, medium rare 62-70
Pork loin, well done 72-80
Beef
Tenderloin or sirloin, rare 45-52
Tenderloin or sirloin, medium rare 55-62
Tenderloin or sirloin, well done 65-75
Veal
Joint of veal or hock, lean 75-80
Joint of veal, shoulder 75-80
Knuckle of veal 85-90
Lamb
Leg of lamb, medium rare 60-65
Leg of lamb, well done 70-80
Saddle of lamb, medium rare 55-60

Programmes en
21
PProgrammes
Pr o g r ammes
You can prepare food very easily using the various
programmes. Simply select a programme and the
appliance will apply the optimal settings for you.
To achieve good results, the cooking compartment
must not be too hot. Allow the cooking compartment to
cool before starting the programme.
Information on the settings
■The cooking result depends on the quality of the
food and the type of cookware. For an optimal
cooking result, only use food that is fresh and in
good condition and meat that is chilled to
refrigerator temperature. For frozen food, only use
food straight out of the freezer.
■For all food, you are asked to enter the weight. The
appliance then applies the time and temperature
settings for you.
It is not possible to set weights outside the
preprogrammed weight range.
■It is therefore important that you use heat-resistant
cookware.
■Information on the right kind of cookware to use and
tips and tricks for preparing your food can be found
at the end of the instruction manual.
Steam
For the steam programme, the appliance provides you
with programmes you can use to prepare your meals
easily and professionally.
Information about the steam functions can be found in
the relevant sections. ~ "Steam" on page 15
:Warning – Risk of scalding!
When you open the appliance door, hot steam can
escape. Steam may not be visible, depending on its
temperature. When opening, do not stand too close to
the appliance. Open the appliance door carefully. Keep
children away.
Selecting a dish
The following table shows the corresponding setting
values for the listed dishes.
Programme Food Cookware Weight range Shelf posi-
tion Set weight Information
˜‚ Plaited loaf, savarin - Baking tray with
greaseproof
paper
0.6–1.5 kg 3 Dough
weight
The cooking compart-
ment must be cold to
begin with.
˜ƒ Proving dough Yeast dough Bowl on wire
rack
0.5–1.5 kg 2 Dough
weight
The cooking compart-
ment must be cold to
begin with.
˜„ Wheat bread, multi-
grain wheat bread on
a baking tray*
- Baking tray with
greaseproof
paper
0.5–2.0 kg 2 Dough
weight The cooking compart-
ment must be cold to
begin with.
˜… Wheat bread, multi-
grain wheat bread in a
loaf tin
- Cake tin,
greased and
floured
0.8–2.0 kg 2 Dough
weight The cooking compart-
ment must be cold to
begin with.
˜† White bread on a bak-
ing tray
- Baking tray with
greaseproof
paper
0.5–2.0 kg 2 Dough
weight
If you are baking two
loaves at the same time,
enter the weight of the
heavier bread
˜‡ Multi-grain rye bread - Cake tin,
greased and
floured
0.8–2.0 kg 2 Dough
weight The cooking compart-
ment must be cold to
begin with.
˜ˆ Flatbread - Baking tray with
greaseproof
paper
0.4–1.0 kg 2 Dough
weight
The cooking compart-
ment must be cold to
begin with.
˜‰ Chicken, not stuffed Ready to cook,
seasoned
Roasting dish
without lid or
universal pan
0.9–1.5 kg 2 Chicken
weight
Place in the cookware
with the breast at the top.
˜Š Chicken pieces Ready to cook,
seasoned
Roasting dish
without lid or
universal pan
0.1–0.8 kg 3 Weight of
the heavi-
est piece
-
˜‚‹ Duck, unstuffed Ready to cook,
seasoned Roasting dish
without lid or
universal pan
1.3–2.5 kg 2 Duck
weight Place in the cookware
with the breast at the top.
˜‚‚ Goose, unstuffed Ready to cook,
seasoned Roasting dish
without lid or
universal pan
2.3–4.5 kg 2 Goose
weight Place in the cookware
with the breast at the top.

en Sabbath mode
22
Setting a program
You will be guided through the entire setting process for
your chosen food.
1. Fill the water tank.
2. Use the function selector to set programs .©
˜‚ will appear on the display.
3. Use the or button to select the program.( )
4. Use the temperature selector to set the weight.
The program will start after a few seconds.
Once the cooking time has elapsed, an audible signal
will sound and the appliance will bring the operating
mode to an end automatically. To silence the signal
tone, press the 0 button.
If you are not satisfied with the cooking result, you can
cook your food for a little longer.
Adding extra cooking time
Use the ) button to set the amount of extra cooking time
you want to add. The appliance will then start cooking
the food for the extra time you set.
Cancelling
Turn the function selector to the function you require or
back to "Programs" to select the program you require.
Switching off the appliance
Turn the function selector to the "Off" position.
FSabbath mode
Sa b ba t h mo de
Sabbath mode lets you set a cooking time of over 70
hours. This enables you to keep dishes in the cooking
compartment warm without having to switch the
appliance on or off.
Starting Sabbath mode
Before you can use Sabbath mode, you will need to
activate it in the basic settings. ~ "Basic settings"
on page 18
The appliance heats from the top and the bottom. You
can set a temperature between 85 °C and 140 °C.The
cooking time can be adjusted to the nearest half hour
between 24 and 72 hours.
1. Use the function selector to set bottom heating .†
†‘› will appear on the display.
2. Use the temperature selector to set the temperature.
3. Use the and buttons to set the cooking time.( )
Note: The end time cannot be delayed.
The appliance will start heating after a few seconds. The
cooking time will count down on the display.
Once the Sabbath mode cooking time comes to an
end, the appliance will stop heating.
To switch off, turn the function selector back to the "Off"
position.
Changing and cancelling
The settings cannot be changed once the appliance
has started.
If you would like to cancel Sabbath mode, switch the
appliance off by turning the function selector to the "Off"
position.
˜‚ƒ Fillet of beef, medium Ready to cook,
seasoned
Roasting dish
without lid or
universal pan
0.8–2.0 kg 2 Meat
weight
The meat does not need
to be seared beforehand.
˜‚„ Fish, whole Ready to cook,
seasoned
Roasting dish
without lid or
universal pan
0.8–1.5 kg 2 Fish weight Place in the dish in a
swimming position.
˜‚… Shoulder of pork Boned, sea-
soned Roasting dish
without lid or
universal pan
0.8–2.5 kg 2 Meat
weight The meat does not need
to be seared beforehand.
˜‚† Joint of pork, with
crackling E.g. shoulder,
seasoned, and
scored rind
Roasting dish
without lid or
universal pan
1.0–2.0 kg 2 Meat
weight Place in the cookware
fatty side up; salt the rind
well
Programme Food Cookware Weight range Shelf posi-
tion Set weight Information

Home Connect en
23
oHome Connect
Home Co nnec t
This appliance is Wi-Fi-capable and can be remotely
controlled using a mobile device.
If the appliance is not connected to the home network,
the appliance functions in the same way as an oven
with no network connection and can still be operated
via the display.
The availability of the Home Connect function depends
on the availability of Home Connect services in your
country. Home Connect services are not available in
every country. You can find more information on this at
www.home-connect.com.
Notes
■Ensure that you follow the safety instructions in this
instruction manual and that you comply with these
even when you are away from home and are
operating the appliance via the Home Connect app.
You must also follow the instructions in the
Home Connect app.~ "Important safety
information" on page 5
■Operating the appliance directly from the appliance
always has priority. During this time, it is not possible
to operate the appliance using the Home Connect
app.
Setting up
To set up Home Connect for your appliance, you
require the following:
■Your appliance that is connected to the power
supply and switched on,
■A smartphone or tablet with a current version of the
iOS or Android operating system,
■And your appliance within range of your home
network's Wi-Fi signal.
1. Download the Home Connect app.
2. Open the Home Connect app and scan the QR
code.
3. Follow the instructions in the Home Connect app.
Remote Start
To start and operate your appliance via the Home
Connect app, you must activate remote start. If remote
start is not activated, you can only view the operating
statuses in the Home Connect app and configure your
appliance's settings.
:Warning – Risk of fire!
Combustible objects that are left in the cooking
compartment may catch fire. Never store combustible
objects in the cooking compartment.
Manual remote start
You can operate and start your appliance remotely.
However, you must activate the remote start before
each operation.
Note: If you open the appliance door 15 minutes after
remote start activation or the end of operation, remote
start is automatically deactivated.
Continuous remote start
You can always operate and start your appliance
remotely.
Activating remote start
Turn the function selector to .C
Home Connect settings
You can adjust Home Connect to suit your
requirements at any time.
Note: You will find the Home Connect settings in your
appliance's basic settings. Which settings the display
shows will depend on whether Home Connect has been
set up and whether the appliance is connected to your
home network.
Setting Selection/display
•’‹‚ Network connec-
tion
‹ = Not connected*
‚ = Connect automatically
ƒ = Connect manually
„ = Connected*
•’‹ƒ Pairing
(connecting to the
app)
‹ = Ready
‚ = Connect appliance
ƒ = Appliance is connected*
•’‹„ Wi-Fi = Switch off‹
‚ = Switch on
If Wi-Fi has been activated, you can
use the Home Connect functions. In
networked standby mode, the appli-
ance requires max. 2 W.
* Display value (not adjustable)
** Factory setting
*** If a software update is available.
**** If the after-sales service has access.

Cleaning agent en
25
--------
Notes
■Slight differences in colour on the front of the
appliance are caused by the use of different
materials, such as glass, plastic and metal.
■Shadows on the door panels, which look like
streaks, are caused by reflections made by the
interior lighting.
■Enamel is baked on at very high temperatures.This
can cause some slight colour variation. This is
normal and does not affect operation.
The edges of thin trays cannot be completely
enamelled. As a result, these edges can be rough.
This does not impair the anti-corrosion protection.
Keeping the appliance clean
Always keep the appliance clean and remove dirt
immediately so that stubborn deposits of dirt do not
build up.
:Warning – Risk of fire!
Loose food remnants, fat and meat juices may catch
fire. Before using the appliance, remove the worst of the
food remnants from the cooking compartment, heating
elements and accessories.
Area Cleaning
Appliance exterior
Stainless steel
front
Hot soapy water:
Clean with a dish cloth and then dry with a soft
cloth.
Remove flecks of limescale, grease, starch and
albumin (e.g. egg white) immediately. Corrosion
can form under such flecks.
Special stainless steel cleaning products suitable
for hot surfaces are available from our after-sales
service or from specialist retailers. Apply a very
thin layer of the cleaning product with a soft cloth.
Plastic Hot soapy water:
Clean with a dish cloth and then dry with a soft
cloth.
Do not use glass cleaner or a glass scraper.
Painted surfaces Hot soapy water:
Clean with a dish cloth and then dry with a soft
cloth.
Control panel Hot soapy water:
Clean with a dish cloth and dry with a soft cloth.
Do not use glass cleaner or a glass scraper.
If descaler comes into contact with the control
panel, wipe it off immediately. If you leave it, it may
stain the control panel.
Door panels Hot soapy water:
Clean with a dish cloth and then dry with a soft
cloth.
Do not use a glass scraper or a stainless steel
scouring pad.
Door handle Hot soapy water:
Clean with a dish cloth and then dry with a soft
cloth.
If descaler comes into contact with the door han-
dle, wipe it off immediately. Otherwise, any stains
will not be able to be removed.
Appliance interior
Enamelled sur-
faces
Hot soapy water or a vinegar solution:
Clean with a dish cloth and then dry with a soft
cloth.
Soften baked-on food remnants with a damp cloth
and soapy water. Use stainless steel wire wool or
oven cleaner to remove stubborn dirt.
Caution!
Never use oven cleaner in the cooking compart-
ment when it is still warm. This may damage the
enamel. Remove all food remnants from the cook-
ing compartment and the appliance door before
you next heat up the appliance.
Leave the cooking compartment open to dry after
cleaning it.
It is best to use the cleaning function.
~ "Cleaning function" on page 26
Note: Food residues can cause white deposits to
form. These are harmless and do not affect how
the appliance works.
Remove using lemon juice if required.
Glass cover for
the interior light-
ing
Hot soapy water:
Clean with a dish cloth and then dry with a soft
cloth.
If the cooking compartment is heavily soiled, use
oven cleaner.
Door cover made from stainless steel:
Use stainless steel cleaner. Follow the manufac-
turers' instructions. Do not use stainless steel
care products.
made from plastic:
Clean using hot soapy water and a dish cloth. Dry
with a soft cloth. Do not use glass cleaner or a
glass scraper.
Remove the door cover for cleaning.
Rails Hot soapy water:
Soak and clean with a dish cloth or brush.
Pull-out system Hot soapy water:
Clean with a dish cloth or a brush.
Do not remove the lubricant while the pull-out rails
are pulled out – it is best to clean them when they
are pushed in. Do not clean in the dishwasher.
Accessories Hot soapy water:
Soak and clean using a dishcloth or brush.
If there are heavy deposits of dirt, use a stainless
steel scouring pad.
Enamelled accessories are dishwasher-safe.
Water tank Hot soapy water:
Clean with a dish cloth and rinse thoroughly to
remove residual detergent.
Then dry with a soft cloth. Leave the water tank to
dry with the lid open. Rub the seal on the lid until
dry.
Do not clean in the dishwasher.
Meat thermome-
ter
Hot soapy water:
Clean with a dish cloth or a brush.
Do not clean in the dishwasher.

en Cleaning function
26
Tips
■Clean the cooking compartment after each use. This
will ensure that dirt cannot be baked on.
■Always remove flecks of limescale, grease, starch
and albumin (e.g. egg white) immediately.
■Use the universal pan for baking very moist cakes.
■Use suitable ovenware for roasting, e.g. a roasting
dish.
.Cleaning function
Cl eani ng f un ct i on
Your appliance is equipped with a self-cleaning
function, EasyClean and a descaling function You can
use the self-cleaning function to clean the cooking
compartment. Use the EasyClean cleaning aid for
intermediate cleaning of the cooking compartment. Dirt
is softened beforehand using EasyClean. It can then be
removed more easily. You can use the descaling
function to remove limescale from the evaporator.
Self-cleaning
Use "Self-cleaning" mode to clean the cooking
compartment.
You can choose from three cleaning cycles.
The dirtier the cooking compartment and the longer the
dirt has been there, the more powerful the cleaning
cycle should be. It is sufficient to clean the cooking
compartment every two to three months. You can clean
it more frequently if necessary. Cleaning requires
approx. 2.5-4.8 kilowatt hours.
Notes
■For safety reasons, the appliance door locks
automatically once a certain temperature is reached.
You will not be able to open it again until the lock
symbol on the display has gone out.n
■The interior lighting will not come on while the
appliance is being cleaned.
:Warning
Risk of burns!
■The cooking compartment becomes extremely hot
during the cleaning function. Never open the
appliance door. Allow the appliance to cool down.
Keep children away from the appliance.
Risk of burns!
■; The appliance becomes very hot on the outside
during the cleaning function. Never touch the
appliance door. Allow the appliance to cool down.
Keep children at a safe distance.
:Warning
Risk of harm to health!
The cleaning function heats up the cooking
compartment to a very high temperature so that food
remnants left over from roasting, grilling and baking will
burn off.This process releases vapours, which can
irritate the mucous membranes. While the cleaning
function is running, keep the kitchen well ventilated. Do
not remain in the room for long periods. Keep children
and pets away. Follow the instructions even when using
the Delayed start function with a delayed end time.
Before running the cleaning function
The cooking compartment must be empty. Remove any
accessories, cookware or shelf rails from the cooking
compartment. Please see the relevant section for
information on how to remove the rails. ~ "Rails"
on page 29
Clean the appliance door and along the edges of the
cooking compartment in the area around the seal. Do
not scrub or remove the seal.
Clean the inner door panel using hot soapy water and a
dish cloth. Dry with a soft cloth. If the cooking
compartment is heavily soiled, use oven cleaner.
:Warning
Risk of fire!
■Loose food remnants, fat and meat juices may catch
fire when the cleaning function is in progress. Before
you start the cleaning function, always remove the
worst of the food residues and remnants from the
cooking compartment.Do not use the cleaning
function for cleaning accessories.
Risk of fire!
■The appliance will become very hot on the outside
during the cleaning function. Never hang
combustible objects, e.g. tea towels, on the door
handle. Do not place anything against the front of
the appliance. Keep children away from the
appliance.
Risk of fire!
■If the door seal is damaged, a large amount of heat
will be generated around the door. Do not scrub or
remove the seal. Never operate the appliance if the
seal is damaged or missing.
Setting the self-cleaning
Before setting the cleaning function, ensure that you
have followed all instructions for preparation.
The duration of each cleaning setting is preset and
cannot be changed.
1. Use the function selector to set the cleaning
functions .2
The 2 symbol and the cleaning functions appear in
the display. The first cleaning function is selected.
2. Press the ) or ( button repeatedly until the ˜ symbol
is selected.
"PYRO" appears in the display.
3. Use the temperature selector to set the cleaning
setting.
Note: Once cleaning starts, the cleaning level can
no longer be changed.
The duration appears in the display for each setting.
The cleaning function starts after a few seconds. The
cooking time counts down on the display.
Cycle Cleaning perfor-
mance
Length of cycle
1 Gentle Approx. 1 hour and 15 minutes
2 Medium Approx. 1 hour and 30 minutes
3 Intensive Approx. 2 hours

Cleaning function en
27
Ventilate the kitchen when the cleaning function is
running.
The appliance door locks shortly after the function starts
running. The 5 symbol appears in the display.
Finishing
As soon as self-cleaning has run through, a signal
sounds. The appliance door cannot be opened until the
5 symbol goes out.
Once the cleaning function has ended
1. Allow the cooking compartment to cool down.
2. Wipe off any ash that has been left behind in the
cooking compartment and around the appliance
door with a damp cloth.
3. Refit the shelf supports or pull-out rails. ~ "Rails"
on page 29
Note: Very bad soiling may cause white deposits to
remain on the enamel surfaces. This is residue from the
food and is harmless. It does not affect performance.
You can remove these residues using lemon juice if
required.
EasyClean
The EasyClean cleaning aid makes it easier to clean the
cooking compartment. Dirt is softened beforehand by
vaporizing soapy water. It can then be removed more
easily.
:Warning – Risk of scalding!
Water in a hot cooking compartment may create hot
steam. Never pour water into the cooking compartment
when the cooking compartment is hot.
Setting the EasyClean cleaning aid
Notes
■The EasyClean š cleaning aid can only be started
once the cooking compartment is cold (room
temperature) and the appliance door is closed.
■Do not open the appliance door while it is running.
Doing this will interrupt the EasyClean š cleaning
aid.
1. Remove any accessories from the cooking
compartment.
2. Mix 0.4 litres water (not distilled water) with a drop of
washing-up liquid and pour into the middle of the
cooking compartment floor.
3. Use the function selector to set the cleaning
functions .2
The 2 symbol and the cleaning functions will
appear on the display.The first cleaning function is
highlighted.
4. Press the ) or ( button repeatedly until the š symbol
is highlighted.
"EASY" will appear on the display.
5. Turn the temperature selector.
"On" will appear on the display.
The cleaning aid will start after a few seconds.The
duration will count down on the display.
Note: The interior lighting remains off while the cleaning
aid is running.
If œ flashes on the display when the function is switched
on, this indicates that the cooking compartment has not
completely cooled down. Switch off the appliance. Wait
until the cooking compartment has cooled down and
switch the cleaning aid back on.
Once the cleaning aid has run through to the end, an
audible signal will sound.
Subsequent cleaning
The remaining water in the cooking compartment must
be removed promptly. Do not leave the remaining water
in the cooking compartment for a long time (e.g.
overnight). The appliance must not be operated when
the cooking compartment is still wet or damp.
1. Open the appliance door and remove the remaining
water with an absorbent sponge cloth.
2. Clean the smooth surfaces in the cooking
compartment with a dish cloth or a soft brush.
Stubborn residues can be removed using a stainless
steel scouring pad.
3. Remove limescale with a cloth soaked in vinegar.
Then wipe with clean water and rub dry with a soft
cloth (including under the door seal).
4. To switch off, turn the function selector to the zero
setting.
5. Depending on the appliance type, open or lower the
appliance door to the stop position (approx. 30°)
and leave it open for approx. one hour to allow the
enamel surfaces in the cooking compartment to dry
thoroughly. Alternatively, you can also run the rapid
drying function for the cooking compartment.
Running the rapid drying function for the cooking
compartment
1. Once the cleaning aid has been run through,
depending on the appliance type, open or lower the
appliance door to the stop position (approx. 30°).
2. Start CircoTherm hot air at 50 °C.
3. After five minutes, switch off the appliance and close
the appliance door.
Removing heavy deposits of dirt
You have several options for removing particularly
stubborn deposits of dirt.
■Leave the soapy water to work for some time before
starting the cleaning aid.
■Rub soapy water onto the dirt on the smooth
surfaces before starting the cleaning aid.
■Repeat the cleaning aid after the cooking
compartment has cooled down.
Descaling
To ensure that your appliance continues to operate
correctly, it must be descaled regularly.
The frequency with which the appliance must be
descaled depends on the hardness of the water used.
The , symbol appears on the display if the appliance
needs to be descaled.
There are four steps in the descaling programme. For
hygiene reasons, the descaling programme must be
run through completely before the appliance is ready

en Cleaning function
28
for operation again. Descaling takes around 90–
110 minutes in total:
■First step (1_4): Descale (approx. 65 minutes), then
empty and refill the water tank
■Second step (2/4): Rinse (approx. 9 minutes), then
empty and refill the water tank
■Third step (3_4): Rinse (approx. 9 minutes), then
empty and refill the water tank
■Fourth step (4_4): Rinse (approx. 9 minutes), then
empty and dry the water tank
Start descaling
Caution!
■Risk of damage to the appliance: Only use the liquid
descaler recommended by us for the descaling
programme. The length of time for which the
descaler is left to work is based on this product.
Using other descalers may damage the appliance.
Descaler order no. 311 680
■Descaling solution: Do not allow any descaling
solution or descaler to come into contact with the
control panel or other surfaces on the appliance.
This may damage the surfaces. If this does happen,
remove the descaling solution immediately with
water.
Note: Do not pour more than 150 ml of liquid into the
water tank throughout the descaling process.
First step (1_4)
1. Mix 100 ml water with 50 ml liquid descaler to make
a descaling solution.
2. Pour the descaling solution into the water tank and
insert the water tank.
3. Use the function selector to set the cleaning
functions .2
The 2 symbol and the cleaning functions appear on
the display. The first cleaning function is highlighted.
4. Press the ) or ( button repeatedly until the , symbol
is highlighted.
"’‘–’" appears on the display.
5. Turn the temperature selector.
"‹Ÿ" appears on the display. Descaling starts after a
few seconds.
6. After operation of the descaling programme, "2/4"
appears on the display. Remove the water tank and
clean thoroughly with water.
Second step (2/4)
1. Fill the water tank with 150 ml water and insert it.
2. After operation of the rinse cycle, "3_4" appears on
the display. Remove the water tank and clean
thoroughly with water.
Third step (3/4)
1. Fill the water tank with 150 ml water and insert it.
2. After operation of the rinse cycle, "4_4" appears on
the display. Remove the water tank and clean
thoroughly with water.
Fourth step (4/4)
1. Fill the water tank with 150 ml water and insert it.
2. After operation of the rinse cycle, "00:00" appears
on the display and the operation ends. Remove the
water tank and clean thoroughly with water.
After descaling
1. Dry the water tank.
2. Reinsert the water tank.
Descaling is complete and the appliance is ready for
use again.
Descaling programme interrupted
If descaling is interrupted (for example, due to a power
failure or because the appliance is switched off), the
descaling symbol appears on the display after the
appliance is switched back on. You will be prompted to
rinse three times. The appliance cannot be used for
other operations until the third rinse cycle comes to an
end. If you set another operation, " " (Cleaning) ’‚Ÿ
appears on the display. Repeat the interrupted
descaling programme after rinsing.
1. Empty the water tank and clean thoroughly with
water.
2. Insert the empty water tank.
3. Use the function selector to set descaling.
4. Turn the temperature selector.
"‹Ÿ" appears on the display. After a few seconds,
the remaining liquid pumped back.
5. Empty the water tank and clean thoroughly with
water.
6. To rinse the steam system, run the three rinse cycles
in the descaling programme.
7. Restart descaling.

en Rails
30
Removing the pull-out rails
1. Push on the tab marked "PUSH" behind the end of
the rail, and push the rail away from you (fig. !).
2. Keep the "PUSH" tab pushed back and swing the rail
out (fig. )."
3. Pull the rail out towards you until the retainer at the
back unhooks (fig. ).#
4. Remove the pull-out rail (fig. $).
Use washing-up liquid and a sponge to clean the pull-
out rails. For stubborn dirt deposits, use a brush.
Fitting the pull-out rails
The rails are designed to fit on either the right- or the
left-hand side (not both).Make sure when you fit them
that you can pull them out towards you.
1. The rail must sit between the two bars (fig. !).
2. Push the retainer at the back in between the lower
and the upper bar (fig. )."
3. Push on the "PUSH" tab and swing the rail in so that
the retainer ends up between the two bars (fig. ).#
4. Release the "PUSH" tab; the retainer will hook into
place (fig. $). Then pull the rail out as far as it will go
and slide it back in.
1
2
I
1
2

Appliance door en
31
qAppliance door
Appl i anc e do or
With good care and cleaning, your appliance will retain
its appearance and remain fully functional for a long
time to come. This will tell you how to remove the
appliance door and clean it.
Removing and fitting the appliance door
To clean the door panels, you can detach the appliance
door.
:Warning – Risk of injury!
The hinges of the appliance door may snap shut with
great force. Always fully turn the two locks for fitting and
removing the appliance door.
:Warning – Risk of injury!
If the appliance door has been removed without turning
both locking levers to their limit stops, the hinge may
snap shut. Do not reach into the hinge. Call the after
sales service.
Detaching the appliance door
1. Open the left- and right-hand door locks (fig. !).
To do this, hold the screwdriver horizontally and use
it to push the door lock (black component) on each
side of the door all the way up (fig. )."
Tip: Use a torch to light up the gap so that you can
see the door locks.
Door lock closed (fig. )#
Door lock open (fig. )$
2. Open the appliance door approx. 45° (fig. %).
3. Using a coin, turn both the left- and right-hand locks
on the inside of the appliance at the bottom as far as
they will go.
Left-hand lock: Clockwise
Right-hand lock: Anti-clockwise
The arrows will now be pointing to one another and
the lock will click into place (fig. &).
Left-hand lock secured (fig. ')
Right-hand lock released (fig. ()
4. Move the appliance
door back and forth until you hear a quiet click
(fig. ).)
The appliance door is now in the lock position.You
will only be able to move it slightly.
Caution!
Risk of damaging the door hinges. Do not force the
appliance door open or closed when it is in the lock
position.
If you have forced the appliance door open or
closed when it was in the lock position, please
contact our after-sales service.
2
1I
I
I

en Trouble shooting
34
5. Push down on the intermediate panel around ƒ, slide
the holder „ in at an angle and push down until it
clicks into place (Fig. &).
The holder has been inserted (Fig. ).'
6. Insert the inner glass into the mounting rail at an …
angle towards the back (Fig. ).(
7. Push the inner glass downwards until it clicks into
place (Fig. )).
3Trouble shooting
Tr ou bl e s hoot i ng
If a fault occurs, there is often a simple explanation.
Before calling the after-sales service, please refer to the
fault table and attempt to correct the fault yourself.
Rectifying faults yourself
You can often easily rectify technical faults with the
appliance yourself.
If a dish does not turn out exactly as you wanted, you
can find useful cooking tips and instructions at the end
of this instruction manual. ~ "Tested for you in our
cooking studio" on page 36
Fault Possible
cause
Notes/remedy
The appliance is
not working.
Defective cir-
cuit breaker.
Check the circuit breaker in the
fuse box.
Power failure Check whether the kitchen light
or other kitchen appliances are
working.
F
E
G
G
Steam-assisted
operation does
not start.
Water tank is
empty.
Fill the water tank.
Descaling
locks opera-
tions with
steam.
Carry out descaling.
Defective
steam sys-
tem.
Call after-sales service.
Cooked dishes
turn out too moist
or too dry when
cooking with
steam-assisted
applications
The wrong
steam inten-
sity was
selected
Select a higher or lower steam
intensity
Steam escapes
from the ventila-
tion slots during
cooking
Normal proce-
dure
Not possible
The "fill water
tank" symbol
lights up continu-
ously
No water in
the water
tank.
Fill the water tank.
The water
tank has not
been put in
fully.
Put the water tank in fully.
The sensor is
defective.
Call after-sales service.
The water
tank is leak-
ing.
Order a new water tank.
The time is flash-
ing on the display.
Power failure. Reset the time.
After switching on
an operating
mode, flashes œ
in the display.
The appliance
has not
cooled down
sufficiently.
Switch off the appliance, allow it
to cool down and switch the oper-
ating mode on again.
No settings can
be made on the
appliance. The
symbol lights 1
up in the display.
The child-
proof lock is
activated.
Press and hold the v button until
the 1 symbol goes out in the dis-
play. Settings can be made on the
appliance.
The childproof lock can be deacti-
vated in the basic settings.
~ "Basic settings" on page 18
The appliance
door cannot be
opened. The
symbol lights 1
up in the display.
The appliance
door is locked
with the child-
proof lock.
Press and hold the v button until
the 1 symbol goes out in the dis-
play. Settings can be made on the
appliance.
The childproof lock with door lock
can be switched off in the basic
settings. ~ "Basic settings"
on page 18
The appliance
door cannot be
opened. The
symbol lights 5
up in the display.
The appliance
door is locked
due to the
cleaning func-
tion.
Wait until the cooking compart-
ment has cooled and the
5 symbol goes out.

Trouble shooting en
35
--------
:Warning – Risk of injury!
Incorrect repairs are dangerous. Do not attempt to
repair the appliance yourself. Repairs must only be
carried out by one of our trained after-sales engineers. If
the appliance is defective, call the after-sales service.
:Warning – Risk of electric shock!
Incorrect repairs are dangerous. Repairs may only be
carried out and damaged power cables replaced by
one of our trained after-sales technicians. If the
appliance is defective, unplug the appliance from the
mains or switch off the circuit breaker in the fuse box.
Contact the after-sales service.
Error messages on the display
If an error message with "“" appears on the display,
e.g. - , touch the button. This will reset the “‹† „ƒ v
error message. Reset the time, if necessary.
If the fault was a one-off, you can continue to use your
appliance as normal. If the error message appears
again, call our after-sales service and quote the exact
error message and the E no. of your appliance.
~ "Customer service" on page 36
Maximum operating time
If you do not change the settings on your appliance for
several hours, the appliance will stop heating
automatically. This prevents unintentional continuous
operation.
When the maximum operating time is reached depends
on the various different settings that have been
configured on the appliance.
Maximum operating time reached
”‰ appears on the display.
Turn the function selector to the "Off" position. You can
configure new settings if required.
Tip: To prevent the appliance from switching off when
you do not want it to, e.g. with an extremely long
cooking time, you should always set a cooking time.
The appliance will heat up until the set cooking time has
elapsed.
Replacing the bulb in the top of the cooking
compartment
If the cooking compartment light bulb fails, it must be
replaced. Heat-resistant, 40 watt, 230 V halogen bulbs
are available from the after-sales service or specialist
retailers.
When handling the halogen bulb, use a dry cloth. This
will increase the service life of the bulb. Only use these
bulbs.
:Warning – Risk of electric shock!
When replacing the cooking compartment bulb, the
bulb socket contacts are live. Before replacing the bulb,
unplug the appliance from the mains or switch off the
circuit breaker in the fuse box.
:Warning – Risk of burns!
The appliance becomes very hot. Never touch the
interior surfaces of the cooking compartment or the
heating elements. Always allow the appliance to cool
down. Keep children at a safe distance.
1. Place a tea towel in the cold cooking compartment
to prevent damage.
2. Turn the glass cover anti-clockwise to remove it
(figure ).!
3. Pull out the bulb – do not turn it (figure ").
Insert the new bulb, making sure that the pins are in
the correct position. Push the bulb in firmly.
The "descale"
symbol appears
in the display.
~ "Getting to
know your
appliance"
on page 9
Build-up of
limescale in
appliance.
Run the descaling programme in
full. ~ "Cleaning function"
on page 26
’‚Ÿ appears in
the display. The power
supply has
been discon-
nected or the
appliance has
been
switched off
during the
descaling pro-
cess.
Run "Descaling interrupted" in
full. ~ "Cleaning function"
on page 26
“†‚ ƒƒ-
appears in the
display.
There is too
much water in
the steam
system. The
water cannot
be pumped
back into the
water tank.
Empty the water tank then insert
it. Touch the v button. Reset the
time. Switch off the appliance and
switch it back on again. Run "Des-
caling interrupted" in full.
~ "Cleaning function"
on page 26
The appliance is
not heat-
ing."DEMO" is
shown on the dis-
play.
Demo mode
is activated. Briefly disconnect the appliance
from the mains (switch off the cir-
cuit breaker in the fuse box) and
then deactivate demo mode
within approx. 5 minutes by
changing the basic setting ™‚„
to . ‹ ~ "Basic settings"
on page 18
Home Connect
does not work
correctly.
Go to www.home-connect.com
2
1

en Customer service
36
4. Screw the glass cover back on.
Depending on the appliance model, the glass cover
may have a sealing ring. If the glass cover has a
sealing ring, put it back in place before screwing the
cover back on.
5. Remove the tea towel and switch on the circuit
breaker.
4Customer service
Cust omer s er v i c e
Our after-sales service is there for you if your appliance
needs to be repaired. We will always find an
appropriate solution, also in order to avoid after-sales
personnel having to make unnecessary visits.
E number and FD number
When calling us, please give the full product number (E
no.) and the production number (FD no.) so that we can
provide you with the correct advice. The rating plate
bearing these numbers can be found on the base of the
appliance when you open the appliance door.
To save time, you can make a note of the number of
your appliance and the telephone number of the after-
sales service in the space below, should it be required.
Please note that a visit from an after-sales service
engineer is not free of charge in the event that the
appliance has been misused, even during the warranty
period.
Please find the contact data of all countries in the
enclosed customer service list.
To book an engineer visit and product advice
Rely on the professionalism of the manufacturer. You
can therefore be sure that the repair is carried out by
trained service technicians who carry original spare
parts for your appliances.
JTested for you in our
cooking studio
Tes t ed f or y ou i n our c ook i ng s t u di o
Here, you can find a selection of dishes and the ideal
settings for them. We will show you which type of
heating and temperature are best suited to your dish.
You will get information on suitable cooking
accessories and the height at which they should be
placed in the oven. You will also get tips about
cookware and preparation methods.
Note: A lot of steam can build up in the cooking
compartment when cooking food.
Your appliance is very energy-efficient and radiates very
little heat to its surroundings during operation. Due to
the high difference in temperature between the
appliance interior and the external parts of the
appliance, condensation may build up on the door,
control panel or adjacent kitchen cabinet panels. This is
a normal physical phenomenon. Condensation can be
reduced by preheating the oven or opening the door
carefully.
During operation with steam assistance, it is desirable
that there is a significant build-up of steam in the
cooking compartment. Wipe the cooking compartment
clean after cooking, once it has cooled off.
Caution!
Never pour water into the hot cooking compartment or
place cookware containing water onto the bottom of the
cooking compartment. The change in temperature can
cause damage to the enamel.
General information
Recommended setting values
The table lists the optimal heating type for various types
of food. The temperature and cooking time are
dependent on the quantity of food and the recipe.
Settings ranges are indicated for this reason. Try using
the lower values to start with. A lower temperature will
result in more even browning. You can use a higher
setting next time if necessary.
Note: Cooking times cannot be reduced by using
higher temperatures. The food would only be cooked
on the outside, but would not be fully baked in the
middle.
The setting values apply to food that is placed into a
cold cooking compartment. By doing so, you can make
energy savings of up to 20 per cent. If you preheat the
oven, you can reduce the indicated baking times by
several minutes.
Preheating is necessary for selected food, and this is
indicated in the table. Do not place your food or
accessories into the cooking compartment until it has
finished preheating.
If you wish to follow one of your own recipes when
baking, you should use the setting values listed for
similar food in the table as reference. Additional
information can be found in the baking tips listed after
the settings tables.
E no. FD no.
After-sales service O
GB 0344 892 8989
Calls charged at local or mobile rate.
IE 01450 2655
0.03 € per minute at peak. Off peak 0.0088 €
per minute.
=1U)'(1U
7\SH

Tested for you in our cooking studio en
37
Remove unused accessories from the cooking
compartment. This will ensure that you achieve the best
possible cooking results and energy savings of up to
20 per cent.
Accessories
Only use original accessories supplied with your
appliance. These have been tailored to the cooking
compartment and the operating modes of your
appliance.
Ensure that you always use suitable accessories and
that they are placed in the oven the right way around.
~ "Accessories" on page 11
Greaseproof paper
Only use greaseproof paper that is suitable for the
selected temperature. Always cut greaseproof paper to
size.
CircoTherm gentle heating function
CircoTherm gentle is an intelligent heating function that
allows you to gently cook meat, fish and baked items.
The appliance optimally controls the supply of energy to
the cooking compartment. The food is cooked in
phases using residual heat. This means that it remains
more succulent and browns less. Depending on the
method of preparation and the type of food, it is
possible to save energy. If you open the appliance door
before the food has finished cooking or if you preheat
the appliance, you may not be able to achieve this
result.
Only use genuine accessories for your appliance.
These have been tailored to the cooking compartment
and the heating functions of your appliance.Remove
any accessories that are not being used from the
cooking compartment.
Place the food into the empty cooking compartment
before the oven is heated up. Always keep the
appliance door closed when cooking.Only cook on one
level when using this function.
The CircoTherm gentle heating function is used to
measure both the energy consumption in air
recirculation mode and the energy efficiency class.
Steam-assisted baking
Certain dishes (e.g. yeast-risen pastries) get a more
crispy crust and a more glossy surface if baked with the
steam-assisted cooking mode. The baked item does
not dry out as much.
Steam-assisted baking is only possible on one level.
Some dishes turn out best if they are cooked in multiple
stages. These are indicated in the table.
Baking
Here, you can find recommended settings for many
dishes.
In addition, refer to the information in the section on
proving dough.
Baking on one level
When baking on one level, use the following shelf
positions:
■Tall baked goods or tin on wire rack: Level 2
■Flat baked goods or goods in a baking tray: Level 3
Baking on two or more levels
Use CircoTherm. Items that are placed in the oven on
baking trays or in baking tins/dishes at the same time
will not necessarily be ready at the same time.
Baking on two levels:
■Universal pan: Level 3
Baking tray: Level 1
■Baking tins/dishes on the wire rack
First wire rack: Level 3
Second wire rack: Level 1
Baking on 3 levels:
■Baking tray: Level 4
Universal pan: Level 3
Baking tray: Level 1
You can cut energy use by up to 45% by preparing
items at the same time. Position baking tins/dishes
either next to one another or offset on different shelves
so that they are not directly one above the other in the
cooking compartment.
Baking tins
For optimal cooking results, we recommend using dark-
coloured metal baking tins.
Tinplate baking tins, ceramic dishes and glass dishes
extend baking time and mean that the baked item will
not brown evenly.
If you are using silicone moulds, follow the
manufacturer's instructions and recipes. Silicone
moulds are often smaller than normal baking tins.
Quantity and recipe specifications may vary.
Steam-assisted baking
Certain types of baked item (e.g. yeast-risen pastries,
bread and bread rolls) get a more crispy crust and a
more glossy surface if baked with steam-assisted
cooking. The baked item does not dry out as much.
Steam-assisted baking is only possible on one level.
Some dishes turn out best if they are cooked in multiple
stages. These are indicated in the table.
The baking tins must be resistant to heat and steam for
preparing with steam-assisted cooking.

en Tested for you in our cooking studio
38
Baking
Baking on one level
Baking on two or more levels
Food Dish Shelf po-
sition
Type of
heating
Temperature
in °C
Steam in-
tensity
Time in minutes
Victoria sponge cake 2x Ø20cm tins 2 150-160 20-35‚ ™
Light fruit cake High Ø20cm tin 2 150-160 40‚ ™
- 50-70
Rich fruit cake High Ø23cm tin 2 140-150 - 180-210¼
Fruit crumble Flat glass dish 3 160-180* - 30-40‚
Sponge Cake (fatless), 3 eggs Springform cake tin Ø26cm 2 150-160 30-35‚ ™
Swiss roll Swiss roll tin 3 180-190* 10-15‚ ™
Fruit Pie Plate Ø20cm or pie tin 2 160-170 - 60-70„
Quiche Quiche tin (dark coated) 3 180-200 - 40-55¼
(White) Bread Loaf tin (1x900g or 2x 450g) 2 190-200 15… ™
- 15-25
Scones Baking sheet on wire rack 3 190-200* - 10-15ƒ
Biscuits Baking sheet on wire rack 3 140-160* - 10-20‚
Small Cakes 12-cup-tin 3 150** - 25-35ƒ
Puff pastry slices Universl pan 3 200-220* 15-25… ™
Jam tarts 12-cup-tin 3 170-190* - 15-25‚
Meringue Baking sheet on wire rack 3 80-90* - 120-150‚
Pavlova Baking sheet on wire rack 3 100-110*** - 150-180‚
Choux pastry Universal pan 3 200-220* 25-35… ™
Meat Pie rectangular pie tin 2 170-180 30ƒ ™
- 20-30
Yorkshire pudding 12-cup-tin 3 200-220**** - 15-25„
Jacket potatoes Universal pan 3 180-190 20‚ ¥
- 35-45
Pizza, homemade Baking tray 3 210-230 - 20-30…
Pizza, homemade, thin base Pizza tray 2 250-270 - 8-13„
* Preheat; do not use rapid heat-up function
** Preheat for 5 mins; do not use rapid heat-up function
*** Preheat with Hotair 180 °C
**** Preheat for 20 mins
Food Dish Shelf posi-
tion
Type of heat-
ing
Temperature
in °C
Time in minutes
Victoria sponge cake, 2 levels 4x Ø20cm tins 3+1 150-160* 20-30‚
Scones, 2 levels 2 baking sheets on 2 wire racks 3+1 160-180* 10-20‚
Biscuits, 2 levels 2 baking sheets on 2 wire racks 3+1 140-160* 15-25‚
Biscuits, 3 levels 3 baking sheets on 3 wire racks 4+3+1 140-160* 15-25‚
Small Cakes, 2 levels 2x 12-cup-tins 3+1 150** 20-30‚
Puff pastry slices, 2 levels Universal pan + baking tray 3+1 170-190* 25-45‚
Puff pastry slices, 3 levels Baking trays + universal pan 4+3+1 170-190* 25-45‚
Jam tarts, 2 levels 2x 12-cup-tins 3+1 170-190* 15-25‚
Meringue, 2 levels 2 baking sheets on 2 wire racks 3+1 90-100* 100-130‚
* Preheat
** Preheat for 5 mins; do not use rapid heat-up function

Tested for you in our cooking studio en
39
Baking tips
Roasting, braising and grilling
Here, you will find information on roasting, braising and
grilling poultry, meat and fish. The settings tables list the
optimal settings for a wide range of dishes.
Poultry
When cooking duck or goose, pierce the skin on the
underside of the wings. This allows the fat to run out.
If using duck breast, score the skin. Do not turn duck
breasts.
Add some liquid to the poultry in the dish. Cover the
base of the ovenware with approx. 1-2 cm of liquid.
When you turn poultry, ensure that the breast side or
the skin side is underneath at first.
Poultry will turn out particularly crispy and brown if you
baste it towards the end of the roasting time with butter,
salted water or orange juice.
Jacket potatoes, 2 levels Universal pan + baking tray 3+1 150-170* 75-90‚
(White) Bread, 2 levels 4x loaf tins 3+1 170-190* 30-40‚
Pizza, homemade, 2 levels Universal pan + baking tray 3+1 180-200 35-45‚
Food Dish Shelf posi-
tion Type of heat-
ing Temperature
in °C Time in minutes
* Preheat
** Preheat for 5 mins; do not use rapid heat-up function
You want to find out whether the
baked item is completely cooked in
the middle.
Push a cocktail stick into the highest point on the baked item. If the cocktail stick comes out clean with no
dough residue, the baked item is ready.
The baked item collapses. Next time, use less liquid. Alternatively, set the temperature 10 °C lower and extend the baking time. Ad
to the specified ingredients and preparation instructions in the recipe.
The baked item has risen in the mid-
dle but is lower around the edge. Only grease the base of the springform cake tin. After baking, loosen the baked item carefully with a knife.
The fruit juice overflows. Next time, use the universal pan.
Small baked items stick to one
another during baking.
There should be a gap of approx. 2 cm around each item. This gives enough space for the baked items to
expand well and brown on all sides.
The baked item is too dry. Set the temperature 10 °C higher and shorten the baking time.
The baked item is too light in colour
overall.
If the shelf position and the accessories are correct, then you should increase the temperature if necessary or
extend the baking time.
The baked item is too light on top, and
too dark underneath. Bake the cake one level higher in the oven the next time.
The baked item is too dark on top,
and too light underneath. Bake the cake one level lower in the oven the next time. Select a lower temperature and extend the baking
time.
The baked item is too dark in a tin or
loaf tin.
Place the baking tray in the middle of the accessory, not directly against the back wall.
The baked item is too dark in colour
overall.
Select a lower temperature next time and extend the baking time if necessary.
The baked item is unevenly browned. Select a slightly lower temperature.
Protruding greaseproof paper can affect the air circulation. Always cut greaseproof paper to size.
Ensure that the baking tin does not stand directly in front of the openings in the cooking compartment back
wall.
When baking small items, you should use similar sizes and thicknesses wherever possible.
You were baking on several levels.
The items on the top baking tray are
darker than those on the lower baking
tray.
Always select hot air when baking on several levels. Baked items that are placed into the oven on trays or i
baking tins at the same time will not necessarily be ready at the same time.
The baked item looks good, but is not
cooked properly in the middle.
Use a lower temperature and bake slightly longer; if necessary, add slightly less liquid. For baked items with
moist topping, bake the base first. Sprinkle it with almonds or breadcrumbs and then place the topping on to
The baked item cannot be turned out
of the dish when it is turned upside
down.
Allow the baked item to cool down for 5 to 10 minutes after baking. If it still sticks, carefully loosen it arou
the edges again using a knife. Turn the baked item upside down again and cover it several times with a cold
wet cloth. Next time, grease the baking tin and sprinkle with breadcrumbs.

en Tested for you in our cooking studio
40
Meat
Baste lean meat with fat as required or cover it with
strips of bacon. Score the rind crosswise. If you turn the
joint when cooking it, ensure that the rind is underneath
to begin with.
When the joint is ready, turn off the oven and allow it to
rest for a further 10 minutes in the cooking
compartment, keeping the door closed. This helps
distribute the meat juices more evenly. Wrap the joint in
aluminium foil if necessary. The recommended resting
time is not included in the indicated cooking time.
Fish
Whole fish does not need to be turned.Place the whole
fish into the cooking compartment in its swimming
position, with the dorsal fin at the top. Placing half a
potato or a small oven-proof container in the stomach
cavity of the fish will keep it upright.
You can tell when the fish is cooked because the dorsal
fin can be removed easily.
Roasting and braising on the wire rack
On the wire rack, poultry and meat will become very
crispy on all sides.Roasting on the wire rack works
particularly well for large poultry or for multiple pieces at
the same time.
Add up to 1/2 litre of water to the universal pan,
depending on the size and type of meat. Any dripping
fat and meat juices will be caught. You can make a
sauce from these juices. This will also result in less
smoke being produced and keep the cooking
compartment cleaner.
Slide the universal pan into the oven at the indicated
shelf position with the wire rack on top. Ensure that the
wire rack is correctly positioned on the universal pan.
Roasting and braising in cookware
:Warning – Risk of injury from shattering glass!
Place hot glass cookware on a dry mat after cooking.
The glass may crack if placed on a cold or wet surface.
:Warning – Risk of scalding!
Very hot steam may escape when opening the lid after
cooking. Lift the lid at the rear, so that the hot steam
can escape away from you.
It is more convenient to roast and braise meat in
cookware. You can take the joint out of the cooking
compartment more easily in the cookware, and prepare
the sauce in the cookware itself.
Only use cookware that is suitable for use in an oven.
Check whether the cookware fits in the cooking
compartment.
It is best to use glass cookware. Place hot glass
cookware onto a dry mat after cooking. The glass may
crack if placed on a cold or wet surface.
When roasting poultry and other meat, add a little liquid.
The liquid in the cookware evaporates as the meat
roasts. Carefully pour in more liquid if required.
Shiny roasting dishes made from stainless steel or
aluminium reflect heat like a mirror and are therefore
not particularly suitable. The meat cooks more slowly
and does not brown so well. Use a higher temperature
and/or a longer cooking time.
Follow the manufacturer's instructions for your roasting
dishes.
Roasting in uncovered cookware
It is best to use a deep roasting dish for roasting poultry
and meat. Place the dish onto the wire rack. If you do
not have any suitable cookware, use the universal pan.
Braising in covered cookware
Cooking with covered cookware keeps the cooking
compartment considerably cleaner. Ensure that the lid
fits well and closes properly. Place the cookware onto
the wire rack.
The distance between the meat and the lid should be at
least 3 cm, as the meat may expand.
Very hot steam may escape when the lid is opened
after cooking. Lift the lid at the rear, so that the hot
steam can escape away from you.
To braise the meat, sear it first as required. Add water,
wine, vinegar or a similar liquid to the braising liquid.
Cover the bottom of the cookware with at least 2 cm of
liquid.
The liquid in the cookware evaporates as the meat
roasts. Carefully pour in more liquid if required.
Grilling flat items
Flat pieces of poultry, meat and fish, such as steaks,
drumsticks and burgers, can be cooked effectively
using the "Grill" heating function. It is also excellent for
toasting bread.
Grilling
Keep the appliance door closed when using the grill.
Never grill with the appliance door open.
Place the food to be grilled on the wire rack. In addition,
slide the universal pan in at least one shelf position
lower, with the slanted edge facing the appliance door.
Any dripping fat will be caught.
When grilling, try wherever possible to use pieces of
food which are of a similar thickness and weight. This
will allow them to brown evenly and remain succulent
and juicy. Place the food to be grilled directly onto the
wire rack.
Use tongs to turn the pieces of food you are grilling. If
you pierce the meat with a fork, the juices will run out
and it will become dry.
Do not add salt to the meat until it has been grilled. Salt
draws water from the meat.
Notes
■The grill element switches itself continuously on and
off; this is normal. The set temperature determines
how frequently this occurs.
■Smoke may be produced when grilling.
Meat thermometer
Depending on your appliance's features, you may have
a meat thermometer. You can cook accurately using a
meat thermometer. Read important notes on using the
meat thermometer in the corresponding chapter. There,

Tested for you in our cooking studio en
41
you can find notes on inserting the meat thermometer,
the possible heating types and additional information.
~ "Meat thermometer" on page 19
Recommended setting values
The table lists values for poultry, meat and fish, with
default values for the weight.
The setting values are based on the assumption that
unstuffed, chilled, ready-to-roast poultry, meat or fish is
placed into a cold cooking compartment.
If you wish to cook heavier poultry, meat or fish, always
use the lower temperature. If cooking more than one
item, use the weight of the heaviest item as a basis for
determining the cooking time. The individual pieces
should be approximately the same size.
As a general rule: The larger the poultry, meat or fish,
the lower the cooking temperature and the longer the
cooking time.
Turn the poultry, meat or fish after approx. to of ^ Z
the time listed.
Cover the bottom of the glass cookware with approx. 1/
2 cm of liquid.
The quantity of liquid depends on the type of meat, the
material the cookware is made from and on whether or
not a lid is used. If you are cooking meat in an
enamelled or dark-coloured metal roasting dish, it will
need a little more liquid than if cooked in glass
cookware.
Calculating the cooking time (e.g. 20+35):
To calculate the cooking time, assume 20 minutes per
500 g of meat plus an extra 35 minutes. For 1.5 kg, the
cooking time would therefore be 95 minutes.
Cooking time range (e.g. 10-15):
Your food will be ready within the specified range of
time (in minutes).
Roasting, braising and grilling
Roasting and Braising
Food Dish Shelf po-
sition
Type of
heating
Temperature in °C Time in minutes
Slow roast joint (beef) Cookware, uncovered 2 140 50+50‚
Beef top side / top rump Cookware, uncovered 2 170 40+30‚
Lamb leg (bone-in) Cookware, uncovered 2 160-170 25+15‚
Lamb shoulder (bone-in) Cookware, uncovered 2 160-170 15+25‚
Lamb shoulder (boned and rolled) Cookware, uncovered 2 170-180 18+30‚
Rack of lamb** Cookware, uncovered 2 170-190* 15+20‚
Pork, roast joint Cookware, uncovered 2 180-190 30+35‚
Pork, loin joint Cookware, uncovered 2 160 35+30‚
ˆ ‰‚Ÿ£/ 3-5
Pork, belly Cookware, uncovered 2 170-180*** 30+30ƒ
ˆ250 3-5
Pork, gammon joint Cookware, uncovered 2 160-170*** 30+30‚
Chicken, whole Wire rack****** 2 170-180 25+15‚
Chicken portion, bone-in, 200-250 g each Cookware, uncovered 2 200-220 40-50‚
Duck, 2-3 kg Cookware, uncovered 2 180-190 25+20‚
Turkey, crown Wire rack 2 140-150**** 20+25‚
Turkey, thighs Cookware, uncovered 2 180-190 40+25‚
Turkey, whole, 4-8 kg Wire rack 1 150-160***** 12+12‚
Fish, braised, whole 300 g, e.g. trout Cookware, covered 2 170-190 25-35¼
Fish, braised, whole 1,5 kg, e.g. salmon Cookware, covered 2 180-200 55-65¼
Fish fillet, plain, braised, 400 g Cookware, covered 2 170-190 30-40¼
Meat loaf Cookware, uncovere 2 170-180 20+40‚
Diced meat (beef, pork, lamb), 500 g meat Cookware, covered 2 140 120-140¼
Diced chicken (boned), 500 g meat Cookware, covered 2 140 100-120¼
* Preheat
** Without fat layer (best end neck), do not turn
*** Do not turn
**** Bone side down, do not turn
***** Turn after app. 1 hour
****** Slide in the universal pan underneath the wire rack

en Tested for you in our cooking studio
42
Grilling
Braising steak Cookware, covered 2 140 100-120¼
Complete meal with beef Wire rack + wire rack + uni-
versal pan
4+1 160, then 200 (york-‚
shire pudding)
beef: (20+15) + 20 for
yorkshire pudding
Complete meal with chicken Wire rack + wire rack + uni-
versal pan
4+1 180, then 200 (york-‚
shire pudding)
chicken: (25+25) + 20
for yorkshire pudding
Food Dish Shelf posi-
tion
Type of heat-
ing
Grill setting Time in minutes
Beef steak, height 2-3cm, medium Wire rack 3 / 1. side 11-13ˆ‚Ÿ£ ‰
2. side 4-6
Beef burger, height 1-2cm Wire rack 4 / 1. side 8-9ˆ‚Ÿ£ ‰ *
2. side 4-5
Lamb chops, height 1-2cm Wire rack 3 / 1. side 5-6ˆ‚Ÿ£ ‰ **
2. side 5-6
Bacon rashers Wire rack*** 3 / 1. side 4-5ˆ‚Ÿ£ ‰ **
2. side 3-4
Sausages, thickness 2-4cm Wire rack 3 / 10-15****ˆ‚Ÿ£ ‰ *
Fish fillets/chops Wire rack 4 / 12-16ˆ‚Ÿ£ ‰ *
Grilling white bread Wire rack 4 / 0-1ˆ‚Ÿ£ ‰ **
* Preheat for 3 mins
** Preheat for 5 mins; do not use rapid heat-up function
*** Slide the universal pan in underneath at shelf position 2
**** Turn over several times
Food Dish Shelf posi-
tion
Type of heat-
ing
Temperature
in °C
Time in minutes
Beef, top side / top rump Cookware, uncovered 2 160 40+35‡
Lamb, leg (bone-in) Cookware, uncovered 2 160-170 25+15‡
Lamb, shoulder (bone-in) Cookware, uncovered 2 170-180 15+15‡
Lamb, shoulder (boned and rolled) Cookware, uncovered 2 160-170 20+15‡
Rack of lamb** Cookware, uncovered 2 170-190* 15+25‡
Pork, roast joint Cookware, uncovered 2 180-200 30+40‡
Pork, loin joint Cookware, uncovered 3 160-170*** 35+35‡
Pork, belly Cookware, uncovered 2 160-170*** 30+30‡
Pork, gammon joint Cookware, uncovered 2 170-180*** 25+20‡
Chicken drumstick, 150 g each Cookware, uncovered 3 210-230 30-40‡
Chicken portion, bone-in, 200-250 g
each
Cookware, uncovered 3 200-220 35-45‡
* Preheat
** Without fat layer (best end neck), do not turn
*** Do not turn
**** Slide in the universal pan underneath the wire rack
Food Dish Shelf po-
sition
Type of
heating
Temperature in °C Time in minutes
* Preheat
** Without fat layer (best end neck), do not turn
*** Do not turn
**** Bone side down, do not turn
***** Turn after app. 1 hour
****** Slide in the universal pan underneath the wire rack

Tested for you in our cooking studio en
43
Steam- assisted roasting, braising and grilling
Certain foodstuffs become crispier during steam-
assisted cooking. Their surface becomes glossier and
they dry out less.
Use cookware without a lid. Cookware must be heat-
and steam-resistant.
The roast does not have to be turned.
Use steam-assisted cooking if it is indicated in the table.
Some dishes turn out best if they are cooked in several
stages. These are indicated in the table.
Chicken, whole Wire rack**** 2 170-180 25+20‡
Duck, 2-3 kg Cookware, uncovered 2 190-200 20+20‡
Turkey, thighs Cookware, uncovered 2 160-170 35+30‡
Trout, whole, 300 g each Wire rack 2 160-180 20-30‡
Food Dish Shelf posi-
tion
Type of heat-
ing
Temperature
in °C
Time in minutes
* Preheat
** Without fat layer (best end neck), do not turn
*** Do not turn
**** Slide in the universal pan underneath the wire rack
Food Dish Shelf posi-
tion
Type of heat-
ing
Tempera-
ture in °C
Steam in-
tensity
Time in minutes
Slow roast joint (beef), 1,5 kg Wire rack 2 140 30‚™
- 150-160
Beef top side / top rump, 1,5 kg Cookware, uncovered 2 180-200 40‚™
- 10-20
Lamb leg (bone-in), 1,5 kg Wire rack 2 180-190 30‚™
- 60-70
Rack of lamb (each 700 g) Wire rack 2 200 20‚™
160-170 - 20-25
Pork, roast joint, 1,5 kg Cookware, uncovered 2 160-170 40‚™
- 90-110
Pork, loin joint, 1,5 kg Cookware, uncovered 2 170-180 40‚™
- 50-60
Pork, gammon joint, 1,5 kg Cookware, uncovered 2 170-180 30‚™
- 85-95
Pork, belly, 1 kg Cookware, uncovered 2 160-170 30‡™
- 50-60
Chicken, whole, 1,5 kg Cookware, uncovered 2 170-180 30‡™
- 40-50
Chicken drumstick (each 150 g) Wire rack 3 200-210 30-40‡™
Chicken portion (each 200-250 g) Wire rack 2 200-220 20‡™
- 20-25
Duck, 2-3 kg Wire rack 2 160-170 30-40‚™
‚160-170 - 30-40
‡180-190 - 30-40
Turkey, crown, 3 kg Wire rack 2 140-150 35‚™
- 90-130
Turkey, whole, 7 kg Wire rack 1 140-150 40‚™
140-150 - 80-110
170-180 - 30-40
Meat loaf, 1 kg Cookware, uncovered 2 170-180 40‚™
- 30-40
Produkt Specifikationer
Mærke: | Neff |
Kategori: | Ovn |
Model: | B5AVM7HH0B |
Vekselstrømsindgangsspænding: | 220 - 240 V |
Vekselstrømsindgangsfrekvens: | 50 / 60 Hz |
Bredde: | 594 mm |
Dybde: | 548 mm |
Højde: | 595 mm |
Vægt: | 41708 g |
Produktfarve: | Rustfrit stål |
Kontroltype: | Dreje |
Lampe type: | Halogen |
Indbygget skærm: | Ja |
Skærmtype: | LCD |
Strøm: | 16 A |
Ledningslængde: | 1.2 m |
Pakkedybde: | 660 mm |
Pakkebredde: | 690 mm |
Pakkehøjde: | 675 mm |
Automatisk slukning: | Ja |
Husmateriale: | Rustfrit stål |
Placering af apparat: | Indbygget |
Vandtank volumen: | 0.22 L |
Indvendig belysning: | Ja |
Dørhængsel: | Ned |
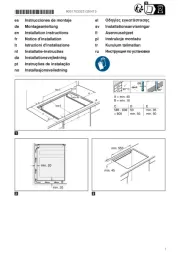
Indvendige mål (B x D x H): | 480 x 415 x 357 mm |
Installationsrum bredde: | 568 mm |
Installationsrum dybde: | 550 mm |
Installationsrum højde: | 595 mm |
Tilsluttet belastning: | 3600 W |
Grill: | Ja |
Damp madlavning: | Ja |
Konvektion madlavning: | Ja |
Børnesikring: | Ja |
Understøttede scanningstilstande: | 635 mm |
Certificering: | CE, VDE |
Energieffektivitetsskala: | A+++ til D |
Selvrensende: | Ja |
Installationsrum højde (min.): | 585 mm |
Kontrolposition: | Front |
Nem at rengøre: | Ja |
Restvarmeindikator: | Ja |
Wi-Fi kontrolleret: | Ja |
Energieffektivitetsklasse: | A |
Rengøringstype: | Pyrolytisk + damp |
Antal gitre: | 2 |
Effektiv bakke overfladeareal: | 1290 cm² |
Kølende ventilator i døren: | Ja |
Ovn - størrelse: | Medium |
Ovntype: | Elektrisk ovn |
Samlet indvendig ovn kapacitet: | 71 L |
Strøm for samtlige ovne: | 3600 W |
Antal ovne: | 1 |
Ovn nettokapacitet: | 71 L |
Konventionel madlavning: | Ja |
Pizza fremstillingsfunktion: | Ja |
Antal lamper: | 1 Lampe( r) |
Energieffektivitetsindeks (EEI): | 95.3 |
Energiforbrug (konventionel): | 1.04 kWh |
Energiforbrug (tvungen konvektion): | 0.81 kWh |
Hurtig varme: | Ja |
Udtrækkelige drejeknapper: | Ja |
Grillrist inkluderet: | Ja |
Automatiske programmer, antal: | 15 |
Opvarmning i både top og bund: | Ja |
Mikroovn madlavning: | Ingen |
Grill med fuld overflade: | Ja |
Dør temperatur (maks.): | 30 °C |
Ovn effekt: | 3600 W |
Rengøringsteknologi: | Hydrolytisk |
Dørmateriale: | Glas |
Brødfremstilling kapacitet: | Ja |
Installationsrum bredde (min.): | 560 mm |
Varmluft grill: | Ja |
Maksimal temperatur (varmluft): | 275 °C |
Maksimal temperatur (konventionel): | 275 °C |
Stegetermometer: | Ja |
Teleskopskinne medfølger: | Ja |
Pyrolyse effekt: | 4800 W |
Roaster funktion: | Ja |
Har du brug for hjælp?
Hvis du har brug for hjælp til Neff B5AVM7HH0B stil et spørgsmål nedenfor, og andre brugere vil svare dig
Ovn Neff Manualer

21 Marts 2025

15 Januar 2025

13 Januar 2025

12 Januar 2025

3 Januar 2025

3 Januar 2025

2 Januar 2025

31 December 2025

31 December 2025

31 December 2025
Ovn Manualer
- Ovn DeLonghi
- Ovn Sinbo
- Ovn Ikea
- Ovn Bosch
- Ovn SilverCrest
- Ovn PKM
- Ovn Gram
- Ovn Sencor
- Ovn Krups
- Ovn Maxxmee
- Ovn Wolkenstein
- Ovn Siemens
- Ovn Day
- Ovn Samsung
- Ovn Scandomestic
- Ovn GE
- Ovn Breville
- Ovn Zanussi
- Ovn Cylinda
- Ovn Panasonic
- Ovn Candy
- Ovn Fisher & Paykel
- Ovn Gorenje
- Ovn AENO
- Ovn Husqvarna
- Ovn VOX
- Ovn Miele
- Ovn Ninja
- Ovn Silverline
- Ovn Blomberg
- Ovn Philips
- Ovn Caso
- Ovn Concept
- Ovn Gastroback
- Ovn Steba
- Ovn Teka
- Ovn Rommelsbacher
- Ovn OK
- Ovn LG
- Ovn AEG
- Ovn Electrolux
- Ovn Thetford
- Ovn Bauknecht
- Ovn Elica
- Ovn Whirlpool
- Ovn Vestfrost
- Ovn Mitsubishi
- Ovn Sharp
- Ovn Hotpoint
- Ovn Dacor
- Ovn Melissa
- Ovn Atag
- Ovn Kenwood
- Ovn Sage
- Ovn Omega
- Ovn Qlima
- Ovn Hoover
- Ovn Daewoo
- Ovn Korona
- Ovn Arçelik
- Ovn Junker
- Ovn JennAir
- Ovn Sanyo
- Ovn Grundig
- Ovn Falmec
- Ovn Progress
- Ovn Presto
- Ovn De Dietrich
- Ovn Witt
- Ovn Indesit
- Ovn GYS
- Ovn Hotpoint Ariston
- Ovn Livoo
- Ovn Toshiba
- Ovn Klarstein
- Ovn Tracer
- Ovn Brother
- Ovn Ardo
- Ovn Furrion
- Ovn Etna
- Ovn Tefal
- Ovn Infiniton
- Ovn Trisa
- Ovn Princess
- Ovn Matsui
- Ovn Biltema
- Ovn Emerio
- Ovn Severin
- Ovn Scholtès
- Ovn Hansa
- Ovn Logik
- Ovn Hendi
- Ovn Bartscher
- Ovn Moulinex
- Ovn Sunbeam
- Ovn Sauber
- Ovn Westinghouse
- Ovn Ilve
- Ovn Eico
- Ovn Element
- Ovn Thomson
- Ovn Constructa
- Ovn Hyundai
- Ovn Proctor Silex
- Ovn Hisense
- Ovn TriStar
- Ovn Clas Ohlson
- Ovn Weber
- Ovn Brandt
- Ovn Airforce
- Ovn Adler
- Ovn Black And Decker
- Ovn Campingaz
- Ovn Camry
- Ovn Dometic
- Ovn Mestic
- Ovn Barbecook
- Ovn Eurom
- Ovn Blaupunkt
- Ovn Tomado
- Ovn Ariston
- Ovn Asko
- Ovn Atlas
- Ovn Becken
- Ovn BEKO
- Ovn Gaggenau
- Ovn Helkama
- Ovn Hoover-Helkama
- Ovn Iberna
- Ovn Ignis
- Ovn Küppersbusch
- Ovn Leonard
- Ovn Privileg
- Ovn Smeg
- Ovn Viva
- Ovn Alpina
- Ovn Clatronic
- Ovn Mesko
- Ovn Quigg
- Ovn SEB
- Ovn Hitachi
- Ovn Buffalo
- Ovn Proficook
- Ovn Rowenta
- Ovn Dualit
- Ovn Medion
- Ovn Liebherr
- Ovn Ariston Thermo
- Ovn Fagor
- Ovn Haier
- Ovn König
- Ovn Cramer
- Ovn AFK
- Ovn Bifinett
- Ovn Bomann
- Ovn Morphy Richards
- Ovn Redmond
- Ovn Russell Hobbs
- Ovn WMF
- Ovn Ariete
- Ovn Innoliving
- Ovn KitchenAid
- Ovn Zelmer
- Ovn Luxor
- Ovn Rosieres
- Ovn Boretti
- Ovn FIAP
- Ovn Vivax
- Ovn Mora
- Ovn Thermex
- Ovn Crosley
- Ovn UPO
- Ovn Zanker
- Ovn George Foreman
- Ovn Galanz
- Ovn Maginon
- Ovn Amana
- Ovn Amica
- Ovn Arthur Martin-Electrolux
- Ovn Euromaid
- Ovn Merrychef
- Ovn KKT Kolbe
- Ovn Comfee
- Ovn Wolf
- Ovn Dimplex
- Ovn Finlux
- Ovn Telefunken
- Ovn Micromaxx
- Ovn Kernau
- Ovn Bertazzoni
- Ovn Caple
- Ovn SIBIR
- Ovn Zerowatt
- Ovn Thane
- Ovn Cuisinart
- Ovn Tiger
- Ovn Primo
- Ovn Orbegozo
- Ovn AGA
- Ovn Viking
- Ovn Emax
- Ovn CaterChef
- Ovn Franke
- Ovn Optimum
- Ovn Cadac
- Ovn Char-Broil
- Ovn Jamie Oliver
- Ovn Koenig
- Ovn Landmann
- Ovn OutdoorChef
- Ovn Rösle
- Ovn Taurus
- Ovn Veripart
- Ovn Zenith
- Ovn Faber
- Ovn Westfalia
- Ovn Balay
- Ovn Cata
- Ovn Exquisit
- Ovn Falcon
- Ovn Pelgrim
- Ovn Elba
- Ovn Elektra Bregenz
- Ovn ELIN
- Ovn Faure
- Ovn Juno
- Ovn Nodor
- Ovn Pyramis
- Ovn Respekta
- Ovn Rommer
- Ovn Stoves
- Ovn Schneider
- Ovn MPM
- Ovn Profilo
- Ovn Tesla
- Ovn Hanseatic
- Ovn G3 Ferrari
- Ovn Thor
- Ovn V-Zug
- Ovn Diplomat
- Ovn Maytag
- Ovn Gourmetmaxx
- Ovn Domo
- Ovn Mellerware
- Ovn BEEM
- Ovn Xblitz
- Ovn Atlantic
- Ovn Saro
- Ovn Thomas
- Ovn Bush
- Ovn Hamilton Beach
- Ovn Ambiano
- Ovn Binatone
- Ovn Unold
- Ovn Aspes
- Ovn Bellini
- Ovn Unox
- Ovn Scancool
- Ovn Nevir
- Ovn Imperial
- Ovn Techwood
- Ovn Inventum
- Ovn Edilkamin
- Ovn Swan
- Ovn Khind
- Ovn Midea
- Ovn Napoleon
- Ovn CDA
- Ovn Laica
- Ovn Frigidaire
- Ovn Frilec
- Ovn Bimar
- Ovn Ardes
- Ovn Suntec
- Ovn Esatto
- Ovn SVAN
- Ovn Everglades
- Ovn Danby
- Ovn Sogo
- Ovn RCA
- Ovn Koenic
- Ovn Scarlett
- Ovn Izzy
- Ovn Currys Essentials
- Ovn Cotech
- Ovn Lofra
- Ovn ECG
- Ovn Nova
- Ovn Saturn
- Ovn Eurochef
- Ovn Trebs
- Ovn Wamsler
- Ovn Fritel
- Ovn General Electric
- Ovn Eldom
- Ovn Navitel
- Ovn H.Koenig
- Ovn Proline
- Ovn Termozeta
- Ovn Hobart
- Ovn Stirling
- Ovn RGV
- Ovn Eta
- Ovn Bella
- Ovn Lynx
- Ovn Kalorik
- Ovn ILive
- Ovn Gemini
- Ovn Cecotec
- Ovn Berg
- Ovn Cosori
- Ovn Rinnai
- Ovn Solac
- Ovn Roadstar
- Ovn Royal Catering
- Ovn Friac
- Ovn Technika
- Ovn Efbe-Schott
- Ovn Seiki
- Ovn Baumatic
- Ovn Sirius
- Ovn Frifri
- Ovn Barazza
- Ovn Palson
- Ovn Chefman
- Ovn Traeger
- Ovn Meireles
- Ovn Steinberg
- Ovn Axis
- Ovn PowerXL
- Ovn Emeril Lagasse
- Ovn Tower
- Ovn Team
- Ovn Kenmore
- Ovn Brentwood
- Ovn Avanti
- Ovn Vestel
- Ovn Continental Edison
- Ovn Cookology
- Ovn Corbero
- Ovn Artusi
- Ovn Aurora
- Ovn La Germania
- Ovn Orima
- Ovn Lenoxx
- Ovn Magic Chef
- Ovn Duronic
- Ovn Lamona
- Ovn Bestron
- Ovn Philco
- Ovn Zanussi-Electrolux
- Ovn Waring Commercial
- Ovn Benavent
- Ovn Sôlt
- Ovn Novy
- Ovn Rex
- Ovn Classique
- Ovn TurboTronic
- Ovn Kunft
- Ovn Euro Appliances
- Ovn Summit
- Ovn Kogan
- Ovn LERAN
- Ovn DCG
- Ovn Coyote
- Ovn New Pol
- Ovn Delta
- Ovn Ravanson
- Ovn Matrix
- Ovn Fulgor Milano
- Ovn BLANCO
- Ovn Airlux
- Ovn Foster
- Ovn Sam Cook
- Ovn Oster
- Ovn Mach
- Ovn Consul
- Ovn Jocel
- Ovn Heller
- Ovn Kayoba
- Ovn Bourgini
- Ovn Signature
- Ovn Ufesa
- Ovn InAlto
- Ovn Manta
- Ovn Dash
- Ovn Tepro
- Ovn Vitrokitchen
- Ovn Comelec
- Ovn Orava
- Ovn Kaiser
- Ovn IFB
- Ovn Esperanza
- Ovn Arctic Cooling
- Ovn Haeger
- Ovn Linarie
- Ovn DPM
- Ovn Create
- Ovn Nutrichef
- Ovn Mistral
- Ovn Glem Gas
- Ovn Flama
- Ovn ARC
- Ovn Chef
- Ovn Thermador
- Ovn Kambrook
- Ovn Atosa
- Ovn Hestan
- Ovn Acec
- Ovn Kluge
- Ovn Leisure
- Ovn AYA
- Ovn Vedette
- Ovn Aroma
- Ovn Salton
- Ovn Arthur Martin
- Ovn Jata
- Ovn BlueStar
- Ovn Mabe
- Ovn Monogram
- Ovn Valberg
- Ovn Castor
- Ovn Heinner
- Ovn Nabo
- Ovn Guzzanti
- Ovn Defy
- Ovn Premium
- Ovn Blokker
- Ovn First Austria
- Ovn Nordmende
- Ovn Rangemaster
- Ovn Drew & Cole
- Ovn Kubo
- Ovn WLA
- Ovn Kelvinator
- Ovn Steel Cucine
- Ovn Jenn-Air
- Ovn Limit
- Ovn Freggia
- Ovn Listo
- Ovn Edesa
- Ovn Milectric
- Ovn EAS Electric
- Ovn Zavor
- Ovn New World
- Ovn Bompani
- Ovn Porter & Charles
- Ovn M-System
- Ovn Koblenz
- Ovn German Pool
- Ovn Creda
- Ovn Godrej
- Ovn Ices
- Ovn Belling
- Ovn Conrad
- Ovn Mx Onda
- Ovn Igenix
- Ovn Kleenmaid
- Ovn Essentiel B
- Ovn Montiss
- Ovn Schock
- Ovn Edy
- Ovn Altus
- Ovn Parmco
- Ovn Zephir
- Ovn Eurotech
- Ovn Café
- Ovn Equator
- Ovn Brixton
- Ovn Superior
- Ovn Smev
- Ovn ZLine
- Ovn Grunkel
- Ovn Belion
- Ovn Nesco
- Ovn Coline
- Ovn White And Brown
- Ovn Home Electric
- Ovn Bora
- Ovn Imarflex
- Ovn Sauter
- Ovn Flavel
- Ovn Bluesky
- Ovn Instant
- Ovn Tecnolux
- Ovn Fratelli Onofri
- Ovn Ronco
- Ovn Premier
- Ovn Marynen
- Ovn Therma
- Ovn Luxell
- Ovn Krefft
- Ovn Girmi
- Ovn Mayer
- Ovn Solitaire
- Ovn Oranier
- Ovn Leventi
- Ovn James
- Ovn Roadeyes
- Ovn Globe
- Ovn Esmaltec
- Ovn Riviera And Bar
- Ovn Apelson
- Ovn Dominox
- Ovn Thermomate
- Ovn Melchioni
- Ovn Tisira
- Ovn Fine Dine
- Ovn Venga
- Ovn Everdure
- Ovn OBU
- Ovn Rival
- Ovn Eudora
- Ovn Hiberg
- Ovn Steelmatic
- Ovn Wells
- Ovn Kucht
- Ovn Avantco
- Ovn Mibrasa
- Ovn Bizerba
- Ovn Vulcan
- Ovn Romo
- Ovn Lacanche
- Ovn Verona
- Ovn Riviera Bar
- Ovn LotusGrill
- Ovn APW Wyott
- Ovn SPT
- Ovn Pit Boss
- Ovn Hatco
- Ovn High One
- Ovn Capital
- Ovn WestBend
- Ovn Companion
- Ovn XO
- Ovn NU-VU
- Ovn Curtiss
- Ovn Blodgett
- Ovn Nemco
- Ovn K&H
- Ovn Winia
- Ovn Bakers Pride
- Ovn Alto-Shaam
- Ovn TurboChef
- Ovn Simfer
- Ovn Firefriend
- Ovn Robinhood
- Ovn LAFE
- Ovn Promis
- Ovn Inno-Hit
- Ovn Fisher Paykel
- Ovn Brock
- Ovn Cosmo
- Ovn Arda
- Ovn Casselin
- Ovn Ferrari
- Ovn Americana
- Ovn Petromax
- Ovn YUNA
- Ovn Spring USA
- Ovn BioChef
- Ovn Forge Adour
- Ovn Blow
- Ovn Chef-Master
- Ovn UGo
- Ovn Eltac
- Ovn Kitchenware
- Ovn Novamatic
- Ovn Emilia
- Ovn VENINI
- Ovn Buschbeck
- Ovn Blackstone
- Ovn Beautiful
- Ovn BSK
- Ovn New.Up!
- Ovn Roller Grill
- Ovn Germanica
- Ovn Studio
- Ovn Adora
- Ovn Sunpentown
- Ovn Backyard Pro
- Ovn Brastemp
- Ovn Ribimex
- Ovn BAXTER
- Ovn Longvie
- Ovn Gasmate
- Ovn Triomph
- Ovn PITT
- Ovn KB Elements
- Ovn TZS First Austria
- Ovn Electroline
- Ovn Pando
- Ovn Wiggo
- Ovn Nestor Martin-Electrolux
- Ovn Thermarest
- Ovn HomeCraft
- Ovn La Cornue
- Ovn Master Kitchen
- Ovn Goldbrunn
- Ovn PITSOS
- Ovn Yamazen
- Ovn St George
- Ovn Fratelli
- Ovn Bröhn
- Ovn Platypus
- Ovn Sheffield
Nyeste Ovn Manualer

9 April 2025

6 April 2025

6 April 2025

6 April 2025

6 April 2025

6 April 2025

6 April 2025

6 April 2025

5 April 2025

5 April 2025