Oregon Scientific RA129 Manual


Læs gratis den danske manual til Oregon Scientific RA129 (8 sider) i kategorien Ur. Denne vejledning er vurderet som hjælpsom af 46 personer og har en gennemsnitlig bedømmelse på 4.6 stjerner ud af 23.5 anmeldelser. Har du et spørgsmål om Oregon Scientific RA129, eller vil du spørge andre brugere om produktet?

Side 1/8
EN
ALTIMO
Digital Altimeter Watch
Model: RA129
USER MANUAL
INTRODUCTION
Thank you for selecting the Oregon Scientific ALTIMO
Digital Altimeter Watch (RA129). Equipped with real-
time clock, stopwatch, alarm, backlight and keypad lock
functions, this watch can also be used for providing daily
altitude reading.
IMPORTANT
The measurement functions built into the RA129 are
not meant to substitute professional measurement
or industrial precision devices. Values produced
by this device should be considered as reasonable
representations only.
Oregon Scientific™ assumes no responsibility for
any loss, or any claims by third parties that may arise
through the use of this device.
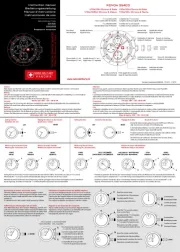
CONTROL BUTTONS
1
2
3
5
4
1. MODE: Switch to another display; quick exit during any
setting mode
2. SET: Enter setting mode; confirm setting value
3. ST / SP / + : Increase value of the setting; start / stop
stopwatch
4. / : Activate backlight; lock keypad
5. : Decrease value of the setting; reset stopwatch RST / -
LCD
1
5
7
8
6
2
3
4
1. : Indicates beep tone is turned Off
2. : Indicates keypad is locked
3. Displays altitude trend bar chart
4. Displays clock, calendar, stop watch, alarm time, altitude
or mode banners
5. : Indicates alarm is On
6. : Indicates stopwatch is displayed or running
7. : , altitude unit12 hour clock
8. or : Indicates battery power is low
GETTING STARTED
TURN ON DEVICE (FIRST-TIME USE ONLY)
Press any key for 2 seconds to activate the LCD display.
BATTERY REPLACEMENT
The RA uses a CR2032 3V battery, which has already 129
been installed. See below for battery warnings.
INDICATION DESCRIPTION
The battery is low.
The battery is too low to operate.
The is altitude trend bar chart
cleared.
NOTE While the low battery icon is displayed, altitude
reading, alarm beeping and backlight are disabled. It will
return to normal once battery has been replaced.
NOTE If you need to replace the battery, we highly
recommend you to contact the retailer or our customer
service department.
To replace the battery:
1. Use a small Phillips screwdriver to remove battery
compartment lid. Once opened, please keep the screws
in a safe place to avoid losing them.
2. Remove the old battery and insert the new one, matching
the polarities.
3. Replace the lid by screwing it back into place using a
Phillips screwdriver.
OPERATING MODES
Press to switch between:MODE
Time Mode
Date Mode
Altimeter Mode
Chrono (Stopwatch) Mode
Alarm Mode
TIME MODE
This mode is used for viewing the current time and altitude
trend bar chart and for setting the time and date.
TO SET TIME AND DATE
1. Press MODE to navigate to Time Mode.
2. Press and hold to enter settings.SET
3. Press ST/SP/+ or RST/- to change values of the setting.
Press and hold to rapidly change ST/SP/+ or RST/-
values.
4. Press SET to confirm and move to the next setting.
Repeat steps 3-4 for each setting option. The setting
options are as follows: 12 / 24-hour time; hour; minute;
year; month-day / day-month; month; day; altitude unit
(m / ft); beep on/off.
5. Press MODE anytime to confirm and exit settings.
DATE MODE
This mode is used for viewing the current date and altitude
trend bar chart. Press to navigate to Date Mode.MODE
ALTIMETER MODE
This mode is used for viewing the current altitude reading.
Press to navigate to Altimeter Mode.MODE
TO SET THE ALTITUDE
For the purpose of accuracy, users are recommended to
manually adjust and set the altitude. The corresponding sea
level pressure will be automatically updated.
1. Press to navigate to Altimeter Mode.MODE
2. Press and hold to enter settings.SET
3. Press ST/SP/+ or RST/- to change values of the setting.
Press and hold or to rapidly change ST/SP/+ RST/-
values.
4. Press MODE to confirm and exit.
ALTITUDE TREND BAR CHART
This bar chart displays the altitude reading of the passed 7
minutes, with the altitude represented by 5 rows (1 row = 10
m or 32.8 ft) and the 7 minutes represented by 7 columns (1
column = 1 min).
The latest reading is displayed at the last column on the
right and is always positioned at the 3rd row. This is to allow
other columns to adjust their height correlative of the latest
reading.
ALTITUDE OUT OF RANGE
When the altitude is out of range, “HIGH” and “LOW” will be
displayed until the altitude is within range again.
when the altitude is above the maximum
value
when the altitude is below the minimum
value
NOTE When the altitude is out of range, the last column on
the right will become blank until the altitude is within range
again. All the other columns will adjust their height to reflect
the latest reading.
STOPWATCH MODE (CHRONO)
TO START / STOP STOPWATCH
1. Press MODE to navigate to Chrono Mode.
2. Press ST/SP/+ to start / stop stopwatch.
TO RESET STOPWATCH
Press to reset stopwatch.RST/-
NOTE Stopwatch can be reset to 00:00:00 only if it has been
stopped or paused.
ALARM MODE
TO SET ALARM
1. Press MODE to navigate to Alarm Mode.
2. Press and hold to enter settings.SET
3. Press ST/SP/+ or RST/- to change values of the setting.
Press and hold to rapidly change ST/SP/+ or RST/-
values.
4. Press SET to confirm and move to the next setting.
Repeat steps 3-4 for each setting option. The setting
options are as follows: hour; minute.
5. Press MODE anytime to confirm and exit settings.
TO ACTIVATE / DEACTIVATE ALARM
1. Press MODE to navigate to Alarm Mode.
2. Press ST/SP/+ or RST/- to activate / deactivate alarm.
indicates that the alarm has been activated.
3. Press MODE to confirm and exit.
TO SILENCE ALARM
When the alarm clock is activated, it will sound at the set time
every day. Press any button to stop the alarm for that day.
NOTE The alarm clock is still active and will set off again the
following day.
BACKLIGHT AND KEYPAD LOCK
To activate backlight:
Press / to turn backlight On for 5 seconds.
NOTE The backlight function will not operate if “ ” or
is displayed.
To toggle keypad lock On or Off:
Press and hold / for 2 seconds. indicates keypad
is locked.
USE IN THE WATER
The RA129 is water-resistant up to 30 meters (98 feet).
NOTE Set the watch before exposing it to excessive water.
Pressing the keys while in the water or during heavy
rainstorms may cause water to enter the watch.
SPECIFICATIONS
Real time clock 12/24 format with hour / minute /
second
Stopwatch 00:00:00 to 99:59:59 (hr:min:sec)
Altitude range -400 m to 9000 m
(-1312 ft to 29520 ft)
Altitude refresh rate 20 sec
Altitude trend bar
chart refresh rate 1 min
Power 1 x CR2032 3V battery
PRECAUTIONS
To ensure you use your product correctly and safely, read
these warnings and the entire user manual before using the
product:
Use a soft, slightly moistened cloth. Do not use abrasive
or corrosive cleaning agents, as these may cause
damage. Use lukewarm water and mild soap to clean
the watch. Never use the products in hot water or store
them when wet.
Do not subject the product to excessive force, shock,
dust, temperature changes, or humidity. Never expose
the product to direct sunlight for extended periods. Such
treatment may result in malfunction.
Do not tamper with the internal components. Doing
so will terminate the product warranty and may cause
damage. The main unit contains no user-serviceable
parts.
Do not scratch hard objects against the LCD display as
this may cause damage.
Take precautions when handling all battery types.
Remove the batteries whenever you are planning to
store the product for a long period of time.
When replacing batteries, use new batteries as specified
in this user manual.
The product is a precision instrument. Never attempt
to take this device apart. Contact the retailer or our
customer service department if the product requires
servicing.
Do not touch the exposed electronic circuitry, as there is
a danger of electric shock.
Check all major functions if the device has not been
used for a long time. Maintain regular internal testing
and cleaning of your device. Have your watch serviced
by an approved service center annually.
When disposing of this product, ensure it is collected
separately for special treatment and not as normal
household waste.
Due to printing limitations, the displays shown in this
manual may differ from the actual display.
The contents of this manual may not be reproduced
without the permission of the manufacturer.
NOTE The technical specifications for this product and the
contents of the user manual are subject to change without
notice.
NOTE Features and accessories will not be available in all
countries. For more information, please contact your local
retailer.
ABOUT OREGON SCIENTIFIC
Visit our website (www.oregonscientific.com) to learn more
about Oregon Scientific products. If you’re in the US and
would like to contact our Customer Care department directly,
please visit: www2.oregonscientific.com/service/support
OR
Call 1-800-853-8883.
For international inquiries, please visit:
www2.oregonscientific.com/about/international
EU-DECLARATION OF CONFORMITY
Hereby, Oregon Scientific, declares that this ALTIMO Digital
Altimeter Watch (Model RA129) is in compliance with
EMC directive 89/336/CE. A copy of the signed and dated
Declaration of Conformity is available on request via our
Oregon Scientific Customer Service.
RAIN
SPLASHES
ETC
OK
SHOWERING
(WARM /
COOL
WATER
ONLY)
NO
LIGHT
SWIMMING /
SHALLOW
WATER
NO
SHALLOW
DIVING /
SURFING /
WATER
SPORTS
NO
SNORKELING/
DEEP
WATER
DIVING
NO
30M /
98 FEET
ALTIMO
Reloj con altímetro digital
Modelo: RA129
MANUAL DE USUARIO
INTRODUCCIÓN
Gracias por elegir el ALTIMO Reloj con altímetro digital
(RA129) de Oregon Scientific
TM. Este reloj, equipado con
reloj a tiempo real, cronómetro, alarma, retroiluminación y
bloqueo de botones, también sirve para disponer de la altura
actual.
IMPORTANTE
Las funciones de medición del RA129 no están pensadas
para sustituir mediciones profesionales ni dispositivos
de precisión industrial. Los valores procedentes de este
dispositivo deben considerarse únicamente indicaciones
orientativas.
Oregon Scientific
TM no asumirá responsabilidad alguna
por pérdidas o reclamaciones de terceros que puedan
derivarse del uso de este dispositivo.
BOTONES DE CONTROL
1
2
3
5
4
1. : MODE Pasar a otra pantalla; salir rápidamente durante
cualquier modo de ajuste
2. : SET Acceder al modo de configuración; confirmar
ajuste
3. :ST / SP / + Incrementar valor del ajuste; iniciar / detener
cronómetro
4. / : Activar retroiluminación; bloqueo de botones
5. : Reducir valor del ajuste; reiniciar cronómetro RST / -
LCD
1
5
7
8
6
2
3
4
1. : Indica que el pitido está desactivado
2. : Indica que los botones están bloqueados
3. Muestra el gráfico de tendencia de altura
4. Muestra reloj, calendario, cronómetro, hora de la alarma,
altura o modo banners
5. : Indica que la alarma está activada
6. : Indica que el cronómetro se muestra o está en
marcha
7. : Reloj de 12 horas, unidad de altura
8. o : Indica que la pila se está acabando
PARA EMPEZAR
PARA PONER EN MARCHA EL DISPOSITIVO (SÓLO LA
PRIMERA VEZ QUE SE USA)
Pulse cualquier botón durante 2 segundos para activar la
pantalla LCD.
CÓMO REEMPLAZAR LAS PILAS
El RA129 funciona con 1 pila CR2032 de 3V que ya lleva
instalada. Consulte la tabla que aparece bajo estas líneas
para ver el significado de los iconos de la pila.
INDICACIÓN DESCRIPCIÓN
La pila del dispositivo está casi
gastada.
La pila est demasiado gastada para á
operar. El icono de gráfico de tendencia
de altura desaparece.
NOTA Mientras se muestra el icono de pila casi gastada,
la función de altura actual, el pitido de la alarma y la
retroiluminación estarán desactivadas. Una vez cambie la
pila, volverá a la normalidad.
NOTA Le recomendamos que se ponga en contacto con el
vendedor o el departamento de atención al público si tiene
que cambiar la pila.
Para reemplazar la pila:
1. Use un destornillador de cruz pequeño para retirar la
cubierta del compartimiento para pila. Una vez abierto,
guarde los tornillos para no perderlos.
2. Retire la pila vieja e introduzca la nueva cuidando de
que las polaridades coincidan.
3. Vuelva a colocar la tapa y fíjela con los tornillos usando
un destornillador.
ES
MODOS DE OPERACIÓN
Pulse para alternar entre:MODE
Modo hora
Modo fecha
Modo altímetro
Modo Crono (cronómetro)
Modo de alarma
MODO DE TIEMPO
Este modo sirve para ver la hora actual y la gráfico de tendencia
de altura, así como para configurar la hora y la fecha.
PARA AJUSTAR FECHA Y HORA
1. Pulse MODE para navegar hasta el Modo hora.
2. Pulse SET y manténgalo pulsado para entrar en
configuración.
3. Pulse ST/SP/+ RST/-o para modificar los valores del
ajuste. Pulse o ST/SP/+ RST/- y manténgalo pulsado
para cambiar rápidamente los valores.
4. Pulse SET para confirmar y pasar al siguiente. Repita
los pasos 3-4 para cada opción de configuración. Las
opciones de configuración son las siguientes: formato
de 12 ó 24 horas, hora, minuto, año, mes-día / día-mes,
mes; día, unidad de altura (m / pie), pitido on/off.
5. Pulse MODE en cualquier momento para confirmar y
salir.
MODO FECHA
Este modo sirve para ver la fecha actual y el gráfico de tendencia
de altura. Pulse MODE para navegar por el Modo fecha.
MODO ALTÍMETRO
Este modo sirve para ver la altura actual. Pulse para MODE
acceder al Modo Altímetro.
REGULAR LA ALTURA MANUALMENTE
Para conseguir la máxima precisión, se recomienda ajustar
y regular la altura manualmente. La presión del nivel de mar
se actualizará automáticamente.
1. Pulse para acceder al Modo Altímetro.MODE
2. Pulse SET y manténgalo pulsado para entrar en
configuración.
3. Pulse o ST / SP / + RST / - para modificar los valores
del ajuste. Pulse y manténgalo ST / SP / + o RST / -
pulsado para cambiar rápidamente los valores.
4. Pulse MODE para confirmar y salir.
GRÁFICO DE TENDENCIA DE ALTURA
Este gráfico de barras muestra la altura de los 7 últimos
minutos. La altura está representada por 5 filas (1 fila = 10
m o 32,8 pies) y los 7 minutos aparecen representados por
7 columnas (1 columna = 1 min).
La última lectura se muestra en la columna de más a la
derecha, y siempre aparece en la 3ª fila. Esto permite a las
demás columnas ajustar su altura según la última lectura.
ALTURA FUERA DEL ALCANCE
Si la altura queda fuera del alcance, la pantalla mostrará
“HIGH” y “LOW” hasta que la altura vuelva a quedar dentro
del alcance del reloj.
si la altura está por encima del
valor máximo
si la altura está por debajo del
valor mínimo
NOTA Si la altura queda fuera del alcance, la última columna
de la derecha quedará en blanco hasta que la altura vuelva
a quedar dentro del alcance del reloj. Todas las demás
columnas ajustarán su altura según la última lectura.
MODO CRONÓMETRO (CHRONO)
PARA INICIAR / DETENER EL CRONÓMETRO
1. Pulse MODE para navegar por el Modo cronómetro.
2. Pulse ST/SP/+ para iniciar/detener el cronómetro.
PARA REINICIAR EL CRONÓMETRO
Pulse para reiniciar el cronómetro.RST/-
NOTA El cronómetro se puede reiniciar a 00:00:00 sólo si p2-ha
sido detenido o está en pausa.
MODO DE ALARMA
CONFIGURACIÓN DE LA ALARMA
1. Pulse MODE para navegar por el Modo de Alarma.
2. Pulse SET y manténgalo pulsado para entrar en
configuración.
3. Pulse ST/SP/+ RST/-o para modificar los valores del
ajuste. Pulse o ST/SP/+ RST/- y manténgalo pulsado
para cambiar rápidamente los valores.
4. Pulse SET para confirmar y pasar al siguiente. Repita los
pasos 3-4 para cada opción de configuración. Las opciones
de configuración son las siguientes: hora; minuto.
5. Pulse MODE en cualquier momento para confirmar y salir.
PARA ACTIVAR O DESACTIVAR LA ALARMA
1. Pulse MODE para navegar por el Modo de Alarma.
2. Pulse ST/SP/+ RST/-o para activar o desactivar la
alarma. significa que la alarma p2-ha sido activada.
3. Pulse MODE para confirmar y salir.
PARA SILENCIAR LA ALARMA
Cuando la alarma esté activada, sonará todos los días a la
hora configurada. Pulse cualquier botón para que la alarma
no vuelva a sonar ese día.
NOTA El despertador sigue activo y volverá a sonar a la
misma hora el día siguiente.
RETROILUMINACIÓN Y BLOQUEO DEL TECLADO
Para activar la función de retroiluminación:
Pulse / n durante ópara encender la retroiluminaci
5 segundos.
NOTA La funció ó á n de retroiluminaci n no se activar si la
pantalla muestra “ ”o ”.
Para activar / desactivar el bloqueo de botones:
Pulse / y manté ngalo pulsado durante 2 segundos.
aparecerá si el bloqueo de botones está activo.
USO EN EL AGUA
El RA129 es resistente al agua a hasta 30 metros (98 pies).
NOTA Trate de no exponer el reloj a demasiada agua. No
pulse los botones dentro del agua, o si llueve mucho, puesto
que podria provocar daños por la entrada de agua en el reloj.
FICHA TÉCNICA
Reloj con hora real Formato de 12 ó 24 horas, con
hora, minuto y segundo
Cronómetro 00:00:00 a 99:59:59 (h:min:sec)
Rango de altura -400 m a 9000 m
(-1312 pies a 29520 pies)
Índice de
actualización de la
altura
20 segundos
Índice de
actualización de la
altura del gráfico
1 min
Alimentación Funciona con 1 x pila CR2032
de 3V
PRECAUCIONES
Pasa asegurarse de que usa su producto correctamente y
sin correr riesgos, lea estos avisos y el manual de usuario
entero antes de utilizar el producto.
Limpie el producto con un pa o suave ligeramente ñ
humedecido. No use detergentes abrasivos ni corrosivos,
porque podr an causar da os a la unidad. Use agua tibia í ñ
y un jab n suave para limpiar el reloj detenidamente ó
después de cada sesi n. No sumerja nunca los productos ó
en agua caliente ni los guarde mojados.
No exponga el producto a fuerza extrema, descargas,
polvo, fluctuaciones de temperatura o humedad. En
ningún caso exponga el producto a la luz directa del sol
durante periodos largos de tiempo. De hacerlo podría
provocar que el producto se estropeara.
No manipule los componentes internos. De hacerlo
anulará í í ños. la garant a de la unidad y podr a causar da
La unidad principal contiene componentes que el
usuario no debe manipular.
No raye la pantalla LCD con objetos duros, porque
podría causar daños.
Tenga cuidado cuando manipule las pilas de cualquier tipo.
Retire las pilas si va a guardar el producto por un largo
periodo de tiempo.
Al reemplazar las pilas, introduzca pilas nuevas siguiendo
las especificaciones de este manual de usuario.
Este producto es un instrumento de precisi n. Nunca ó
intente desmontarlo, Si necesita reparaci n, pó óngase
en contacto con el proveedor o nuestro departamento
de atención al cliente.
No toque los circuitos del dispositivo, p2-ya que existe un
peligro de descarga eléctrica.
Compruebe todas las funciones principales si el
dispositivo no se usa durante un largo periodo de tiempo.
Compruebe y limpie regularmente la parte interior de
su dispositivo. Asegúrese de que su reloj sea revisado
cada año por un centro de servicio autorizado.
Cuando elimine este producto, asegúrese de que no
vaya a parar a la basura general, sino separadamente
para recibir un tratamiento especial.
Debido a limitaciones de imprenta, las pantallas que se
muestran en este manual pueden diferir de las pantallas
reales.
Los contenidos de este manual no pueden reproducirse
sin permiso del fabricante.
NOTA éLa ficha t cnica de este producto y los contenidos de
este manual de usuario pueden cambiarse sin aviso.
NOTA No todas las funciones y accesorios estarán
disponibles en todos los países. Sírvase ponerse en contacto
con su distribuidor local si desea más información.
SOBRE OREGON SCIENTIFIC
Visite nuestra página web (www.oregonscientific.com) para
conocer más sobre los productos de Oregon Scientific.
Si está en EE.UU y quiere contactar directamente con
nuestro Departamento de Atención al Cliente, por favor
visite www2.oregonscientific.com/service/support.asp o
llame al 1-800-853-8883.
Si está en España y quiere contactar directamente con
nuestro Departamento de Atención al Cliente, por favor
visite www.oregonscientific.es o llame al 902 338 368.
Para consultas internacionales, por favor visite www2.
oregonscientific.com/about/international.asp.
EU - DECLARACIÓN DE CONFORMIDAD
Por medio de la presente, Oregon Scientific declara que
el ALTIMO RA129) Reloj con altímetro digital (Modelo:
cumple con la Directiva 89/336/CE del EMC. Tiene a su
disposición una copia firmada y sellada de la Declaración
de Conformidad, solicítela al Departamento de Atención al
Cliente de Oregon Scientific.
ALTIMO
SALPICA-
DURAS DE
LLUVIA
ETC
OK
DUCHA
(CALIENTE/
FRÍA)
NO
NADAR EN
AGUAS
POCO
PROFUNDAS
BUCEO EN
AGUAS POCO
PROFUNDAS /
DEPORTES
ACUÁTICOS /
SURFING
NO
HACER
SNORKEL /
SUBMARINIS-
MO / EN
AGUAS
PROFUNDAS
3 / 98 PIES0M NO NO


Produkt Specifikationer

Mærke: Oregon Scientific
Kategori: Ur
Model: RA129

Har du brug for hjælp?

Hvis du har brug for hjælp til Oregon Scientific RA129 stil et spørgsmål nedenfor, og andre brugere vil svare dig