Panasonic HC-V757 Manual
Panasonic
Digital kamera
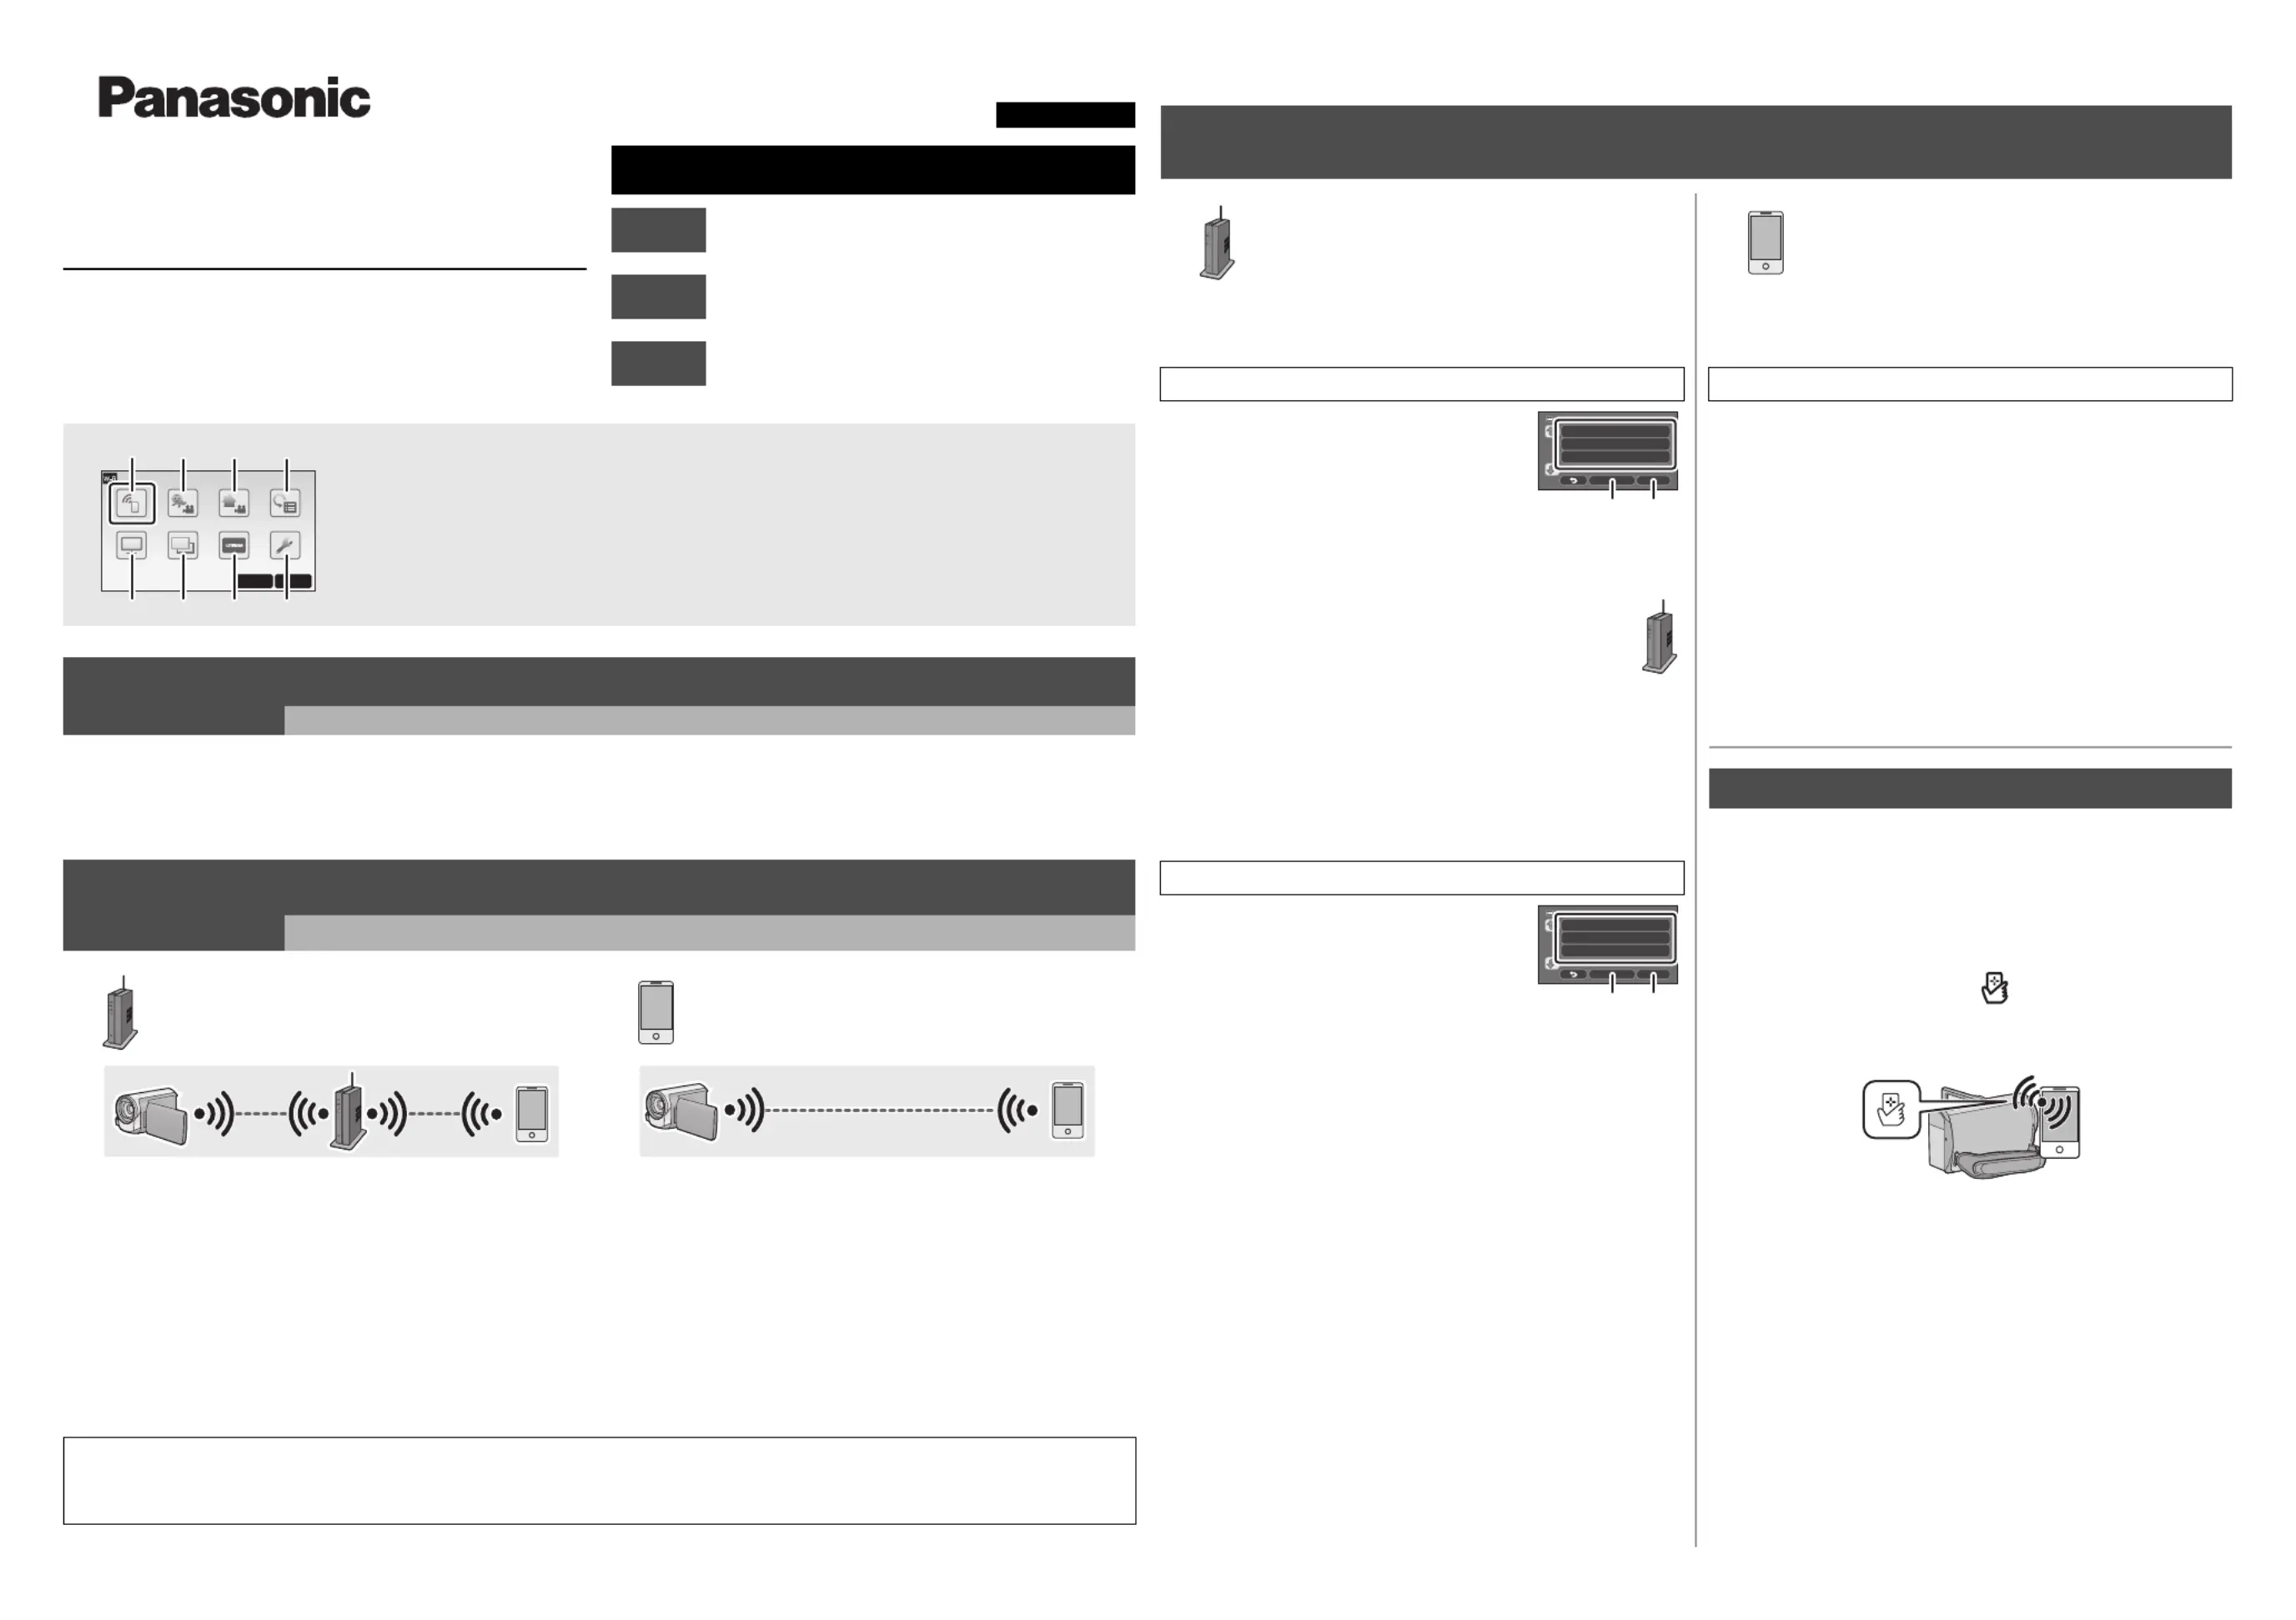
HC-V757
| Mærke: | Panasonic |
| Kategori: | Digital kamera |
| Model: | HC-V757 |
| Bredde: | 65 mm |
| Dybde: | 139 mm |
| Højde: | 73 mm |
| Vægt: | 353 g |
| Produktfarve: | Hvid |
| Batterispænding: | 3.6 V |
| Batterikapacitet: | 1940 mAh |
| Indbygget skærm: | Ja |
| Skærm diagonal: | 3 " |
| Kompatible hukommelseskort: | SD, SDHC, SDXC |
| Wi-Fi: | Ja |
| HD-type: | Fuld HD |
| Understøttede videotilstande: | 1080p, 720p |
| 3D: | Ingen |
| Antal USB 2.0-porte: | 1 |
| Udgange til hovedtelefoner: | 1 |
| Wi-Fi-standarder: | 802.11b, 802.11g, Wi-Fi 4 (802.11n) |
| Skærmvisning (OSD): | Ja |
| Understøttede videoformater: | AVC, AVCHD, H.264, MPEG4 |
| Understøttede lydformater: | AAC, MP4 |
| Skærm: | LCD |
| Kabler inkluderet: | HDMI, USB |
| Batterier inkluderet: | Ja |
| Understøttede billedformater: | 3:2, 4:3, 16:9 |
| Near Field Communication (NFC): | Ja |
| AC-adapter inkluderet: | Ja |
| Understøttede disktyper: | Ingen |
| HDMI: | Ja |
| Batterilevetid (maks.): | - t |
| Mikrofonindgang: | Ja |
| Medfølgende software: | HD Writer AE 5.1 |
| Opladningskilde: | USB |
| Hvidbalance: | Auto, Manual |
| Skærmopløsning (numerisk): | 460800 pixel |
| Sensortype: | MOS |
| Maksimal billedopløsning: | 6528 x 3672 pixel |
| Opløsning på stillbillede(r): | 6528 x 3672, 4736 x 2664, 1920 x 1080, 5472 x 3648, 3984 x 2656, 1728 x 1152, 4896 x 3672, 3264 x 2448, 640 x 480 |
| Billedstabilisator: | Ja |
| Samlet antal megapixels: | 12.76 MP |
| Maksimal videoopløsning: | 1920 x 1080 pixel |
| Videoopløsninger: | 1280 x 720,1920 x 1080 pixel |
| Lydsystem: | Dolby Digital 2.0 |
| Søgertype: | Ikke tilgængelig |
| Optisk zoom: | 20 x |
| Digital zoom: | 60 x |
| Fokusindstilling: | Auto/manuel |
| Intern lagerkapacitet: | - GB |
| Optisk sensorstørrelse: | 1/2.3 " |
| Brændviddeområde: | 4.08 - 81.6 mm |
| Indbygget flash: | Ja |
| Filterstørrelse: | 49 mm |
| Billedstabilisator type: | Hybrid Image Stabilization (HIS) |
| Videokameraets medietype: | Hukommelseskort |
| Videokamera type: | Håndholdt videokamera |
| Brændvidde (svarende til 35 mm film): | 29.5 - 612 mm |
| Videokameraets båndtype: | Ingen |
| Effektive megapixels (billede): | 5.21 MP |
Har du brug for hjælp?
Hvis du har brug for hjælp til Panasonic HC-V757 stil et spørgsmål nedenfor, og andre brugere vil svare dig
Digital kamera Panasonic Manualer

15 Januar 2025

15 Januar 2025

7 Juli 2024

7 Juli 2024

7 Juli 2024

7 Juli 2024

6 Juli 2024

5 Juli 2024

5 Juli 2024

5 Juli 2024
Digital kamera Manualer
- Somikon
- Easypix
- Renkforce
- BML
- SeaLife
- General Electric
- Toshiba
- Leica
- Jobo
- Kyocera
- Sakar
- Insta360
- AgfaPhoto
- Technaxx
- Storex
Nyeste Digital kamera Manualer
29 Marts 2025
29 Marts 2025
11 Marts 2025

11 Marts 2025
20 Februar 2025

20 Januar 2025
18 Januar 2025
18 Januar 2025

15 Januar 2025

12 Januar 2025