Perel SON202S Manual


Læs gratis den danske manual til Perel SON202S (8 sider) i kategorien Skadedyrsbekæmper. Denne vejledning er vurderet som hjælpsom af 25 personer og har en gennemsnitlig bedømmelse på 5.0 stjerner ud af 13 anmeldelser. Har du et spørgsmål om Perel SON202S, eller vil du spørge andre brugere om produktet?

Side 1/8
SON202S
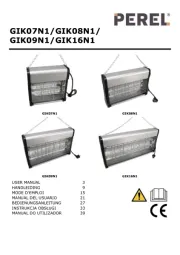
V. 01 – 1 07/11/2023 ©Velleman Group nv
SON202S
01
02
USER MANUAL
1. Introduction
To all residents of the European Union
Important environmental information about this
product
This symbol on the device or the package indicates that
disposal of the device after its lifecycle could
harm the environment. Do not dispose of the
unit (or batteries) as unsorted municipal
waste; it should be taken to a specialized
company for recycling. This device should be
returned to your distributor or to a local
recycling service. Respect the local environmental rules. If
in doubt, contact your local waste disposal
authorities.
Thank you for choosing Perel! Please read the manual
thoroughly before bringing this device into service. If the
device was damaged in transit, do not install or use it and
contact your dealer.
2. S ymbols
01
CE marking
02
Read and understand this manual and all
safety signs before using this appliance.
3. Safety Instructions
This device can be used by children aged from 8 years
and above, and persons with reduced physical, sensory or
mental capabilities or lack of experience and knowledge if
they have been given supervision or instruction concerning
the use of the device in a safe way and understand the
hazards involved. Children shall not play with the device.
Cleaning and user maintenance shall not be made by
children without supervision. There are no user-
serviceable parts inside the device. Refer to an authorized
dealer for service and/or spare parts. Do not immerge
the device in any liquid. Keep the main unit away from high
heat . and fire
4. General Guidelines
Refer to the Velleman® Service and Quality Warranty on
www.velleman.eu. Protect this device from shocks and
abuse. Avoid brute force when operating the device.
Familiarise yourself with the functions of the device
before actually using it. All modifications of the device
are forbidden for safety reasons. Damage caused by user
modifications to the device is not covered by the warranty.
Only use the device for its intended purpose. Using the
device in an unauthorised way will void the warranty.
Damage caused by disregard of certain guidelines in this
manual is not covered by the warranty and the dealer will
not accept responsibility for any ensuing defects or
problems. Keep this manual for future reference.
5. Battery Instructions
Step 1. When using the device for the first time, please
use the device till power to the lowest (built-in batteries):
the red low-voltage indicator will keep blinking or there is
no reaction after turn-on the device.
Step 2. Use the USB cable in packaging connect the
device to a standard USB output, charge the device for 6-
12 hours:
2.1: Because of the different power and voltage output
by different USB and different activity of batteries, it's
normal that the red indicator may keep flashing after
charging for more than 12 hours (the device could be
used normally even charging is stopped), please just
install the device in a normal usage scenario and use it
would be OK.
2.2: If the charging time is significantly less than 6
hours, but the indicator kept light up (showed charging
finished, not flashing), please continue to charge for at
least 6 hours.
Step 3. If the red indicator keeps flashing or device stop
working without any response after using for some time,
please repeat Step 2., charge 6-12 hours, after 3-5
cycles of charge and discharge, the charge and discharge
characteristics of the batteries would be stable and the
charging index tends to be back to normal.
Step 4. Please follow the three Steps above to enable the
batteries in the device to maximize its best performance.
Please take out the batteries if you won’t use the device
for a long time or recommend to replace three 1.2V AA
rechargeable batteries (replace with Ni-Cd or Ni-MH
rechargeable batteries).
6. Installation
Regarding to the linear propagation characteristic of
ultrasonic waves, please install this device to the
direction of invading animals for best effect. When
installing this device, please choose a place where the
solar parts on the top of the unit can get as much
sunshine as possible and avoid the obstacles which block
the sunshine. If there is dust or besmirch on the solar
panel, please wipe clean to ensure the high efficiency of
photoelectric conversion. Fix the spike stake on the
unit. Plant the unit into the ground at the place that
seems more favorable. It will be more difficult to connect
the spikes for the first time, which is normal. After using
several times, it will be easy to install them so DO NOT
use external force to hammer the top of products. When
selecting the installation place, please choose a suitable
terrain to ensure water won't dip the USB interface (see
chart) in bad weather conditions, so as to avoiding
damage to the product. A hanger is on the back of unit,
device could be hanged up to the place like wall or tree
which you want frighten animals.
Do not use the device in any extreme environment.
Otherwise, important components of the device may be
damaged or stop working.
Solar panel: air salinity NO more than 3%; Applicable
temperature: - -20~ +85Ni Cd battery applicable
temperature: - 10~ +45(over -10~ +50can t be
charged, over -20 -~ +60can t output power) Ni MH
battery applicable temperature: - 18~ +65(over 0
~ +55 can t be charged, over -18 ~ +65 can t
output power).
7. Settings
Button "SENS" (Left): Is for adjusting sensitivity and
distance. By turning the knob clockwise, you increase the
range of protection. To repel small animals, turn the knob
up to the right. Button "FREQ" (Right): Frequency
control. By turning the knob clockwise, you increase the
frequency. 0: OFF 1: 13.5KHz 17.5KHz Repels -
animals such as mice, small rodents, ... 2: 15.5KHz -
19,5KHz Repels animals such as large dogs, foxes ... 3:
19.5KHz -23.5KHz Repels animals such as small dogs,
cat, bird ... 4: Strong flashing 5: All functions
working, sweep frequency from mode 1 -- mode 2 --
mode 3, and turn on strong flashing. This is the best
function as it will cover all the functions of the device.
Important: To change a setting, you must always start
from OFF position and then go directly to the function you
need. If you want to change the setting, you always have
to restart from Off position. (Eg. if you go from 5 to 3
directly, the frequency result will be different from the
real 3 position).
8. Operation
A strong ultrasonic signal which frightens wild animals.
The animals avoid the area because of its unpleasant
ultrasonic sound. The sound is activated when an animal
enters the detect range. Thus, animals cannot get used
to the sound, and the repel effect is good. A strong
flashing scares wild animals. The strong flashing is
activated when an animal enters the detect range then
scaring the animal away.
9. Specifications
power supply
solar energy cell
rechargeable Ni-MH 1.2V / 800mAh battery
dimensions ........................................ 70 x 130 x 90mm
total weight .........................................................1 g 60
range ..............................................................± 65m²
frequency .......................................... 13.500-23.500Hz
Use this device with original accessories only.
Velleman Group nv cannot be held responsible in the
event of damage or injury resulting from (incorrect)
use of this device. For more info concerning this
product and the latest version of this manual, please
visit our website www.velleman.eu. The information
in this manual is subject to change without prior
notice.
© COPYRIGHT NOTICE
The copyright to this manual is owned by Velleman
Group nv. All worldwide rights reserved. No part of
this manual may be copied, reproduced, translated or
reduced to any electronic medium or otherwise without the
prior written consent of the copyright holder.
HANDLEIDING
1. Inleiding
Aan alle ingezetenen van de Europese Unie
Belangrijke milieu-informatie betreffende dit
product
Dit symbool op het toestel of de verpakking geeft aan dat,
als het na zijn levenscyclus wordt
weggeworpen, dit toestel schade kan
toebrengen aan het milieu. Gooi dit toestel
(en eventuele batterijen) niet bij het gewone
huishoudelijke afval; het moet bij een
gespecialiseerd bedrijf terechtkomen voor
recyclage. U moet dit toestel naar uw verdeler of naar een
lokaal recyclagepunt brengen. Respecteer de plaatselijke
milieuwetgeving. Hebt u vragen, contacteer dan de
plaatselijke autoriteiten betreffende de
verwijdering.
Bedankt voor uw aankoop! Lees deze handleiding grondig
door voor u het toestel in gebruik neemt. Werd het toestel
beschadigd tijdens het transport, installeer het dan niet en
raadpleeg uw dealer.
2. Symbolen
01
CE- markering
02
Lees en begrijp deze handleiding en de
veiligheidsinstructiesór ingebruikname.
3. Veiligheidsvoorschriften
Dit toestel is geschikt voor gebruik door kinderen vanaf
8 jaar, door personen met fysieke, zintuiglijke of
verstandelijke beperkingen, of door personen met gebrek
aan ervaring en kennis, op voorwaarde dat dit onder
toezicht gebeurt van een persoon die verantwoordelijk is
voor hun veiligheid of hun aanwijzingen heeft gegeven,
hoe zij het toestel moeten gebruiken en zich bewust zijn
van de risico's die het gebruik van het toestel met zich
meebrengt. Kinderen mogen niet met het toestel spelen.
De reiniging en het onderhoud van het toestel mogen niet
worden uitgevoerd door kinderen, tenzij ze onder toezicht
staan. ● Er zijn geen onderdelen in het toestel die door de
gebruiker gerepareerd kunnen worden. Contacteer uw
verdeler voor eventuele reserveonderdelen. Dompel het
toestel nooit onder in een vloeistof. Stel het toestel niet
bloot aan extreme temperaturen of vuur.
4. Algemene richtlijnen
Raadpleeg de Velleman® service- en kwaliteitsgarantie op
www.velleman.eu. Bescherm tegen schokken. Vermijd
brute kracht tijdens de bediening van het toestel. Leer
eerst de functies van het toestel kennen voor u het gaat
gebruiken. Om veiligheidsredenen mag u geen
wijzigingen aanbrengen. Schade door wijzigingen die de
gebruiker heeft aangebracht valt niet onder de garantie.
Gebruik het toestel enkel waarvoor het gemaakt is. De
garantie vervalt automatisch bij ongeoorloofd gebruik.
De garantie geldt niet voor schade door het negeren van
bepaalde richtlijnen in deze handleiding en uw dealer zal
de verantwoordelijkheid afwijzen voor defecten of
problemen die hier rechtstreeks verband mee houden.
Bewaar deze handleiding voor verdere raadpleging.
5. Instructies batterij
Stap 1. Als u het apparaat voor het eerst gebruikt, gebruik
het dan tot de spanning het laagst is (ingebouwde
batterijen): de rode laagspanningsindicator blijft
knipperen of er is geen reactie na het inschakelen van het
apparaat.
Stap 2. Gebruik de USB-kabel in de verpakking om het
apparaat aan te sluiten op een standaard USB-uitgang en
laad het apparaat gedurende 6-12 uur op:
2.1: Vanwege de verschillende stroom- en
spanningsuitvoer door verschillende USB en verschillende
activiteit van batterijen, is het normaal dat de rode
indicator kan blijven knipperen na het opladen gedurende
meer dan 12 uur (het apparaat kan normaal worden
gebruikt, zelfs als het opladen is gestopt), installeer het
apparaat dan gewoon in een normaal gebruiksscenario en
gebruik het zou OK zijn.
2.2: Als de oplaadtijd aanzienlijk korter is dan 6 uur, maar
de indicator blijft branden (laat zien dat het opladen
voltooid is, niet knippert), ga dan minstens 6 uur door met
opladen.
Stap 3. Als de rode indicator blijft knipperen of het
apparaat stopt met werken zonder enige reactie na enige
tijd te hebben gebruikt, herhaal dan stap 2., laad 6-12 uur
op, na 3-5 cycli van laden en ontladen, zijn de laad- en
ontlaadeigenschappen van de batterijen stabiel en neigt de
laadindex weer naar normaal.
Stap 4. Volg de drie bovenstaande stappen om de
batterijen in het apparaat optimaal te laten presteren. Haal
de batterijen eruit als u het apparaat lange tijd niet
gebruikt of raad aan om drie oplaadbare AA-batterijen van
1,2 V te vervangen (vervang door oplaadbare Ni-Cd- of Ni-
MH-batterijen).
6. Installatie
In verband met de lineaire voortplantingskarakteristiek
van ultrasone golven, installeer dit apparaat in de richting
Pvan binnendringende dieren voor het beste effect. Kies
bij het installeren van dit apparaat een plaats waar de
zonnestralen op de bovenkant van het apparaat zoveel
mogelijk in de zon kunnen schijnen en vermijd obstakels
die de zonnestralen blokkeren. Als er stof of vlekken op
het zonnepaneel zitten, veeg het dan schoon om de hoge
efficiëntie van de foto elektrische omzetting te -
garanderen. Bevestig de spies aan het apparaat. Plant het
apparaat in de grond op een plek die gunstiger lijkt. De
eerste keer zal het moeilijker zijn om de spikes aan te
sluiten, wat normaal is. Dit is normaal. Na enkele keren
gebruik zal het gemakkelijk zijn om ze te installeren, dus
gebruik GEEN kracht van buitenaf om de bovenkant van
de producten in te slaan. Kies bij het kiezen van de
installatieplaats een geschikt terrein om ervoor te zorgen
dat er bij slechte weersomstandigheden geen water in de
USB-interface (zie tabel) komt, zodat het product niet
beschadigd raakt. Aan de achterkant van het apparaat
bevindt zich een ophangbeugel waarmee het apparaat aan
een muur of boom kan worden opgehangen om dieren af
te schrikken.
Gebruik het apparaat niet in een extreme omgeving.
Anders kunnen belangrijke onderdelen van het apparaat
beschadigd raken of niet meer werken.
Zonnepaneel: zoutgehalte in de lucht NO meer dan 3%;
Toepasbare temperatuur: -20 ~ +85Toepasbare
temperatuur Ni-Cd batterij: -10 ~ +45 (meer dan -10
~ +50 kan niet worden opgeladen, meer dan -20 ~
+60 kan geen uitgangsvermogen leveren) -Ni MH
batterij toepasselijke temperatuur: -18 ~ +65(meer
dan 0 ~ +55 kan niet worden opgeladen, meer dan -
18 ~ +65 kan geen uitgangsvermogen leveren).
SON202S
V. 01 – 2 07/11/2023 ©Velleman Group nv
7. Instellingen
Knop "SENS" (Links): Is voor het aanpassen van de
gevoeligheid en afstand. Door de knop met de klok mee te
draaien, vergroot je het bereik van de bescherming. Draai
de knop naar rechts om kleine dieren af te weren. Knop
"FREQ" (Rechts): Frequentieregeling. Door de knop
rechtsom te draaien, verhoogt u de frequentie. ● 0: UIT ●
1: 13,5KHz-17,5KHz Weert dieren af zoals muizen, kleine
knaagdieren, ... 2: 15,5KHz -19,5KHz Weert dieren af
zoals grote honden, vossen ... 3: 19,5KHz -23,5KHz
Schrikt dieren af zoals kleine honden, katten, vogels ...
4: Sterk knipperen 5: Alle functies werken, veeg de
frequentie van modus 1 -- modus 2 -- modus 3, en zet
sterk knipperen aan. Dit is de beste functie omdat het alle
functies van het apparaat dekt. ●
Belangrijk: Om een instelling te wijzigen, moet je altijd
beginnen bij de OFF-stand en dan direct naar de functie
gaan die je nodig hebt. Als je de instelling wilt wijzigen,
moet je altijd opnieuw starten vanuit de uit-stand. (Als je
bijvoorbeeld direct van 5 naar 3 gaat, zal het resultaat van
de frequentie verschillen van de echte 3 positie).
8. Werking
Een sterk ultrasoon signaal dat wilde dieren afschrikt. De
dieren mijden het gebied vanwege het onaangename
ultrasone geluid. Het geluid wordt geactiveerd wanneer
een dier het detectiebereik betreedt. Zo kunnen dieren niet
wennen aan het geluid en is het verjagende effect goed.
Een sterk knipperlicht schrikt wilde dieren af. Het sterke
knipperen wordt geactiveerd wanneer een dier het
detectiebereik binnenkomt en schrikt het dier dan af.
9. Specificaties
voeding
- zonne energie
oplaadbare NiMH 1,2V/800mAh batterij (meegelev.)
afmetingen ........................................ 70 x 130 x 90mm
totaal gewicht ......................................................160g
bereik ............................................................ ± 65
frequentie .......................................... 13.500 23.500- Hz
Gebruik dit toestel enkel met originele accessoires.
Velleman Group nv is niet aansprakelijk voor schade
of kwetsuren bij (verkeerd) gebruik van dit toestel.
Voor meer informatie over dit product en de laatste
versie van deze handleiding, zie www.velleman.eu.
De informatie in deze handleiding kan te allen tijde
worden gewijzigd zonder voorafgaande
kennisgeving.
© AUTEURSRECHT
Velleman Group nv heeft het auteursrecht voor deze
handleiding. Alle wereldwijde rechten
voorbehouden. Het is niet toegestaan om deze
handleiding of gedeelten ervan over te nemen, te
kopiëren, te vertalen, te bewerken en op te slaan op een
elektronisch medium zonder voorafgaande schriftelijke
toestemming van de rechthebbende.
MODE D'EMPLOI
1. Introduction
Aux résidents de l'Union européenne
Informations environnementales importantes
concernant ce produit
Ce symbole sur l'appareil ou l'emballage indique que
l’élimination d’un appareil en fin de vie peut
polluer l'environnement. Ne pas jeter un
appareil électrique ou électronique (et des
piles éventuelles) parmi les déchets
municipaux non-sujets au tri lectif ; une
déchetterie traitera l’appareil en question.
Renvoyer l'appareil à votre fournisseur ou à un service de
recyclage local. Respecter la réglementation locale relative
à la protection de l’environnement. En cas de questions,
contacter les autorités locales pour élimination.
Nous vous remercions de votre achat ! Lire attentivement
le présent mode d'emploi avant la mise en service de
l’appareil. Si l'appareil a é endommagé pendant le
transport, ne pas l’installer et consulter votre revendeur.
2. Symboles
01
Marquage CE
02
Lire et comprendre ce mode d'emploi et
toutes les consignes de sécurité avant
d'utiliser l'appareil.
3. Consignes de sécurité
Cet appareil peut être utilisé par des enfants âgés de 8
ans et plus et des personnes manquant d’expérience et de
connaissances ou dont les capacités physiques,
sensorielles ou mentales sont réduites, si elles ont été
formées et encadrées quant à l'utilisation de l'appareil
d'une manière sûre et connaissent les risques encourus.
Ne pas laisser les enfants jouer avec l'appareil. Le
nettoyage et l'entretien ne doivent pas être effectués par
des enfants sans surveillance. Il n’y a aucune pièce
réparable par l’utilisateur. Commander des pièces de
rechange éventuelles chez votre revendeur. Ne jamais
immerger l’appareil dans un liquide. Ne pas exposer
l'appareil à des températures extrêmes et au feu.
4. Directives générales
Se référer à la garantie de service et de qualité Velleman®
sur www.velleman.eu. Protéger l’appareil des chocs et
de l'abus. Traiter l'appareil avec circonspection pendant
l’opération. Se familiariser avec le fonctionnement de
l'appareil avant de l'utiliser. Toute modification est
interdite pour des raisons de sécurité. Les dommages
occasionnés par des modifications par le client ne tombent
pas sous la garantie. ● N’utiliser l'appareil qu’à sa fonction
prévue. Un usage impropre annule d'office la garantie. La
garantie ne se s’applique pas aux dommages survenus en
négligeant certaines directives de ce mode d'emploi et
votre revendeur déclinera toute responsabili pour les
problèmes et les défauts qui en résultent. Garder ce
mode d'emploi pour toute référence ultérieure.
5. Instructions batterie
Étape 1. Lors de la première utilisation de l'appareil,
veuillez utiliser l'appareil jusqu'à ce que la tension soit au
plus bas (piles intégrées) : l'indicateur rouge de faible
tension continue de clignoter ou il n'y a pas de réaction
après la mise en marche de l'appareil.
Étape 2. Utilisez le câble USB fourni dans l'emballage pour
connecter l'appareil à une sortie USB standard, et chargez
l'appareil pendant 6 à 12 heures :
2.1 : En raison de la différence de puissance et de tension
de sortie des différents ports USB et de l'activité différente
des batteries, il est normal que l'indicateur rouge continue
de clignoter après une charge de plus de 12 heures
(l'appareil peut être utilisé normalement même si la charge
est interrompue).
2.2 : Si le temps de charge est nettement inférieur à 6
heures, mais que le voyant reste allumé (il indique que la
charge est terminée, mais ne clignote pas), continuez à
charger l'appareil pendant au moins 6 heures.
Étape 3. Si l'indicateur rouge continue de clignoter ou si
l'appareil s'arrête de fonctionner sans réponse après un
certain temps d'utilisation, répétez l'étape 2, chargez
pendant 6 à 12 heures, après 3 à 5 cycles de charge et de
décharge, les caractéristiques de charge et de décharge
des batteries sont stables et l'indice de charge tend à
revenir à la normale.
Étape 4. Veuillez suivre les trois étapes ci-dessus pour
permettre aux piles de l'appareil de maximiser leurs
performances. Retirez les piles si vous n'utilisez pas
l'appareil pendant une longue période ou recommandez de
remplacer trois piles rechargeables AA de 1,2 V
(remplacez-les par des piles rechargeables Ni-Cd ou Ni-
MH).
6. Installation
En ce qui concerne la caractéristique de propagation
linéaire des ondes ultrasoniques, veuillez installer cet
appareil dans la direction des animaux envahissants pour
un meilleur effet. Lors de l'installation de cet appareil,
choisissez un endroit les parties solaires situées sur le
dessus de l'appareil peuvent recevoir autant de soleil que
possible et évitez les obstacles qui bloquent la lumière du
soleil. S'il y a de la poussière ou des souillures sur le
panneau solaire, veuillez l'essuyer pour garantir la haute
efficacité de la conversion photoélectrique. ● Fixez le
piquet sur l'uni. Plantez l'unité dans le sol à l'endroit qui
vous semble le plus favorable. Il sera plus difficile de
connecter les pointes pour la première fois, ce qui est
normal. Après plusieurs utilisations, il sera facile de les
installer. N'utilisez donc PAS de force extérieure pour
marteler le dessus des produits. Lors de la sélection du lieu
d'installation, veuillez choisir un terrain approprpour que
l'eau ne trempe pas l'interface USB (voir tableau) en cas
de mauvaises conditions météorologiques, afin d'éviter
d'endommager le produit.Un crochet se trouve à l'arrière
de l'appareil, qui peut être accroché à un mur ou à un arbre
pour effrayer les animaux.
N'utilisez pas l'appareil dans un environnement extrême.
Dans le cas contraire, des composants importants de
l'appareil pourraient être endommagés ou cesser de
fonctionner.
Panneau solaire : salinité de l'air NO plus de 3% ;
Température applicable : -20 ~ +85 Batterie Ni-Cd
température applicable : -10 ~ +45(plus de -10~
+50 ne peut pas être chargé, plus de -20 ~ +60ne
peut pas sortir de puissance)Ni-MH batterie température
applicable : -18 ~ +65(plus de 0~ +55ne peut
pas être chargé, plus de -18 ~ +65ne peut pas sortir
de puissance).
7. Réglages
Bouton "SENS" (gauche) : Permet de régler la sensibilité
et la distance. En tournant le bouton dans le sens des
aiguilles d'une montre, vous augmentez la portée de la
protection. Pour repousser les petits animaux, tournez le
bouton vers le haut à droite. Bouton "FREQ" (Droite) :
Contrôle de la fréquence. En tournant le bouton vers la
droite, vous augmentez la fréquence. 0 : OFF 1 :
13,5KHz-17,5KHz Repousse les animaux tels que les
souris, les petits rongeurs, .... 2 : 15,5KHz -19,5KHz
Repousse les animaux tels que les gros chiens, les renards,
.... ● 3 : 19.5KHz -23.5KHz Repousse les animaux tels que
les petits chiens, les chats, les oiseaux ... 4 :
Clignotement puissant 5 : Toutes les fonctions
fonctionnent, balayage de la fréquence du mode 1 -- mode
2 -- mode 3, et activation du clignotement puissant. C'est
la meilleure fonction car elle couvrira toutes les fonctions
de l'appareil. ●
Important : Pour modifier un réglage, vous devez
toujours commencer par la position OFF, puis passer
directement à la fonction dont vous avez besoin. Si vous
souhaitez modifier le réglage, vous devez toujours repartir
de la position Off. (Par exemple, si vous passez
directement de 5 à 3, le résultat de la fréquence sera
différent de la position 3 réelle).
8. Fonctionnement
Un signal ultrasonique puissant qui effraie les animaux
sauvages. Les animaux évitent la zone à cause du son
ultrasonique désagréable. Le son est activé lorsqu'un
animal entre dans la zone de détection. Ainsi, les animaux
ne peuvent pas s'habituer au son et l'effet répulsif est bon.
Un clignotement puissant effraie les animaux sauvages.
Le clignotement puissant est activé lorsqu'un animal entre
dans la zone de détection puis fait fuir l'animal.
9. Spécifications
alimentation
énergie solaire
pile rechargeable NiMH 1,2V/800mAh (incl.)
dimensions ........................................ 70 x 130 x 90mm
poids total ........................................................... 160g
plage .............................................................. ± 65m²
fréquence .......................................... 13.500-23.500Hz
N'employer cet appareil qu’avec des accessoires
d’origine. Velleman Group nv ne peut, dans la
mesure conforme au droit applicable être tenue
responsable des dommages ou lésions (directs ou
indirects) pouvant résulter de l’utilisation de cet
appareil. Pour plus d'informations concernant cet
article et la dernière version de ce mode d'emploi,
consulter notre site www.velleman.eu. Les
spécifications et le continu de ce mode d'emploi
peuvent être modifiés sans notification préalable.
© DROITS D’AUTEUR
Velleman Group nv est l’ayant droit des droits
d’auteur de ce mode d'emploi. Tous droits mondiaux
réservés. Toute reproduction, traduction, copie ou
diffusion, intégrale ou partielle, du contenu de ce mode
d'emploi par quelque procédé ou sur tout support
électronique que ce soit est interdite sans l’accord
préalable écrit de l’ayant droit.
MANUAL DEL USUARIO
1. Introducción
A los ciudadanos de la Unión Europea
Importantes informaciones sobre el medio ambiente
concerniente a este producto
El símbolo del contenedor de basura tachado en el
producto eléctrico y electrónico o el embalaje
indica que no es reciclable al final de su vida
útil. Por lo tanto, no se puede tirar (ni las
pilas, si las hubiera) a la basura. Debe ir a una
empresa especializada en reciclaje. Lleve este
aparato a su distribuidor o el punto de
reciclaje s cercano. Respete las leyes locales en relación
con el medio ambiente. Si tiene dudas, contacte con las
autoridades locales para residuos.
¡Gracias por elegir Perel! Lea atentamente las
instrucciones del manual antes de usar el aparato. Si ha
sufrido algún daño en el transporte no lo instale y póngase
en contacto con su distribuidor.
2. Símbolos
01
marcado CE
02
Lea y comprenda este manual y todas las
instrucciones de seguridad antes de usar el
aparato.
3. Instrucciones de seguridad
Este aparato no es apto para niños menores de 8 os
ni para personas con capacidades físicas, sensoriales o
mentales reducidas ni para personas con una falta de
experiencia y conocimientos del producto, salvo si están
bajo la vigilancia de una persona que pueda garantizar la
seguridad. Aserese de que los niños no jueguen con este
dispositivo. Nunca deje que los niños limpien o manipulen
el aparato sin supervisión. El usuario no habrá de
efectuar el mantenimiento de ninguna pieza. Contacte con
su distribuidor si necesita piezas de recambio. No
sumerja el aparato en ningún líquido. No exponga el
aparato a temperaturas extremas y fuego.
4. Normas generales
Para más información sobre la Garantía de servicio y
calidad Velleman®, visite www.velleman.eu. Proteja el
aparato contra choques y golpes. Evite usar excesiva
fuerza durante el manejo. Familiacese con el
funcionamiento del aparato antes de utilizarlo. Por
razones de seguridad, las modificaciones no autorizadas
del aparato están prohibidas. Los daños causados por
modificaciones no autorizadas, no están cubiertos por la
garantía. Utilice sólo el aparato para las aplicaciones
descritas en este manual. Su uso incorrecto anula la
garantía completamente. Los daños causados por
descuido de las instrucciones de seguridad de este manual
invalidarán su garantía y su distribuidor no será
responsable de ningún do u otros problemas
resultantes. Guarde este manual del usuario para cuando
necesite consultarlo.
5. Instrucciones para la batéria
Paso 1. Cuando utilice el dispositivo por primera vez, por
favor, utilice el dispositivo hasta que la energía esté al
mínimo (baterías incorporadas): el indicador rojo de bajo
voltaje seguirá parpadeando o no habrá reacción después
de encender el dispositivo.


Produkt Specifikationer

Mærke: Perel
Kategori: Skadedyrsbekæmper
Model: SON202S

Har du brug for hjælp?

Hvis du har brug for hjælp til Perel SON202S stil et spørgsmål nedenfor, og andre brugere vil svare dig


Skadedyrsbekæmper Perel Manualer

Perel

Perel GIK09N1 Manual

31 December 2025
Perel

Perel GIK16N1 Manual

31 December 2025
Perel

Perel GIKLED03 Manual

4 September 2024
Perel

Perel GIKLED04 Manual

30 August 2024
Perel

Perel SON202S Manual

30 August 2024
Perel

Perel GIKLED09 Manual

24 August 2024
Perel

Perel GIK07ON Manual

11 August 2024
Perel

Perel GIK39 Manual

9 August 2024
Perel

Perel GIK08N1 Manual

9 August 2024
Perel

Perel GRR01 Manual

8 August 2024

Skadedyrsbekæmper Manualer

Nyeste Skadedyrsbekæmper Manualer

Ardes

Ardes AR6S05A Manual

30 December 2025
LAS

LAS 16274 Manual

14 December 2024
Ardes

Ardes PP1603 Manual

4 Oktober 2024
Sencor

Sencor SIK 50B Manual

4 September 2024
Pest Reject

Pest Reject Pro Manual

31 August 2024
K&K Sound

K&K Sound M15 Manual

30 August 2024