Philips Norelco MG3750 Manual

Philips Skægtrimmer Norelco MG3750

Læs nedenfor 📖 manual på dansk for Philips Norelco MG3750 (3 sider) i kategorien Skægtrimmer. Denne guide var nyttig for 6 personer og blev bedømt med 4.7 stjerner i gennemsnit af 3.5 brugere

Side 1/3
ENGLISH
Introduction
Congratulations on your purchase and welcome to
Philips! To fully benet from the support that Philips
oers, register your product at www.philips.com/
welcome.
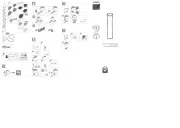
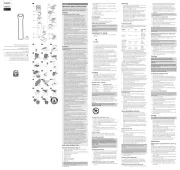
General description (Fig. 1)
1 Rotary nose and ear trimmer
3 Full size trimmer
4 On/o button
5 Handle
6 Socket for small plug
7 Beard comb (7mm/9/32in)
8 Beard comb (5mm/3/16in)
9 Beard comb (3mm/1/8in)
10 Beard and stubble comb (1.5mm/1/16in)
11 Hair comb (9mm/3/8in)
12 Hair comb (12mm/15/32in)
13 Hair comb (16mm/21/32in)
14 Pouch
15 Power plug
16 Small plug
Not shown: cleaning brush
Important safety information
Read this important information carefully before you
use the appliance and its accessories and save it for
future reference. The accessories supplied may vary
for dierent products.
Danger
-Keep the supply unit dry.
Warning
-To charge the battery, only use the detachable
supply unit (HQ8505) provided with the appliance.
-The supply unit contains a transformer. Do not cut
o the supply unit to replace it with another plug,
as this causes a hazardous situation.
-Children shall not play with the appliance. Cleaning
and user maintenance shall not be made by
children without supervision.
-Always check the appliance before you use it.
Do not use the appliance if it is damaged, as this
may cause injury. Always replace a damaged part
with one of the original type.
-Do not open the appliance to replace the
rechargeable battery.
Caution
-This appliance is not washable. Never immerse the
appliance in water and do not rinse it under the
tap.
-Only use this appliance for its intended purpose as
shown in the user manual.
-For hygienic reasons, the appliance should only be
used by one person.
-Never use compressed air, scouring pads, abrasive
cleaning agents or aggressive liquids such as petrol
or acetone to clean the appliance.
-Do not use the supply unit in or near wall sockets
that contain an electric air freshener to prevent
irreparable damage to the supply unit.
Electromagnetic elds (EMF)
-This Philips appliance complies with all applicable
standards and regulations regarding exposure to
electromagnetic elds.
General
-The appliance is suitable for mains voltages
ranging from 100 to 240 volts.
-The supply unit transforms 100-240 volts to a safe
low voltage of less than 24 volts.
Charging
It takes approximately 8 hours to fully charge the
appliance. When the appliance is fully charged,
it has an operating time of up to 60 minutes.
1 Switch o the appliance.
2 Put the small plug in the appliance and put the
adapter in the wall .socket (Fig. 3)
3 After charging, remove the adapter from the wall
socket and pull the small plug out of the appliance.
Using the product
Warning: Always check the product before you
use it. Do not use the product if it is damaged,
as this may cause injury. Always replace a
damaged part with one of the original type.
Note: This product can only be used without cord
(Fig. 4).
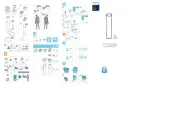
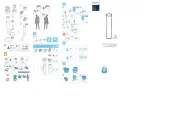
Detaching and attaching cutting elements
1 To detach a cutting element, push upwards against
the teeth of the cutting unit and take it o the
handle (Fig. 5).
2 To attach a cutting element, insert the lug of the
cutting unit into the guiding slot and push the
cutting element onto the product (‚click‘ .) (Fig. 6)
Detaching and attaching combs
1 To detach any type of comb from the cutting
element, pull its back part o the product and then
slide it o the cutting . element (Fig. 7)
2 To attach any type of comb onto a cutting
element, slide the front part of the comb onto the
teeth and push the projection at the back of the
comb into the product (‚click‘ .) (Fig. 8)
Switching the product on and o
1 To switch on the product, press the on/o button
once (Fig. 9).
2 To switch o the product, press the on/o button
once (Fig. 9).
Precision attachments for use on face
Rotary nose and ear trimmer
You can use the nose and ear trimmer attachment to
trim your nose hair and ear hair.
-Make sure your nostrils are clean. Make sure your
outer ear channels are clean and free from wax.
-Do not insert the tip more than 0.5cm/1/4in and
make controlled movements.
Trimming nose hair
1 Gently move the tip in and out of your nose while
turning it around to remove unwanted hairs (Fig. 10).
5
6
4
3
2
1
9
11
12
13
10
8
7
15
14
16
1
4222.002.8684.2www.philips.com
>75% recycled paper
>75% papier recyclé
432
109
2
1
8
1
2
75
1
2
6
1311 12
161514
222120
1917 18
23
MG3750
Trimming ear hair
1 Slowly move the tip round the ear to remove hairs
that stick out beyond the rim of the ear.
2 Gently move the tip in and out of the outer ear
channel to remove unwanted .hairs (Fig. 11)
Detail trimmer
You can use the detail trimmer without a comb to
create ne lines and contours around your facial style,
close to the skin (to a length of 0.5mm/1/32in).
1 Hold the detail trimming head perpendicular to
the skin and move the trimming head upwards or
downwards with gentle .pressure (Fig. 12)
Attachments for use on beard
Full-size trimmer
You can use the full-size metal trimmer without a
comb to trim hair close to the skin or to create clean
lines around your beard, neck and sideburns close to
the skin (to a length of 0.5mm/1/32in).
1 To trim hair close to the skin, place the at side of
the cutting element against your skin and make
strokes against the direction of hair .growth (Fig. 13)
2 For contouring hold the cutting element
perpendicular to the skin and move it upwards or
downwards with gentle .pressure (Fig. 14)
Beard combs
You can use the beard combs attached to the full size
trimmer to evenly trim your beard and moustache.
The product comes with 3 dierent beard combs.
The indication on each comb corresponds to the hair
length in millimeters.
Note: You can also use the hair combs to trim your
beard (see ‚Hair combs‘).
3mm 1/8inch
5mm 3/16inch
7mm 9/32inch
1 Attach a beard comb onto the product.
2 Switch on the product.
3 To trim most eectively, move the product against
the hair growth . direction (Fig. 15)
Make sure that the surface of the comb always
stays in contact with the skin.
Stubble comb
You can use the stubble comb attached to the full
size trimmer to trim your stubble to a length of 1.5mm
(1/16inch . ) (Fig. 16)
Attachments for use on head
Full-size trimmer
You can use the full-size metal trimmer without a
comb to clip hair very close to the skin (to a length of
0.5mm/1/32in) or to create contours around your ears
or neck.
1 Move the product slowly and smoothly.
2 Follow the natural .hairline (Fig. 17)
3 To contour the neckline and sideburns, turn the
product and make downward .strokes (Fig. 18)
4 Only cut the hair ends. The hairline should be close
to the ear.
Hair combs
You can use a hair comb attached to the full size
trimmer for an even haircut.The product comes with
3 dierent hair combs. The indication on each comb
corresponds to the hair length in millimeters.
Note: You can also use the beard combs to clip your
hair (see ‚Beard combs‘).
9mm 3/8inch
12mm 15/32inch
16mm 21/32inch
1 Attach a hair comb onto the product.
2 Switch on the product.
3 Slowly move the product against the hair growth
direction (Fig. 19). Press lightly and make sure that
the surface of the comb always stays in contact
with the scalp to obtain an even result.
Cleaning and storage
Note: Only the attachments can be rinsed under the
tap.
Caution: Never use scouring pads, abrasive cleaning
agents or aggressive liquids such as gasoline or
acetone to clean the product.
1 Switch o the product and disconnect it from the
wall outlet.
2 Wipe the handle of the product with a dry cloth.
3 Remove any comb or attachment from the product.
4 Brush and/or blow out any hair that has
accumulated in the hair .chamber (Fig. 20)
5 Brush and/or blow out any hair that has
accumulated in the attachments and/or combs
(Fig. 21).
6 Clean the attachments (Fig. 22) combs and the
(Fig. 23) under a lukewarm tap after every use.
Note: Only the attachments and combs can be
rinsed under the tap
7 Carefully shake o excess water and let all parts
dry completely.
Note: Never dry the trimmer teeth with a towel or
tissue, as this may damage the trimmer teeth.
8 You can store the attachments in the pouch
supplied to keep them clean.
Disposal
This appliance contains a rechargeable battery which
must be disposed of properly. Contact your local
town or city ocials for battery disposal information.
You can also call 1-800-8-BATTERY or visit
www.call2recycle.ca for battery drop-o .locations
For assistance, visit our website www.philips.com/
support or call 1-800-243-3050 toll free.
Removing the rechargeable battery
Only remove the rechargeable battery when
you discard the appliance. Before you remove
the battery, make sure that the appliance is
disconnected from the wall socket and that the
battery is completely empty.
Take any necessary safety precautions when you
handle tools to open the appliance and when you
dispose of the rechargeable battery.
1 Check if there are screws in the back or front of the
appliance. If so, remove them.
2 Remove the back and/or front panel of the appliance
with a screwdriver. If necessary, also remove
additional screws and/or parts until you see the
printed circuit board with the rechargeable battery.
3 Remove the rechargeable battery.
Guarantee and support
If you need information or support, please
www.philips.com/support or call toll free:
1-866-800-9311. To locate the nearest Philips
warranty depot, visit our website .www.philips.com
Guarantee restrictions
-Philips Consumer Lifestyle guarantees its
products for a period of two years after the date
of purchase. If any defect due to faulty materials
and workmanship occurs within this two-year
guarantee period, Philips Consumer Lifestyle will
repair or replace the product at its expense.
-Philips Consumer Lifestyle will only pay for repair
or replacement if convincing proof is provided, for
instance by means of a receipt, that the day on
which service is claimed is within the guarantee
period. Parts that are subject to wear (such as
cutting units and shaving heads) are not covered
by the terms of the international guarantee.
-The guarantee is not valid if a defect is due to
damage caused by incorrect use, poor
maintenance (e.g. parts blocked by scale) or if
alterations or repairs have been carried out by
persons not authorised by Philips Consumer
Lifestyle.
-For the appliance to be used correctly, the user
should strictly adhere to all instructions included
in the user manual and should abstain from any
actions or uses that are described as undesired or
which are warned against in the user manual.
-These guarantee restrictions do not aect your
statutory rights.
FRANÇAIS CANADA
Introduction
Félicitations pour votre achat et bienvenue dans
l‘univers Philips! Pour proter pleinement des
avantages de l‘assistance Philips, enregistrez votre
produit à l‘adresse . www.philips.com/welcome
Description générale (g. 1)
1 Tondeuse nez rotative
2 Tondeuse de précision
3 Tondeuse large
4 Bouton marche/arrêt
5 Manche
6 Prise pour miniche d’adaptateur
7 Sabot pour la barbe (7 mm)
8 Sabot pour la barbe (5 mm)
9 Sabot pour la barbe (3 mm)
10 Sabot pour la barbe et pour barbe de trois jours
(1,5 mm)
11 Sabot cheveux (9 mm)
12 Sabot cheveux (12 mm)
13 Sabot cheveux (16 mm)
14 Étui
15 Adaptateur
16 Petite che
Non illustré : brosse de nettoyage
Renseignements importants sur
la sécurité
Lisez attentivement ces informations importantes
avant d‘utiliser l‘appareil et ses accessoires
et conservez-les pour un usage ultérieur.
Les accessoires fournis peuvent varier selon
les diérents produits.
Danger
-Gardez le bloc d’alimentation au sec.
Avertissement
-Pour charger la pile, utilisez uniquement le bloc
d‘alimentation détachable (HQ8505) fourni avec
l’appareil.
-Le bloc d’alimentation contient un transformateur.
Pour éviter tout risque d’accident, ne coupez pas la
che du bloc d’alimentation pour la remplacer par
une autre.
-Les enfants ne doivent pas jouer avec l‘appareil.
Le nettoyage et l‘entretien ne doivent pas être
eectués par des enfants sans surveillance.
-Vériez toujours l’appareil avant utilisation. An
d’éviter tout accident, n’utilisez pas l’appareil s’il
est endommagé. Remplacez toujours une pièce
endommagée par une pièce du même type.
-N‘ouvrez pas l‘appareil pour remplacer la pile
rechargeable.
Attention
-Cet appareil n’est pas étanche. Ne plongez jamais
l’appareil dans de l’eau et ne le rincez pas sous le
robinet.
-N‘utilisez cet appareil qu‘aux ns décrites dans le
mode d‘emploi.
-Pour des raisons d‘hygiène, l‘appareil doit être
utilisé par une seule personne.
-N‘utilisez jamais d‘air comprimé, de tampons à
récurer, de produits abrasifs ou de détergents
agressifs tels que de l‘essence ou de l‘acétone
pour nettoyer l‘appareil.
-Ne branchez pas le bloc d’alimentation sur une
prise de courant ou près d’une prise de courant qui
contient un désodorisant électrique an d’éviter
des dommages irréparables au bloc d’alimentation.
Champs électromagnétiques (CEM)
-Cet Philips appareil est conforme à toutes les
normes et à tous les règlements applicables relatifs
à l‘exposition aux champs électromagnétiques.
Général
-L‘appareil est conçu pour une tension secteur
comprise entre 100 V et 240 V.
-Le bloc d’alimentation transforme la tension
de 100-240 volts en tension plus faible et plus
sécuritaire de 24 volts.
Charge
La période de charge complète est d’environ 8 heures.
Une fois complètement rechargé, l’appareil dispose
d’une autonomie maximale de 60 minutes.


Produkt Specifikationer

Mærke: Philips
Kategori: Skægtrimmer
Model: Norelco MG3750
Vekselstrømsindgangsspænding: 100-240 V
Produktfarve: Black, Metallic
Opladningstid: 1 t
Batteriteknologi: Lithium-Ion (Li-Ion)
Strømkilde: Vekselstrøm/batteri
Batteritype: Indbygget
Hurtig opladning: Ja
Etui til opbevaring: Ja
Vaskbar: Ja
Etui: Ja
Genopladelig: Ja
Driftstid: 60 min.
Antal trin, længde: 7
Minimum hårlængde: - mm
Maksimal hårlængde: - mm
Overflade: Krom
Selvslibende knive i rustfrit stål: Ja
Kamtilbehør: Beard, Mustache, Nose, Whisker
Selvslibende kniv: Ja

Har du brug for hjælp?

Hvis du har brug for hjælp til Philips Norelco MG3750 stil et spørgsmål nedenfor, og andre brugere vil svare dig