Philips Series 5000 MG5930 Manual

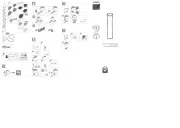
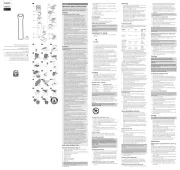
Philips Skægtrimmer Series 5000 MG5930

Læs gratis den danske manual til Philips Series 5000 MG5930 (2 sider) i kategorien Skægtrimmer. Denne vejledning er vurderet som hjælpsom af 2 personer og har en gennemsnitlig bedømmelse på 4.6 stjerner ud af 1.5 anmeldelser. Har du et spørgsmål om Philips Series 5000 MG5930, eller vil du spørge andre brugere om produktet?

Side 1/2
人が亡または傷をう可能性が大きい内
人が傷物的損害みの発生想定
注意
人が傷を
MG5930/15
©2024 Koninklijke Philips N.V.
記載てい品名は、
Koninklijke Philips N.V.
の他の
の商登録
3000.113.6091.1 (03/24)
お守
電表プに
しか
本的な使いか
しか
えか
しか
廃棄
故障
?
無料理規
Guidance in English
 
ールマーい上げい
にあがとただために使
扱説明書みの使いださい。
は、お使にな
い。
●商品の確認
商品確認い。
9mm 12mm 16mm
1mm 2mm 3
7mm
(調節式)
3mm
鼻毛耳毛
転式)
ーマ
お守
1
注意、安全重要内容ですの
た取内容「危注意
に区分け
 全 上 の ご  
人の
明書以外使
がの
お問いわせ
体が異常った異臭、充
異常は、使い。
使火災・けがにれが
USB
確実
USB
。スズにみがでない場合は無理
火災の原因に
場やでのしないでください。ショ
原因に
液漏場合皮膚れな
ださい。万入っは、すら
十分洗浄し医治療受けさい皮膚
た場合は十分い。
接続前にコネ全に乾い
確認い。状態
原因に
本製は充てい本製の充使
5
℃か
35
℃のい。入、
での・使放置発熱発火
原因に寿及ぼ
  告
 危 
使  上 の ご  
1 .
体や品の入れは、はぬださい。
60
℃以上
熱湯では洗浄ないでくい。研磨ドや研磨を含やエ
は使ないい。
2 .
刃は、上げてあますのでえたいものに
ないていねださい。
3 .
刃の清掃やコームおびトーの
OFF
にしから
てくい。
4 .
てきームなどの破損合は使
い同型品に交ださい。
5 .
光のる場にはないださい。夏場中に
い。
6 .
本製品は、使都度掃除
7 .
防水工をの中
ッチメン
表示
鼻毛耳毛
転式)
ーマ
注意
を乾かした状態で使てくださいがぬれた状態でヘ
アーカットしないでくだい。
カッは、整髪剤を使ないでください。
ーカット
7
9
1.
は、聞紙
2.
ても人のる人の
3.
て、
4.
沿
マーのお
ィーグルーマーの
1.
OFF
体か
1.
OFF
3.
40
℃前たは
3.
余分ない、十分に自然
2.
ON
40
℃前たは耳毛
(
)
OFF
2.
40
℃前たは
2.
ボデーグルーマープロテク
40
℃前たは
4.
燥後
付け
品の取
ッチやコした場合ずフプス
の同品にお取ださい。
注意
体やのお入れは、またはぬってください。
60
以上の熱湯ではしないでください研磨パッドや研磨を含んだ
やエアダスターは使ないでくさい
体は水洗いできますがないでください。
品を浄機わないでださい。
リマリマびボディーグ
せるきにタオルやティッシューパを使ないでくださ
を傷たりぬけをすことがあます
入れ方法
10
本製品はご使びに掃除い。
本製品に潤滑使必要ん。
故障
13
故障かな調
以上の点検正常状態ない場合は、
お問い合わ
14
証書つい(必い。
上げから
2
体、鼻毛耳毛
ム、
用性能部品の有期間
用性能品の有期
6
性能は、そ品の機能維持必要
ご不や修相談は】
相談らびは、サポセンーに
問い合わい。
【修は】
ご依前に扱説明書みい、再度点検
い。異常きは使を中、フサポセンーに
い。
【保証期間中は
証書用意いたき、ーにお問い合
い。保規定
【保証期間は】
機能維持る場合は、用性能品の保有期
れば、希望有料で修せて
での本製品の及びについ
本製品の保おいても効で品のいがある国
日本以外サー部門おいも保証期
アフサー受けとができ、こ場合多
外にてアを受け場合はサー
い合わせい。、お困ざいら下でご
Ph il ip s Co n s u m e r L i f e s t y l e Se rv ic e De p a r t m e n t P. O. Bo x 20 1 0 0 920 0 CA DRA C H T E N
The Netherlands Fax:+31 51 259 2785
個人報の
お受客様の個人は、株式ンの
http://www.philips.co.jp/
てい客様の個人の取
いに当社」に基づき切に管理
〈保証書表面左側に付属〉
証書は、い上名」入をめのえ、
受け取ていみの大切に保
リマ式)
1.
OFF
40
℃前
耳毛マー
(
)
3.
耳毛マー
(
)
体か
40
℃前
の中に耳毛
(
)
れ、
2
程度
果的れが可
耳毛
(
)
以外は入れいで
4.
余分ない、十分に自然
4.
余分ない、十分に自然
い上
                 
い上げ店
TEL.


便
のよ症状は、故障や事故防止電源
OFF
ルを
ら外お問い合わせ
ご使症状んか
がす
動か通電なか
の他異常
 充表示点灯
 ※充は、
30
表示プが
●充催促表示
 動作中に
表示
 充中は表示プが白色点滅
15
改良、仕予告
品の修受付はポーーに問い合わ
ついておにならなとはポー
い。
しか
8
カットす
1.
内を清潔てお
1.
清潔ておいて
垢も
2.
耳毛
体に
OFF
るこ
い。
2.
耳毛
体に
OFF
るこ
い。
使
鼻毛耳毛
転式)
 
 
3.
ON
し、
マーの先
注意深入し
た、
の先沿
ゆっと動からは
み出
注意
あるめ、トリマの先
5mm
以上入しないださい。
3.
ON
し、
の先
注意深
つけない
し入
さを
6
1.
体に付け
OFF
ていい。
2.
3.
ON
れにに動
ポイント
ヒゲは位によっての向きがなります。の向きに合わせて、カット
下、を変えてみてください。
カットの仕上りが均一なるように、ゲトリミングコームの
皮膚密着せ、しつけず、すべらすように動かしてください
作るにはゲトリミングコーム
1mm
使するかヒゲ
リミングームを取り外リマーのみでカットします。リマのみ
0.5mm
ットです。
使
4.
ームに多ゲがつい場合は、
体か
3mm
ーマ
える
3mm)
剃る
1.
体に付け
OFF
ていい。
1.
体に付け
OFF
ていい。
1.
体に
OFF
ていい。
2.
体のルー
マーにはスキロテ
使さい
使
使
使
ポイント
頭髪位によっての向きがります。の向きに合わせて、カットす
下、を変えてみてください。
カットした分と、にカットする分がなるように動かすと、の刈り
なくなります。
コーム装着ずにカットするときは、れた分のがとても
0.5mm
カットされますのでご注意ください。
注意
コームを外して使する刃にれた全てのがカットされます
ので、注意ください。
4.
の仕上に、
皮膚
動か
5.
に多ついた場は、
2.
体のに取付け
2.
体の
3.
ON
体を
と、に動かし
3.
ON
に動
ボデ
つけに動かい。
3.
ON
を伸ばしながら
れに動かその
ボデマー皮膚
つけべらに動か
9mm
12mm
16mm
じやまわりのライ
1.
体に付け
OFF
ていい。
2.
じのグは
ON
へなし、じやもみあ
3.
グは
ON
刃の
側だ体を
先だ
使
電表示つい
4
3
1.
には
OFF
い。
ON
状態は充
5.
中は、表示プが点滅了し
表示プが点灯
30
表示プが
2.
ルのコネ体の
3.
ルの
USB
USB
4.
家庭
USB
本製品はチウ使ていご使ても
寿命にん。
お買い上げお客様
初めご使ご使前に充
/
ケーブル
2
電源
電表示
電源
電源
電源
USB
USB Type-A
本的使い
5
電源
ON/OFF
ない状態
1
ON
1
OFF
※使用後
OFF
し、ご使たび
ムの取り付け、取り外
の取
コームの前の先
コームの
がす
の取
ろ側の注意
ら上上げ前側の
刃か
2
1
1
2
マーの取り付け、取り
の取付け
マー起部分を側の
ろ側を
体に
の取
マーを上向に上げ
体か
USB
タは付ておん。
は、
USB
定格出力
DC5V
定格出力
1A
以上
PSE
クの表示技術
合し
USB
11
前に体、を十分乾せて
室温
5
35
℃ので保い。
直射る場には
※夏場、の中には放置
注意
品を廃棄するとき以外は体をしないでください。
体内具はいので、注意ださい。
全上ら、した品は絶対使いでださい。
てかしてください
漏液した場合はないように注意てく
さい。万一ったときは、こすらず十分し医
治療を受けてくださいについた場合はで十分
してくだ
注意
出力
DC5V
、定出力電流
1A
以上で
PSE
表示る安全技術
USB
い。
USB
接続は変コネや変ルは使
場やで充
接続前に完全乾いてい確認
で充
長時間使い場合は、充電池過放電液漏て使え
は充い。
注意
体は防水加工をてお場や使ますが、
体の中に(故障の原因
ご使前に刃にがな確認い。
着脱電源
OFF
てか
ウムイオン充電池のリクルについて
廃棄
12
本製品はチウ使
チウオンル可貴重
ですご使用済廃棄は、
ン充ムイ
体の廃棄方法ル協力い。
※おる充電池の修
Li-ion
取り外しかた
1.
を上向に上げてから
い。
2.
体上
3.
体上
4.
5.
面部外し
6.
トからモーターお
7.
接続外し
ON
て、全に動作で充てか
い。
2
2
1
1
2
1
2
株式会社
106-0041
都港布台
1-3-1
布台
JP
15
取扱説明書
CERTIFICATE OF PURCHASE
この証書無料理規記載内容でをお約束
のでい上げのから下記期間故障発生合は
サポートセンタにお問い合わせださい。お客だいた個
株式・ジパンのホムページ
http://
www.philips.co.jp/
れてい「お客個人につ
当社方針管理いたしま
証書は再発行、大切にい。
店様
の保証書はお客様実施明確
ものです記念の場合も含め客様にお
ルイマー
MG5930/15
証期間
2
象部
体、鼻毛耳毛マー
コーム、
い上げ
             
お客
ご住
話番
名・住話番
証書
の印刷生紙使てお
は、快適
使ため
登録おす
My Philips
ではの保証書
証明の写
万が一証明書失された
も安
http://www.philips.co.jp/myphilips-about
U RL
My Philips
登録
品の使用方法や修問い合
受付時間
9
00
18
00
年始
0120
944
859
Web
お問い合わ
絵表の例
は、てはいけな図の具体
禁止図の場合は分解禁
ずしただの中
制内図の場合はプラコンセントか
号は「危の中やに具体
図の場合温注意
絵表につい
品     
MG5930/15
MG5930
(高××行)
165
×
40
×
38mm
 体  
154g
   電式
定   
DC 5V 1A
充   
1
時間
使   
120
使 チウムイオン充
Li-ion)
※充を取り外し通電しないでください。
※ショートしないよに充端子テープください。
を取り出した品の廃棄については、お住まいの地域の例などに
してください。
しても使用時間極端
●刃を掃除してください。
本製品が完全にるまで作動せてから、う一してく
ださい。それ善されなときは、の寿命です
だんだん切れ味がくなった
●刃がれていないか確認してください。
刃がたは磨耗ていないかください破損または
磨耗しているときは、刃を交してください。
●刃にがからまっていないか確認してください。
電源ボタンをしても作動しない
がされていない場合は
1
時間の充をしてください。
刃が動かなくなるほどれている場は刃をれしてください。
●刃がしく取り付けられているか確認してください。
●刃が破損している場合は交してください。
常ながする
●刃がしく取り付けられているか確認してください。
コーしく取りけられてるかてください。
る場合はコームをいったん外してから、り付けてください。
刃が傷またはしていないか確認してください。また
磨耗しているときは、刃を交してください。
できない
電源
OFF
になっているか確認くだい。
には電源
OFF
にしてから充してください。
体のネクタ受に充ーブルがきちんと差まれてい
るか確認してくだい。
ケーブルが断線している場合はしい充ーブルが必要
です。フィリップスサポートセンターにお問い合わせください。
使いる
USB
アダしてくだい。
無料理規
16
1.
扱説明書ベル注意書正常使用状態で保
証期内にた場合に無料
2.
証期内に無料受けにる場には、
お問い合わい。
3.
品の相談サポ
問い合い。
4.
証期場合に有料
1
使上の及び不な修及び傷。
2
上げ輸送動、傷。
3
火災水害その他の天地変、異常及び傷。
4
般家庭以外例えば、使に使れた場合の傷。
5
証書提示がない場合。
6
証書い上げ客様名のない場合、
た場合。
※保証書は、本書明示におい無料約束
て保証書ている以外の
業者客様法律上のではん。
証期ご不の場合は、サポ
い合
※保の修用性能品の保いて
は取扱説明書スのださ
客様いただいた証書は保証期
のサービ及びその点検活ためにせていた
がござす。株式
パンのホームージ
http://www.philips.co.jp/
個人の取いにいて
基づ切に管理
無料理規定〉
初めお使いご使たは電残が少
は、ご使前に充い。電時
1
時間電開後数電表
プが点灯その電表示プが点滅
使いご使は、電表示
表示時間かか場合があ
ご使用の際は本体から充抜いご使続さてい
作動
  
る場合は定格出力
DC5V
定格出力
1A
以上
PSE
マー表示技術
USB
で充
USB
接続は変タや変ケールは
使い。体の破損火災の原因
は、ずにず先
いてださい。
発火
以外ら充ケールをいてださい。け
がやや絶縁劣化に火災の原因
ルは付専用ケールを使さい
た付の充ケールで他商品をないでく
異常発熱火災の原因に破損
場合は、事社製の同型
タ受ンやせない
発火原因に
本製品や洗浄機ないださい。
原因に
ご使前に刃に異常がな確認ださ
刃はえなださ破損傷つ
衛生上の理由他の人
本製
IH
調理器具のに保
破損原因に
耳毛の先
5mm
以上
。けがを
耳毛
ルやーを使
。刃とが
1mm
2mm
調節式ングコー
3
7mm
1mm
調整
設定は、上がになす。初めてお使いいたには、
めらお勧め
体から充ださい。
やけ
でください。
けが
無理、ひ
ばねたもの
ないださドが火災の原
刃や品が破損た場合は、本製
使ないけがの原因に。交には
同型
児のろに本製かな。ま
子様本製がな監視い。
必要も含に使せなでく
た、お体の不自由人だけでは使い。
  告
電残量状態で充
5
1
回分が急速
ジ中は充電表示高速点滅
ージが完了す常のわれその電表
がゆ点滅
使用箇所
ネ、
VIO
ど全毛部位にお使い
使用箇所
ネ、
VIO
ど全毛部位にお使い
All- in-one
trimmer
MG5930/15
ENGLISH
Important safety information
Read this important information carefully before you
use the appliance and its accessories and save it for
future reference. The accessories supplied may vary for
dierent products.
Warning
-To charge the product, only use a certied safety
extra low voltage (SELV) supply unit with output
rating 5 V, ≥ 1 A. For safe charging in a moist
environment (e.g. in a bathroom), only use an IPX4
(splash-proof) supply unit. A suitable supply unit
(e.g. Philips HQ87) is available via
www.philips.com/support. If you need support
nding the correct USB supply unit, contact the
Consumer Care Center in your country (see the
international warranty leaet for contact details).
Using a non-certied supply unit may cause hazards
or serious injuries.
-Keep the USB cable and the USB supply unit dry (Fig.
2).
-This appliance is waterproof (Fig. 3). It is suitable for
use in the bath or shower and for cleaning under the
tap. For safety reasons, the appliance can therefore
only be used without cord.
-This appliance can be used by children aged from 8
years and above and persons with reduced physical,
sensory or mental capabilities or lack of experience
and knowledge if they have been given supervision
or instruction concerning use of the appliance in
a safe way and understand the hazards involved.
Children shall not play with the appliance. Cleaning
and user maintenance shall not be made by children
without supervision.
-Do not modify the supply unit.
-Do not use the supply unit in or near wall sockets
that contain an electric air freshener to prevent
irreparable damage to the supply unit.
-Do not use a damaged appliance. Replace damaged
parts with new Philips parts.
-Because of hygiene, only one person should use the
appliance.
-Unplug the appliance before cleaning it with water.
-Only use cold or lukewarm water to clean the
appliance.
-Never use compressed air, scouring pads, abrasive
cleaning agents or aggressive liquids to clean the
appliance.
-Only use original Philips accessories or consumables.
-Charge, use and store the product at a temperature
between 5°C and 35°C.
-Keep product and batteries away from re and
do not expose them to direct sunlight or high
temperatures.
-If the product becomes abnormally hot or smelly,
changes color or if charging takes longer than usual,
stop using and charging the product and contact
Philips.
-Do not place products and their batteries in
microwave ovens or on induction cookers.
-Do not open, modify, pierce, damage or dismantle
the product or battery to prevent batteries
from heating up or releasing toxic or hazardous
substances. Do not short-circuit, overcharge or
reverse charge batteries.
-If batteries are damaged or leaking, avoid contact
with the skin or eyes. If this occurs, immediately rinse
well with water and seek medical care.
Electromagnetic elds (EMF)
This Philips appliance complies with all applicable
standards and regulations regarding exposure to
electromagnetic elds.
Introduction
Congratulations on your purchase and welcome to
Philips! To fully benet from the support that Philips
oers, register your product at
www.philips.com/welcome.
You can nd the model number on the back of your
product.
The full model number (e.g. MG1234/56) is located
on the bottom of the packaging, your receipt or order
conrmation.
Features (Fig. 1)
1 Nose and ear hair trimmer
2 Skin protector
3 Body groomer
4 Full-size hair trimmer
5 On/o button
6 Battery status indicator
7 Socket for small plug
8 USB cable
Note: A suitable power source (e.g. Philips HQ87) is
available via www.philips.com/support.
9 Adjustable beard and hair comb 3 mm – 7 mm
10 Stubble comb 1 mm
11 Stubble comb 2 mm
12 Hair comb 9 mm
13 Hair comb 12 mm
14 Hair comb 16 mm
15 Body comb 3 mm
Not shown: cleaning brush and pouch
Charging
-Charging or using the appliance at temperatures
below 5 °C or higher than 35 °C adversely aects the
lifespan of the battery.
-If the appliance is subjected to a major change in
temperature, pressure or humidity, let the product
acclimatize for 30 minutes before use.
Charge the appliance before rst use and when the
battery status indicator shows that the battery is almost
empty. When the appliance has charged for 60 minutes,
it has a cordless operating time of 120 minutes.
Warning: Keep the USB cable and the USB power
source dry (Fig. 2).
1 Make sure that the appliance is switched o.
2 Insert the small plug of the USB cable into the socket
in the bottom of the appliance (Fig. 5).
3 Insert the USB plug into the USB power source (not
included) (Fig. 6).
4 Insert the USB power source into the power outlet
(Fig. 7).
5 After charging, remove the USB power source from
the power outlet and pull the small plug out of the
appliance.
Quick charge
After approx. 5 minutes of charging, the appliance
contains enough power for one cordless trimming
session.
Battery status indications
Battery status Indicator mode
Almost empty Flashing orange light
Charging Flashing white light
Fully charged Solid white light
Note: Approx. 30 minutes after the battery is fully
charged, the battery status indicator switches o auto-
matically.
Using the appliance
Trimming tips
-When trimming for the rst time, start by using the
comb with the maximum trimming length setting to
familiarize yourself with the appliance.
-Since all hairs do not grow in the same direction, you
may want to try dierent trimming directions (i.e.
upwards, downwards, or across). Practice is best for
optimum results.
-Always make smooth and gentle movements and be
sure the surface of the comb always stays in contact
with your skin.
-For best results, use the appliance on clean, dry hair,
as wet hair tends to stick to the body.
-When too many hairs have accumulated on the
appliance, remove the hairs before and/or during
use, for best trimming results.
Detaching and attaching cutting elements
1 To detach a cutting element, place your nger near
the teeth of the cutting element and push gently
upwards until the cutting element is released from
the handle (Fig. 8).
2 To attach a cutting element, insert the plastic notch
at the back of the cutting element into the guiding
slot in the handle and gently press the teeth of the
cutting element downwards until they click into
place (Fig. 9).
Attaching and detaching combs
1 To attach any type of comb onto a cutting
element,slide the front part of the comb onto the
teeth and press the notch at the back of the comb
downwards until it clicks into place (Fig. 10).
2 To detach any type of comb from the cutting
element, carefully push its back part o the
appliance and then slide it o the cutting element
(Fig. 11).
Detaching the nose and ear hair trimmer
1 Place your nger on the recess at the back of the
attachment and push the attachment o the
handle (Fig. 12). Use your other hand to prevent the
attachment from dropping on the oor.
Comb colours
The combs provided with the appliance have dierent
colors depending on their intended use. Select the type
of comb suitable for the part of the body that you want
to trim.
Comb color Intended use
Black Beard and scalp hair
Light gray Body
Switching the appliance on and o
To switch the appliance on or o, press the on/o
button once.
Attachments for use on beard
Always comb your beard or moustache with a ne
comb before you start trimming.
Full-size hair trimmer
Use the full-size hair trimmer without a comb to trim
hair close to the skin (to a length of approx. 0.5mm)
or to create clean lines around your beard, neck and
sideburns.
1 To trim hair close to the skin, place the at side of
the cutting element against your skin and make
strokes against the direction of hair growth (Fig. 13).
2 For contouring, hold the cutting element
perpendicular to the skin and move it upwards or
downwards with gentle pressure.
Attach a black beard comb to the full-size hair trimmer
to trim your beard and mustache evenly to the desired
length. The appliance comes with 2 black beard combs.
The numbers on the combs relate to the number
of millimeters of hair length that will remain after
trimming.
Comb mm
Stubble comb 1mm
Stubble comb 2mm
1 Attach a beard comb to the full-size hair trimmer.
2 To trim in the most eective way, move the comb
against the direction of hair growth. Make sure that
the surface of the comb always stays in contact with
the skin.
Attachments for use on beard and head
Adjustable beard and hair comb
Use the black adjustable beard and hair comb to trim
your beard or scalp hair evenly to the desired length
ranging from 3 mm to 7 mm. The numbers on the comb
relate to the number of millimeters of hair length that
will remain after trimming.
1 Attach the adjustable beard and hair comb to the
full-size hair trimmer (see 'Attaching and detaching
combs').
2 Use the slide switch on the comb to adjust the
length (Fig. 14).
3 To trim in the most eective way, move the comb
against the direction of hair growth. Make sure that
the surface of the comb always stays in contact with
the skin.
Attachments for use on head
Always comb your hair before you start trimming.
For best results, use the appliance on clean, dry hair.
Attach a black hair comb to the full-size trimmer to
trim your scalp hair evenly to the desired length. The
appliance comes with 3 black hair combs. The numbers
on the combs relate to the number of millimeters of hair
length that will remain after trimming.
Comb mm
Hair comb 9mm
Hair comb 12mm
Hair comb 16mm
1 Attach a hair comb to the full-size hair trimmer (see
'Attaching and detaching combs').
2 Move the trimmer slowly over the crown from
dierent directions to achieve an even result. Make
sure that the surface of the comb always stays in
contact with the skin.
3 Always move the trimmer against the direction of
hair growth (Fig. 15). Press lightly.
4 Make overlapping passes over the head to ensure
that all hair that should be cut has been cut.
5 Gently shake the hairs o the appliance in between
strokes to prevent hairs from collecting between the
cutting element and the comb.
Attachments for use on body
Always use a body comb when trimming sensitive areas.
Body combs
Attach a light gray body comb to the full-size hair
trimmer to trim hairs below the neckline. The appliance
comes with 1 body comb. Use the body comb to trim
your body hair to the length of 3 mm.
1 Attach the body comb to the full-size hair trimmer
(see 'Attaching and detaching combs').
2 To trim in the most eective way, stretch the skin
with your free hand and move the comb against the
direction of hair growth (Fig. 16). Make sure that
the surface of the comb always stays in contact with
the skin.
Body groomer
Use the body groomer to shave hair below the neckline
such as your underarms and chest.
Only use the body groomer with the skin
protector.
1 Attach the body groomer to the appliance (see
'Detaching and attaching cutting elements').
2 Attach the skin protector to the body groomer (Fig.
17).
3 To shave in the most eective way, stretch the skin
with your free hand and move the groomer against
the direction of hair growth (Fig. 18). Make sure the
surface of the groomer always stays in full contact
with the skin.
Precision attachments for use on face
Nose and ear hair trimmer
Use the nose and ear hair trimmer to trim your nose
and/or ear hair.
-Make sure nasal passages are clean. Make sure outer
ear channels are clean and free from wax.
-Do not insert the cutting element too deep into your
nostrils or ear channels (max. 5 mm).
-When trimming both nose and ear hair, make
rm, rotary movements to ensure that the cutting
element reaches all the hairs.
-Clean the nose and ear hair trimmer after each use.
Note: The nose and ear hair trimmer is designed not
to clean-shave your nostrils or ear channels, but to cut
the hairs to a shorter length. Nose and ear hairs have
important protective functions and should not be fully
removed.
Trimming nose hair
1 Gently insert the cutting element into one of the
nostrils. Move the tip in and out of the nostril in
a rm, rotary motion to cut the hairs to a shorter
length (Fig. 19).
Trimming ear hair
1 Slowly move the cutting element along the outer ear
to trim hairs that stick out beyond the rim.
2 Gently insert the cutting element into the outer ear
channel. Move the tip in and out of the outer ear
channel in a rm, rotary motion to cut the hairs to a
shorter length (Fig. 19).
Take any necessary safety precautions when you
handle tools to open the appliance and when
you dispose of the rechargeable battery.
When you handle batteries, make sure that your
hands, the product and the batteries are dry.
To avoid accidental short-circuiting of batteries
after removal, do not let battery terminals
come into contact with metal objects (e.g.
coins, hairpins, rings). Do not wrap batteries in
aluminum foil. Tape battery terminals or put
batteries in a plastic bag before you discard
them.
1 Remove the cutting element (Fig. 8).
2 Unscrew the screws at the bottom and at the top of
the handle (Fig. 23), and remove the top ring (Fig.
24).
3 Remove the bottom cap of the handle together with
the motor unit and the power supply unit with the
rechargeable battery (Fig. 25).
4 Unsnap the bottom cap (Fig. 26).
5 Separate the supply unit from the motor unit (Fig.
27). Unsnap the battery frame from the power
supply unit with the rechargeable battery (Fig.
28). You can now dispose of and/or replace the
rechargeable battery.
English
2
3
4
5
6
7
8
1
2
1
2
10
9
11
12
13
= mm
2
2
1
1
2
14
15
16
17
18
19
20
23
26
21
24
27
22
25
28
16 mm
12 mm
9 mm
3 mm
3 mm – 7 mm
2 mm
1 mm
7
8
5
6
4
1
9
10
11
14
15
2
3
12
13
1
Cleaning
-Clean the appliance after each use (see 'Cleaning').
-Switch o the appliance before removing or
attaching attachments and before cleaning.
-Never use compressed air, scouring pads, abrasive
cleaning agents or aggressive liquids such as
gasoline or acetone to clean the appliance.
-Caution: Never dry the trimmer teeth with a towel or
tissue, as this may damage the trimmer teeth.
After every use: cleaning under the tap
1 Make sure that the appliance is switched o and
that the USB power source has been removed from
the power outlet and from the appliance.
2 Remove any comb (see 'Attaching and detaching
combs') and cutting element (see 'Detaching and
attaching cutting elements') from the appliance.
3 Rinse the hair chamber under running tap water
(Fig. 20).
4 Clean the cutting element and comb under running
tap water.
5 Carefully shake o excess water and let all parts air-
dry completely.
Thorough cleaning
1 Make sure that the appliance is switched o and
that the USB power source has been removed from
the power outlet and from the appliance.
2 Clean the handle under the tap or wipe the handle
clean with a dry or moist cloth.
3 Remove any comb (see 'Attaching and detaching
combs') or cutting element (see 'Detaching and
attaching cutting elements') from the appliance.
4 Remove any hairs that have accumulated in the hair
chamber with the cleaning brush supplied.
5 Remove any hairs that have accumulated in the
cutting elements and/or combs with the cleaning
brush supplied.
6 Rinse the cutting elements and combs under
running tap water.
7 Carefully shake o excess water and let all parts air-
dry completely.
Cleaning the nose and ear hair trimmer
Clean the nose and ear hair trimmer immediately after
use and when a lot of hair or dirt has accumulated on
the cutting element.
1 Rinse the nose and ear hair trimmer head under
running tap water (Fig. 21).
2 Switch on the appliance and rinse the cutting
element once more to remove any remaining hairs.
Then switch o the appliance again.
If a lot of hair or dirt accumulates on the
cutting element, this can hinder or decrease the
performance of the nose and ear hair trimmer. For
a thorough clean, detach the nose and ear hair
trimmer head from the appliance and immerse it in
a bowl with warm water for a few minutes to soak
and soften the debris. Reattach the nose and ear
trimmer head and switch on the appliance to rinse
o stubborn hair/debris.
3 Carefully shake o excess water and let all parts air-
dry completely.
Cleaning the body groomer
1 Remove the skin protector by pulling it upwards o
the groomer.
2 Clean the skin protector and body groomer under
running tap water (Fig. 22).
3 Carefully shake o excess water and let both parts
air-dry completely.
4 Reattach the skin protector onto the body groomer
(Fig. 17).
Storage
Note: Do not place or store the appliance where it can
fall or be pulled into a tub or sink, water or other liquid
while plugged in.
-Make sure that the appliance is switched o and
that the USB power source has been removed from
the power outlet and from the appliance.
-Do not wrap the USB cable around the appliance
when storing.
-Store the appliance, the USB power source and all
the accessories in the pouch supplied. Place the
pouch in a safe, dry location, where it will not be
crushed, banged, or subject to damage.
-Make sure that the appliance and the accessories are
dry before you store them in the pouch.
Support
For all product support such as frequently asked
questions, please visit .www.philips.com/support
Cutting units are not covered by the terms of the
international warranty because they are subject to
wear.
Ordering accessories
To buy accessories or spare parts, visit
www.philips.com/parts-and-accessories or go to
your Philips dealer. You can also contact the Philips
Consumer Care Center in your country (see the
international warranty leaet for contact details).
Recycling
-This symbol means that electrical products and
batteries shall not be disposed of with normal
household waste (Fig. 4).
-Follow your country’s rules for the separate
collection of electrical products and batteries.
Removal of built-in rechargeable
battery
The built-in rechargeable battery must only be removed
by a qualied professional when the appliance is
discarded. Before removing the battery, make sure that
the appliance is disconnected from the wall socket and
that the battery is completely empty.


Produkt Specifikationer

Mærke: Philips
Kategori: Skægtrimmer
Model: Series 5000 MG5930

Har du brug for hjælp?

Hvis du har brug for hjælp til Philips Series 5000 MG5930 stil et spørgsmål nedenfor, og andre brugere vil svare dig