©2024 Koninklijke Philips N.V. (KPNV). All rights
reserved. Philips and the Philips shield are trademarks
of KPNV. Sonicare and the Sonicare logo are
trademarks of Philips Oral Healthcare, LLC and/or
©2024 Koninklijke Philips N.V. (KPNV)。保留所有权利。
飞利浦及飞利浦盾牌标志是 KPNV 的商标。Sonicare 和
Sonicare 徽标是 Philips Oral Healthcare, LLC 和/或 KPNV
©2024 Koninklijke Philips N.V. (KPNV) 。 版權所有。
飛利浦及飛利浦盾牌標誌為 的商標。 及 KPNV Sonicare
Sonicare KPNV 標誌為飛利浦口腔保健公司和/或 的商標。
300013066542 (2024-10-23)
Congratulations on your purchase and welcome to Philips!
To fully benet from the support that Philips oers, register
your product at . www.philips.com/welcome
Important safety information
Read this important information carefully before you use
the appliance and save it for future reference.
-Keep the charger away from water.
-After cleaning, make sure the charger is completely dry
before you connect it to the wall socket.
-This appliance can be used by children and persons
with reduced physical, sensory or mental capabilities
or lack of experience and knowledge if they have been
given supervision or instruction concerning use of the
appliance in a safe way and understand the hazards
involved. Cleaning and user maintenance shall not be
made by children without supervision.
-Children should be supervised to ensure that they do
not play with the appliance.
-Charge only with certied adapters.
-USB cable should be dried after any contact with water
-Only use original Philips accessories and consumables.
-The charger cord cannot be replaced. If the charger
cord is damaged, discard the charger.
-Always replace the charger with one of the original
type in order to avoid a hazard.
-Do not charge the product outdoors or near heated
-Do not clean any part of the product in the dishwasher.
-This appliance has only been designed for cleaning
-Stop using a brush head with crushed or bent bristles.
Replace the brush head every 3 months or sooner if
-Charge, use and store the product at a temperature
between 0 °C and 40 °C (32 °F and 104 °F).
-Stop using the appliance and consult your dentist/
doctor if excessive bleeding occurs after use, if bleeding
continues to occur after 1 week of use or if you
experience discomfort or pain.
-If you have had oral or gum surgery in the previous
2 months, consult your dentist before you use the
-If you have medical concerns, consult your doctor
before you use this appliance.
-If you have a pacemaker or other implanted device,
contact your doctor or the manufacturer of the
implanted device prior to use.
-This appliance is a personal care device and is not
intended for use on multiple patients in a dental
-This appliance contains no user-serviceable parts. If the
appliance is damaged, stop using it and contact the
Consumer Care Center in your country (see ‘Warranty
BATTERY SAFETY INSTRUCTIONS
Keep product and batteries away from re and do not
expose them to direct sunlight or high temperatures.
If the product becomes abnormally hot or smelly, changes
color or if charging takes longer than usual, stop using and
charging the product and contact Philips.
-Do not place products and their batteries in microwave
ovens or on induction cookers.
-Do not open, modify, pierce, damage or dismantle the
product or battery to prevent batteries from heating
up or releasing toxic or hazardous substances. Do not
short-circuit, overcharge or reverse charge batteries.
-If the battery is damaged or leaking, avoid contact with
skin or eyes. If this occurs, immediately rinse well with
water and seek medical attention.
Electromagnetic elds (EMF)
This Philips appliance complies with all applicable
standards and regulations regarding exposure to
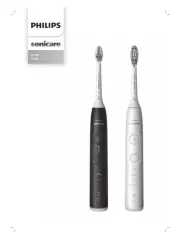
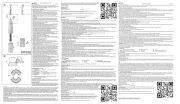
Your Philips Sonicare (Fig. 1)
4 Power on/o and mode button
6 Post brushing feedback indicator
Note: Appearance may slightly dier, depending on the
Note: Power adapter not included. Charge only with
IPX4 adapters with output ratings 5 V , ≥ 2 W. It is
recommended to use a Philips adapter; see the Philips
website for current information.
The following symbols may appear on the product:
Read Operator’s Manual (Fig. 2).
Detachable Power Supply Part (Fig. 3):The “xxxxxx“
indicates the model number of the approved chargers to
Locating the model number
Look on the bottom of the Philips Sonicare toothbrush
handle for the model number HX52xx.
1 Align the brush head so the bristles point in the same
direction as the front of the handle.
2 Press the brush head down onto the metal shaft until
there is a small 1-2 mm gap.
Note: It is normal to see a slight gap between the brush
head and the handle. This allows the brush head to vibrate
Charging your Philips Sonicare
1 Place the power toothbrush handle on the charger
2 Connect the charger to a 5 V USB wall adapter.
3 Your toothbrush continues to charge until it is fully
-When the toothbrush is charging, the battery
indicator pulsates green.
-When fully charged, the battery indicator will light
up solid green for 30 seconds before turning o.
Note: It can take up to 10 hours to fully charge the
battery, but you can use the toothbrush before it is fully
Using your Philips Sonicare toothbrush
If you are using your Sonicare toothbrush for the rst
time, it is normal to feel more vibration than when using a
non-electric toothbrush. It is common for rst time users to
apply too much pressure. Only apply gentle pressure and
let the toothbrush do the brushing for you. Please follow
brushing instructions below for the best experience.
1 Wet the bristles and apply a small amount of
2 Place the toothbrush bristles against the teeth at a
slight angle (45 degrees) (Fig. 7). The handle has two
45 - degree indication bars to help guide your Bass
brushing technique. Press the brush head gently against
the gum to make the bristles reach the gum line or
slightly beneath the gum line.
3 Press the power on/o button to turn on the Philips
Note: Keep the center of the brush in contact with the
4 Gently keep the bristles placed on the teeth and in
the gumline. Brush your teeth with small back and
forth motion so the bristles reach between the teeth.
Continue this motion throughout your brushing cycle.
Note: The bristles should slightly are. Do not scrub. It is
not recommended to scrub as you would with a manual
5 To clean the inside surfaces of the front teeth, tilt the
brush handle semi-upright and make several vertical
overlapping brushing strokes on each tooth (Fig. 8).
Note: To make sure you brush evenly throughout the
mouth, divide your mouth into 4 sections using the
QuadPacer feature (see chapter ‘Features’).
6 Begin brushing in section 1 (outside upper teeth) and
brush for 30 seconds before you move to section 2
(inside upper teeth). Continue brushing in section 3
(outside lower teeth) and brush for 30 seconds before
you move to section 4 (inside lower teeth) (Fig. 9).
7 After you have completed the brushing cycle, you can
spend additional time brushing the chewing surfaces
of your teeth and areas where staining occurs. You can
also brush your tongue, with the toothbrush turned on
or o, as you prefer (Fig. 10).
Your Philips Sonicare toothbrush should be safe to use on
braces (brush heads wear out sooner when used on braces)
and dental restorations (llings, crowns, veneers) if they
are properly adhered and not compromised. If a problem
occurs, please follow up with a dental professional.
This Philips Sonicare toothbrush is designed to provide at
least 120 brushing sessions after fully charged for 10 hours,
each session lasting 2 minutes. When the battery is low,
the battery indicator starts to ash amber.
Note: When the battery is completely empty, the
toothbrush switches o. Place the handle on the charger
Note: To keep the battery fully charged at all times, you
may keep your Philips Sonicare toothbrush on the charger
Note: Battery usage time is expected to reduce over
Your power toothbrush is equipped with ve dierent
A gentle mode to help user adapt to electric toothbrush.
Switching to an electric toothbrush can be an adjustment
if you‘re used to manual toothbrushes. But once you get
used to it, you can benet from the rich technology and
features of your Philips toothbrush that will improve your
brushing habits. We recommend using the Easy Mode for
14 days before switching to other modes if it is your rst
time using an electric toothbrush (2 minutes) (Fig. 11).
It removes plaque eectively for daily cleaning (2 minutes)
Removes stains on teeth (2 minutes) (Fig. 13).
Gentle cleaning of gums (2 minutes) (Fig. 14).
Gentle cleaning for sensitive gums and teeth (2 minutes)
Note: When you use the toothbrush for the rst time, the
To toggle between the brushing modes:
-Press the power button once to turn on the toothbrush.
-Press a second time within 2 seconds to change the
-After the toothbrush has been on for more than
2 seconds, if you want to change modes, you‘ll need to
pause the toothbrush rst (click the mode button), then
press the mode button within 2 seconds.
Your power toothbrush comes with three dierent types
It tells you if too much pressure was applied during the last
brushing cycle. After brushing, if the pressure light is on, it
means the pressure was moderate. If the pressure indicator
light is o, it means the brushing pressure was too heavy
It records if the last brushing cycle reached 2 minutes. After
brushing, if the duration light is on, it means the brushing
time reached 2 minutes. If the duration indicator is o,
it means the brushing duration was less than 2 minutes
It indicates if the time interval between the last two
brushings is controlled in the proper duration to keep
plaque growth low. After brushing, if the cleaning light is
on, it means the interval between two brushing activities is
moderate, which can eectively prevent excessive plaque
growth. If the cleaning light is o, it means the interval
between two brushing activities is too long, which might
cause a risk of excessive plaque growth (Fig. 18).
The Smartimer indicates that your brushing cycle is
complete by automatically turning o the toothbrush at
the end of the brushing cycle.
Dental professionals recommend brushing no less than
The Quadpacer is an interval timer that beeps every
30 seconds to remind you to brush all teeth evenly by
dividing your mouth into 4 sections (Fig. 9).
Your Sonicare toothbrush measures the pressure you
apply while brushing to protect your gums and teeth from
If you apply excess pressure, the handle changes its
vibration and the light ring at the end cap ashes purple
until you reduce the pressure.
You should clean your Philips Sonicare toothbrush
regularly to remove toothpaste and other residue. Failure
to clean your Philips Sonicare toothbrush may result in an
unhygienic product and damage to it may occur.
Warning: Do not clean brush heads, the handle or
the charger in the dishwasher.
Warning: Do not clean with boiling hot water.
1 Remove the brush head and rinse the metal shaft area
with warm water. Make sure you remove any residual
Caution: Do not push on the rubber seal on the metal
shaft with sharp objects, as this may cause damage.
2 Wipe the entire surface of the handle with a damp
Note: Do not tap the handle on the sink to remove excess
1 Rinse the brush head and bristles after each use
2 Remove the brush head from the handle and rinse the
brush head connection with warm water at least once
1 Unplug the charger before you clean it.
2 Wipe the surface of the charger with a damp cloth.
If you are not going to use the product for a long time,
unplug it, clean it (see chapter ‘Cleaning‘) and store it in a
cool and dry place away from direct sunlight.
Replace Philips Sonicare brush heads every 3 months
to achieve optimal results. Use only Philips Sonicare
This chapter summarizes the most common problems you
could encounter with the appliance. If you are unable
to solve the problem with the information below, visit
www.philips.com/support for a list of frequently asked
questions or contact the Consumer Care Center in your
Problem Possible cause Solution
If you need information or support, please visit
www.philips.com/support or read the international
The terms of the international warranty do not cover the
-Damage caused by use of unauthorized replacement
-Damage caused by misuse, abuse, neglect, alterations
-Normal wear and tear, including chips, scratches,
abrasions, discoloration or fading.
-This symbol means that electrical products and batteries
shall not be disposed of with normal household waste
-Follow your country’s rules for the separate collection
of electrical products and batteries.
Removing the rechargeable battery
CONTAINS LITIHIUM-ION RECHARGEBALE CELL. MUST BE
RECYCLED OR DISPOSED OF PROPERLY.
The built-in rechargeable battery must only be removed by
a qualied professional when the appliance is discarded.
Before removing the battery, make sure that the appliance
is disconnected from the wall socket and that the battery is
Take any necessary safety precautions when you
handle tools to open the appliance and when you
dispose of the rechargeable battery.
When you handle batteries, make sure that your
hands, the product, and the batteries are dry.
To avoid accidental short-circuiting of batteries
after removal, do not let battery terminals come
into contact with metal objects (e.g. coins, hairpins,
rings). Do not wrap batteries in aluminum foil. Tape
battery terminals or put batteries in a plastic bag
Only remove the rechargeable battery when you discard
the product. Before you remove the battery, make sure
that the product is disconnected from the wall socket and
that the battery is completely empty.
1 Remove the inner body from the handle.
2 Remove the rechargeable battery from the inner body.
在 上注册www.philips.com/welcome
可拆卸电源部件 (图 3): “xxxxxx”表示要