Roland JUNO-D8 Manual
Roland
Syntese maskine
JUNO-D8
Læs nedenfor 📖 manual på dansk for Roland JUNO-D8 (54 sider) i kategorien Syntese maskine. Denne guide var nyttig for 3 personer og blev bedømt med 4.1 stjerner i gennemsnit af 2 brugere
Side 1/54

© 2024 Roland Corporation
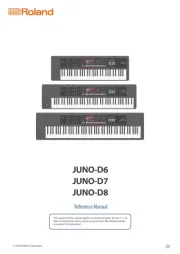
JUNO-D6
JUNO-D7
JUNO-D8
Reference Manual
The content of this manual applies to system program version 1.11 or
later. Download the latest system program from the Roland website
to update this instrument.
02

2
Contents
Main specications .....................................3
Placing this instrument on a stand .......................4
JUNO-D6 / JUNO-D7 users ..................................4
JUNO-D8 users ............................................5
Panel descriptions ......................................6
Top panel ..................................................6
Basic operation ............................................7
Rear panel (Connecting your equipment) .....................8
Overview ..............................................9
Basic structure of the JUNO-D ................................9
Components of the sounds ................................ 10
TONE ................................................... 10
PART ................................................... 10
SCENE .................................................. 10
Eects ................................................... 11
Memories ................................................ 13
Playing ...............................................14
Turning the power on/o .................................. 14
Selecting a scene ......................................... 14
Selecting a tone .......................................... 15
Playing with a single tone (SINGLE) ......................... 15
Playing dierent tones with your left and right hands (SPLIT) .. 15
Playing with two tones layered (DUAL). . . . . . . . . . . . . . . . . . . . . . 16
Using a single tone to create a thicker sound (SUPER LAYER) ... 16
Multipart mode .......................................... 17
Raising/lowering the keyboard pitch in semitones (TRANSPOSE)
......................................................... 17
Changing the key range in octaves (OCTAVE) ................ 17
Changing the playing feel of the keyboard (KEY TOUCH) ...... 18
Using the SOUND MODIFY knobs to alter the sound .......... 18
Registering your favorite scenes to the buttons (FAVORITE) ... 19
Playing arpeggios (ARPEGGIO) ............................. 20
Playing chords (CHORD MEMORY) .......................... 20
Playing the drum sounds (DRUMS) ......................... 21
Using the mic audio to play ................................ 21
Using the vocoder and auto-pitch .......................... 21
Editing the vocoder ...................................... 21
Using the phrase pads ..................................... 22
Importing and playing samples (sample import) .........23
Importing audio les (samples) ............................ 23
Recalling a sample ....................................... 23
Deleting a sample that was imported ....................... 24
Optimizing the sample storage area ........................ 24
Editing a sample .......................................... 24
Editing the sounds ....................................25
Editing a scene (part) ...................................... 25
Copying a part ........................................... 25
Initializing a scene or part ................................. 25
Editing a tone ............................................ 26
Copying a partial ......................................... 27
Initializing a tone or partial ................................ 27
Editing a drum kit ......................................... 27
Copying an instrument ................................... 28
Initializing a drum kit or instrument ........................ 28
Editing the eects ........................................ 28
Saving the settings (WRITE) ............................29
Saving a scene (SCENE WRITE) .............................. 29
Saving a tone/drum kit (TONE WRITE/DRUM WRITE) .......... 30
Saving the system settings (SYSTEM WRITE) ................. 30
Playing back/recording with the step sequencer .........31
Playing back the step sequencer ........................... 31
Step sequencer: basic operations ........................... 31
Recording to the step sequencer ........................... 32
Conguring the recording settings ......................... 32
Recording in REALTIME REC mode .......................... 33
Recording in STEP REC mode .............................. 33
Recording in TR-REC mode ................................ 34
Erasing the entire step sequencer contents or tracks at once
(ERASE) ................................................. 35
Sequencer utilities ........................................ 35
Duplicating the contents of all steps to the end of a track
(DUPLICATE STEPS) ....................................... 35
Copying the contents of a step to another step (COPY STEP) ... 36
Copying the contents of one track to another (COPY TRACK) .. 36
Initializing all tracks (INITIALIZE) ........................... 36
Playing back the rhythm patterns ......................37
Selecting and playing back a rhythm pattern ................ 37
Changing the tempo ...................................... 37
Playing back audio les (audio player) ..................38
Assigning audio les to pads for playback ................... 38
Operating the audio player ................................ 39
Assigning functions to the SOUND MODIFY knobs .......40
Editing the assigned parameters in system settings .......... 40
Editing assigned parameters in the scene settings ........... 40
Editing the setting source of the assigned parameters ........ 40
Using a general-purpose controller .....................41
Connecting to a computer via USB ......................42
Installing the USB driver ................................... 42
Conguring the USB driver ................................ 42
Using USB audio .......................................... 43
Adjusting the USB audio input ............................. 43
Adjusting the USB audio output ........................... 43
Using the JUNO-D as a MIDI keyboard ...................... 43
Using the DAW software ...............................44
Using the JUNO-D as a DAW controller ...................... 44
Controlling MainStage .................................... 44
Controlling Mackie Control-compatibal software. . . . . . . . . . . . . 44
Saving the DAW CONTROL Settings ......................... 45
Produkt Specifikationer
Mærke: | Roland |
Kategori: | Syntese maskine |
Model: | JUNO-D8 |
Har du brug for hjælp?
Hvis du har brug for hjælp til Roland JUNO-D8 stil et spørgsmål nedenfor, og andre brugere vil svare dig
Syntese maskine Roland Manualer
1 Juni 2025

3 Maj 2024

16 April 2024

15 April 2024

26 Marts 2024

9 December 2023

28 Oktober 2023

22 September 2023

17 Juli 2023

14 Juni 2023
Syntese maskine Manualer
- Syntese maskine Pioneer
- Syntese maskine Moog
- Syntese maskine Nord
- Syntese maskine Korg
- Syntese maskine Sonicware
- Syntese maskine Waldorf
- Syntese maskine Behringer
- Syntese maskine Analogue Solutions
- Syntese maskine Ferrofish
- Syntese maskine Casio
- Syntese maskine Studiologic
- Syntese maskine Modal Electronics
- Syntese maskine Twisted Electrons
- Syntese maskine Suzuki
- Syntese maskine Qu-Bit
Nyeste Syntese maskine Manualer
3 Juni 2025

4 Marts 2025

2 Februar 2025

30 Januar 2025

30 Januar 2025

30 Januar 2025

30 Januar 2025

30 Januar 2025

30 Januar 2025

30 Januar 2025