Samsung LN-S4041D Manual
Samsung
televisión
LN-S4041D
Læs nedenfor 📖 manual på dansk for Samsung LN-S4041D (179 sider) i kategorien televisión. Denne guide var nyttig for 11 personer og blev bedømt med 4.7 stjerner i gennemsnit af 6 brugere
Side 1/179

Owner’s
Instructions
This device is a Class B digital apparatus.
Register your product at
www.samsung.com/global/register
LN-S2641D
LN-S3241D
LN-S4041D
TFT-LCD TELEVISION
BN68-01001A-01
Contact SAMSUNG WORLD-WIDE
If you have any questions or comments relating to Samsung products, please contact the SAMSUNG
customer care center.
Comment contacter Samsung dans le monde
Si vous avez des suggestions ou des questions concernant les produits Samsung, veuillez contacter le Service
Consommateurs Samsung.
Contacte con SAMSUNG WORLD-WIDE
Si tiene alguna pregunta o comentario referente a nuestros productos, por favor contacte con nuestro Servicio de
Atención al Cliente.
Country
CANADA
U.S.A
Customer Care Center ☎
1-800-SAMSUNG (7267864)
Address
Samsung Electronics Canada Inc., Customer Service
55 Standish Court Mississauga, Ontario L5R 4B2
Canada
Samsung Electronique Canada Inc., Service
á
la Client
é
le
55 Standish Court Mississauga, Ontario L5R 4B2
Canada
Samsung Electronics America, Inc.
105 Challenger Road
Ridgefield Park, NJ 07660-0511
Web Site
www.samsung.com/ca
www.samsung.com

Precautions When Displaying a Still Image
A still image may cause permanent damage to the TV screen.
• Do not display a still image on the LCD panel for more than 2 hours as it can cause screen image retention.
This image retention is also known as "screen burn".
To avoid such image retention, reduce the degree of brightness and contrast of the screen when displaying a still image.
• Watching the LCD TV in 4:3 format for a long period of time may leave traces of borders displayed on the left, right and center of the screen
caused by the difference of light emission on the screen.
Playing a DVD or a game console may cause a similar effect to the screen.
Damages caused by the above effect are not covered by the Warranty.
•Displaying still images from Video games and PC for longer than a certain period of time may produce partial after-images.
To prevent this effect, reduce the ‘brightness’ and ‘contrast’ when displaying still images.
Précautions à prendre lors de l'affichage d'une image fixe
Une image fixe peut causer des dommages irrémédiables à l'écran du téléviseur.
• N'affichez pas une image fixe sur l'écran LCD plus de 2 heures. Cela pourrait provoquer une rémanence de l'image à l'écran.
Cette rémanence de l'image est également appelée "brûlure de l'écran".
Pour éviter une telle rémanence de l'image à l'écran, réduisez la luminosité et le contraste de l'écran lorsque vous laissez une image fixe affichée.
• Regarder l'écran LCD du téléviseur en format 4:3 pendant une longue période peut laisser des traces de bordures à gauche,
à droite et au centre de l'écran, à cause de la différence d'émission de lumière sur l'écran.
La lecture d'un DVD ou l'utilisation d'une console de jeu peut avoir un effet similaire sur l'écran.
Les dommages provoqués par les effets qui précèdent ne sont pas couverts par la garantie.
•L'affichage d'images fixes de jeux vidéo et d'ordinateurs pendant plus longtemps qu'une période spécifique peut provoquer des rémanences.
Pour éviter cela, réduisez la "luminosité" et le "contraste" lors de l'affichage d'images fixes.
Precauciones al mostrar en la pantalla una imagen fija
La imagen fija puede causar daños permanentes en la pantalla del televisor.
•No deje una imagen fija en la pantalla LCD durante más de dos horas ya que se podría producir una retención de la imagen en la pantalla. Este fenómeno de
retención de imágenes también se denomina "quemadura de pantalla".
Para evitar que se produzca esa persistencia de la imagen, reduzca el nivel de luminosidad y de contraste de la pantalla cuando muestre imágenes fijas.
• El uso del televisor LCD en formato 4:3 durante un tiempo prolongado puede dejar rastros de bordes en las partes izquierda,
derecha y central de la pantalla debido a las diferencias en la emisión lumínica de la pantalla.
La reproducción de un DVD o el uso de una consola de videojuegos pueden provocar un efecto similar en la pantalla.
Reproducir un DVD o una videoconsola puede causar un efecto similar en la pantalla. La garantía no cubre estos daños.
•Ver imágenes fijas de videojuegos y PC durante más tiempo del indicado puede producir restos de imágenes parciales.
Para evitar este efecto, reduzca el 'brillo' y el 'contraste' cuando vea imágenes fijas.

English
Symbol Press Important Note One-Touch
Button
Contents
GENERAL INFORMATION
List of Features .................................................................................. 2
Accessories........................................................................................ 2
Viewing the Control Panel.................................................................. 3
Viewing the Connection Panel ........................................................... 4
Remote Control .................................................................................. 6
Installing Batteries in the Remote Control ......................................... 7
CONNECTIONS
Connecting VHF and UHF Antennas ................................................. 7
Connecting Cable TV ......................................................................... 8
Connecting a VCR ............................................................................. 9
Connecting an S-VHS VCR ............................................................... 9
Connecting a Camcorder
(LN-S3241D/LN-S4041D)
............................. 10
Connecting a DVD Player .................................................................. 10
Connecting a DVD Player/Set-Top Box via DVI ................................ 10
Connecting a DVD Player/Set-Top Box via HDMI ............................. 11
Connecting a Digital Audio System.................................................... 11
Connecting an Amplifier/DVD Home Theater .................................... 12
Connecting a PC................................................................................ 12
OPERATION
Turning the TV On and Off ............................................................... 13
Plug & Play Feature ........................................................................... 13
Changing Channels ........................................................................... 14
Adjusting the Volume ......................................................................... 15
Viewing the Display............................................................................ 15
Viewing the Menus............................................................................. 15
Memorizing the Channels .................................................................. 16
Setting Up Your Remote Control........................................................ 17
To Select the Source (depending on the model) ............................... 22
To Edit the Input Source Name (depending on the model) ............... 22
PICTURE CONTROL
Using Automatic Picture Settings ................................................. 23
Adjusting the Color Tone .............................................................. 24
DNIe Demo(Digital Natural Image engine)................................... 24
Changing the Screen Size............................................................ 25
Freezing the Picture ..................................................................... 26
Viewing Picture-in-Picture............................................................. 26
SOUND CONTROL
Customizing the Sound ................................................................ 28
Using Automatic Sound Settings ................................................. 28
Setting the TruSurround XT.......................................................... 28
Choosing a Multi-Channel Sound (MTS) track - Digital .............. 29
Choosing a Multi-Channel Sound (MTS) track - Analog ............. 29
Selecting the Internal Mute........................................................... 30
Automatic Volume Control ........................................................... 30
Setting the On/Off Melody ............................................................ 31
Listening to the Sound of the Sub (PIP) Picture .......................... 31
CHANNEL CONTROL
Selecting the Antenna................................................................... 32
Setting the Channel Manager....................................................... 32
To set-up Your Favorite Channels ............................................... 33
Using the Channel Lists................................................................ 34
Viewing the Channel Lists ............................................................ 34
Labeling Channels ....................................................................... 35
Fine Tuning Analog Channels....................................................... 35
Checking the Digital-Signal Strength............................................ 36
LNA (Low Noise Amplifier)............................................................ 36
PC DISPLAY
Using Your TV as a Computer (PC) Display ................................ 37
Display Modes .............................................................................. 37
Setting up the TV with your PC .................................................... 38
TIME SETTING
Setting the Clock .......................................................................... 40
FUNCTION DESCRIPTION
Selecting a Menu Language......................................................... 43
Setting the Blue Screen Mode...................................................... 43
Selecting the Film Mode............................................................... 44
Digital Noise Reduction ................................................................ 44
Using the Game Mode.................................................................. 44
Viewing Closed Captions (On-Screen Text Messages) - Analog
... 45
Viewing Closed Captions (On-Screen Text Messages) - Digital .. 46
Menu Transparency Level ............................................................ 47
Using the Energy Saving Feature ................................................ 47
Setting the Function Help ............................................................ 48
Using the V-Chip........................................................................... 48
APPENDIX
Identifying Problems .................................................................... 54
Installing the Stand ....................................................................... 55
Disconnecting the Stand............................................................... 55
Installing the Wall Mount Kit (LN-S2641D)................................... 56
Installing the Wall Mount Kit (LN-S3241D/LN-S4041D) ............... 57
Using the Anti-Theft Kensington Lock .......................................... 58
Specifications................................................................................ 58
English-1

English-2
List of Features
Adjustable picture settings that can be stored in the TV’s memory.
Automatic timer to turn the TV on and off.
A special sleep timer.
V
-Chip function.
Excellent Digital Interface & Networking
With a built-in HD digital tuner, non-subscription HD broadcasts can be viewed with no Set-Top Box needed.
Remote Control
The supplied remote can be used to operate the TV as well as most DVD players, Set-top boxes, Cable Boxes and VCRs.
Excellent Picture Quality
- DNIe technology provides life-like clear images.
SRS TruSurround XT
- SRS TruSurround XT provides a virtual Dolby surround system.
Accessories
Please make sure the following items are included with your LCD TV.
If any items are missing, contact your dealer.
M4 X L16
General Information
Remote Control & Batteries (AAA x 2)
(BN59-00511A)
Power Cord
(3903-000144)
Cover-Bottom
LN-S2641D/LN-S3241D
(BN63-02415A)
LN-S4041D (BN63-02416A)
Stand
LN-S2641D (BN96-03192A)
LN-S3241D (BN96-03191A)
Screw
(6002-001294)
Owner’s Instructions Warranty Card / Registration Card
/Safety Guide Manual
(Not available in all locations)

English-5
AV IN 2
Video and audio inputs for external devices.
S-VIDEO IN 2
Video inputs for external devices with an S-Video output.
HEADPHONE
Connect a set of external headphones for private listening.
Side Panel Jacks (LN-S3241D/LN-S4041D)
Use the left side panel jacks to connect a component that is used only occasionally, such as a camcorder or video game. (See page 10)

English-6
Remote Control
You can use the remote control up to a distance of about 23 feet from the TV. When using the remote, always point it directly at the TV.
You can also use your remote control to operate your VCR, Cable box, DVD player, or Set-Top Box.
POWER
Turns the TV on and off.
NUMERIC BUTTONS
Press to change the channel.
–
Press to select additional channels
(digital and analog) being broadcast by
the same station. For example, to
select channel “54-3”, press “54”, then
press “ –
” and “3”.
CH MGR
Used to display Channel Lists on the
screen.
ANTENNA
Press to select “AIR” or “CABLE”.
VCR/DVD Functions
- Rewind
- Stop
- Play/Pause
- Fast/Forward
VOL / VOL
Press to increase or decrease the
volume.
(
MUTE)
Press to temporarily cut off the sound.
MENU
Displays the main on-screen menu.
S.MODE
Sound mode selection.
PIP
Picture-in Picture ON/OFF.
P.MODE
Picture effect selection.
SRS
Selects SRS TruSurround XT mode.
MTS
Press to choose stereo, mono or
Separate Audio Program
(SAP broadcast).
AUTO PROG.
Press to automatically store selected
TV/Cable channels.
ADD/DEL
Use to store and delete channels
to/from memory.
SET
Sets the remote to control your
TV, VCR, Cable, DVD, or Set-Top Box
TV, DVD, STB, CABLE, VCR
Press to operate your TV,
DVD, STB, CABLE (box), or VCR
SOURCE
Press to display all of the available
video sources.
PRE-CH
Tunes to the previous channel.
FAV.CH
Press to switch to your favorite channels.
E.SAVING
Adjusts screen brightness to save energy.
CH / CH
Press to change channels.
EXIT
Press to exit the menu.
UP / DOWN / LEFT /
RIGHT / ENTER
Use to select on-screen menu items
and change menu values.
INFO
Press to display information on the TV
screen.
SLEEP
Press to select a preset time interval for
automatic shut off.
STILL
Press to stop the action during a
particular scene.
Press again to resume normal video.
P.SIZE
Picture size selection.
SWAP
Switches the main and sub (PIP) picture.
CH
Displays the available channels in
sequence. (These buttons change
channels in the PIP window only.)
CAPTION
Controls the caption decoder.
RESET
When your remote does not work,
change the batteries and press the
RESET button for 2-3 seconds
before use.
This is a special remote control for the visually impaired, and has Braille points on the Power,
Channel and Volume buttons.

English-7
1. Place the wires from the twin leads under the screws on a 300-75
Ω
adapter
(not supplied).
Use a screwdriver to tighten the screws.
2. Plug the adaptor into the ANT 2 IN (CABLE) terminal on the back of the TV.
Connecting VHF and UHF Antennas
If your antenna has a set of leads that look like this, see “Antennas with 300
Ω
Flat Twin Leads”
below.
If your antenna has one lead that looks like this, see “Antennas with 75
Ω
Round Leads”.
If you have two antennas, see “Separate VHF and UHF Antennas”.
Antennas with 300 Flat ΩTwin Leads
If you are using an off-air antenna (such as a roof antenna or “rabbit ears”) that has 300
Ω
twin flat leads, follow the directions below.
1. Plug the antenna lead into the ANT 1 IN (AIR) terminal on the back of the TV.
Antennas with 75 Ω Round Leads
1. Connect both antenna leads to the combiner.
2. Plug the combiner into the ANT 1 IN (AIR) terminal on the bottom of the rear panel.
Separate and UHFVHF Antennas
If you have two separate antennas for your TV (one VHF and one UHF), you must combine the two antenna signals before connecting
the antennas to the TV. This procedure requires an optional combiner-adaptor (available at most electronics shops).
UHF
VHF
ANT 1 IN
(AIR)
ANT 2 IN
(CABLE)
ANT 1 IN
(AIR)
1. Lift the cover at the back of the remote control upward as shown in the figure.
2. Install two AAA size batteries.
Make sure to match the “+” and “–” ends of the batteries with the diagram inside the compartment.
3. Replace the cover.
Remove the batteries and store them in a cool, dry place if you won’t be using the remote control for a long time.
The remote control can be used up to about 23 feet from the TV.
(Assuming typical TV usage, the batteries last for about one year.)
If the remote control doesn’t work, check the following:
1. Is the TV power on?
2. Are the plus and minus ends of the batteries reversed?
3. Are the batteries drained?
4. Is there a power outage, or is the power cord unplugged?
5. Is there a special fluorescent light or neon sign nearby?
Installing Batteries in the Remote Control
UHF
VHF

English-8
After you have made this connection, set the A/B switch to the “A” position for normal viewing. Set the A/B switch to the “B” position to view scrambled
channels. (When you set the A/B switch to “B”, you will need to tune your TV to the cable box’s output channel, which is usually channel 3 or 4.)
2. Connect this cable to a two-way splitter.
Splitter
Incoming
cable
3. Connect an RF cable between an OUTPUT
terminal on the splitter and the IN terminal
on the cable box.
Splitter
Cable Box
Incoming
cable
4. Connect an RF cable between the
ANT OUT terminal on the cable box and
the B–IN terminal on the RF(A/B) switch.
Splitter
Cable Box
RF (A/B)
Switch
Incoming
cable
5. Connect another cable between the other
OUT terminal on the splitter and the A–IN
terminal on the RF (A/B) switch.
Splitter
Cable Box
Incoming
cable
6. Connect the last RF cable between the
OUT terminal on the RF (A/B) switch and
the ANT 2 IN (CABLE) terminal on the rear
of the TV.
Splitter
Cable Box
Incoming
cable
Connecting to a Cable Box that Descrambles Some Channels
If your cable box descrambles only some channels (such as premium channels), follow the instructions below. You will need a two-way
splitter, an RF (A/B) switch, and four lengths of RF cable. (These items are available at most electronics stores.)
1. Find and disconnect the cable that is
connected to the ANT IN terminal on your
cable box.
This terminal might be labeled “ANT IN”,
“VHF IN” or simply, “IN”.
ANT IN
RF (A/B)
Switch
TV Rear
RF (A/B)
Switch
ANT 2 IN
(CABLE)
Connecting Cable TV
To connect to a cable TV system, follow the instructions below.
Cable without a Cable Box
1. Plug the incoming cable into the ANT 2 IN (CABLE) terminal on the back of the TV.
Because this TV is cable-ready, you do not need a cable box to view unscrambled cable channels.
2. Connect the other end of this cable to the ANT 2 IN (CABLE) terminal on the back of the TV.
Connecting to a Cable Box that Descrambles All Channels
1. Find the cable that is connected to the ANT OUT terminal on your cable box.
This terminal might be labeled “ANT OUT”, “VHF OUT” or simply, “OUT”.
ANT OUT
ANT IN
ANT 2 IN
(CABLE)
ANT 2 IN
(CABLE)

English-9
Connecting a VCR
These instructions assume that you have already connected your TV to an antenna or a cable TV system (according to the instructions on
pages 7-8). Skip step 1 if you have not yet connected to an antenna or a cable system.
1. Unplug the cable or antenna
from the back of the TV.
2. Connect the cable or antenna
to the ANT IN terminal on the
back of the VCR.
3. Connect an RF Cable
between the ANT OUT
terminal on the VCR and the
ANT 1 IN (AIR) or ANT 2 IN
(CABLE) terminal on the TV.
4. Connect a Video Cable
between the VIDEO OUT jack
on the VCR and the AV IN 1
[VIDEO] jack on the TV.
5. Connect Audio Cables
between the AUDIO OUT
jacks on the VCR and the
AV IN 1 [R-AUDIO-L] jacks
on the TV.
If you have a “mono”
(non-stereo) VCR, use a
Y-connector (not supplied) to
hook up to the right and left
audio input jacks of the TV.
If your VCR is stereo, you
must connect two cables.
ANT 2 IN
(CABLE)
Follow the instructions in “Viewing a VCR or Camcorder Tape” to view your VCR tape.
Each external input source device has a different back panel configuration.
When connecting an external device, match the color of the connection terminal to the cable.
For 40 inch model, use the cables with the ferrite core.
VCR Rear Panel
TV Rear Panel
RF Cable (Not supplied)
Video Cable (Not supplied)
Audio Cable (Not supplied)
2
3
4
5
Connecting an S-VHS VCR
Your Samsung TV can be connected to an S-Video signal from an S-VHS VCR.
(This connection delivers a better picture as compared to a standard VHS VCR.)
1. To begin, follow steps 1–3
in the previous section to
connect the antenna or
cable to your VCR and
your TV.
2. Connect an S-Video Cable
between the S-VIDEO OUT
jack on the VCR and the
AV IN1 [S-VIDEO] jack on
the TV.
3. Connect Audio Cables
between the AUDIO OUT
jacks on the VCR and the
AV IN1 [R-AUDIO-L] jacks
on the TV.
An S-Video cable is usually included with an S-VHS VCR. (If not, check your local electronics store.)
Each external input source device has a different back panel configuration.
When connecting an external device, match the color of the connection terminal to the cable.
For 40 inch model, use the cables with the ferrite core.
VCR Rear Panel
TV Rear Panel
RF Cable (Not supplied)
S-Video Cable (Not supplied)
Audio Cable (Not supplied)
3
2
1
ANT 1 IN
(AIR)

English-12
Connecting a PC
1. Connect a D-Sub Cable
between PC IN [PC]
connector on the TV and
the PC output connector
on your computer.
2. Connect a PC Audio Cable
between PC IN [AUDIO]
jack on the TV and the
Audio Out jack of the sound
card on your computer.
PC
TV Rear Panel
D-Sub Cable (Not supplied)
PC Audio Cable (Not supplied)
Each external input source device has a different back panel configuration.
When connecting an external device, match the color of the connection terminal to the cable.
The HDMI/DVI jacks do not support PC connection.
For 40 inch model, use the cables with the ferrite core.
Connecting an Amplifier/DVD Home Theater
1. Connect Audio Cables
between the AUDIO OUT
[R-AUDIO-L] on the TV
and AUDIO IN [R-AUDIO-L]
on the Amplifier/DVD Home
Theater.
When an audio amplifier is
connected to the “AUDIO
OUT [L-AUDIO-R]”
terminals: Decrease the
gain (volume) of the TV,
and adjust the volume level
with the Amplifier’s volume
control.
Amplifier/DVD Home Theater
TV Rear Panel
Audio Cable (Not supplied)
1
2
Each external input source device has a different back panel configuration.
When connecting an external device, match the color of the connection terminal to the cable.
For 40 inch model, use the cables with the ferrite core.
Internal Mute Off
Internal Mute On
Video No Signal
RF
Speaker Output
Mute
Mute
Internal Speakers
AV, S-Video
Speaker Output
Mute
Mute
Component, PC, HDMI
Speaker Output
Mute
Mute
RF
Sound Output
Sound Output
Mute
AV, S-Video
Sound Output
Sound Output
Mute
Component, PC, HDMI
Sound Output
Sound Output
Mute
When “Internal mute” is set to “On”, Sound menus except “Multi-Track Options” and “Digital Output” cannot be adjusted.
Audio Out (Optical, L/R Out)

English-13
Turning the TV On and Off
Press the POWER button on the remote control.
You can also use the button on the front of the panel.POWER
Plug & Play Feature
When the TV is initially powered on, two basic customer settings proceed automatically and subsequently:
1. Press the POWER button on the remote control.
The message “Menu language, Channels and Time will be set.” is displayed.
Press the ENTER button, then “Select the language of the OSD” menu is
automatically displayed.
2. Press the ENTER button to enter the language.
Press the or buttons to select language, then the ENTER button.
“Select the antennas to memorize.” menu is automatically displayed.
3. Press the or buttons to memorize the channels of the selected connection.
Press the ENTER button to select “Start”.
If the antenna is connected to ANT 1 (AIR), select “Air” and if it is connected to
ANT 2 (CABLE), select “Cable”.
If both ANT 1 (AIR) and ANT 2 (CABLE) are connected, select the “Air + Cable”.
In Cable mode, you can select the correct signal source among STD, HRC, and IRC
by pressing the or button, then press the ENTER button.
Contact your local cable company to identify the type of cable system that exists in your
particular area.
4. The TV will begin memorizing all of the available channels.
After all the available channels are stored, the Auto program menu reappears.
Press the ENTER button when channel memorization is complete.
“Select the clock mode.” menu is automatically displayed.
To stop the search before it has finished, press the button with stop selected.ENTER
5. Press the button. ENTER
Press the button. or buttons to select “Manual” or “Auto”, then the ENTER
Switches the Daylight Saving Time function on or off.
Operation

English-14
6. Press the button. ENTER
Press the or buttons to select “Yes” or “No”, then the ENTER button.
“Select the time zone in which you live” menu is automatically displayed.
7. Press the or buttons to highlight the time zone for your local area (and to
move the highlight to the appropriate time zone on the map of the United States).
Press the ENTER button. If you have received a digital signal, the time will
be set automatically.
If not, see page 40 to set the clock.
8. The message “Enjoy your watching.” is displayed.
When you have finished,press the button.ENTER
1. Press the MENU button.
Press the button. or buttons to select “Setup”, then press the ENTER
2. Press the or buttons to select “Plug & Play”.
Press the ENTER button.
For further details on setting up options, refer to the previous page.
Plug & Play can only be accessed in the TV mode.
If you want to reset this feature...
Changing Channels
1. Press the CH or CH button to change channels.
When you press the button, the TV changes channels in sequence. CH CHor
You will see all the channels that the TV has memorized. (The TV must have memorized
at least three channels). You will not see channels that were either erased or not
memorized. See page 16 to memorize channels.
Using the Channel Buttons
1. Press the PRE-CH button.
The TV will switch to the last channel viewed.
To quickly switch between two channels that are far apart, tune to one channel, then use
the number button to select the second channel. Then use the PRE-CH button to quickly
alternate between them.
Using the PRE-CH Button to select the Previous Channel

English-15
Viewing the Menus
1. With the power on, press the button.MENU
The main menu appears on the screen. Its left side has five icons:
Input, Picture, Sound, Channel, Setup.
2. Use the or buttons to select one of the five icons.
Then press the button to access the icon’s sub-menu.ENTER
3. Press the EXIT button to exit.
The on-screen menus disappear from the screen after about two minutes.
Viewing the Display
1. Press the INFO button on the remote control.
The TV will display the channel, the type of sound,
and the status of certain picture and sound settings.
The screen displays disappear after about ten seconds.
The display identifies the current channel and the status of certain audio-video settings.
Press the button once more or wait approximately 10 seconds and it disappears INFO
automatically.
Adjusting the Volume
1. Press the
VOL VOLor
buttons to increase or decrease the volume.
1. Press and the sound cuts off. MUTE
The word “ will appear in the lower-left corner of the screen. ”
2. To turn mute off, press the button again, or simply press the MUTE
VOL VOLor
buttons.
Using Mute
At any time, you can cut off the sound using the MUTE button.

English-16
Memorizing the Channels
Your TV can memorize and store all of the available channels for both “off-air” (antenna) and cable channels.
After the available channels are memorized, use the buttons to scan through the channels. CH or CH
This eliminates the need to change channels by entering the channel digits. There are three steps for memorizing channels:
selecting a broadcast source, memorizing the channels (automatic).
Selecting the Video Signal-source
Before your television can begin memorizing the available channels, you must specify the type of signal source that is connected to the
TV (i.e. an antenna or a cable system).
1. Press the MENU button to display the menu.
Press the or buttons to select “Channel”, then press the ENTER button.
2. Press the ENTER button select “Antenna”.
Press the or buttons to select “Air” or “Cable”, then press the
ENTER button.
Press the EXIT button to exit.
Storing Channels in Memory (Automatic Method)
1. Press the MENU button to display the menu.
Press the or buttons to select “Channel”, then press the ENTER button.
2. Press the or buttons to select “Auto Program”, then press the ENTER button.
3. Press the or buttons to select the antenna connection, then press the
ENTER button.
Air: “Air” antenna signal. / Cable: “Cable” antenna signal. /
Air+Cable: “Air” and “Cable” antenna signals.
4. After all the available channels are stored, the “Auto Program” menu reappears.
Press the EXIT button to exit.
Alternately, you can press the button on the remote control to bring up AUTO PROG.
the Auto Program menu.

English-17
Setting Up the Remote to Operate Your VCR
1.
Turn off your VCR.
2.
Press the VCR button on your TV’s remote control.
3.
Press the SET button on your TV’s remote control.
4.
Using the number buttons on your remote control, enter three digits of the VCR code listed on
page 19 of this manual for your brand of VCR. Make sure you enter three digits of the code,
even if the first digit is a “0”. (If more than one code is listed, try the first one.)
5.
Press the POWER button on the remote control. Your VCR should turn on if your remote is
set up correctly.
If your VCR does not turn on after set-up, repeat steps 2, 3 and 4, but try one of the other codes
listed for your brand of VCR. If no other codes are listed, try each VCR code, 000 through 080.
Note on Using Remote Control Modes: VCR
When your remote control is in “VCR” mode, the volume buttons still control your TV’s volume.
Setting Up Your Remote Control
After it has been set up properly, your remote control can operate in five different modes: TV, VCR, Cable, DVD, or Set-Top Box.
Pressing the corresponding button on the remote control allows you to switch between these modes, and control whichever piece of
equipment you choose.
The remote control might not be compatible with all DVD Players, VCRs, Cable boxes, and Set-Top Boxes.
Setting Up the Remote to Operate Your Cable Box
1.
Turn off your cable box.
2.
Press the CABLE button on your TV’s remote control.
3.
Press the SET button on your TV’s remote control.
4.
Using the number buttons on your remote control, enter three digits of the cable box code
listed on page 20 of this manual for your brand of cable box. Make sure you enter three digits
of the code, even if the first digit is a “0”. (If more than one code is listed, try the first one.)
5.
Press the POWER button on the remote control.
Your cable box should turn on if your remote is set up correctly.
If your cable box does not turn on after set-up, repeat steps 2, 3 and 4, but try one of the other
codes listed for your brand of cable box. If no other codes are listed, try each code,
000 through 046.
Note on Using Remote Control Modes: Cable Box
When your remote control is in “CATV” mode, the volume buttons still control your TV’s volume.

English-18
Setting Up the Remote to Operate Your DVD
1.
Turn off your DVD.
2.
Press the DVD button on your TV’s remote control.
3.
Press the SET button on your TV’s remote control.
4.
Using the number buttons on your remote control, enter three digits of the DVD code listed on
page 20~21 of this manual for your brand of DVD. Make sure you enter three digits of the code,
even if the first digit is a “0”. (If more than one code is listed, try the first one.)
5.
Press the POWER button on the remote control.
Your DVD should turn on if your remote is set up correctly.
If your DVD does not turn on after set-up, repeat steps 2, 3 and 4, but try one of the other codes
listed for your brand of DVD. If no other codes are listed, try each code, 000 through 141.
Note on Using Remote Control Modes: DVD
When your remote control is in “DVD” mode, the volume buttons still control your TV’s volume.
Setting Up the Remote to Operate Your Set Top Box
1.
Turn off your STB.
2.
Press the STB button on your TV’s remote control.
3.
Press the SET button on your TV’s remote control.
4.
Using the number buttons on your remote control, enter three digits of the STB code listed on
page 21 of this manual for your brand of STB. Make sure you enter three digits of the code, even
if the first digit is a “0”. (If more than one code is listed, try the first one.)
5.
Press the POWER button on the remote control.
Your STB should turn on if your remote is set up correctly.
If your STB does not turn on after set-up, repeat steps 2, 3 and 4, but try one of the other codes
listed for your brand of STB. If no other codes are listed, try each code, 000 through 074.
Note on Using Remote Control Modes: STB
When your remote control is in “STB” mode, the volume buttons still control your TV’s volume.

English-19
Remote Control Codes
Brand
SAMSUNG
ADMIRAL
AIWA
AKAI
AUDIO DYNAMICS
BELL&HOWELL
BROKSONIC
CANDLE
CANON
CITIZEN
COLORTYME
CRAIG
CURTIS MATHES
DAEWOO
DB
DIMENSIA
DYNATECH
ELECTROHOME
EMERSON
FISHER
FUNAI
GENERAL ELECTRIC
GO VIDEO
HARMAN KARDON
HITACHI
INSTANT REPLAY
JC PENNEY
JCL
JVC
KENWOOD
KLH
KONIA
LG(Goldstar)
LIOYD
LOGIK
LXI
MAGNAVOX
MARANTZ
MARTA
MEI
MEMOREX
MGA
MIDLAND
MINOLTA
MITSUBISHI
Code
000 001 002 003 004 005 077 078 079
020
025
004 027 032
007 026
018
022
002 003 006 008 015 055
021 056
002 003 006 008 015 055
007
002 024
002 007 008 017 021 025 056 064 066
003 010 011 012 013 014 015 016
007 026
017
025
034
001 003 006 021 022 025 030 032 034 040
047 050 052 060 063 065 066 067 069 073
018 024 028 029 048 051 061
025
002 005 017 021 056
002
007
019 025 041 042 074
021
002 007 018 019 021 026 037 041 054 056
007 008 018 021 026 037
081 082 083
007 008 018 021 026 037
070
036
006 007 008 009 010
025
038
025
021 056 059
007 008 018 021 026 037 062
006
021
006 021 024 025
034
005
019 041 075
019 034 041 046
VCR
Brand
MONTGOMERY WARD
MTC
MULTITECH
NEC
OPTIMUS
ORION
PANASONIC
PENTAX
PENTEX RESEARCH+
PHILCO
PHILIPS
PIONEER
PORTLAND
PROSCAN
QUARTZ
QUASAR
RADIO SHACK/REALISTIC
RCA
SANSUI
SANYO
SCOTT
SEARS
SHARP
SHIMTOM
SIGNATURE
SONY
SYLVANIA
SYMPHONIC
TANDY
TASHIKA
TATUNG
TEAC
TECHNICS
TEKNIKA
TMK
TOSHIBA
TOTEVISION
UNITECH
VECTOR RESEARCH
VICTOR
VIDEO CONCEPTS
VIDEOSONIC
WARDS
YAMAHA
ZENITH
Code
020
002 025
002 005 025 038
007 008 018 026 037 062 064
020
073 074 075 076
021 056 071 072
019 041 075
008
021 056 059
021 080
019 026 039 053
015 049 055
017
018
021 056
006 018 020 021 024 025 029 034 048 056
002 017 019 021 035 041 043 057 068 076
026
018 024
003 047 052 067
006 018 019 024 028 029 041 048 051
020 034 045 015
027 033 038 058
025
027 033 044
021 025 056 059
025
018 025
006
037
025 037 068
021
006 021 025 031
066
003 019 029 051 052
002 006
002
007 026
026
007 026
002
002 003 006 019 020 021 024 025 034 038 041
007 008 018 026 037
023 027 033

English-20
Brand
ANAM
AUDIOVOX
AUDIOLOGIC
ANABA
APEX DIGITAL
AIWA
BROKSONIC
BLAUPUNKT
B&K
CURTIS MATHES
CYBER HOME
CLARION
CIRRUS
CYBER HOME
CINEVISION
DAEWOO
DENON
FARENHEIT
FISHER
GPX
GO VIDEO
GE
GREENHILL
HITACHI
HITEKER
HOYO
HARMAN / KARDON
IRT
Code
030
075
085
072
070 071 074 086 083 084 088 111 112
114
062
074
122 123
027
077 078 079 082
080 125
081
065
095
066
146
067 068
090
060
061 089 133 135
069 074
074
064 113
071
073
091 110
089
DVD
Brand
INTEGRA
JBL
JVC
JATON
KENWOOD
KISS
KONKA
KLH
LG(Goldstar)
LOEWE
LASONIC
MOBILE AUTHORITY
MEMOREX
MALATA
MAGNAVOX
MINTEK
MONYKA
NORCENT
NEXT BASE
NEC
NANTAUS
NESA
OPTOMEDIA ELECTRONICS
OPTIVIEW
ONKYO
PHILCO
PRINCETON
PROSCAN
Code
092
091
022 033 115 116
073
051 108 109
073
059 100 106 107
074 075
025 031
057
058
054
055
056
076 093
074 094
073
048 049 050
052
053
144
074
105
072
076 092 119
044 045
046 047
023
Brand
SAMSUNG
GI
HAMLIN
HITACHI
JERROLD
MACOM
MAGNAVOX
OAK
PANASONIC
PHILIPS
PIONEER
RCA
REGAL
Code
000 001 002 003 004 005 006 007
041
003 024 031
025 030
038 039
025 030
019 023 028
026
003 022 027 037 044
019 021 023 028
004 018 020 044
014 022 040
003
CABLE
Brand
REGENCY
SA
SCIENTIFIC ATLAN
SPRUCER
STARGATE 2000
SYLVANIA
TEXSCAN
TOCOM
UNIVERSAL
VIEWSTAR
WAMER AMEX
ZENITH
Code
015 023
042 043
042 043
022
036
016
016
032
033 034
019 021 023 028
046
017 029 035 037 045
Product
DVD
DVDR
BD Record
VCR COMBO
VCR Record
DHR COMBO
Code
000 001 002
003 004
005 006
007 008 009 010 011
012
013
SAMSUNG DVD
Product
Home Theater VCR COMBO
HDD Recorder COMBO
TWIN TRAY COMBO
STB DVD COMBO
DVD Receiver
AV Receiver
Code
014 015 016
017
018
019
020
021

English-21
Brand
ALPHASTAR
ANAM
CHANNEL MASTER
CROSSDIGITAL
CHAPARRAL
DIRECT TV
DAEWOO
DISH NETWORK SYSTEM
DISHPRO
DRAKE
DX ANTENNA
ECHOSTAR
EXPRESSVU
GOI
GE
GENERAL INSTRUMENT
HTS
HOME CABLE
HITACHI
HUGHES NETWORK
IQ
IQ PRISM
JANEIL
JERROID
JVC
LG(Goldstar)
Code
023
043
018 034
019
035
015 016 017 019 022 045 060 061 062 065 066 067 068
074
069 070
069
018 024 032
027
025 069 070 071
069
069
065
046 047 048 063 064
069
056
022
015 017
020
020
059
063
069 070
044 073
STB
Brand
MAGNAVOX
MEMOREX
MOTOROLA
MACOM
MITSUBISHI
NEXT LEVEL
PHILIPS
PRIMESTAR
PANASONIC
PAYSAT
PROSCAN
RCA
RADIOSHACK
REALISTIC
STAR TRAK
STS
SKY
SKY LIFE
SHACK
STAR CHOICE
SONY
TOSHIBA
ULTIMATE TV
UNIDEN
ZENITH
Code
016 021 036 038 039 040 041 042
016
064
018
015
047 048 064
015 016 017 021 033 036 038 039 040 041 042 067
046 049 050 063
058 059 061 062
016
065 066
051 052 053 065 066
064
057
026
020 027
031
005 006 007
064
064
054 060
015 017 028 029 030 072
060 066
016 021 037 055 056 057
024 031 068
Brand
PANASONIC
PHILIPS
ROTEL
RIO
RCA
RAITE
ROWA
SAMPO
SONY
SHERWOOD
SVA
SYLVANIA
SHARP
SANSUI
SANYO
SHINSONIC
Code
024 034 124 134 136 137 138
036 076
117 118
120
023 035 074 075 131 132
073
038
104
026 029 126 127 128 129 130 141
039 041
042
043 093
140
062
062 090
094
DVD
Brand
THOMSON
TOSHIBA
TECHNICS
TVIEW
TOKAI
TEAC
TECHWOOD
TREDEX
URBAN CONCEPTS
VENTURER
VOCOPRO
YAMAHA
YAMAKAWA
XWAVE
ZENITH
Code
145
028 062 076
139
072
073
096
097
098 099 101
076
075
102
032 063
040 073
103
076 121
Product
Ground wave STB
Satellite STB
CABLE STB
STB DVD COMBO
Satellite STB HDD COMBO Standard
Code
001 002
003
004
008
009
SAMSUNG STB
Product
Satellite STB HDD COMBO Premium
CABLE STB HDD COMBO Standard
CABLE STB HDD COMBO Premium
Ground wave STB HDD COMBO Standard
Ground wave STB HDD COMBO Premium
Code
010
011
012
013
014

English-22
To Select the Source (depending on the model)
Press the button on the remote control to view an external signal source.SOURCE
To Edit the Input Source Name (depending on the model)
Name the device connected to the input jacks to make your input source selection easier.
1. Press the MENU button to display the menu.
Press the ENTER button to select “Input”.
Press the or buttons to select “Edit Name”, then press the ENTER button.
2. Press the or buttons to select “AV1”, “AV2”, “S-Video1”, “S-Video2”,
“Component”, “PC”, “HDMI1” or “HDMI2” input jack, then press the
ENTER button.
26 inch model only supports AV, S-Video, Component, PC, HDMI1, and HDMI2.
3. Press the or buttons to select “VCR”, “DVD”, “D-VHS”, “Cable STB”, “HD
STB”, “Satellite STB”, “PVR STB”, “AV Receiver”, “DVD Receiver”, “GAME”,
“Camcorder”, “DVD Combo”, “PC”, “VOD STB”, or “TV” input source, then press
the ENTER button.
Press the EXIT button to exit.
Use to select TV or other external input sources connected to the TV.
Use to select the input source of your choice.
1. Press the MENU button to display the menu.
Press the ENTER button to select “Input”.
2. Press the ENTER button to select “Source List”.
Press the or buttons to select signal source, then press the ENTER button.
When you connect equipment to the LCD, you can choose between the following sets of
jacks: TV, AV1, AV2, S-Video1, S-Video2, Component, PC, HDMI1, or HDMI2 on the
TV’s rear panel.
HDMI1 or HDMI2 input can only be selected when the external device is turned on and
connected via HDMI.
AV2/S-Video2 is placed on the side of the TV.
26 inch model only supports AV, S-Video, Component, PC, HDMI1, and HDMI2.
You can choose only those external devices that are connected to the TV.

English-23
Using Automatic Picture Settings
Your TV has four automatic picture settings (“Dynamic”, “Standard”, “Movie”, and “Custom”) that are preset at the factory.
You can activate either Dynamic, Standard, Movie, or Custom by making a selection from the menu.
Or, you can select “Custom” which automatically recalls your personalized picture settings.
1. Press the MENU button to display the menu.
Press the or buttons to select “Picture”, then press the ENTER button.
2. Press the ENTER button to select “Mode”.
Press the ENTER button again.
Press the or buttons to select the “Dynamic”, “Standard”, “Movie”,
or “Custom” picture setting. Press the button.ENTER
When in PC mode, Tint, Sharpness and Color are not available.
Picture mode needs to be adjusted separately for each input.
3. Press the or buttons to select “Contrast”, “Brightness”, “Sharpness”,
“Color”, or “Tint”, then press the button.ENTER
4. Press the or buttons to decrease or increase the value of a particular item.
For example, if you select “Contrast”, pressing the button increases it.
Press the ENTER button.
Press the EXIT button to exit.
• “Tint” doesn’t operate in HDMI, PC or any Component mode.
• The Tint cannot be adjusted while watching Digital TV.
• Each adjusted setting will be stored separately according to its input mode.
• When you make changes to Contrast, Brightness, Sharpness, Color, Tint , OSD color will also be
adjusted accordingly.
Choose to increase the clarity and sharpness of the picture.Dynamic
Choose for the standard factory settings.Standard
Choose when watching movies. Movie
Choose if you want to adjust the settings according to personal preference.Custom
Picture Control

English-25
Changing the Screen Size
Screen size selection depends on the type of video input.
1. Press the button to display the menu.MENU
Press the buttons to select “Picture”, then press the or ENTER button.
2. Press the buttons to select “Size”, then press the or ENTER button.
3. Press the buttons to select the screen format you want. or
Press the ENTER button.
Press the EXIT button to exit.
• 16:9 : Sets the picture to 16:9 wide mode.
• Zoom1 : Magnifies the size of the picture on the screen.
• Zoom2 : Expands the Zoom1 format picture.
• 4:3 : Sets the picture to 4:3 normal mode.
• In TV, VIDEO, S-VIDEO,and all COMPONENT (480i, 480p) modes, all screen modes can be selected.
(16:9 • Zoom1 • Zoom2 • 4:3).
• In TV(DTV), DVI, PC, HDMI, COMPONENT (720p, 1080i) modes, only 16:9 & 4:3 modes can be selected.
• You must select Zoom with P. Size button on the remote (not in the OSD menu) if you want to move the Zoom 1
or 2 picture up or down.
• You can not change the picture size when PIP is set to Double.
•
If you watch a still image or the 4:3 mode for a long time (over 2 hours), an image may be burned onto the screen.
View the TV in 16:9 mode as much as possible.
•
HD (High Definition)
16:9 - 1080i (1920x1080), 720P (1280x720)
Alternately, you can press the P.SIZE button on the remote control repeatedly to change
the picture size.
16:9
Sets the picture to 16:9 wide mode.
Zoom1
The screen size when Wide screen is
vertically enlarged.
Zoom2
The screen size when the Zoom1 screen is
vertically enlarged.
4:3
Sets the picture to 4:3 normal mode.

English-26
Freezing the Picture
1. Press the STILL button to freeze a moving picture.
Normal sound will still be heard. Press again to cancel.
Viewing Picture-in-Picture
This product has one built-in tuner, which does not allow PIP to function in the same mode. For example, you cannot watch one TV
channel in the main screen, and a different one in the PIP screen. Please see ‘PIP Settings’below for details. You can use the PIP feature
to simultaneously watch two video sources. (See page 31 to select the PIP picture sound.)
While V-Chip is in operation, the PIP function cannot be used.
Activating Picture-in-Picture
1. Press the MENU button to display the menu.
Press the button. or buttons to select “Picture”, then press the ENTER
Press the or buttons to select “PIP”, then press the ENTER button.
2. Press the ENTER button again.
Press the or buttons to select “On”, then press the ENTER button.
If you turn the TV off while watching in PIP mode and turn it on again, the PIP window
will disappear.
Alternately, you can press the button on the remote control repeatedly to activate or PIP
deactivate the PIP.
TV analog
AV 1,2
S-Video 1, 2
TV digital
HDMI 1, 2
Component
PC
X
X
X
X
O
X
O
X
X
X
O
O
X
O
X
X
X
O
O
X
X
X
O
O
X
X
O
X
O
O
O
X
X
O
X
X
X
X
O
O
X
X
X
X
X
X
X
X
X
TV analog AV 1,2 S-Video 1, 2 TV digital HDMI 1, 2 Component PC
Sub
Picture
Main
Picture
PIP Settings O: PIP operates / X: PIP doesn’t operate

English-27
Selecting a Signal Source (External A/V) for PIP.
3. Press the or buttons to select “Source”, then press the button.ENTER
Select the source of the sub picture (PIP) by pressing the buttons and or
press the button.ENTER
MAIN: TV(Analog) / PIP: HDMI(1, 2)
The sub picture can serve different source selections based on what the main picture is set to.
In the PIP Source selection menu, ‘TV’ represents both analog and digital tuning.
Swapping the Contents of the PIP and Main image
4. Press the or buttons to select “Swap”, then press the button.ENTER
Press the PIP Channel buttons on the remote control.
Changing the PIP Channel
5. Press the or buttons to select “Channel”, then press the ENTER button.
Press the or buttons to select the desired channel in the PIP window.
Press the ENTER buttons.
• MAIN: AV(1, 2), S-Video(1, 2), Component / PIP: TV(Digital)
• MAIN: PC, HDMI(1,2) / PIP: TV(Analog)
• The channel can be active when the sub picture is set to TV.
Changing the Position of the PIP Window
6. Press the or buttons to select “Position”, then press the button.ENTER
Press the or buttons to select the desired PIP window position.
Press the ENTER buttons.
The Double ( ), Double Wide ( ) mode cannot be selected in Position mode.
Changing the Size of the PIP Window
7. Press the or buttons to select “Size”, then press the button.ENTER
Press the or buttons to select the desired size of the PIP window.
Press the ENTER button.
Press the EXIT button to exit.
If main picture is in mode, is not available.PC Size
• You cannot choose the PIP option.
• You may notice that the picture in the PIP window becomes slightly unnatural when
you use the main screen to view a game or karaoke.
• You can adjust picture position only by using the size menu.

English-28
Customizing the Sound
The sound settings can be adjusted to suit your personal preference. (Alternatively, you can use one of the “automatic” settings.)
1. Press the MENU button to display the menu.
Press the or buttons to select “Sound”, then press the ENTER button.
2. Press the or buttons to select “Equalizer”, then press the button.ENTER
3. Press the or buttons to select a particular frequency to adjust.
Press the or buttons to increase or decrease the level of the particular frequency.
Press the ENTER button.
Press the EXIT button to exit.
• L/R Sound Balance Adjustment: To adjust the sound balance of the L/R speakers.
• Bandwidth Adjustment (100Hz, 300Hz, 1KHz, 3KHz, 10KHz)
: To adjust the level of different bandwidth frequencies.
Using Automatic Sound Settings
Your TV has automatic sound settings (“Standard”, “Music”, “Movie”, “Speech”, and “Custom”) that are preset at the factory.
Or, you can select “Custom”, which automatically recalls your personalized sound settings.
1. Press the MENU button to display the menu.
Press the or buttons to select “Sound”, then press the ENTER button.
2. Press the ENTER button to select “Mode”.
Press the or buttons to select “Standard”, “Music”, “Movie”, “Speech”,
or “Custom” sound setting, then press the ENTER button.
Press the EXIT button to exit.
• Choose Standard for the standard factory settings.
• Choose Music when watching music videos or concerts.
• Choose Movie when watching movies.
• Choose Speech when watching a show that is mostly dialog (i.e., news).
• Choose Custom to recall your personalized settings (see “Customizing the Sound”).
Setting the TruSurround XT
TruSurround XT is a patented SRS technology that solves the problem of playing 5.1 multichannel content over two speakers.
TruSurround delivers a compelling, virtual surround sound experience through any two-speaker playback system, including internal
television speakers. It is fully compatible with all multichannel formats.
1. Press the MENU button to display the menu.
Press the or buttons to select “Sound”, then press the ENTER button.
2. Press the or buttons to select “SRS TruSurround XT”, then press the
ENTER button.
3. Press the or buttons to select “On” or “Off”, then press the
ENTER button.
Press the EXIT button to exit.
TRADEMARK & LABEL LICENSE NOTICE
TruSurround XT, SRS and Symbol are
trademarks of SRS Labs, Inc.
TruSurround XT technology is incorporated
under license from SRS Labs, Inc.
Sound Control

English-29
1. Press the MENU button to display the menu.
Press the or buttons to select “Sound”, then press the ENTER button.
2. Press the or buttons to select “Multi-Track Options”,
then press the ENTER button.
3. Press the or buttons to select “Multi-Track Sound”, then press the ENTER button.
Press the or buttons to select a setting you want, then press the button.ENTER
Press the EXIT button to exit.
Multi-Track Sound
• Choose Mono for channels that are broadcasting in mono, or if you are having difficulty
receiving a stereo signal.
• Choose Stereo for channels that are broadcasting in stereo.
• Choose SAP to listen to the Separate Audio Program, which is usually a foreign-language
translation.
1. Press the MENU button to display the menu.
Press the or buttons to select “Sound”, then press the ENTER button.
Quick way to access the MTS menu: Just press the “MTS” button on the remote control.
You can listen in a language other than your chosen language by pressing the MTS button.
2. Press the or buttons to select “Multi-Track Options”, then press the
ENTER button.
3. Press the ENTER button to select “Preferred Language”.
Press the or buttons to choose the language (English, Spanish or French)
you want, then press the ENTER button.
Press the EXIT button to exit.
Preferred Language
Choosing a Multi-Channel Sound (MTS) track - Digital
The digital-TV transmission system is capable of simultaneous transmission of many audio tracks (for example, simultaneous translations
of the program into foreign languages). The availability of these additional “multitracks” depends upon the program.
Choosing a Multi-Channel Sound (MTS) track - Analog
Press the buttons on the remote control repeatedly to select “Mono”, “Stereo”, or “SAP”.MTS

English-30
Selecting the Internal Mute
1. Press the MENU button to display the menu.
Press the or buttons to select “Sound”, then press the ENTER button.
2. Press the or buttons to select “Internal Mute”, then press the ENTER button.
3. Press the or buttons to select “On”, then press the button.ENTER
Press the EXIT button to exit.
Sound output from the TV speakers is muted.
Automatic Volume Control
1. Press the MENU button to display the menu.
Press the or buttons to select “Sound”, then press the ENTER button.
2. Press the or buttons to select “Auto Volume”, then press the ENTER button.
3. Press the or buttons to set Auto Volume “On” then press the ENTER button.
Press the EXIT button to exit.
Reduces the differences in volume level among broadcasters.

You can select this option when “PIP” is set to “On”.
Main: Used to listen to the sound of the main picture.
Sub: Used to listen to the sound of the sub picture.
Listening to the Sound of the Sub (PIP) Picture
1. Press the MENU button to display the menu.
Press the or buttons to select “Sound”, then press the ENTER button.
2. Press the or buttons to select “Sound Select”, then press the ENTER button.
3. Press the or buttons to select “Sub”, then press the button.ENTER
Press the EXIT button to exit.
When the PIP feature is activated, you can listen to the sound of the sub (PIP) picture.
English-31
Setting the On/Off Melody
1. Press the MENU button to display the menu.
Press the or buttons to select “Sound”, then press the ENTER button.
2. Press the or buttons to select “Melody”, then press the ENTER button.
3. Press the or buttons to select “On” or “Off”, then press the button.ENTER
Press the EXIT button to exit.
A melody sound can be set to come on when the TV is powered On or Off.
DOLBY DIGITAL
Manufactured under license from Dolby Laboratories.
“Dolby” and the double-D symbol are trademarks of Dolby Laboratories.

English-35
Fine Tuning Analog Channels
1. Press the MENU button to display the menu.
Press the button. or buttons to select “Channel”, then press the ENTER
2. Press the or buttons to select “Fine Tune”, then press the button.ENTER
3. Press the or buttons to adjust the fine tuning.
If you do not store the fine-tuned channel in memory, adjustments are not saved.
4. To store the fine tuning setting in the TV’s memory, press the button.ENTER
To reset the fine tuning setting, press the button to select “Reset”,
then press the button.ENTER
Press the EXIT button to exit.
Only analog TV channels can be fine tuned.
“*” will appear next to the name of fine-tuned channels.
Use fine tuning to manually adjust a particular channel for optimal reception.
Labeling Channels
1. Press the MENU button to display the menu.
Press the button. or buttons to select “Channel”, then press the ENTER
Press the or buttons to select “Name”, then press the ENTER button.
2. Press the or buttons to select the channel to be assigned a new name,
then press the button.ENTER
Press the or buttons to select a letter, a number or a blank
(Results in this sequence: A...Z, 0...9, +, -, *, /, blank).
Press the button to switch to the next field, which will be selected.
Select a second letter or digit by pressing the buttons, as above. or
Repeat the process to select the last three digits. When you have finished,
press the button to assign the new name. ENTER
To erase the assigned new name, select "Clear" by pressing the or button,
then press the button.ENTER
Press the EXIT button to exit.
The names of digital broadcasting channels are automatically assigned and thus
cannot be assigned by users.

English-36
Checking the Digital-Signal Strength
LNA (Low Noise Amplifier)
1. Press the MENU button to display the menu.
Press the button. or buttons to select “Channel”, then press the ENTER
2. Press the or buttons to select “LNA”, then press the button.ENTER
3. Press the or buttons to select “On”, then press the button.ENTER
Press the EXIT button to exit.
LNA functions when antenna is set to Air or Cable. Settings will be stored
separately in each channel. (See “Selecting the antenna.” on page 32.)
If the TV is operating in a weak-signal area, sometimes the LNA function can improve the reception (a low-noise preamplifier boosts the
incoming signal).
1. Press the MENU button to display the menu.
Press the button. or buttons to select “Channel”, then press the ENTER
2. Press the or buttons to select “Signal Strength”, then press the button.ENTER
If the signal strength meter indicates that the signal is weak, physically adjust
your antenna to increase the signal strength.
Continue to adjust the antenna until you find the best position with the strongest signal.
Press the EXIT button to exit
Unlike analog channels, which can vary in reception quality from “snowy” to clear, digital (HDTV) channels have either perfect reception
quality or you will not receive them at all. So, unlike analog channels, you cannot fine tune a digital channel. You can, however, adjust
your antenna to improve the reception of available digital channels.

English-37
Using Your TV as a Computer (PC) Display
Setting Up Your PC Software (Based on Windows XP)
The Windows display-settings for a typical computer are shown below. The actual screens on your PC will probably be different,
depending upon your particular version of Windows and your particular video card. However, even if your actual screens look different,
the same basic set-up information will apply in almost all cases. (If not, contact your computer manufacturer or Samsung Dealer.)
1. First, click on “ ” on the Windows start menu.Control Panel
2. When the control panel window appears, click on “Appearance and Themes” and a
display dialog-box will appear.
3. When the control panel window appears, click on “ ” and a display dialog-box Display
will appear.
4. Navigate to the “ ” tab on the display dialog-box.Settings
The correct size setting (resolution)
Optimum: 1360 x 768 pixels
If a vertical-frequency option exists on your display settings dialog box,
the correct value is “60” or “60 Hz”. Otherwise, just click “OK” and exit the dialog box.
Display Modes
If the signal from the system equals the standard signal mode, the screen is adjusted automatically. If the signal from the system doesn’t equal the standard
signal mode, adjust the mode by referring to your videocard user guide; otherwise there may be no video. For the display modes listed below, the screen
image has been optimized during manufacture.
Mode
IBM
VESA
Resolution
640 X 350
720 X 400
640 X 480
640 x 480
640 x 480
640 x 480
800 x 600
800 x 600
800 x 600
800 x 600
1024 x 768
1024 x 768
1024 x 768
1024 x 768
1360 x 768
Horizontal
Frequency (kHz)
31.469
31.469
31.469
35.000
37.861
37.500
37.879
48.077
46.875
43.750
48.363
56.476
56.672
60.023
47.712
Vertical
Frequency (Hz)
70.086
70.087
59.940
70.000
72.809
75.000
60.317
72.188
75.000
70.000
60.004
70.069
72.000
75.029
60.015
Pixel Clock
Frequency (MHz)
25.175
28.322
25.175
28.560
31.500
31.500
40.000
50.000
49.500
45.500
65.000
75.000
78.434
78.750
85.800
Sync Polarity
(H/V)
+ / -
- / +
- / -
- / -
- / -
- / -
+ /+
+ /+
+ /+
- / -
- / -
- / -
- / -
+ /+
+ /+
PC Display

English-43
Selecting a Menu Language
1. Press the MENU button to display the menu.
Press the or buttons to select “Setup”, then press the ENTER button.
Press the or buttons to select “Language”, then press the ENTER button.
2. Press the or buttons to select the appropriate language: “English”, “Spanish”
or “French”. Press the button.ENTER
Press the EXIT button to exit.
Setting the Blue Screen Mode
If no signal is being received or the signal is very weak, a blue screen automatically replaces the noisy picture background.
If you wish to continue viewing the poor picture, you must set the “Blue Screen” mode to “Off”
1. Press the MENU button to display the menu.
Press the or buttons to select “Picture”, then press the ENTER button.
2. Press the or buttons to select “Blue Screen”, then press the button.ENTER
3. Press the or buttons to select “On” or “Off” then press the button.ENTER
Press the EXIT button to exit.
Pressing the buttons will alternate between “On” or “Off” or
Function Description

English-44
Digital Noise Reduction
If the broadcast signal received by your TV is weak, you can activate the Digital Noise Reduction feature to help reduce any static
and ghosting that may appear on the screen.
1. Press the MENU button to display the menu.
Press the or buttons to select “Picture”, then press the ENTER button.
2. Press the or buttons to select “Digital NR”, then press the button.ENTER
3. Press the or buttons to select “On”, then press the button.ENTER
Press the EXIT button to exit.
Using the Game Mode
When connecting to a game console such as PlayStationTM or XboxTM
, you can enjoy a more realistic gaming experience by selecting game
menu.
1. Press the MENU button to display the menu.
Press the or buttons to select “Setup”, then press the ENTER button.
2. Press the or buttons to select “Game Mode”, then press the button.ENTER
3. Select Off or or On by pressing the buttons, then press the button.ENTER
4. Press the EXIT button to exit.
To disconnect the game console and connect another external device, cancel game mode
in the picture menu.
If you display the TV menu in Game mode,the screen shakes slightly.
Game Mode is not available in TV mode.
Selecting the Film Mode
On: Automatically senses and processes film signals from all sources and adjusts the picture for optimum quality.
Off: Switches off the Film mode.
1. Press the MENU button to display the menu.
Press the or buttons to select “Picture”, then press the ENTER button.
2. Press the or buttons to select “Film Mode”, then press the button.ENTER
3. Press the or buttons to select “On”, then press the button.ENTER
Press the EXIT button to exit.
Film mode is supported in TV, VIDEO, S-VIDEO, and COMPONENT 480i

English-46
Viewing Closed Captions (On-Screen Text Messages) - Digital
The Digital Captions function operates on digital channels.
1. Press the MENU button to display the menu.
Press the or buttons to select “Setup”, then press the ENTER button.
2. Press the or buttons to select “Caption”, then press the button.ENTER
3. Press the ENTER button to select “Caption”.
Press the or buttons to select “On”, then press the ENTER button.
4. Press the or buttons to select “Caption Mode”, then press the button.ENTER
Press the or buttons to select submenu (Default, Service1~Service6,
CC1~CC4, or Text1~Text4) you want, then press the button.ENTER
5. Press the or buttons to select “Caption Options”, then press the ENTER button.
“Caption Options” are available only when “Service1~Service6” can be selected in “Caption Mode”.
Service1~6 in digital caption mode may not be available depending on the broadcast.
6. Press the or buttons to select “Size”, then press the button.ENTER
Press the or buttons to select the desired Caption option, then press the
ENTER button.
Press the or button to select the desired sub-menu options
(see options below), then press .ENTER
Press the EXIT button to exit.
The availability of captions depends on the program being broadcast.
“Default” means to follow the standard set by the broadcaster.
• Size: This option consists of “Default”, “Small”, “Standard”, and “Large”. The default is “Standard”.
• Font Style: This option consists of “Default”, “Style0 ~ Style 7”. You can change the font you want.
The default is “Style 0”.
• Foreground Color: This option consists of “Default”, “White”, “Black”, “Red”, “Green”, “Blue”,
“Yellow”, “Magenta”, and “Cyan”. You can change the color of the letter.
The default is “White”.
• Background Color: This option consists of “Default”, “White”, “Black”, “Red”, “Green”, “Blue”,
“Yellow”, “Magenta”, and “Cyan”. You can change the background color
of the caption. The default is “Black”.
• Foreground Opacity: This option consists of “Default”, “Transparent”, “Translucent”, “Solid”,
and “Flashing”. You can change the opacity of the letter.
• Background Opacity: This option consists of “Default”, “Transparent”, “Translucent”, “Solid”,
and “Flashing”. You can change the background opacity of the caption.
• Return to Default: This option sets each of “Size”, “Font Style”, “Foreground Color”, “Bakcground
color”, “Foreground Opacity”, and “Background Opacity” to its default.
Press the button repeatedly to select “On” or “Off”.CAPTION

English-47
Using the Energy Saving Feature
This feature adjusts the brightness of the TV in order to reduce power consumption. When watching TV at night, set the
"Energy Saving " mode option to "High" to reduce eye fatigue as well as power consumption.
1. Press the MENU button to display the menu.
Press the or buttons to select “Setup”, then press the ENTER button.
2. Press the or buttons to select “Energy Saving”, then press the ENTER button.
Select the required option (Off, Low, Medium, High) by pressing or button.
Press the ENTER button.
Press the EXIT button to exit.
Menu Transparency Level
Adjusts the transparency of the menu screen.
1. Press the MENU button to display the menu.
Press the or buttons to select “Setup”, then press the ENTER button.
2. Press the or buttons to select “Menu Transparency”,
then press the ENTER button.
3. Press the or buttons to select level, then press the button.ENTER
Press the EXIT button to exit.
To select the Energy Saving setting you have made, press the
E.SAVING
button
on the remote control.

English-48
Using the V-Chip
The V-Chip feature automatically locks out programs that are deemed inappropriate for children. The user must enter a PIN (personal ID
number) before any of the V-Chip restrictions are set up or changed.
When the V-chip feature is activated, the PIP features do not function.
Setting Up Your Personal ID Number (PIN)
1. Press the MENU button to display the menu.
Press the or buttons to select “Setup”, then press the ENTER button.
2. Press the or buttons to select “V-Chip”, then press the button.ENTER
The message “Enter PIN” will appear. Enter your 4 digit PIN number.
The default PIN number of a new TV set is “0-0-0-0”.
3. The “V-Chip” screen will appear.
Press the button. or buttons to select “Change PIN”, then press the ENTER
The Change PIN screen will appear. Choose any 4 digits for your PIN and enter them.
As soon as the 4 digits are entered, the “Confirm new PIN” screen appears.
Re-enter the same 4 digits. When the Confirm screen disappears,
your PIN has been memorized.
Press the EXIT button to exit.
If you forget the PIN, press the remote-control buttons in the following sequence,
which resets the pin to 0-0-0-0 : Power Off. → → → →Mute 8 2 → 4 Power On.
Setting the Function Help
Displays help on the menu functions.
1. Press the MENU button to display the menu.
Press the or buttons to select “Setup”, then press the ENTER button.
2. Press the or buttons to select “Function Help”, then press the button.ENTER
3. Press the or buttons to select “On”, then press the button.ENTER
Press the EXIT button to exit.
The predetermined value of the function help is On.

English-50
3. The “V-Chip” screen will appear. Press the buttons to select “TV Parental or
Guidelines”, then press the button.ENTER
4. The “TV Parental Guidelines” screen will appear.
Press the or buttons to select one of the six aged based categories:
5. At this point, one of the TV-Ratings is selected.
Press the ENTER button. Depending on your existing setup, the “ ” symbol will
be selected. (Blank = Unblocked, = Blocked)
While “ ” is selected, press the button to block or unblock the category.ENTER
To select a different TV-Rating, press the or buttons and then repeat the process.
Allow all: Press to unlock all TV ratings. / Block all: Press to lock all TV ratings.
The TV-Y, TV-Y7, TV-G, TV-PG, TV-14 and TV-MA have additional options. See the next step to
change any of the following sub-ratings:
FV: Fantasy violence / D: Sexually Suggestive Dialog / L: Adult Language /
S: Sexual situation / V: Violence
The V-Chip will automatically block certain categories that are “more restrictive”. For example,
if you block “TV-Y” category, then TV-Y7 will automatically be blocked. Similarly, if you block the
TV-G category, then all the categories in the “young adult” group will be blocked
(TV-G, TV-PG, TV-14, and TV-MA). The sub-ratings (D, L, S, V) work together similarly.
(See next section.)
6. How to set the FV, D, L, S and V sub-ratings.
First, select one of these TV-Ratings: TV-Y, TV-Y7, TV-G, TV-PG, TV-14, or TV-MA
(See Step 4, on previous page), and press the button. The “ ” symbol will be
displayed for each sub-rating.
While “ ” is selected, press the button to go to a sub rating. ENTER
Press to block the sub rating. To select a different TV-Rating, ENTER
press the buttons and then repeat the process. or
The V-chip will automatically block certain categories that are “More restrictive”.
For example, if you block “L” sub-rating in TV-PG, then the “L” sub-ratings in TV-14 and
TV-MA will automatically be blocked.
7. Press the MENU button to clear all the screens. (Or proceed to the next section,
and set up additional restrictions based on the MPAA codes.)
These categories consist of two separate groups: TV-Y and TV-Y7
(young children through age 7), and TV-G through TV-MA (everybody else).
The restrictions for these two groups work independently: If a household includes very
young children as well as young adults, the TV guidelines must be set up separately for
each age group. (See next step.)
• TV-Y: Young children
• TV-Y7: Children 7 and over
• TV-G: General audience
• TV-PG: Parental guidance
• TV-14: Viewers 14 and over
• TV-MA: Mature audience

English-53
How to Set up Restrictions Using the ‘Canadian French’
1. Press the MENU button to display the menu.
Press the or buttons to select “Setup”, then press the ENTER button.
2. Press the or buttons to select “V-Chip”, then press the button.ENTER
The message “Enter PIN” will appear. Enter your 4 digit PIN number.
3. The “V-Chip” screen will appear. Press the buttons to select or
“Canadian French”, then press the button.ENTER
4. Press the or buttons to select a appropriate restriction.
Press the ENTER button to activate the restriction selected. The “ symbol is ”
indicated.
Press the EXIT button to exit.
Allow all: Press to unlock all TV ratings. / Block all: Press to lock all TV ratings.
• E: Exempt programming includes...news, sports, documentaries and other information
programming, talk shows, music videos, and variety programming.
• G: General.
• 8 ans+: Not recommended for young children.
• 13 ans+: Programming may not be suitable for children under the age of 13.
• 16 ans+: Programming is not suitable for children under the age of 16.
• 18 ans+: Programming restricted to adults.

Français-4
AV IN 1
Entrée audio et vidéo pour périphériques externes,
tels qu’un caméscope ou un magnétoscope.
S-VIDEO IN 1
Connectez un signal S-Vidéo provenant d'un caméscope
ou d'un magnétoscope.
AUDIO OUT
Branchez la prise d'entrée audio sur votre amplificateur
ou votre système de cinéma à domicile.
SORTIE AUDIO NUMERIQUE (OPTIQUE)
À brancher à un appareil audio numérique.
SERVICE 1/SERVICE 2
Connecteur réservé aux opérations de maintenance
uniquement.
HDMI/DVI IN 1/2, DVI IN
Se connecte à la prise HDMI d’un périphérique doté
d’une sortie HDMI. Utilisez le terminal HDMI/DVI pour les
connexions DVI vers un périphérique externe.
Utilisez le câble DVI vers HDMI ou l'adaptateur DVI-HDMI
(DVI vers HDMI) pour la connexion vidéo et la borne DVI-IN
"R - AUDIO – L" pour la sortie audio.
- la borne HDMI/DVI IN ne prend pas en charge le PC.
- Aucune connexion audio n'est requise
entre deux appareils HDMI.
PRISE CASQUE
(LN-S2641D)
Pour connecter un ensemble d’écouteurs externes pour
une écoute individuelle.
ANT 1 IN/ANT 2 IN
Pour connecter une antenne ou un système de télévision
par câble.
PC IN
A connecter à la prise de sortie audio et vidéo de votre PC.
COMPONENT IN
Connectez le composant vidéo/audio.
ENTREE D’ALIMENTATION
Connectez le câble d’alimentation fourni.
KENSINGTON LOCK
Le verrou Kensington (en option) est un dispositif utilisé
pour fixer physiquement le système dans le cas d’une
utilisation dans un endroit public. Pour utiliser un
dispositif de verrouillage, contactez le revendeur de votre
téléviseur.
L’emplacement du “verrou Kensington” peut varier en fonction
du modèle.
Prises du panneau arrière
Les prises du panneau arrière sont utilisées pour brancher de façon permanente un appareil Audio/Vidéo comme par exemple un lecteur
DVD ou un magnétoscope. Pour plus d’informations sur le branchement des appareils, voir pages 7-12.
Présentation du panneau de branchement
LN-S2641D
LN-S3241D/LN-S4041D
Produkt Specifikationer
Mærke: | Samsung |
Kategori: | televisión |
Model: | LN-S4041D |
Har du brug for hjælp?
Hvis du har brug for hjælp til Samsung LN-S4041D stil et spørgsmål nedenfor, og andre brugere vil svare dig
televisión Samsung Manualer
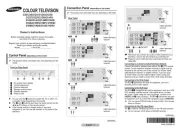
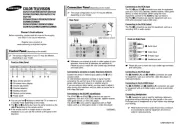
30 Januar 2025

14 Januar 2025

14 Januar 2025

14 Januar 2025

12 Januar 2025

12 Januar 2025

12 Januar 2025

10 Januar 2025

8 Januar 2025

2 Januar 2025
televisión Manualer
- televisión Viewsonic
- televisión Westinghouse
- televisión RCA
- televisión Uniden
- televisión HCI
- televisión AEG
- televisión DirecTV
- televisión Odys
- televisión Majestic
- televisión BenQ
- televisión Sylvania
- televisión Techwood
- televisión Loewe
- televisión Abus
- televisión Xiaomi
Nyeste televisión Manualer

20 Februar 2025

19 Februar 2025

19 Februar 2025

10 Februar 2025

5 Februar 2025

30 Januar 2025

15 Januar 2025

15 Januar 2025

15 Januar 2025

15 Januar 2025