2 EN
EN
Copyright © 2025, Fast ČR, a. s.
Revision 01/2025
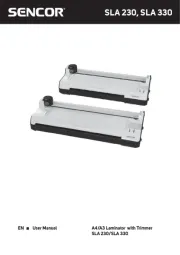
OPERATING ELEMENTS
1. Cutting head
2. Guide rail
3. Pressing rail with finger protection
4. Function switch (temperature control)
5. Indicator elements(LEDs)
6. Laminator in feed
7. Visual positioning aids in cm
(lines,angles,scale)
8. ON/OFF switch
9. Anti-blocking slider(for clearing jams)
10. Corner rounder (The function for round-
ing off the corners is located on the
reverse side of the devices.)
OPERATION
Laminator
The laminator can complete hot and cold lamination:
In the case of hot lamination, the lamination foil is adhered together. In the case of cold lam-
ination, the lamination foil is pressed together. Select the lamination method according to the
material to be laminated.
Note: Only cold lamination should be used for thermopaper and ultrasonic images!
1. Hot laminating
1.1 Connect the power cable to an easily accessible, standard electrical socket.
Caution: Check that the voltage specifications of the unit correspond to that of your
power supply network (220 - 240V, 50Hz).
1.2 Use the on/off switch on the right of the appliance to switch on:"HOT", the red display
lamp shows.
1.3 The drive motor for the transport rollers starts up. The correct operating temperature is
reached after about 3-5 minutes and the green display lamp shows.
1.4 Insert the document to be laminated in the pouches so that there is a margin of approx.
3 - 5 mm to the edge of the foil on all sides.
Caution: Only use foil intended for hot laminating.
1.5 Insert the foil containing the document in the laminator's insertion slot. Insert the ready
closed side of the pouch first.
Note: To prevent the laminating foil from creasing, never insert the open end of the foil
pocket in the insertion slot of the laminator first. When inserting the foil, observe the
instructions on the insertion slot. The laminating process occurs automatically.
There is a spare underlay pad
inside of the guide rail