Sharp 32HE2245KW Manual

Sharp TV 32HE2245KW

Læs gratis den danske manual til Sharp 32HE2245KW (2 sider) i kategorien TV. Denne vejledning er vurderet som hjælpsom af 3 personer og har en gennemsnitlig bedømmelse på 3.9 stjerner ud af 2 anmeldelser. Har du et spørgsmål om Sharp 32HE2245KW, eller vil du spørge andre brugere om produktet?

Side 1/2
SHA/QSW/0376
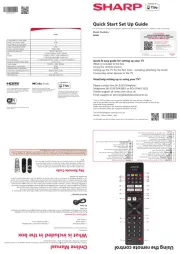
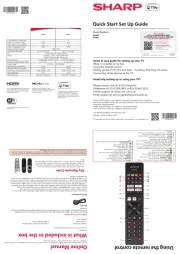
1. (standby) Switch on the TV when in standby or vice versa.
2. INPUT Displays the input/source menu.
3. NUMBER BUTTONS 09 to select a TV channel directly.
4. (mute) Mutes the sound or vice versa.
5. GUIDE Opens the 7 day TV guide (digital TV mode).
6.
(settings) Opens the Settings menu.
8. INFO Short press: Press once to view information about the
program you are currently watching. Press again to display the
TV channel list. Long press: Opens Sharp Life Portal.
9. (▲/▼/◄/►/OK) Allows you to navigate the on-screen menus
and adjust the system settings to your preference.
10. BACK Short press: Step back in the menu. Long press: Exit the
currently displayed menu or application.
11.
(TiVo) Displays the TVs home screen.
12. FREELY Access the Freely service. Only available in the UK.
13. VOL (+/-) Tilt to increase/decrease the sound level.
14. CH (+/-) Tilt to switch to the next/previous channel in the
sequence.
15. NETFLIX – Access the Netix App.
16. Prime video Access the Prime video App.
17. DISNEY+ Access to the Disney+ app.
18. YOUTUBE Access to the YouTube app.
19. AUDIO Opens audio track menu.
20. SUB – Turns on/o subtitles at the bottom of the screen.
21. TEXT – Turns teletext on/o.
22. TV Switches the TV to the last watched input.
23.
Play/pause media.
24. Play in fast rewind mode.
25. Play in fast forward mode.
26. Stop playback.
27. COLOUR BUTTONS Execute corresponding function at that
time.
Using the remote control
What is included in the box
Online Manual
To launch the online manual, press the (TiVo) button on your remote. On the home screen navigate to the control carousel
and select Life Portal, then select the option Instruction manual.
Accessories
Included with this TV are the following accessories
1 x Quick Start Guide 1 x Remote Control and 2 x AAA Batteries
1 x Stand installation pack
1x Power cable
1 x Safety Leaet
Microsoft PlayReady
This product contains technology subject to certain intellectual property rights of Microsoft. Use or distribution of
this technology outside of this product is prohibited without the appropriate license(s) from Microsoft.
Content owners use Microsoft PlayReady content access technology to protect their intellectual property,
including copyrighted content. This device uses PlayReady technology to access PlayReady-protected content and/
or WMDRM-protected content. If the device fails to properly enforce restrictions on content usage, content owners
may require Microsoft to revoke the devices ability to consume PlayReady-protected content. Revocation should not
aect unprotected content or content protected by other content access technologies. Content owners may require
you to upgrade PlayReady to access their content. If you decline an upgrade, you will not be able to access content
that requires the upgrade.
Additional Accessories
If you don’t have the RF cable shown below, then you can purchase one from www.umc-uk.co.uk/cables
If you are intending to connect your TV to an RF socket in order to receive digital TV channels, you will need
this cable.
RF Cable
24HE2
32HE2
Quick Start Set Up Guide
For information on using the TVs features, please refer to the Operating Instructions. (Available online to download.)
Model Numbers
Please save your box/packaging as you will need this in the event of warranty/service repair or support. We are
unable to carry out warranty/service if you are unable to package it correctly. The safest way to package your item
in the event of warranty/service repair is in its original box/packaging.
If you wish to use your Sky remote to operate the TVs basic functions,
you will need a Sky remote control (Revision 9 or later) and you will need
to program it with the code 2134. If you wish to use your Sky Q remote to
operate the TVs basic functions, you will need to program it with the code
4170.
Sky Remote Code
Quick & easy guide for setting up your TV
What is included in the box
Using the remote control
Setting up the TV for the rst time - including attaching the stand
Connecting other devices to the TV
Need help setting up or using your TV?
Please contact the UK & ROI Helpline*
Telephone UK 0330 024 0803 or ROI 01443 3323
Online support at: www.umc-uk.co.uk
Email support at: service.gb@sharpconsumer.eu
*Calls to 0330 numbers are charged at standard call rates and are included as
part of any bundled minutes with your phone provider. Hours are correct at time of this
document being published.
Please note these hours are subject to change periodically.
Calls to the ROI number are charged at the local call rate.
The helpline telephone opening hours are:
Monday - Friday: 8.30am 6pm
For Saturdays and Bank Holidays, please refer to the website for our opening hours.
REGISTER NOW!
ACTIVATE YOUR MANUFACTURERS
GUARANTEE WITHIN 14 DAYS OF PURCHASE
+ GET AN EXTRA 6 MONTHS FREE
*
SCAN QR CODE TO ACTIVATE
Or use one of the methods below
sharpconsumer.eu/register
UK 0800 802 1838 (freephone)
ROI 01 270 8449
Lines are open 9am - 8pm, Mon - Sun
* UK and Ireland only.
24HE2 32HE2
2
3
4 5
7
9
11
12
13 14
15 16
17 18
19 22
20
21
23 26
24 25
27
6 8
10
1
Energy Eciency Class (SDR) E E
Power consumption (SDR) 17 W 26 W
Power Eciency Class (HDR) G G
Power Consumption (HDR) 23 W 35 W
Screen resolution (pixels) 1366 x 768
Screen Size (diagonal) 60 cm / 24 inches 80 cm / 32 inches
RF 75 ohm Antenna DVB Satellite
Inputs
3 x HDMI, 2 x USB, 1 x RJ45 LAN/Ethernet,
1x Mini Composite/CVBS + Audio input
Sound Outputs 1 x Digital Optical Audio output 1 x 3.5mm Headphone
Speaker/ Amplier Watts (RMS) 2 x 5 / 2 x 3 2 x 10 / 2 x 8
Input voltage AC 220V ~ 240V; 50/60Hz
Rated power consumption 36 W 56 W
Standby power consumption <0.5 W <0.5 W
Dimensions including stand (mm) 535W x 369H x 216D 715W x 473H x 216D
Net weight (Kgs) 2.25 3.35
Wall Mounting VESA 100 x 100 (mm) VESA 100 x 100 (mm)
The terms HDMI, HDMI High-Denition Multimedia
Interface, HDMI Trade dress and the HDMI Logos
are trademarks or registered trademarks of HDMI
Licensing Administrator, Inc.
The Wi-Fi CERTIFIED Logo is a certication mark of
the Wi-Fi Alliance.
Manufactured under license from Dolby
Laboratories. Dolby, DolbyAudio, and the double-D
symbol are trademarks of Dolby Laboratories
Licensing Corporation.
© 2025 Xperi Inc. All Rights Reserved. TiVo and
the TiVo logo are trademark(s) or registered
trademark(s) of Xperi Inc. or its subsidiaries in
the United States and other countries. All other
trademarks and content are the property of their
respective owners.
SHA/QSW/0376
2
1
3
1 3 2
1 2
4 First time installation
When the TV rst turns on, select your preferred on-screen display
language. This sets the language in which menus and information
displays.
Select the country where your TV is physically located to ensure
appropriate content availability and features.
Further installation screens appear in sequence. Please read the
information on each screen carefully and select the options that
are most suitable for you.
Basic installation steps are shown below. These may vary slightly depending on your model. Due to software updates, the look and feel of the TV
start up procedure and subsequent menus can be subject to change.
Connect the TV to your power socket.
To use Freely to receive free channels and on-demand shows, connect the TV to the internet. You can do this
by connecting to Wi-Fi during the rst time installation setup or by plugging in an Ethernet cable from your
router to the TV.
If you choose to, you can top up your channels with an aerial connection. Connect the RF input from the TV to
your outdoor Digital TV aerial.
Insert the batteries supplied into the remote
control and press the standby button to power on
the TV.
1 Fitting the stand
2 Connecting your TV 3
Powering on the TV
Setting up the TV for the rst time
Used for attaching the stand
to the TV (g.2)
The TV panel must be facing downwards.
For the stand installation, there
is one type of screw provided as
shown below.
Note: To complete the stand
installation you will require a
cross head screw driver.
Remote Control:
Installing Batteries
4 x
Switch on the TV by pressing the on/o button
on the bottom of the LED light.
LED Light
Place the TV on a flat and clean surface with the panel facing down-
wards to avoid damage.
Ensure the stand feet match the orientation as shown above.
We hope you have many years of trouble free enjoyment from your purchase.
Your product is covered under the manufacturers guarantee for 12 months from the date of
purchase.
If you experience any difficulties with your TV, please refer to the 'Frequently asked questions' in
the manual.
Please make a note of your TV model, the serial number and the date of purchase.
You will need this information should you need to call the helpline.
The on-screen keyboard lets you type text like a Wi-Fi password or movie title using your remote
control. Highlight the character you want using the [ARROW] buttons and press [OK].
You can type characters with accents or diacritical marks by pressing and holding the [OK] button
for 2 seconds on a character.
Thank you for purchasing this TVOn-screen keyboard
Press to navigate up
Press to conrm a selection
Press to navigate right
Press to navigate left
Press to navigate down


Produkt Specifikationer

Mærke: Sharp
Kategori: TV
Model: 32HE2245KW

Har du brug for hjælp?

Hvis du har brug for hjælp til Sharp 32HE2245KW stil et spørgsmål nedenfor, og andre brugere vil svare dig