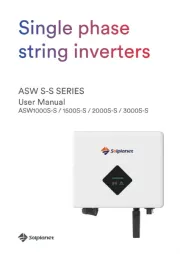
Solplanet ASW3000S-S Manual


Læs gratis den danske manual til Solplanet ASW3000S-S (2 sider) i kategorien Ikke kategoriseret. Denne vejledning er vurderet som hjælpsom af 121 personer og har en gennemsnitlig bedømmelse på 4.9 stjerner ud af 61 anmeldelser. Har du et spørgsmål om Solplanet ASW3000S-S, eller vil du spørge andre brugere om produktet?

Side 1/2
Quick Guide
Solplanet App
This document describes the activities related to the creation of a PV plant, set-up and commissioning of a Solplanet
inverter and connecting the Solplanet inverter to a WiFi network.
The contents of this quick guide apply to the following models:
ASWx000S-S
ASWx000-S
ASWx000-T
ASWxxK-LT
ASWxxK-LT-G2
ASW TLCx000
The firmware of the Solplanet WiFi stick should be 19B01-0021R or greater. Please contact the Solplanet service team in
your region if in doubt.
Solplanet inverter with a WiFi stick
WiFi stick with firmware greater than 19B01-0021R
iOS or Android based mobile device
Solplanet app
Please ensure the following has been completed before using this quick guide:
A Solplanet inverter installed as per the Solplanet guidelines
A Solplanet WiFi stick has been connected to the inverter
The inverter has been connected to a string of solar panels of the appropriate voltage or to a DC power source
The inverter DC switch is in the “ON” position
Ensure the WiFi stick´s green LED is solid ON and the blue LED is OFF
If the blue LED is solid ON before your first attempt to begin, the WiFi stick may have already connected to a WiFi network.
Please contact the Solplanet service team in your region if this is the case.
There are two LED indicators on the WiFi stick, the state of each LED indicator is defined in the table below:
Solid OFF
Solid ON
Blinking
Green LED
WiFi stick is OFF
WiFi stick is ON
NA
Blue LED
Not connected to WiFi
ASW-XXXX access point is
ON
Connected to WiFi
ASW-XXXX access point
is OFF
Connected to WiFi
ASW-XXXX access point is OFF
Data cannot be sent to server
To download the Solplanet app, please scan the appropriate QR code below.
Android
iOS
An account can be created in the following ways:
Tapping on “Do not have an account? on the login screen of the app selecting the appropriate user type and ,
following the prompts
Registration is possible using either an email or a registered cellular phone number
Log into the App after the account has been registered.
2. Tap “Create or modify a plant”
3. Scan WiFi stick QR code or manually
enter the serial number and the
registration code
5. Enter PV plant information in all
fields marked with a red asterix and
tap “Create”
6. Optional: turn on the App location
services
7. Tap “Add dongle to this plant
1 About this Document.
2 Items Required.
1
2
3
3. Before Using the App
4. WiFi Stick LED Indicators
5 App Download.
6. Account Registration
7. Create PV Plant
8. Tap ”Add to plant”
9. Tap the inverter serial number that
matches your inverter – TIP: tape
“Scan inverter if the inverter is
displayed as “Unknown”
10. Tap “Grid” code settings”
11. Tap “Grid code settings”
12. Select the correct grid code and tap
“Save
13. Tap return arrow three times to return
to inverter list
14. Tap “Next step”
15. To set up export power limitation or
consumption monitoring tap “Yes”
otherwise tap “Skip” and proceed to
step 21
16. Select meter type
17. Enable energy meter
18. Enable export power control
19. Enter “Export Power Limit Setpoint in
watts (W)
20. Tap “Save”
21. Tap “Next step”
22. Tap “Continue”
23. Select WiFi network from list
24. Enter WiFi password and tape “continue”
25. Follow the prompts on the page to
confirm whether the dongle is
configured with a network. If the
BLUE LED is SOLID ON, click
"Continue". Otherwise, go back to
the previous step.
26. Setup is now completed, tap
“End process and the PV plant
will now be shown on the PV
plant list.
If you have any technical problems with our products, please contact our service.
Provide the following information to assist in providing you with the necessary
assistance:
Inverter device type
Inverter serial number
Type and number of connected PV modules
Error code
Mounting location
Warranty card
Mobile device type
SOLPLANET INTERNATIONAL
service@solplanet.net
SOLPLANET AUSTRALIA
Service: +61 390 988 674
service.au@solplanet.net
SOLPLANET BRAZIL
Support: +55 51 99765 3389
SOLPLANET GERMANY
Service: +31 20 800 4844
service.eu@solplanet.net
SOLPLANET HUNGARY
Service: +36 465 00 384
service.hu@solplanet.net
SOLPLANET KOREA
Service: +82 31 422 8110
Service.kr@solplanet.com
SOLPLANET POLAND
Service: +48 13 4926 109
service.pl@solplanet.net
SOLPLANET SOUTH AFRICA
service@solplanet.com
SOLPLANET SPAIN
Service: +31 20 800 4844 (EN)
service.eu@solplanet.net
SOLPLANET SWEDEN
Service: +31 20 800 4844 (EN)
service.eu@solplanet.net
SOLPLANET THE NETHERLANDS
Service: +31 20 800 4844 (EN)
service.eu@solplanet.net
SOLPLANET TURKEY
Service: +90 850 346 00 24
service.tr@solplanet.net
AISWEI GREATER CHINA
Service: +86 400 801 9996
service.china@aiswei-tech.com
5
9. Contact
6
8. Inverter Set-up
4
7


Produkt Specifikationer

Mærke: Solplanet
Kategori: Ikke kategoriseret
Model: ASW3000S-S

Har du brug for hjælp?

Hvis du har brug for hjælp til Solplanet ASW3000S-S stil et spørgsmål nedenfor, og andre brugere vil svare dig