StarTech.com ATX2POW400HS Manual
StarTech.com
Computer strømforsyning
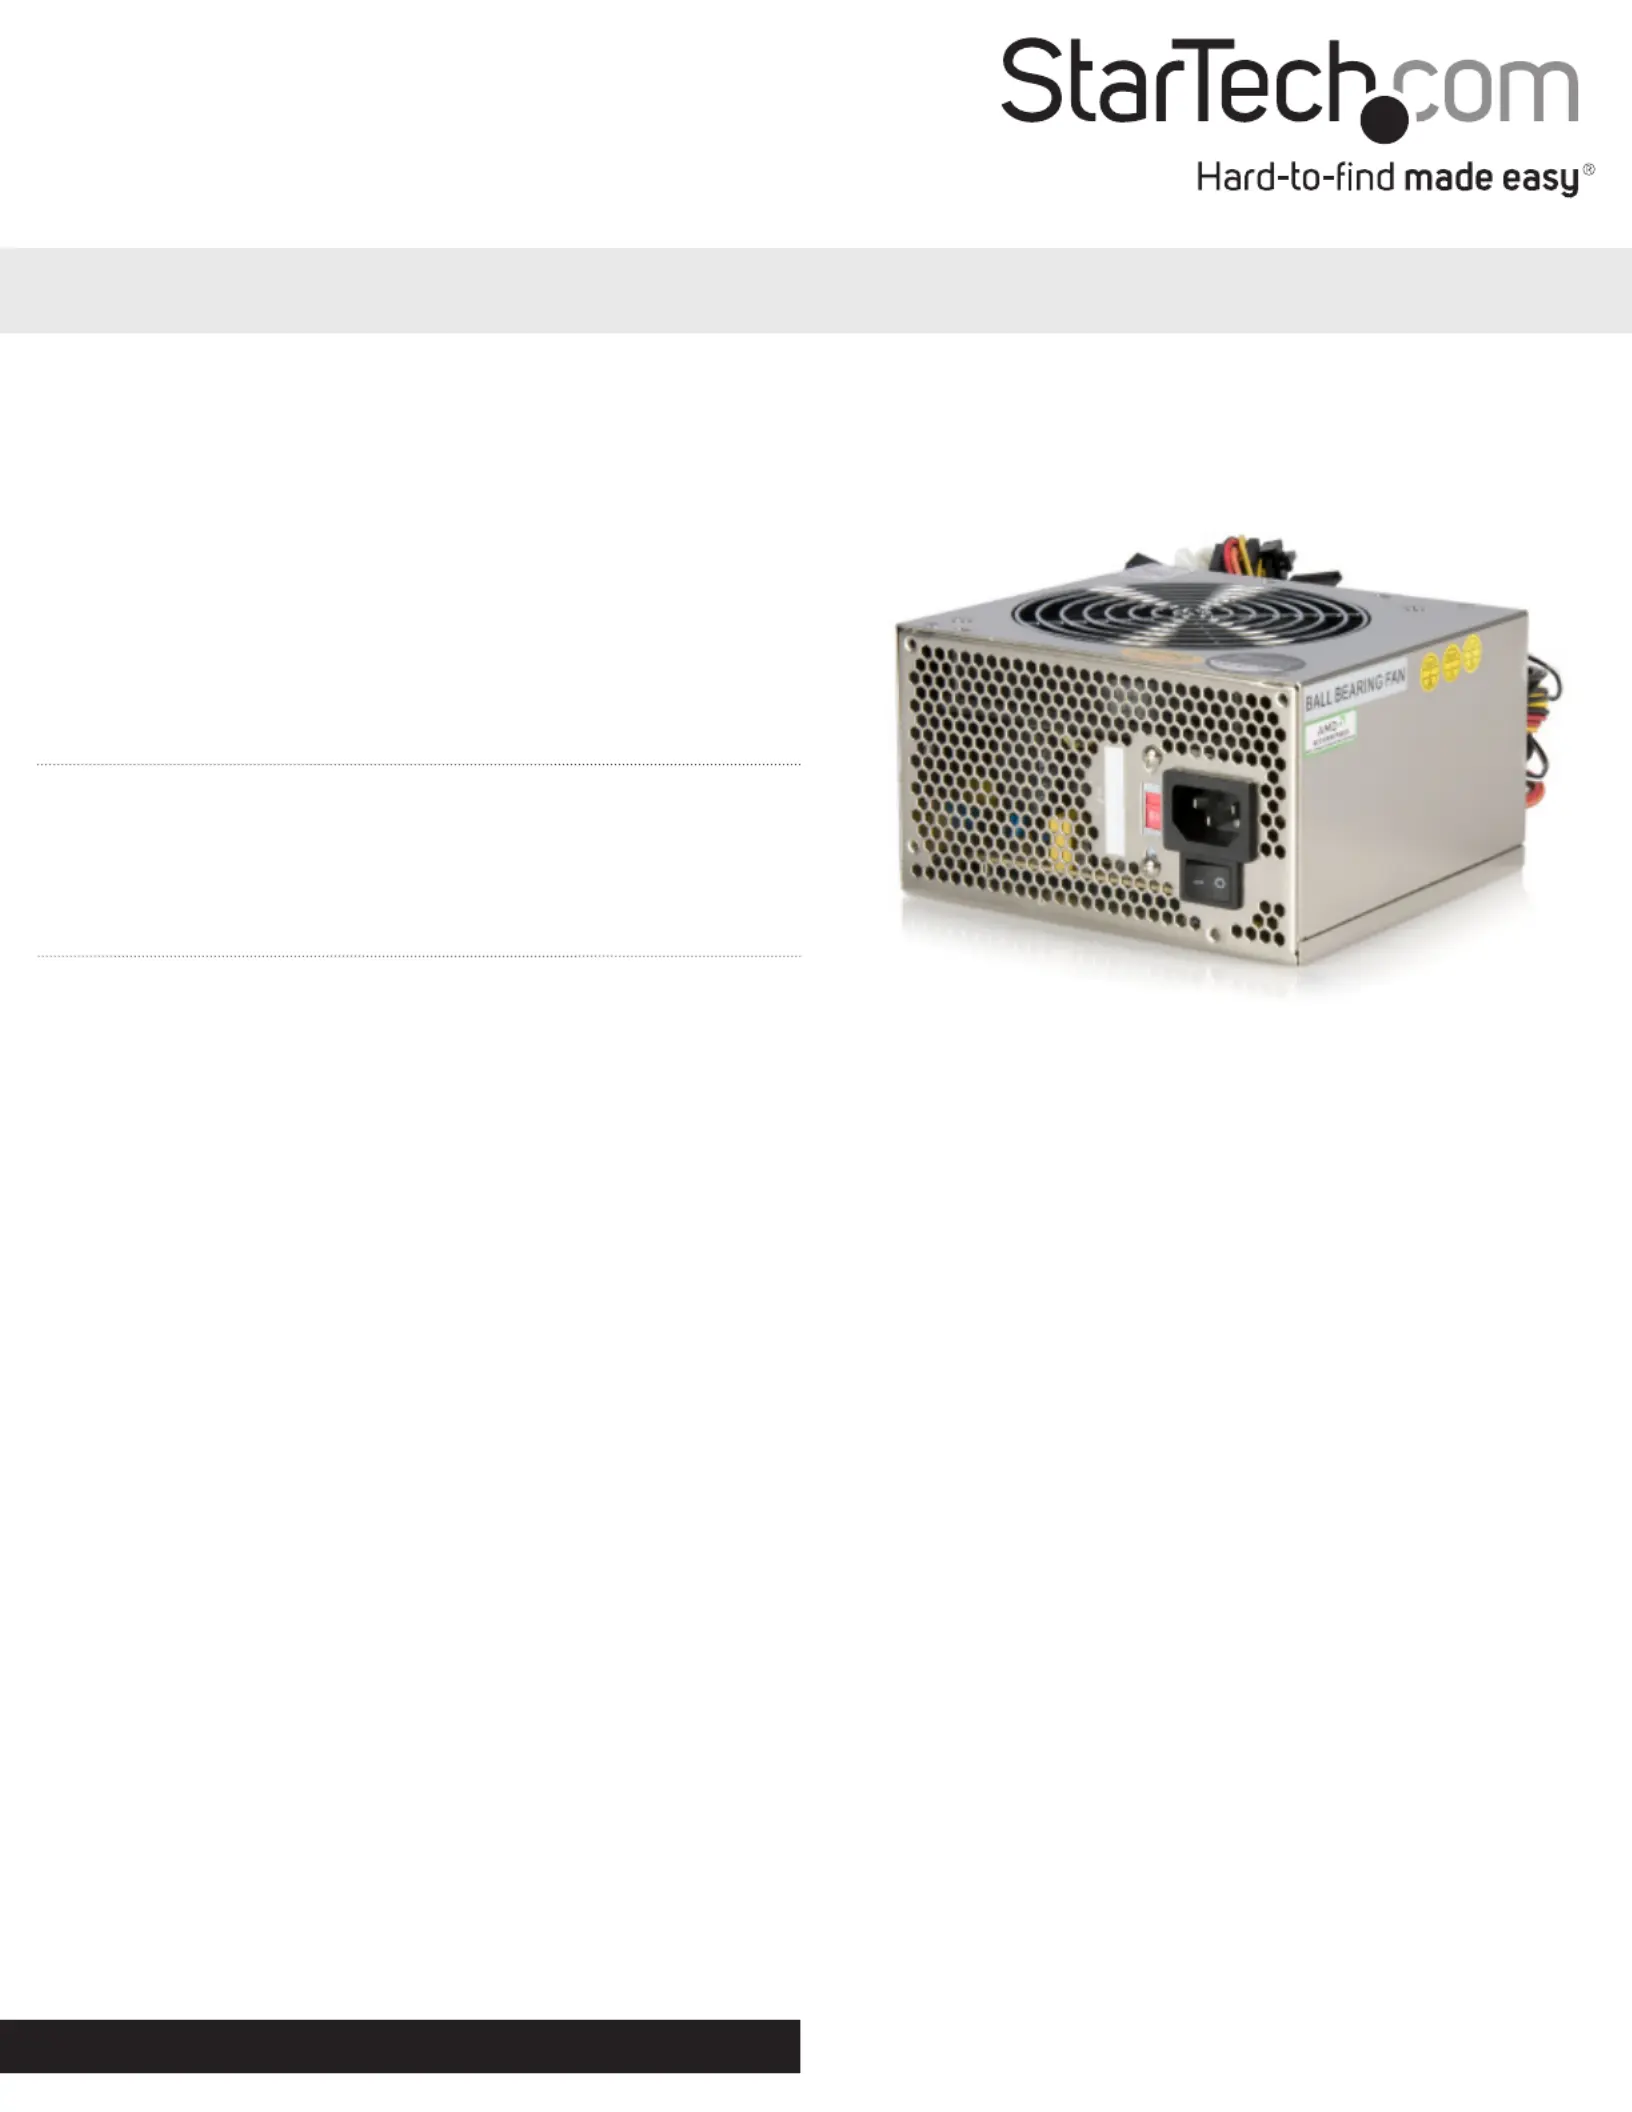
ATX2POW400HS
| Mærke: | StarTech.com |
| Kategori: | Computer strømforsyning |
| Model: | ATX2POW400HS |
| Højde: | 86 mm |
| Vægt: | 1900 g |
| Pakkevægt: | 2300 g |
| Pakkedybde: | 235 mm |
| Pakkebredde: | 98 mm |
| Pakkehøjde: | 215 mm |
| Total effekt: | 400 W |
| Kabeltype: | Ikke modulær |
Har du brug for hjælp?
Hvis du har brug for hjælp til StarTech.com ATX2POW400HS stil et spørgsmål nedenfor, og andre brugere vil svare dig
Computer strømforsyning StarTech.com Manualer
1 Januar 2025

1 Januar 2025

1 Januar 2025
1 Januar 2025

1 Januar 2025
1 Januar 2025

1 Januar 2025
1 Januar 2025
1 Januar 2025
1 Januar 2025
Computer strømforsyning Manualer
- ADATA
- MSI
- DeepCool
- Ewent
- Edge-Core
- Cooler Master
- Sharkoon
- Tripp Lite
- Thermaltake
- Zippy
- FSP
- Adj
- Be Quiet!
- CLUB3D
- Fractal Design
Nyeste Computer strømforsyning Manualer
5 Januar 2025
1 Januar 2025
1 Januar 2025

30 December 2025
30 December 2025
30 December 2025
30 December 2025
25 December 2024

16 December 2024
13 December 2024