SteelSeries Arctis 9 Manual
SteelSeries
Headset
Arctis 9
Læs gratis den danske manual til SteelSeries Arctis 9 (56 sider) i kategorien Headset. Denne vejledning er vurderet som hjælpsom af 24 personer og har en gennemsnitlig bedømmelse på 4.4 stjerner ud af 12.5 anmeldelser. Har du et spørgsmål om SteelSeries Arctis 9, eller vil du spørge andre brugere om produktet?
Side 1/56

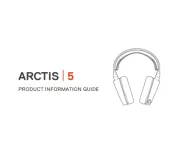
PRODUCT INFORMATION GUIDE
ARCTIS 9

CONTENTS
Welcome 2
SteelSeries Engine 3
Product Overview 5–6
Setup
PC 7
Playstation / Switch 9
Ski Goggle Headband 11
Power On/O 12
2.4 GHz Pairing 13
Bluetooth 14
Charging 15
Microphone 16
Translations
Español 17
简体中文19
繁體中文22
日本語24
한국어27
Deutsch 29
Русский 32
Français 35
Italiano 38
Português 40
Regulatory 45

2
WELCOME TO ARCTIS
Your new headset is the result of our unyielding pursuit of perfection for
over 15 years. We poured our hearts into creating the best possible gaming
headset by pushing the boundaries of sound quality, mic clarity, comfort,
and style. Arctis is our glory; now go chase yours.

STEELSERIES ENGINE
3
Download SteelSeries Engine to customize your audio settings and
check for rmware updates:
steelseries.com/engine
STEELSERIES ENGINE

4
PACKAGE CONTENTS
Arctis 9
Wireless Transmitter
USB Charging Cable
SYSTEM REQUIREMENTS //
COMPATIBILITY
PC
Playstation
Switch
STEELSERIES ENGINE
SOFTWARE REQUIREMENTS
Platforms*
Windows 7+
Mac OS X 10.8+
* Some software features available
on Windows 10 only
nd help at support.steelseries.com

1
3
54
6
8
10
7
9
2
5
PRODUCT OVERVIEW
1 Ski Goggle Headband*
2 Airweave Ear Cushions*
3 ClearCast Microphone
4 ChatMix Dial
5 Volume Wheel
6 Microphone Mute Button
7 Bluetooth Button
8 Power Button
9 Micro-USB Jack
for charging and rmware updates
10 Headphone Share Jack

GA ME IN LINE OUT
12
14
15 16
17
13
11
6
* Find accessories and replacement parts at steelseries.com/gaming-accessories
11 USB Charging Cable
WIRELESS TRANSMITTER
12 USB Plug
13 PC / Playstation Mode Switch
14 Pairing Button
15 Game In Jack
16 Line Out Jack
17 LED

GA ME IN LINE OUT
2.4
GHz
16
12
7
SETUP – PC
HARDWARE INSTALLATION
Connect the Wireless Transmitter’s USB Plug 12
to the PC.
Optional: Connect a 3.5 mm audio cable (not
included) from the Wireless Transmitter’s Line Out
Jack 16 to a pair of speakers for automatic switching
when the headset power is toggled.

8
WIRELESS TRANSMITTER SETTINGS
Toggle the PC / Playstation Mode Switch 13 on
the bottom of the wireless transmitter to PC. The
Wireless Transmitter LED 17 will turn white.
WINDOWS SOUND SETTINGS
1 Under “Playback”, highlight Arctis 9
Game Audio and select “Set Default”.
2 Select Arctis 9 Chat Audio and select
“Set Default Communications Device”.
3 Under “Recording”, highlight Arctis 9
Chat Audio and select “Set Default”.

GA ME IN LINE OUT
2.4
GHz
12
Playstation
Switch
9
SETUP – PLAYSTATION / SWITCH (TV MODE)
HARDWARE INSTALLATION
Connect the Wireless Transmitter’s USB Plug 12
to the USB port on the Playstation / Switch dock.
*ChatMix feature only available on PC.

10
WIRELESS TRANSMITTER SETTINGS
For use with the Playstation / Switch in docked
mode, toggle PC / Playstation Mode Switch 13
on the bottom of the wireless transmitter to
Playstation. The Wireless Transmitter LED 17 will
turn blue.
ADDITIONAL SETTINGS NEEDED FOR PS4 AUDIO
PS4 SETTING > Devices Audio Devices>
Output to Headphones All Audio

11
SKI GOGGLE HEADBAND
Install
Direction of headband
installation
Velcro
Tighten or loosen the Velcro straps
on the side of the headband to
achieve the desired t

3s
ON
OFF
12
POWER ON / OFF
To power on the headset, press and
hold the Power Button 8 for at least 3
seconds. You will hear a tone, and the
Headset LED will illuminate.
To power o the headset, press and
hold the Power Button 8 for at least 3
seconds.

5s5s 6s
13
2.4 GHZ PAIRING
1 Press and hold the Wireless Transmitter’s
Pairing Button 14 for 5 seconds until the LED
17 begins blinking rapidly
Note: The headset is already paired to the
transmitter when it arrives.
2 With the headset o, press and hold the Power
Button 8 for 6 seconds

6s
14
BLUETOOTH
1 With the headset powered on, press and hold
the Bluetooth Button 7 for 6 seconds. The
headset LED will rapidly blink blue.
2 In your device’s Bluetooth settings, scan for
available devices and select “Arctis 9”.
Answer/end voice call
single · press Bluetooth button 7
Play/pause music
single · press Bluetooth button 7
PAIRING
CONTROL
Next track
double · · press Bluetooth button 7
Previous track
triple · · · press Bluetooth button 7

15
CHARGING
To charge the headset, connect the USB
Charging Cable 11 to the Micro-USB
Jack 9 on the headset, and plug the
other end into any USB power source.
The color of the Headset LED indicates
the battery level.
Green 100–50 %
Yellow 49–20 %
Red 19–10 %
Red (fast blink) 9–1 %

16
MICROPHONE
RETRACTABLE MICROPHONE POSITIONING
Position the ClearCast Microphone 3
close to the corner of your mouth with
the at surface facing you
top view front view

17
ESPAÑOL
CONTENIDO DE LA CAJA
Arctis 9
Transmisor inalámbrico
Cable de carga USB
REQUISITOS DEL SISTEMA // COMPATIBILIDAD
PC / Playstation / Switch
REQUISITOS DEL SOFTWARE
STEELSERIES ENGINE
Plataformas*
Windows 7 o superior
Mac OS X 10.8 o superior
*Algunas características de software solo están
disponibles para Windows 10
DESCRIPCIÓN GENERAL DEL PRODUCTO
1 Diadema de gafas de esquí
2 Almohadillas Airweave*
3 Micrófono ClearCast
4 Dial ChatMix
5 Rueda de volumen
6 Botón de silencio del micrófono
7 Botón de Bluetooth
8 Botón de encendido
9 Toma micro-USB
para carga y actualizaciones de rmware
10 Toma para compartir los auriculares
11 Cable de carga USB
TRANSMISOR INALÁMBRICO
12 Conector USB
13 Interruptor de modo Playstation/PC
14 Botón de enlace
15 Toma de entrada de juego
16 Toma de salida de línea
17 LED
CONFIGURACIÓN: PC
INSTALACIÓN DEL HARDWARE
Conecta el conector USB del transmisor
inalámbrico 12 al PC.
Opcional: Conecta un cable de audio de 3,5 mm
(no incluido) de la toma de salida de línea 16 del
transmisor inalámbrico a un par de altavoces para la
conmuta automática al pulsar el botón de encendido
de los auriculares.
AJUSTES DEL TRANSMISOR INALÁMBRICO
Pon el interruptor de modo 13 de la parte inferior
del transmisor inalámbrico en la posición de PC. El
LED de transmisor inalámbrico 17 se pondrá blanco.

18
CONFIGURACIÓN DE SONIDO DE WINDOWS
1 Dentro de “Reproducción”, selecciona Arctis 9
Game Audio y establécelo como “Dispositivo
predeterminado”.
2 Selecciona Arctis 9 Chat Audio y establécelo
como “Dispositivo de comunicaciones
predeterminado”.
3 Dentro de “Grabar”, selecciona Arctis 9
Chat Audio y establécelo como “Dispositivo
predeterminado”.
CONFIGURACIÓN:
PLAYSTATION / SWITCH (MODO TV)
INSTALACIÓN DEL HARDWARE
Introduce la clavija USB del conector inalámbrico
12 en el puerto USB de la parte frontal de la
Playstation / Switch.
*La función ChatMix solo está disponible para PC.
AJUSTES DEL TRANSMISOR INALÁMBRICO
Para usar la Playstation / Switch en el modo TV,
cambia el interruptor 13 situado en la parte inferior
del conector inalámbrico para pasar del modo
PC/Playstation al modo Playstation. El LED del
conector inalámbrico 17 se pondrá azul.
SE NECESITAN AJUSTES ADICIONALES PARA
EL AUDIO DE LA PLAYSTATION
Playstation AJUSTES > Dispositivos > Dispositivos
de audio
Salida a auriculares Todo el audio
DIADEMA DE GAFAS DE ESQUÍ
Montaje
Sentido de montaje de la diadema
Velcro
Apriete o suelte las cintas de Velcro a los lados de
la diadema hasta lograr el ajuste deseado.
ENCENDIDO Y APAGADO
Para encender los auriculares, mantenga pulsado el
botón de encendido 8 al menos 3 segundos. Oirás
un tono y se iluminará el LED de los auriculares.
Para apagar los auriculares, mantenga pulsado el
botón de encendido 8 al menos 3 segundos.
ENLACE 2,4 GHZ
Por defecto, los auriculares p19-ya vienen emparejados
con el transmisor.
1 Mantén pulsado el botón de enlace 14 del
transmisor inalámbrico durante 5 segundos
hasta que el LED 17 comience a parpadear
rápidamente.
2 Con los auriculares apagados, mantén pulsado
6 segundos el botón de encendido 8.
BLUETOOTH
ENLAZADO
Con los auriculares encendidos, mantenga pulsado
6 segundos el botón de Bluetooth 7. El LED de los

19
auriculares parpadeará rápidamente en color azul.
En los ajustes de Bluetooth de su dispositivo,
busque los dispositivos disponibles y seleccione
«Arctis 9».
CONTROL
Responder/nalizar llamada de voz
Única pulsación del botón de Bluetooth ·7
Reproducir/pausar música
Única pulsación del botón de Bluetooth ·7
Pista siguiente
Doble ·· pulsación del botón de Bluetooth 7
Pista anterior
Triple ·· · pulsación del botón de Bluetooth 7
CARGA
Para cargar los auriculares, conecte el cable micro-
USB 11 a la toma micro-USB 9 de los auriculares
y enchufe el otro extremo a cualquier fuente de
alimentación USB.
El color del LED de los auriculares indica el nivel
de la batería.
Verde 100–50%
Amarillo 49–20%
Rojo 19–10%
Rojo (parpadeo rápido) 9–1%
MICRÓFONO
Micrófono retráctil
Posicionamiento
Coloque el micrófono cerca de la esquina de su
boca con la supercie plana hacia su rostro
Vista superior
Vista frontal
简体中文
包装内容
Arctis 9
无线接收器
USB 充电线缆
系统要求 //兼容性
PC / Playstation / Switch
STEELSERIES ENGINE 软件要求
平台*
Windows 7+
Mac OS X 10.8+
*一些软件功能只能在Windows10上使用

20
产品概览
1 滑雪镜头带*
2 AirWeave 耳罩*
3 ClearCast 麦克风
4 ChatMix 旋钮
5 音量调节滚轮
6 麦克风静音按钮
7 蓝牙按钮
8 电源按钮
9 Micro-USB 接口
用于充电和固件更新
10 耳机共享接口
11 USB 充电线缆
无线适配器
12 USB 插头
13 Playstation / PC 模式切换
14 配对按键
15 游戏音频输入接口
16 音频输出接口
17 LED 指示灯
设置 – PC
硬件安装
将无线适配器的 USB 插头 12 连接至 PC
可选:使用 3.5mm 耳机线缆(未随附) 从无线适配
器音频输出接口 16 至您的音箱,以便在关闭耳机电
源时自动切换声音设备
无线适配器设置
将无线适配器底部的模式开关 13 切换至 PC。无线
适配器 LED 指示灯 17 将变成白色。
WINDOWS 声音设置
1 在“播放”下方,高亮显示 Arctis 9游戏音频并选
择“设置为默认设备”
2 选择 Arctis 9聊天音频并选择“设置为默认通
信设备”
3 在“录制”下方,高亮显示 Arctis 9聊天音频并选
择“设置为默认设备”
设置 – PLAYSTATION / SWITCH (電視模式)
硬件安装
将无线适配器的 USB 插头 12 连接至 PlayStation /
Switch 主机的 USB 接口。。
*ChatMix功能仅适用于电脑。
无线适配器设置
如需在 PlayStation / Switch 上使用该耳机,将无
线发射器底部的 PS / PC 模式切换开关 13 切换至
PlayStation 即可,此时无线适配器的 LED 指示灯
17 将变为蓝色。
PLAYSTATION 音频输出设定

21
Playstation 设置 > 设备 > 音频设备
输出至耳机 所有音频
滑雪镜头带
安装
头带安装说明
魔术贴
头带两边附有魔术贴,可随意调节松紧。。
电源开关
要打开耳机电源,按住电源按钮 8 至少 3 秒钟。您
将会听到提示音,耳机 LED 指示灯也会亮起。
如要关闭耳机,请按住电源按钮 8 最少 3 秒。
2.4 GHZ 配对
耳机在收到时已经为配对状态,可直接使用
1 按住无线适配器的配对按键 14 5 秒钟,直至
LED 指示灯 17 开始快速闪烁
2 在耳机关闭的情况下,按住电源按钮 8 6 秒钟
蓝牙
配对
启动耳机,按住蓝牙按钮 7 6 秒。耳机的 LED 灯会
快速闪烁蓝光。
在播放设备的蓝牙设定中,搜寻可用设备,然后选择
「Arctis 9」。
控制
接听 / 结束语音通话
按蓝牙按钮一次
播放 / 暂停曲目
按蓝牙按钮一次
下一首歌
按蓝牙按钮兩次
上一首歌
按蓝牙按钮三次
充电
耳机如果需要充电,请将 Micro-USB 线缆 11 连接到
耳机的 Micro-USB 插孔 9,然后将线缆另一端插到
可用的 USB 充电器上。
耳机 LED 颜色对应的电池电量。
绿色 100–50 %
黄色 49–20 %
红色 19–10 %
红色(快速闪动) 9–1 %
麦克风
伸缩式麦克风
麦克风位置
将麦克风放置于靠近您的嘴角处,宽平面朝向您
自己。
鸟瞰图
正面图

23
3 在「錄音」下方,高亮標示 Arctis 9 聊天音效並選
取「設定預設值」
設定 – PLAYSTATION / SWITCH(電視模式)
硬體安裝
將無線接收器的 USB 插頭 12 連接至 Playstation
/ Switch 底座的 USB 端口。
*ChatMix功能僅PC端可用。
無線傳輸器設定
若要在電視模式下使用 Playstation / Switch,請將
無線接收器底部的 PC / Playstation 模式開關 13 切
换至 Playstation。無線接收器 LED 17 將變藍色。
PLAYSTATION 音訊所需的其他設定
Playstation 設定 > 裝置 > 音訊裝置
輸出至耳機 聊天音效
滑雪鏡頭帶
安裝
頭帶安裝方向
魔鬼氈
可根據自己的舒適度拉緊或放鬆頭戴兩側的魔鬼氈
電源開/關
如要開著耳機,請按住電源按鈕 8 最少 3 秒。您會
聽到一個聲響,然後耳機 LED 指示燈便會亮起。
按壓電源按鈕 8 並保持至少 3 秒鐘,以關閉耳機
電源。
2.4 GHZ 配對
耳機在到貨時已與傳輸器配對。
1 按住無線傳輸器的配對按鈕 14 5 秒,直至 LED
燈 17 開始快速閃爍
2 關掉耳機,按住電源按鈕 8 6 秒。
藍牙
配對
1 打開耳機電源,按壓藍牙按鈕 7 並保持 6 秒鐘。
耳機的 LED 指示燈將會快速閃爍藍光。
2 在設備的藍牙設置中搜尋可用設備並選
擇“Arctis 9”。
控制
應答/結束語音呼叫
按壓藍牙按鈕一次 7
播放/暫停音樂
按壓藍牙按鈕一次 7
下一首
按壓藍牙按鈕两次 7
上一首
按壓藍牙按鈕三次 7
充電
如需為耳機充電,可將 micro-USB 線 11 連接至耳
機的 micro-USB 接口 9,並將其另一端插入任何
USB 電源。
耳機 LED 指示燈的顏色可顯示電池電量。

24
綠色 100–50 %
黄色 49–20 %
紅色 19–10 %
紅色(快速閃爍) 9–1 %
麥克風
伸縮式麥克風
麥克風位置
將麥克風放置於靠近您嘴角處,
寬平面朝向您自己。
鳥瞰圖
正面圖
日本語
パッケージ内容
Arctis 9
ワイヤレストランスミッター
USB充電ケーブル
システム要件 // 互換性
PC / Playstation / Switch
STEELSERIES ENGINEのソフトウェア要件
プラットフォーム *
Windows 7以降
Mac OS X 10.8以降
一部のソフトウェア機能はWindows10でのみご利
用いただけます
製品概要
1 スキ ーゴ ー グル ヘッドバンド*
2 Airweaveイヤークッション*
3 ClearCastマイク
4 ChatMixダイヤル
5 ボリュームホイール
6 マイク消音ボタン
7 Bluetoothオン/オフ
8 電源ボタン
9 マイクロ U SB ジャック
充電およびファームウェア更新用
10 ヘッドフォン 共 有 ジャック
11 USB充電ケーブル

25
ワイヤレストランスミッター
12 USBプラグ
13 Playstation / PCモード切替
14 ペアリングボタン
15 ゲーム入 力 ジャック
16 ライン出 力 ジャック
17 LED
セットアップ – PC
ハードウェアのインストール
ワイヤレストランスミッター のU S Bプラグ
12 をPCに
接続します
オプション:ヘッドセットの電源を切り替える際に自
動で切り替えるには、ワイヤレストランスミッターのラ
イン出力ジャック16から3.5mmオーディオケーブル
(別売)をスピーカーに接続します。
ワイヤレストランスミッター の設 定
ワイヤレストランスミッターの底面にあるモードスイ
ッチ 13 をPCに切り替えます。ワイヤレストランスミッ
ターLED 17 が白に変わります。
WINDOWSのサウンド設定
1 [再生] で Arctis 9 ゲームオーディオをハイライト
表示し、[デフォルトを設定]を選択します。
2 Arctis 9チャットオーディオを選択し、[デフォルト
の通信機器を設定]を選択します。
3 [レコーディング] で Arctis 9 ゲームオーディオ
をハイライト表示し、[デフォルトを設定]を選択
します。
セットアップ ー PLAYSTATION / SWITCH (TVモ
ード)
ハードウェアのインストール
ワイヤレストランスミッター のU S Bプラグ
12 を
Playstation / Switch ドックのUSBポートに接続
します。
*ChatMix機能はPCのみで使用可。
ワイヤレストランスミッターの設定
Playstation / SwitchをTVモードで使用するに
は、ワイヤレストランスミッターの底部にある
PC / Playstationモードスイッチ 13 をPlaystation側
に切り替えます。ワイヤレストランスミッターのLED 17
が青色に変わります。
PLAYSTATIONのオーディオに必要な追加設定
Playstation 設定 > デバイス > オーディオデバイス
ヘッドフォンへの出力 すべてのオーディオ
スキーゴーグルヘッドバンド
取り付け
ヘッドバンドの取り付け方法
面ファスナー
丁度いい装着感になるよう、ヘッドバンド両側のスト
ラップの面ファスナーを調 整してください。

27
12
16
13

28
17
(TV 모드)
12
13
17
8
8
14
17
8
7

29
7
7
7
7
충전
11
9
마이크
접이식 마이크
위치 조절
DEUTSCH
LIEFERUMFANG
Arctis9
Funksender
USB-Ladekabel
SYSTEMANFORDERUNGEN // KOMPATIBILITÄT
PC / Playstation / Switch
STEELSERIESENGINE –
SOFTWAREANFORDERUNGEN
Plattformen*
Windows7 und neuer
MacOS X10.8 und neuer
*Einige Softwarefunktionen sind nur bei Windows10
verfügbar.
PRODUKTÜBERSICHT
1 Skibrillenriemen*
2 Airweave-Ohrpolster*
3 ClearCast-Mikrofon
4 ChatMix-Regler
5 Lautstärkerad

30
6 Stummschalttaste für das Mikrofon
7 Bluetooth-Taste
8 Ein/Aus-Taste
9 Micro-USB-Port
für Auadung und Firmware-Updates
10 Klinkenbuchse für zweiten Kopfhörer
11 USB-Ladekabel
FUNKSENDER
12 USB-Stecker
13 Schalter für Playstation-/PC-Modus
14 Kopplungstaste
15 Game-In-Buchse
16 Line-Out-Buchse
17 LED
KONFIGURATION– PC
ANSCHLUSS AN DIE HARDWARE
Stecke den USB-Stecker 12 des Funksenders in
den PC.
Optional: Schließe ein 3,5-mm-Audiokabel (nicht im
Lieferumfang enthalten) an die Line-Out-Buchse 16
des Funksenders und an ein Lautsprecherpaar an, um
die Tonwiedergabe automatisch umzuschalten, wenn
der Kopfhörer ein-/ausgeschaltet wird.
FUNKSENDER-EINSTELLUNGEN
Stelle den Schalter für den Playstation-/PC-
Modus 13 , der sich unten am Funksender bendet,
auf „PC“. Die LED 17 des Funksenders leuchtet
weiß.
WINDOWS-SOUNDEINSTELLUNGEN
1 Wähle unter „Wiedergabe“ den Kopfhörer
„Arctis 9 Chat Audio“ und dann „Als Standard“
aus.
2 Oder klicke mit der rechten Maustaste
auf „Arctis 9 Chat Audio“ und wähle „Als
Standardgerät auswählen“ aus.
3 Wähle unter „Aufnahme“ den Kopfhörer
„Arctis 9 Chat Audio“ und dann „Als Standard“
aus.
KONFIGURATION–
PLAYSTATION / SWITCH TVMODUS
ANSCHLUSS AN DIE HARDWARE
Stecke den USB-Stecker 12 des Funksenders in
den USB-Port deiner PlayStation/Switch-Station.
* ChatMix-Funktion nur bei PC-Verwendung
verfügbar.
FUNKSENDER-EINSTELLUNGEN
Für die Verwendung mit der PlayStation/Switch
im TV-Modus: Stelle den Schalter für den PC-/
PlayStation-Modus 13 am unteren Ende des
Funksenders auf „PlayStation“. Die LED 17 des
Funksenders leuchtet blau.
ZUSÄTZLICHE EINSTELLUNGEN FÜR
PLAYSTATION-AUDIOWIEDERGABE

31
Playstation: EINSTELLUNGEN > Geräte >
Audiogeräte
Ausgabe über Kopfhörer Gesamtes Audio
SKIBRILLENRIEMEN
Befestigung
Befestigungsrichtung des Riemens
Klettband
Stelle mit den Klettbändern an den Seiten des
Riemens die gewünschte Länge ein.
EIN/AUS
Halte die Ein/Aus-Taste 8 mindestens 3Sekunden
gedrückt, um das Headset einzuschalten. Es wird
ein Ton abgespielt und die LED des Headsets
leuchtet auf.
Halte die Ein/Aus-Taste 8 mindestens 3Sekunden
gedrückt, um das Headset auszuschalten.
2,4-GHZ-KOPPLUNG
Der Kopfhörer ist bei der Lieferung bereits mit dem
Sender gekoppelt.
1 Halte die Kopplungstaste 14 des Funksenders
5Sekunden gedrückt, bis die LED 17 schnell
blinkt.
2 Der Kopfhörer muss ausgeschaltet sein.
Halte nun die Ein/Aus-Taste 8] 6Sekunden
gedrückt.
BLUETOOTH
KOPPELN
Das Headset muss eingeschaltet sein. Halte nun
die Bluetooth-Taste 7 6Sekunden gedrückt. Die
LED des Headsets beginnt, schnell blau zu blinken.
Suche in den Bluetooth-Einstellungen deines
Geräts nach verfügbaren Geräten und wähle
„Arctis9“ aus.
BEDIENUNG
Anruf annehmen/beenden
Einmal auf die Bluetooth-Taste drücken 7
Musik abspielen/pausieren
Einmal auf die Bluetooth-Taste drücken 7
Nächster Titel
Zweimal auf die Bluetooth-Taste drücken 7
Vorheriger Titel
Dreimal auf die Bluetooth-Taste drücken 7
AUFLADUNG
Stecke das Micro-USB-Kabel 11 in die Micro-USB-
Buchse 9 des Headsets und verbinde das andere
Ende mit einer USB-Stromquelle, um das Headset
zu laden.
Die Farbe der LED des Headsets verweist auf den
Akkustand.
Grün 100–50%
Gelb 49–20%
Rot 19–10%

32
Rot (schnell blinkend) 9–1%
MIKROFON
Einklappbares Mikrofon
Platzierung
Platziere das Mikrofon in die Nähe deines
Mundwinkels, wobei die ache Oberäche in deine
Richtung deuten soll.
Ansicht von oben
Seitenansicht
РУССКИЙ
КОМПЛЕКТАЦИЯ
Гарнитура Arctis 9
Беспроводной передатчик
Кабель зарядки USB
СИСТЕМНЫЕ ТРЕБОВАНИЯ/
СОВМЕСТИМОСТЬ
ПК / Playstation / Switch
ТРЕБОВАНИЯ ПРОГРАММНОГО ПАКЕТА
STEELSERIES ENGINE
Платформы *
Windows 7 и более поздние версии
Mac OS X 10.8 и более поздние версии
* Некоторые функции программного
обеспечения доступны только в ОС
Windows 10
КРАТКИЕ СВЕДЕНИЯ О ПРОДУКТЕ
1 Оголовье из материалов
для лыжных масок *
2 Амбушюры Airweave *
3 Микрофон ClearCast
4 Выносной пульт ChatMix
5 Регулятор громкости
6 Кнопка отключения звука микрофона
7 Кнопка Bluetooth
8 Кнопка питания
9 Разъем Micro USB
для зарядки и установки обновлений
10 Разъем для наушников
11 Кабель зарядки USB
БЕСПРОВОДНОЙ ПЕРЕДАТЧИК
12 USB-разъем
13 Переключатель режима Playstation/ПК
14 Кнопка сопряжения

33
15 Игровой порт входа
16 Разъем линейного выхода
17 Светодиод
НАСТРОЙКИ: ПК
УСТАНОВКА ОБОРУДОВАНИЯ
Подключите USB-разъем беспроводного
передатчика 12 к ПК.
Дополнительно. Спомощью3,5-мм
аудиокабеля(невходитвкомплектпоставки)
подключитеразъемлинейноговыхода
беспроводногопередатчика16 кнаушникам
дляавтоматическоговключенияпосле
подачипитаниянагарнитуру.
НАСТРОЙКИ БЕСПРОВОДНОГО
ПЕРЕДАТЧИКА
Поверните переключатель режима
13 , расположенный в нижней части
беспроводного передатчика, в положение
«ПК». Светодиод беспроводного
передатчика 17 будет гореть белым светом.
НАСТРОЙКИ ЗВУКОВ WINDOWS
1 На вкладке Playback (Воспроизведение)
выделите пункт Arctis 9 Game Audio
(Arctis 9: звучание в игре) и выберите Set
Default (Настройки по умолчанию)
2 Выделите пункт Arctis 9 Chat Audio (Arctis
9: звучание в чате) и выберите Set Default
Communications Device (Устройство
связи по умолчанию)
3 На вкладке Recording (Запись) выделите
пункт Arctis 9 Chat Audio (Arctis 9:
звучание в чате) и выберите Set Default
(Настройки по умолчанию)
НАСТРОЙКИ: PLAYSTATION / SWITCH
(РЕЖИМ ТВ)
УСТАНОВКА ОБОРУДОВАНИЯ
Подключите USB-разъем 12 беспроводного
передатчика к USB-порту в передней части
консоли Playstation / Switch.
*ФункцияChatMixдоступнатольконаПК.
НАСТРОЙКИ БЕСПРОВОДНОГО
ПЕРЕДАТЧИКА
Для использования с Playstation / Switch
в режиме ТВ переведите переключатель
13 режима ПК / Playstation в нижней части
беспроводного передатчика в положение
Playstation. Светодиод беспроводного
передатчика 17 будет гореть синим цветом.
ДЛЯ PLAYSTATION AUDIO ТРЕБУЮТСЯ
ДОПОЛНИТЕЛЬНЫЕ НАСТРОЙКИ
Playstation SETTINGS > Devices > Audio Devices
(НАСТРОЙКИ Playstation > Устройства >
Аудиоустройства)
Output to Headphones All Audio
(Выход для подключения наушников

35
аккумулятора.
Зеленый 100–50 %
Желтый 49–20 %
Красный 19–10 %
Красный (быстро мигает) 9–1 %
МИКРОФОН
Выдвижной микрофон
Platzierung
Расположите микрофон около уголка рта,
плоской стороной
к себе.
Вид сверху
Вид спереди
FRANÇAIS
CONTENU DE L’EMBALLAGE
Arctis 9
Émetteur sans l
Câble de charge USB
CONFIGURATION SYSTÈME REQUISE //
COMPATIBILITÉ
PC / Playstation / Switch
EXIGENCES DU LOGICIEL
STEELSERIES ENGINE
Plateformes*
Windows7+
Mac OS X10.8+
* Certaines fonctionnalités logicielles sont
uniquement disponibles sous Windows10
VUE D’ENSEMBLE DU PRODUIT
1 Bandeau de lunette ski*
2 Coussinets d’écouteur Airweave*
3 Microphone ClearCast
4 Molette ChatMix
5 Molette de volume
6 Bouton de désactivation du microphone
7 Bouton Bluetooth
8 Bouton marche/arrêt
9 Prise micro-USB
pour la charge et les mises à jour du rmware
10 Prise Jack 3,5 mm
11 Câble de charge USB
ÉMETTEUR SANS FIL
12 Prise USB

37
Pour allumer le casque, appuyez sur le bouton
marche/arrêt 8 et maintenez-le pendant au
moins 3secondes. Vous entendez une tonalité et la
LED du casque s’allume.
Pour éteindre le casque, appuyez sur le bouton
marche / arrêt 8 et maintenez-le pendant au
moins 3secondes.
APPARIEMENT 2,4GHZ
Le casque est déjà apparié avec l’émetteur.
1 Appuyez sur le bouton d’appariement 14 de
l’émetteur sans l et maintenez-le enfoncé
pendant 5secondes jusqu’à ce que le témoin
lumineux 17 se mette à clignoter rapidement
2 Lorsque le casque est hors tension, appuyez
sur le bouton marche/arrêt 8 et maintenez-le
enfoncé pendant 6secondes
BLUETOOTH
APPARIEMENT
1 Lorsque le casque est allumé, appuyez sur le
bouton Bluetooth 7 et maintenez-le pendant
au moins 6secondes. La LED du casque
clignotera rapidement en bleu.
2 Dans les paramètres Bluetooth de votre
appareil, recherchez les appareils disponibles,
puis sélectionnez «Arctis 9».
COMMANDES
Répondre à / terminer un appel vocal
Appuyez une fois · sur le bouton Bluetooth 7
Lecture / pause de la musique
Appuyez une fois · sur le bouton Bluetooth 7
Piste suivante
Appuyez deux fois · · sur le bouton Bluetooth 7
Piste précédente
Appuyez trois fois · · · sur le bouton Bluetooth 7
CHARGE
Pour recharger le casque, connectez le câble
micro-USB 11 à la prise micro-USB 9 du casque,
puis branchez l’autre extrémité à une source
d’alimentation USB.
La couleur de la LED du casque indique le niveau
de charge de la batterie.
Vert 100 – 50 %
Jaune 49 – 20 %
Rouge 19 – 10 %
Rouge (clignotement rapide) 9 – 1 %

38
MICROPHONE
Microphone rétractable
Positionnement
Placez le microphone près du coin de votre
bouche, la surface plate vous faisant face
Vue du haut
Vue avant
ITALIANO
CONTENUTO DELLA CONFEZIONE
Arctis 9
Trasmettitore wireless
Cavo di ricarica USB
REQUISITI DI SISTEMA//COMPATIBILITÀ
PC / Playstation / Switch
REQUISITI SOFTWARE STEELSERIES ENGINE
Piattaforme*
Windows 7 e versioni successive
Mac OS X 10.8 e versioni successive
* Alcune funzionalità software disponibili solo su
Windows 10
PANORAMICA DEL PRODOTTO
1 Archetto per occhiali da sci
2 Cuscinetti auricolari Airweave*
3 Microfono ClearCast
4 Manopola di selezione ChatMix
5 Rotellina del volume
6 Pulsante esclusione microfono
7 Pulsante Bluetooth
8 Pulsante di accensione
9 Presa Micro-USB
per ricarica e aggiornamenti rmware
10 Presa per condivisione cue
11 Cavo di ricarica USB
TRASMETTITORE WIRELESS
12 Connettore USB
13 Interruttore modalità Playstation/PC
14 Pulsante accoppiamento
15 Gioco in Jack
16 Jack di uscita linea
17 LED
CONFIGURAZIONE – PC
INSTALLAZIONE DELL’HARDWARE
Collegare il connettore USB del trasmettitore
wireless 12 al PC

39
Facoltativo: collegare un cavo audio da 3,5
mm (non incluso) dal jack di uscita linea del
trasmettitore wireless 16 a una coppia di
altoparlanti per la commutazione automatica
quando l’alimentazione dell’auricolare viene
attivata
IMPOSTAZIONI DEL
TRASMETTITORE WIRELESS
Commutare l’interruttore di modalità
13 sulla parte
inferiore del trasmettitore wireless su PC. Il LED
del trasmettitore wireless 17 diventerà bianco.
IMPOSTAZIONI AUDIO DI WINDOWS
1 In “Riproduzione” evidenziare Arctis 9 Game
Audio e selezionare “Imposta predenito”
2 Selezionare Arctis 9 Chat Audio e selezionare
“Imposta dispositivo di comunicazione
predenito”
3 In “Registrazione” evidenziare Arctis 9 Chat
Audio e selezionare “Imposta predenito”
CONFIGURAZIONE –
PLAYSTATION / SWITCH MODALITÀ TV
INSTALLAZIONE DELL’HARDWARE
Collegare il connettore USB del trasmettitore
wireless 12 alla porta USB della Playstation/
Switch.
*La funzione ChatMix è disponibile solo su PC.
IMPOSTAZIONI DEL
TRASMETTITORE WIRELESS
Per l’utilizzo con Playstation/Switch in modalità
TV, spostare l’interruttore di modalità PC/
Playstation 13 nella parte inferiore del trasmettitore
wireless su Playstation. Il LED del trasmettitore
wireless 17 diventerà blu.
IMPOSTAZIONI AGGIUNTIVE NECESSARIE
PER L’AUDIO PLAYSTATION
IMPOSTAZIONE Playstation > Dispositivi >
Dispositivi audio
Uscita alle cue tutto l’audio
ARCHETTO PER OCCHIALI DA SCI
Installazion
Direzione di installazione dell’archetto
Velcro
Stringere o allentare le cinghie in velcro sui lati
dell’archetto per ottenere la calzata desiderata
ACCENSIONE/SPEGNIMENTO
Per accendere le cue, tenere premuto il pulsante
di accensione 8 per almeno 3 secondi. Verrà
emesso un segnale acustico e il LED delle cue
si illuminerà.
Per spegnere le cue, tenere premuto il pulsante
di accensione 8 per almeno 3 secondi.
ABBINAMENTO 2,4 GHZ
L’auricolare è già abbinato al trasmettitore quando
arriva.
1 Tenere premuto il pulsante di abbinamento

40
del trasmettitore wireless 14 per 5 secondi
no a quando il LED 17 inizia a lampeggiare
rapidamente
2 Con le cue spente, tenere premuto il
pulsante di accensione 8 per 6 secondi
BLUETOOTH
ASSOCIAZIONE
Con le cue accese, tenere premuto il pulsante
Bluetooth 7 per 6 secondi. Il LED delle cue
inizierà a lampeggiare rapidamente di luce blu.
Nelle impostazioni Bluetooth del dispositivo,
eseguire la scansione dei dispositivi disponibili e
selezionare ‘Arctis 9’
CONTROLLO
Avviare/terminare una chiamata vocale
premere una volta il pulsante Bluetooth 7
Riprodurre/mettere in pausa la musica
premere una volta il pulsante Bluetooth 7
Brano successivo
premere due volte il pulsante Bluetooth 7
Brano precedente
premere tre volte il pulsante Bluetooth 7
RICARICA
Per caricare le cue, collegare il cavo micro-
USB 11 alla presa micro-USB 9 sulle cue e
collegare l’altra estremità a qualsiasi sorgente di
alimentazione USB.
Il colore del LED delle cue indica il livello della
batteria.
Verde 100 – 50%
Giallo 49 – 20%
Rosso 19 – 10%
Rosso (lampeggio rapido) 9 – 1%
MICROFONO
Microfono retrattile
Posizionamento
Sistema il microfono vicino all’angolo della bocca
con la supercie piatta rivolta verso di te
Vista dall’alto
Vista frontale
PORTUGUÊS
CONTEÚDO DA EMBALAGEM
Arctis 9
Transmissor sem os
Cabo de carregamento USB
REQUISITOS DO SISTEMA //
COMPATIBILIDADE

41
PC / Playstation / Switch
REQUISITOS DO SOFTWARE
STEELSERIES ENGINE
Plataformas*
Windows 7+
Mac OS X 10.8+
* Algumas funções do software estão apenas
disponíveis no Windows 10
VISÃO GERAL DO PRODUTO
1 Bandana de óculos de esqui*
2 Almofadas de auscultadores Airweave*
3 Microfone ClearCast
4 Indicador ChatMix
5 Controlo de volume
6 Botão desativar som do microfone
7 Botão Bluetooth
8 Botão de alimentação
9 Ficha Micro-USB
para carregamento e atualizações de rmware
10 Ficha de partilha de auscultadores
11 Cabo de carregamento USB
TRANSMISSOR SEM FIOS
12 Ficha USB
13 Interruptor de modo Playstation/PC
14 Botão de emparelhamento
15 Ficha de entrada de jogo
16 Ficha de saída de linha
17 LED
CONFIGURAÇÃO – PC
INSTALAÇÃO DE HARDWARE
Ligue a cha USB do transmissor sem os 12 ao
PC
Opcional: Ligue um cabo de áudio de 3,5 mm
(não incluído) da cha de saída de linha do
transmissor sem os 16 a um par de colunas para
comutação automática quando a alimentação dos
auscultadores é alternada
DEFINIÇÕES DO TRANSMISSOR SEM FIOS
Alterne o interruptor de modo 13 na parte inferior
do transmissor sem os para PC. O LED do
transmissor sem os 17 cará branco.
CONFIGURAÇÕES DE SOM DO WINDOWS
1 Em “Reprodução” destaque o áudio de jogo do
Arctis 9 e selecione “Denir Predenição”
2 Selecione o áudio de chat do Arctis 9 e
selecione “Denir Dispositivo de Comunicação
Predenido”
3 Em “Gravação” destaque o áudio de jogo do

42
Arctis 9 e selecione “Denir Predenição”
CONFIGURAÇÃO –
PLAYSTATION / SWITCH (MODO TV)
INSTALAÇÃO DE HARDWARE
Ligue a cha USB do transmissor sem os 12 à
porta USB na doca Playstation / Switch.
*Função ChatMix apenas disponível no PC.
DEFINIÇÕES DO TRANSMISSOR SEM FIOS
Para utilização com Playstation / Switch no
modo TV, alternar PC / Playstation Mode Switch
13 na parte inferior do transmissor sem os da
Playstation. O LED do transmissor sem os 17
cará azul.
DEFINIÇÕES ADICIONAIS NECESSÁRIAS
PARA O ÁUDIO PLAYSTATION
DEFINIÇÃO DA Playstation > Dispositivos >
Dispositivos de Áudio
Saída para auscultadores Todo o áudio
BANDANA DE ÓCULOS DE ESQUI
Instalação
Direção de instalação de bandana
Velcro
Aperte ou desaperte as correias de Velcro nas
laterais da bandana para ajustar conforme desejado
BOTÃO LIGAR/DESLIGAR
Para ligar os auscultadores, prima sem soltar o
botão de alimentação 8 durante, pelo menos, 3
segundos. Vai ouvir um sinal sonoro e o LED dos
auscultadores vai acender.
Para desligar o auscultador pressione sem soltar
o botão de alimentação 8 durante, pelo menos, 3
segundos.
EMPARELHAMENTO DE 2,4 GHZ
Os auscultadores já estão emparelhados com o
transmissor quando chega.
1 Prima sem soltar o botão de emparelhamento
do transmissor sem os 14 durante 5 segundos
até o LED 17 começar a piscar rapidamente
2 Com os auscultadores desligados, prima sem
soltar o botão de alimentação 8 durante 6
segundos
BLUETOOTH
EMPARELHAMENTO
Com o auscultador ligado, pressione sem soltar o
botão Bluetooth 7 durante 6 segundos. O LED do
auscultador pisca rapidamente azul.
Nas denições de Bluetooth do seu dispositivo,
verique se existem dispositivos disponíveis e
selecione ‘Arctis 9’
CONTROLO
Atender/terminar uma chamada de voz
pressione o botão Bluetooth uma vez 7

43
Reproduzir/pausar música
pressione o botão Bluetooth uma vez 7
Faixa seguinte
pressione o botão Bluetooth duas vezes 7
Faixa anterior
pressione o botão Bluetooth três vezes 7
CARGA
Para carregar o auscultador, ligue o cabo micro-
USB 11 à tomada micro-USB 9 no auscultador
e ligue a outra extremidade a qualquer fonte de
alimentação USB.
A cor do LED dos auscultadores indica o nível da
bateria.
Verde 100 – 50%
Amarelo 9 – 20%
Vermelho 19 – 10%
Vermelho (intermitente rápido) 9 – 1%
MICROFONE
Microfone retrátil
Posicionamento
Posicione o microfone perto do canto da sua boca
com a superfície lisa virada para você
Visão de cima
Visão frontal

44

45
REGULATORY
Europe – EU Declaration of Conformity
Hereby, SteelSeries ApS. declares that the equipment which is compliance with directive RoHS 2.0 (2015/863/EU),
R.E.D (2014/53/EU), EMC Directive (2014/30/EU), and LVD (2014/35/EU) which are issued by the Commission of the
European Community.
The full text of the EU declaration of conformity is available at the following internet address: https://steelseries.com/
Operating Temperature: 0 to + 40 °C
SteelSeries ApS. hereby conrms, to date, based on the feedback from our suppliers indicates that our products shipping
to the EU territory comply with REACH (Registration, Evaluation, Authorization, and Restriction of Chemicals - (EC)
1907/2006) compliance program. We are fully committed to oering REACH compliance on the products and posting
accurate REACH compliance status for the all of products.
Frequency bands and Powers (Headset and Transceiver)
a. Frequency band(s) in which the radio equipment operates:
• BT and WIFI: 2.400 - 2.4835 GHz
b. Maximum radio-frequency power transmitted in the frequency band(s) in which the radio equipment operates:
• EIRP: л/4-DQPSK: 3.18 dBm (Headset-WIFI)
• EIRP: 8DPSK: 2.46 dBm (Headset-Bluetooth)
• EIRP: GFSK: 4.87 dBm (Headset-Bluetooth)
• EIRP: л/4-DQPSK: 3.13 dBm (Transceiver-WIFI)
c. Firmware Version: 0.9.5.0
WEEE
This product must not be disposed of with your other household waste or treat them in compliance with the local
regulations or contact your local city oce, your household waste disposal service or the shop where you purchased the
product.
Safety Guideline for Lithium Battery
This battery must not be disposed of with your other household waste or treat them in compliance with the local
regulations or contact your local city oce, your household waste disposal service or the shop where you purchased the
product.
“CAUTION!” Risk of explosion if battery pack is not replace by same type as specied by the manufacturer.
Please keep follow all listed important warnings and cautions below while using this battery pack to avoid any damage
or hazard.
1. The battery polarity (+) and (-) shall not be connected and charged reversely. Risk of explosion if the battery polarity
(+) and (-) is reversed.
2. Please keep this battery pack away from re and high heat sources due to explosion might happen. Do not place your

46
battery pack close to any heater or hot location.
3. This battery pack shall not be hit or impacted. This battery pack shall not be dealt with any sharp or keen objects
either.
4. This battery pack shall not be exposed to moisture, dripping or splashing.
5. If any electrolyte ow out of this battery pack when touch the user’s eyes and skin, please seek medical advice
immediately.
Federal Communication Commission Interference Statement
This device complies with Part 15 of the FCC Rules. Operation is subject to the following two conditions: (1) This device
may not cause harmful interference, and (2) this device must accept any interference received, including interference
that may cause undesired operation.
This equipment has been tested and found to comply with the limits for a Class B digital device, pursuant to Part 15 of
the FCC Rules. These limits are designed to provide reasonable protection against harmful interference in a residential
installation. This equipment generates, uses and can radiate radio frequency energy and, if not installed and used in
accordance with the instructions, may cause harmful interference to radio communications. However, there is no
guarantee that interference will not occur in a particular installation. If this equipment does cause harmful interference to
radio or television reception, which can be determined by turning the equipment o and on, the user is encouraged to try
to correct the interference by one of the following measures:
• Reorient or relocate the receiving antenna.
• Increase the separation between the equipment and receiver.
• Connect the equipment into an outlet on a circuit dierent from that to which the receiver is connected.
• Consult the dealer or an experienced radio/TV technician for help.
Radiation Exposure Statement:
The device has been evaluated to meet general RF exposure requirement, the device can be used in portable exposure
condition without restriction.
FCC Caution:
Any changes or modications not expressly approved by the party responsible for compliance could void the user’s
authority to operate this equipment.
This transmitter must not be co-located or operating in conjunction with any other antenna or transmitter.
Headset FCC ID: ZHK-HS00018
Transceiver FCC ID: ZHK-HS00018TX
Regions Contact Information
USA SteelSeries ApS., 656 W Randolph St., Suite 3E, Chicago, IL 60661, USA +1 312 258 9467
More information and support from https://steelseries.com/

47
Industry Canada Statement
This device complies with Industry Canada license-exempt RSS standard(s). Operation is subject to the following two
conditions:
1. this device may not cause interference, and
2. this device must accept any interference, including interference that may cause undesired operation of the device.
Le présent appareil est conforme aux CNR d’Industrie Canada
applicables aux appareils radio exempts de licence. L’exploitation est autorisée aux deux conditions suivantes:
1. l’appareil ne doit pas produire de brouillage, et
2. l’utilisateur de l’appareil doit accepter tout brouillage radioélectrique subi, même si le brouillage est susceptible d’en
compromettre le fonctionnement.
This Class B digital apparatus complies with Canadian ICES-003.
Cet appareil numérique de la classe B est conforme à la norme NMB-003 du Canada.
This device and its antenna(s) must not be co-located or operating in conjunction with any other antenna or transmitter,
except tested built-in radios.
Cet appareil et son antenne ne doivent pas être situés ou fonctionner en conjonction avec une autre antenne ou un autre
émetteur, exception faites des radios intégrées qui ont été testées.
The County Code Selection feature is disabled for products marketed in the US/ Canada.
La fonction de sélection de l’indicatif du pays est désactivée pour les produits commercialisés aux États-Unis et au Canada.
Radiation Exposure Statement:
The device has been evaluated to meet general RF exposure requirement, The device can be used in portable exposure
condition without restriction.
Déclaration d’exposition aux radiations:
L’appareil a ete evalue pour repondre aux exigencies generals d’ exposition aux radio frequencies .
L’appareil peut etre utilise en condition d’ exposition portable sans restriction
Headset IC: 9638A-HS00018
Transceiver IC: 9638A-HS00018TX
Frequency bands and Powers (Headset and Transceiver)
a. Frequency band(s) in which the radio equipment operates: 2.400 - 2.4835 GHz
b. Maximum radio-frequency power transmitted in the
frequency band(s) in which the radio equipment operates:
• Conducted Peak Power/ /4-DQPSK: 0.34 dBm (Headset-WIFI)л
• Conducted Peak Power/ 8DPSK: 0.42 dBm (Headset-Bluetooth)
• Conducted Peak Power/GFSK: 0.31 dBm (Headset-Bluetooth)
• Conducted Peak Power/ /4-DQPSK: 0.51 dBm (Transceiver-WIFI)л
c. Firmware Version: 0.9.5.0
해당 무선설비는 운용 중 전파혼신 가능성이 있음

48
この装置は、クラスB機器です。この装置は、住宅環境で使用することを目的としていますが、この装置がラジオやテレビジ
ョン受信機に近接して使用されると、受信障害を引き起こすことがあります。取扱説明書に従って正しい取り扱いをして下
さい。VCCI-B
この機器の使用周波数帯では、電子レンジ等の産業・科学・医療用機器のほか工場の製造ライン等で使用されている移動体
識別用の構内無線局(免許を要する無線局)及び特定小電力無線局(免許を要しない無線局)並びにアマチュア無線局(免
許を要する無線局)が運用されています。
1. この機器を使用する前に、近くで移動体識別用の構内無線局及び特定小電力無線局並びにアマチュア無線局が運用さ
れていないことを確認して下さい。
2. 万一、この機器から移動体識別用の構内無線局に対して有害な電波干渉の事例が発生した場合には、速やかに使用周
波数を変更するか又は電波の発射を停止した上、下記連絡先にご連絡頂き、混信回避のための処置等(例えば、パーティ
ションの設置など)についてご相談して下さい。
3. その他、この機器から移動体識別用の特定小電力無線局あるいはアマチュア無線局に対して有害な電波干渉の事例が
発生した場合など何かお困りのことが起きたときは、次の連絡先へお問い合わせ下さい。
低功率電波輻射性電機管理辦法
第十二條經型式認證合格之低功率射頻電機,非經許可,公司、商號或使用者均不得擅自變更頻率、加大功率或變更原設
計之特性及功能。
第十四條低功率射頻電機之使用不得影響飛航安全及干擾合法通信;經發現有干擾現象時,應立即停用,並改善至無干
擾時方得繼續使用。
前項合法通信,指依電信法規定作業之無線電通信。
低功率射頻電機須忍受合法通信或工業、科學及醫療用電波輻射性電機設備之干擾。
鋰電池安全使用指南
注意:電池若未正確更換,可能會爆炸,請用原廠建議之同款的電池來更換。
電池不可當作一般的家庭廢棄物棄置,請依據當地法規使用公共回收系統退回、回收或處理電池。
電池極性(+)和(-)不得相反連接,充電電池極性如果電池極性反轉,則有爆炸危險。
請勿將此電池放在靠近火源或任何高溫的地方,否則可能會因高熱源而發生爆炸。
Produkt Specifikationer
Mærke: | SteelSeries |
Kategori: | Headset |
Model: | Arctis 9 |
Har du brug for hjælp?
Hvis du har brug for hjælp til SteelSeries Arctis 9 stil et spørgsmål nedenfor, og andre brugere vil svare dig
Headset SteelSeries Manualer
8 August 2025
7 August 2025
7 August 2025
19 Juli 2025
9 April 2025
21 Februar 2025
8 Januar 2025
3 Januar 2025
31 December 2025
31 December 2025
Headset Manualer
- JAYS
- EnGenius
- JVC
- Beyerdynamic
- Avantree
- Maginon
- PSB
- Konix
- Speed-Link
- ProXtend
- Jabra
- Pyle
- Onkyo
- V-Moda
- Monacor
Nyeste Headset Manualer
13 August 2025
13 August 2025
13 August 2025
13 August 2025
13 August 2025
13 August 2025
13 August 2025
12 August 2025
11 August 2025
9 August 2025