Stinger SEADASH3B Manual

Stinger VHF radio SEADASH3B

Læs gratis den danske manual til Stinger SEADASH3B (2 sider) i kategorien VHF radio. Denne vejledning er vurderet som hjælpsom af 5 personer og har en gennemsnitlig bedømmelse på 4.7 stjerner ud af 3 anmeldelser. Har du et spørgsmål om Stinger SEADASH3B, eller vil du spørge andre brugere om produktet?

Side 1/2
SEADASH3B
SEADASH3W
Installation Guide
UNIVERSAL MARINE 3” RADIO KIT
Drill
5/32”, 11/64” Drill Bits
Phillips Screwdriver
7mm Wrench / Socket
Cutting Tool / Hole Saw
Masking Tape
Recommended Tools
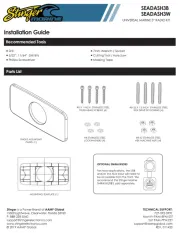
Parts List
OPTIONAL SMRAUXUSB3
For most applications, the USB
and/or the AUX input will need to
be accessible from the front. We
recommend the Stinger Marine
SMRAUXUSB3, sold seperately.
#8 X 1 INCH STAINLESS STEEL
TRUSS HEAD SCREWS (4)
#8-32 X 1.5 INCH STAINLESS STEEL
HEX DRIVE SET SCREWS (4)
#8-32 STAINLESS STEEL
HEX MACHINE NUTS (4)
#8 STAINLESS STEEL
LOCKWASHERS (4)
RADIO MOUNTING
PANEL (1)
MOUNTING TEMPLATE (1)
Stinger is a Power Brand of AAMP Global
15500 Lightwave, Clearwater, Florida 33760
P: 888-228-5560
support@stingerelectronics.com
www.stingerelectronics.com
© 2019 AAMP Global
TECHNICAL SUPPORT:
727-592-5991
Mon-Fri 9AM-8PM EST
Sat 9AM-7PM EST
support@aampglobal.com
REV. 011420
Front Mounting
When there is no access behind the mounting location, the trim panel may be attached from the front using four #8 x
1” mounting screws.
1. Unless there is interference, use the outer holes, closest to the corners
2. From the back side of the SEADASH3 panel, drill out the four mounting holes using a 11/64” drill bit. (FIG. A)
3. Using the drilled panel as a template, position the panel in the desired location and mark and drill 5/32” pilot holes
into the mounting location.
4. Fasten the panel using the four #8 x 1” mounting screws.
Rear Mounting
When there is access behind the mounting location, it’s recommended to mount the SEADASH3 panel using
the four threaded studs. NOTE: If you are replacing a Single DIN radio with a cover, you may be able to use
the existing holes to mount the SEADASH3 panel.
1. Using the supplied template, determine the mounting location.
2. Using a 5/32” drill bit, mark and drill the four mounting holes.
3. Using a 2mm allen wrench, thread the four studs in the corresponding locations on the back of the panel.
4. Mount the panel using lock washers and nuts.
Drill these locations for
front mounting
2mm
FIG. A


Produkt Specifikationer

Mærke: Stinger
Kategori: VHF radio
Model: SEADASH3B

Har du brug for hjælp?

Hvis du har brug for hjælp til Stinger SEADASH3B stil et spørgsmål nedenfor, og andre brugere vil svare dig


VHF radio Stinger Manualer
Stinger

Stinger SEADASH3B Manual

10 September 2025

VHF radio Manualer

Nyeste VHF radio Manualer

Simrad

Simrad NAIS-500 Manual

22 August 2025
Simrad

Simrad RS100-B Manual

21 August 2025
Simrad

Simrad RS40 Manual

21 August 2025
Simrad

Simrad NSPL-500 Manual

21 August 2025
Simrad

Simrad RS20S Manual

21 August 2025
Simrad

Simrad RS100 Manual

21 August 2025
Albrecht

Albrecht DR 316 Manual

15 April 2024