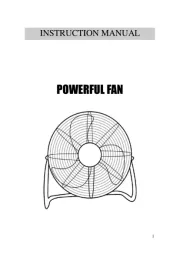
SVAN SVVE16P41 Manual

SVAN Ventilator SVVE16P41

Læs gratis den danske manual til SVAN SVVE16P41 (2 sider) i kategorien Ventilator. Denne vejledning er vurderet som hjælpsom af 18 personer og har en gennemsnitlig bedømmelse på 4.3 stjerner ud af 9.5 anmeldelser. Har du et spørgsmål om SVAN SVVE16P41, eller vil du spørge andre brugere om produktet?

Side 1/2
(PLEASE READ THIS USER'S MANUAL THROUGHLY BEFORE USING)
• Safety Instruction:
1. Never put your nger or other something into the cover to avoid any hurts.
2. Make sure to keep the fan far away from humidity, chemical articles and oil.
3. While cleaning, be sure to not splash water and do not use oil, alcohol or chemica
articles as they may cause distortion of fan body and cause electrical hazards.
4. Do not pull out the power supply plug by pulling power supply cord, which may lead to
electrical shock or generating electrical shock.
5. Keep away from curtain, clothing or other something may aect the fan's working.
6. Turn o all switches and pull out power supply plug when you go out for long time.
7. Never use the fan before nishing assembly to avoid any hurts.
8. If the supply cord is damaged, it must be repaired by the manufacture or its service
agent or a similarly qualied in order to avoid a hazard.
9. Before sending for maintaining, if the unit doesn't work please check the plug of power
supply has been inserted into socket with electricity.
10. Do not use the electric fan in rai n.
1
INSTRUCTION MANUAL
Stand Fan
SVVE16P41
SVVE41R
• Stucture Diagram
1. Shroud Ring 9. Back Pane
2. Front Cove 10. Screw
3. Fastener for Fan blade 11. Up-Down Tube
4. Fan Blade 12. External Joint
5. Fastener for Cover 13. Support Tube
6. Back Cover 14. Decorative Cover
7. Output shaft 15. Round Base/Cross base
8. Joint
• Installing and Using
First step: Assemble and connect the base with assembly up-down tube and
support tube.
Open the casing and take out base. Then assemble the tube and cover of up-down tube
and support tube. Aim the four holes on the bottom of support tube at the holes on the
base and tighten the screws. Slip decorative cover to base alongside the tube of support
tube and adjust up-down tube to proper height. Then rotate tighten the external joint.
Second step: Assemble fan blade
1) Assemble guard cover and shroud ring
Tighten back cover enclosure io the motor by Fastener. (Pay attention to direction of
rotation). Place joint of shroud ring downwards and cover the deep groove of shroud ring
to the circle side ring of back cover enclosure. Then tighten the bolts at the position of join
properly by nut.
2) Install fan blade
While installing fan blade, please wedge groove on the back of fan blade on spacer pin o
the output shaft of motor. Then tighten the xing nut of fan blade unclockwisely.
3) Assemble front cover
Insert the circle of front cover into the groove of shroud ring, which has been xed to the
back cover. Finally fasten the bolts into screw of the joint of shroud ring.
• Direction of Use
1. Setting of wind direction
This fan can swing in up and down direction. The angle of facing upwards and downwards
can be adjusted by slightly lift or press the cover.
2. Setting of shaking
Press the turning button and the head starts to rotate. Then pull it out and fan will stop
rotating.
3. Setting of wind speed and wind type
Pressing button of wind speed can adjust the speed of wind.
2
When starting the fan, the fan blade doesn't work. Please check whether the power plug
has really inserted into the socket or the cover has distorted, which has touched the fan
blade. If sound the noise when starting the fan, please check the unit as follows:
(1) Fan blade has been right installed into the output shaft of motor.
(2) Groove on back of cover has matched the inserting groove on the output shaft.
(3) There tiny defective edge ring existing around the fan blade. is
(4) The cover has distorted, which has touched the fan blade.
* Maintaining and Storing
Be sure to switch o the power supply and pull out the plug before cleaning.
1. This machine only needs common external cleaning and wiping.
2. Place into casing and store in the dry position.
Technical Parameters
Model
Rating
Voltage
Rating
Power
Rating
Frequency
Remark
SVVE16P41
SVVE41R
220 240V-
50W
50Hz
Base
3
SVAN TRADING S.L.
C/Ciudad de Cartagena, 20. Paterna (46988). SPAIN.
info@svanelectro.com
96060034


Produkt Specifikationer

Mærke: SVAN
Kategori: Ventilator
Model: SVVE16P41

Har du brug for hjælp?

Hvis du har brug for hjælp til SVAN SVVE16P41 stil et spørgsmål nedenfor, og andre brugere vil svare dig


Ventilator SVAN Manualer
SVAN

SVAN SVVE410C Manual

31 Maj 2025
SVAN

SVAN SVP401600OBA Manual

20 December 2024
SVAN

SVAN SVP401600MOBA Manual

20 December 2024
SVAN

SVAN SVVE01290TR Manual

12 September 2024
SVAN

SVAN SVVE450C Manual

28 August 2024
SVAN

SVAN SVVE02420TR Manual

5 August 2024
SVAN

SVAN SVVE02160PR Manual

2 August 2024
SVAN

SVAN SVVE12B Manual

26 Juli 2024
SVAN

SVAN SVVE16P41 Manual

23 Juli 2024

Ventilator Manualer

Nyeste Ventilator Manualer