21
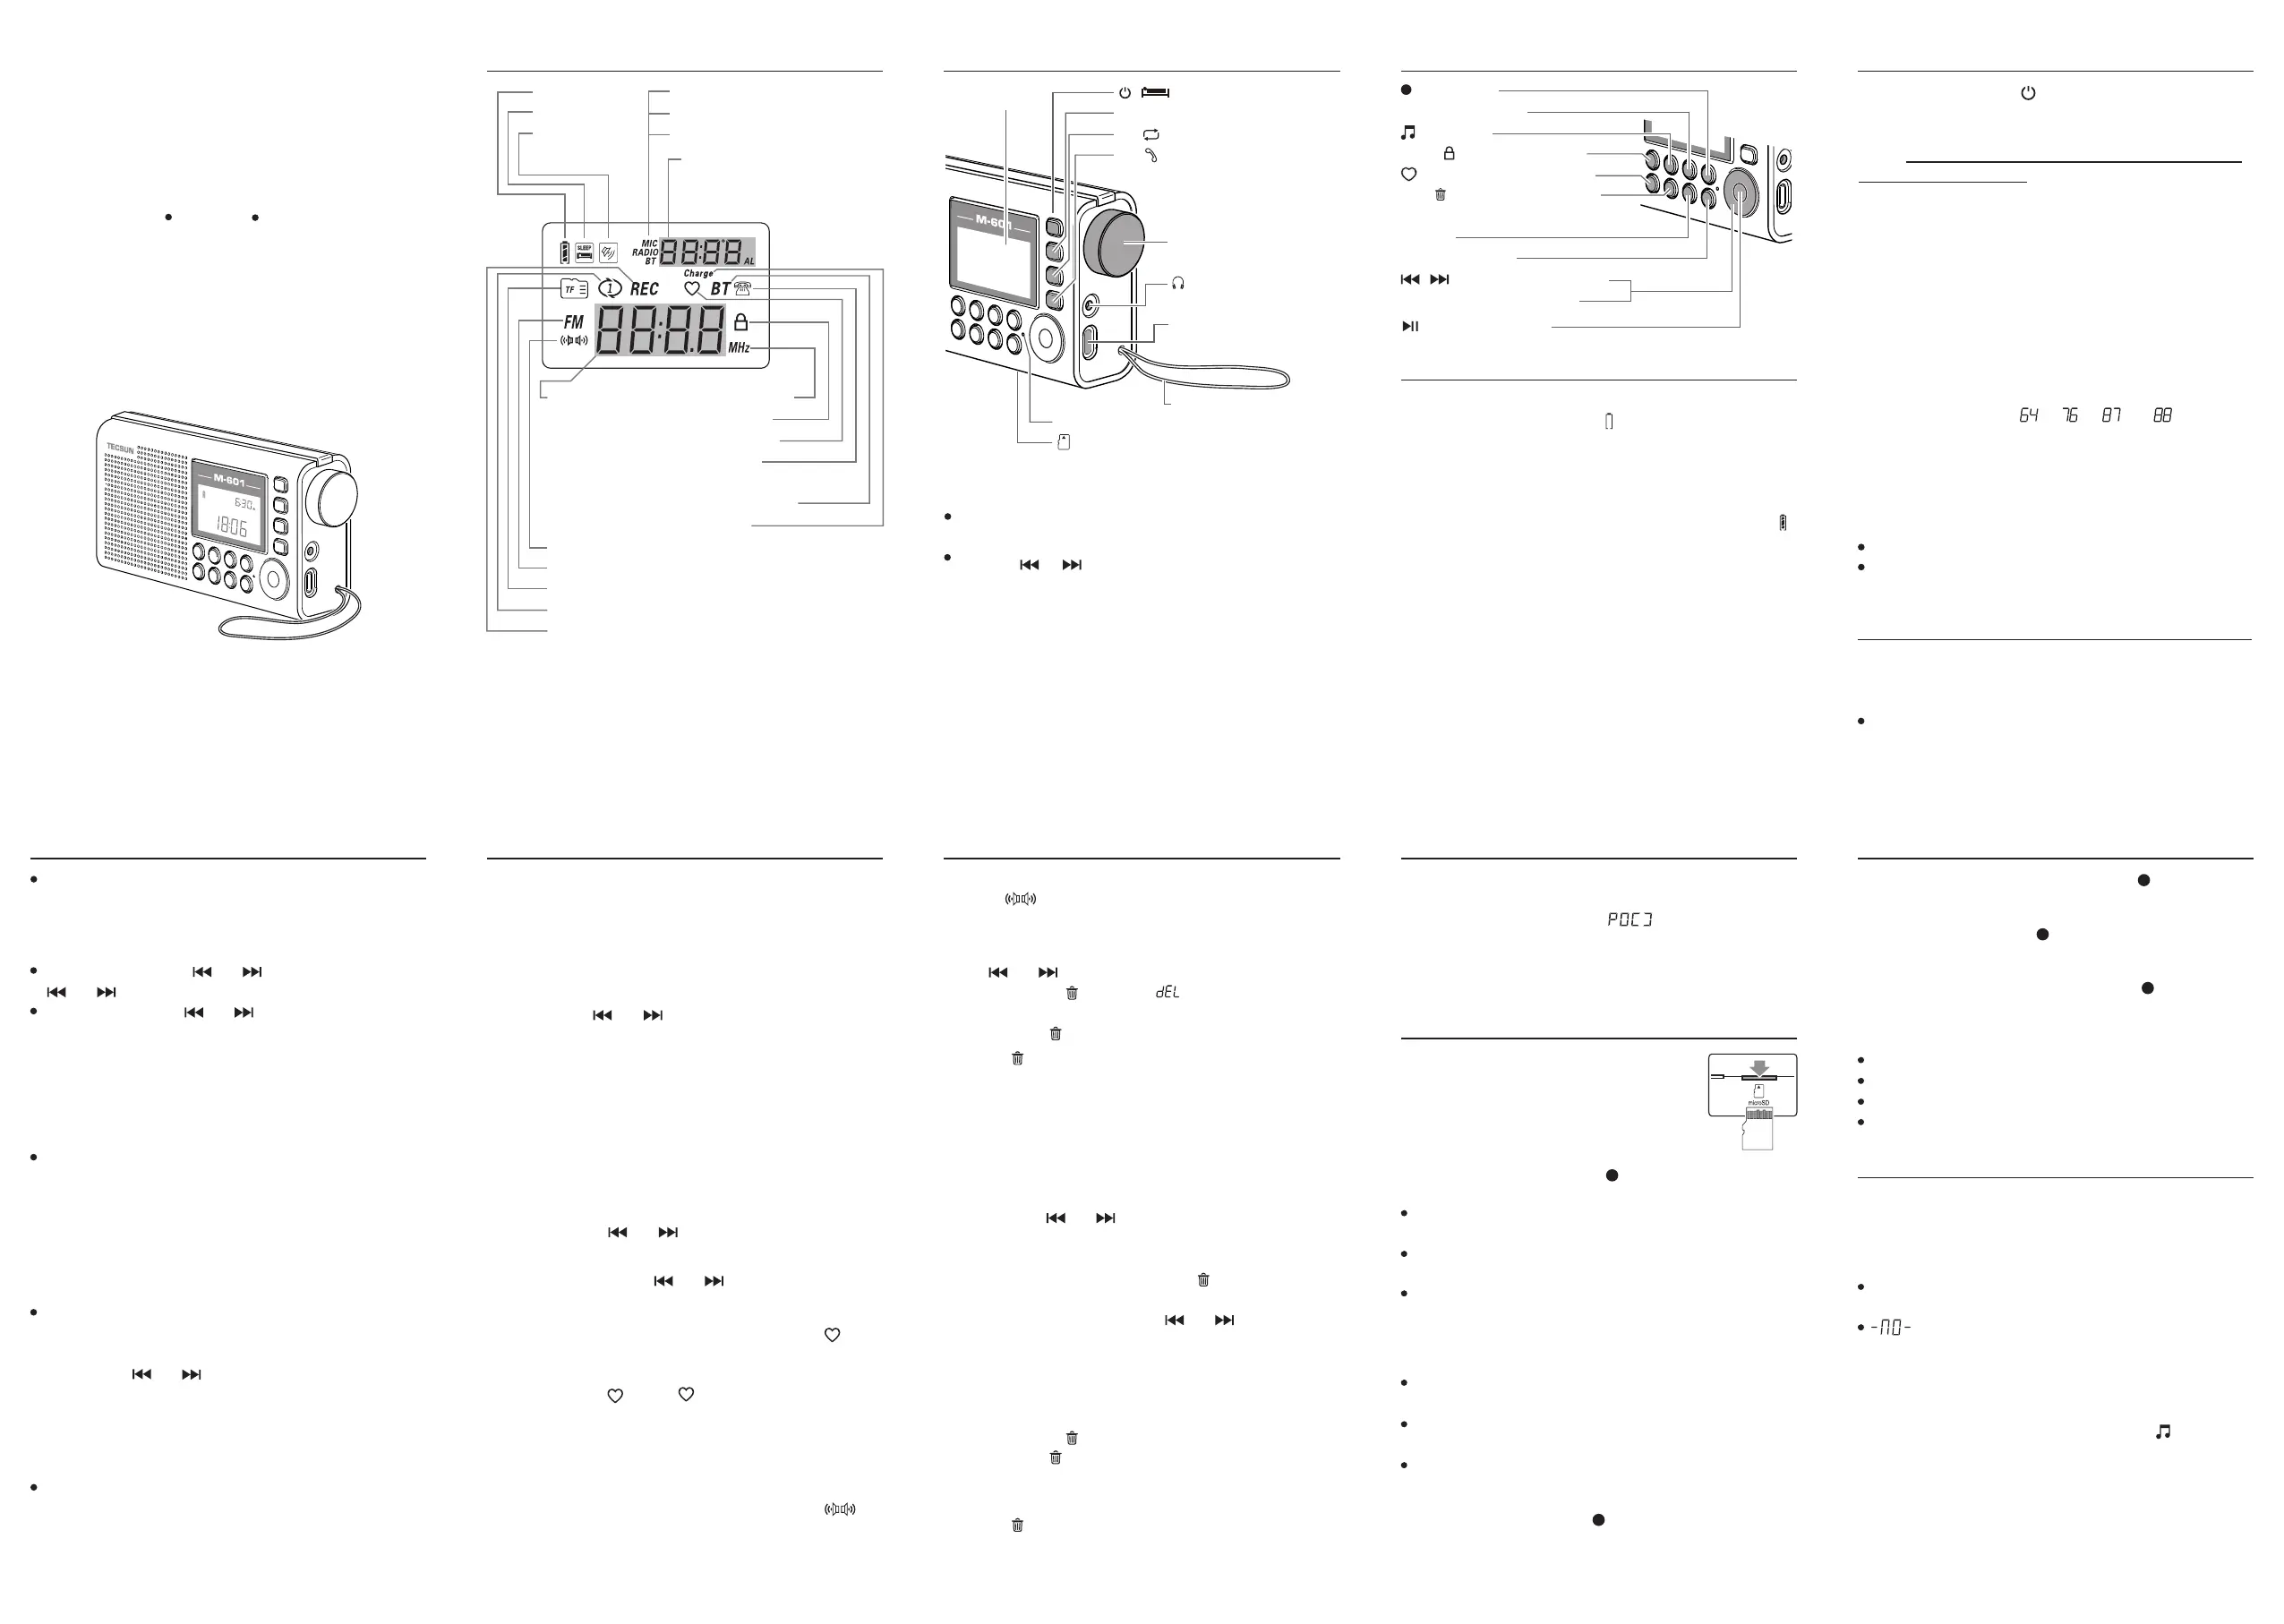
M-601 at a Glance – Display indication
Battery indicator
Sleep timer
Alarm
FM frequency unit
Key/knob lock
Favorite station
Handsfree /
call recording playback
Bluetooth enabled
Charging
MIC: Mic recording/playback
RADIO: Radio recording/playback
BT: Bluetooth recording/playback
Displays: Alarm clock (AL) / clock /
temperature / FM memory preset /
track number / charging time
Displays:
Time/frequency/
recording duration/
folder selection /
playback status
FM stereo reception
FM radio mode
MicroSD (TF) player mode
Repeat track
Recording (flashing) / recording playback
GENERAL OPERATION
Power on/off: Quick press the [ ] button.
Volume adjustment: Quick press the [ Vol.+ ] or [ Vol.- ] button.
Headphone socket: Suitable for 32Ω - 150Ω headphones (Φ3.5mm plug).
Caution! Do not use headphones at high volume for a long time period, as
this may cause hearing damage.
TECSUN
TECSUN ELECTRONIC IND. LTD.
4
Setting the clock (in power off state): 24H format
1. Press and hold the [ TIME ] button until the "hour" digits flash.
2. Rotate the tuning knob to adjust the hour indicator.
3. Quick press the [ TIME ] button to confirm. The "minute" digits start to flash.
4. Rotate the tuning knob to adjust the minute indicator.
5. Quick press the [ TIME ] button to confirm.
Setting the FM Frequency Range
With the device off, set the frequency range to correspond with the
country in which you are using the radio. Press and hold the [ FM ]
button. The display will show “ ”, “ ”, “ ” or “ ” to indicate
the corresponding range: 64 - 108MHz, 76 - 108MHz, 87 - 108MHz or
88 - 108MHz.
Quick press [ FM ] repeatedly to select your preference.
Temperature Display: Fahrenheit (ºF) or Celsius (ºC)
The temperature reading corresponds with the selected FM frequency range.
Fahrenheit (ºF): 88 - 108MHz
Celsius (ºC): 64 - 108MHz, 76 - 108MHz, 87 - 108MHz
Tip: Quick press [ DISPLAY ] repeatedly to display the temperature.
Quick press the [ FM ] button to switch to FM radio listening.
While listening to FM, quick press the [ FM ] button to toggle between the
frequency tuning (VF) and memory mode (VM).
Tuning mode (VF): Frequency flashes after a quick press of the [ FM ]
button.
LISTENING TO FM RADIO
Tuning for new FM frequencies
Manual tuning: Quick press [ ] or [ ]. Alternatively, quick press
[ ] or [ ] and then rotate the [ TUNING ] knob.
Auto tune: Press and hold [ ] or [ ]. The device automatically scans
the FM frequency band. When a radio station is found, it will stay there for
about 5 seconds before continuing the scan. To stop, gently rotate the
[ TUNING ] knob.
Storing FM frequencies
There are several ways to store FM stations.
Storing Stations Manually
1) In VF mode, tune into the frequency.
2) Quick press the memory [ MEM. ] button, the next available memory
location flashes on the display. If desired, select a different memory
location by rotating the [ TUNING ] knob.
3) Quick press the [ MEM. ] button again to confirm the location or wait for
about 2 seconds to auto store the station into the memory.
6
7
AUDIO PLAYER (SD MODE)
Notes:
The volume level of voice recordings and Bluetooth recordings depend on
the volume level of the audio source.
While making voice recordings, to avoid noise, do not use any of the
buttons or the tuning knob.
A recording file has a maximum duration of 1 hour. If the duration of the
recording exceeds 1 hour, a new file will be generated.
Pause the recording: Quick press [ ]. When the recording is paused,
"REC" stops flashing, and the recording time stops and flashes.
Resume the recording after pausing: Quick press [ ] again.
The recording continues, "REC" flashes, and the recording time resumes.
Stop recording: Press and hold [ ]. Recording stops and the device starts
to playback the audio that was just recorded.
Exit recording: Stop recording and then quick press [ ].
Tips: When accessing the microSD card on a computer, recordings can be
found in the following folders:
RECORDB: Bluetooth recording folder.
RECORDF: Radio recording folder.
RECORDH: Phone call recording folder.
RECORDM: Voice recording folder
8
9
5
Deleting a Single Station
1) Enter the memory (VM) mode using the [ FM ] button.
2) Use [ ] or [ ] to select the station that you wish to delete.
3) Press and hold the [ ] button until “ ” and “xx Ch” flash on the
display.
4) Quick press the [ ] button to confirm and delete the unwanted station.
Note: If the [ ] button is not pressed for confirmation within 3 seconds, the
delete function is exited automatically.
Deleting Stations During Memory Scan
The device can auto scan all stored stations, staying on each station for about
5 seconds, and giving you the opportunity to delete any unwanted stored
stations.
1) Use the [ FM ] button to enter the memory (VM) mode.
2) Press and hold [ ] or [ ] until "Ch" flashes in the upper right corner
of the display. The device starts to scan all stored stations and stays on
each station for about 5 seconds before continuing.
3) Upon finding an unwanted station, press the [ ] button. No confirmation
is required and scanning continues immediately.
4) To stop the memory scan, quick press [ ] or [ ].
Deleting All Stored Stations
It is possible to simultaneously delete all stored stations from the memory,
but excluding the favorite station.
1) Use the [ FM ] button to enter the memory (VM) mode.
2) Press and hold the [ ] button untill "P0 dEL" flashes on the display.
3) Quick press the [ ] button to confirm and delete all stored stations.
4) "P0--" is briefly shown on the display. Once the display returns to showing
the frequency, all stored frequencies have been deleted.
Note: If the [ ] button is not pressed for confirmation within 3 seconds, the
delete function is exited automatically.
Auto Sorting Memory
This device can automatically organize all stored stations. In power off mode,
press and hold the [ REC. ] button until appears on the display,
indicating that stored stations are being sorted in ascending frequency. Once
the display returns to showing the time and temperature, the memory sorting
has completed.
RECORDING (microSD card required)
You can use M-601 to make FM radio recordings,
voice recordings, and recordings of audio received via
Bluetooth (including phone calls).
Recordings are saved to an inserted microSD card
(max. 128GB supported).
To start a recording: Press and hold [ ]. “REC” flashes and the recording
time is shown on the display.
FM radio recording: In FM mode, records the selected radio station.
The display indicates “Radio” while recording.
Voice recording: In audio player (SD) mode, uses the built-in microphone
to record the surroundings. The display indicates “Mic” while recording.
Bluetooth recording: In Bluetooth mode, records audio from paired audio
sources as well as incoming and outgoing phone calls.
The display indicates “BT” while recording.
Take note of the correct direction, and then insert a microSD card
(max. 128GB) with supported audio files into the card slot. Quick press the
[ SD ] button, the device starts playing audio from the card automatically.
Notes:
Supported audio formats: 16bit/44.1kHz, FLAC / WAV / WMA / and MP3
formats up to 320kbps.
“ ” is displayed when there is no card inserted, the card is not
supported, or the card does not contain any (supported) files.
Music playback: In audio player mode, quick press the [ ] button.
Recording playback:
In audio player mode, quick press the [ REC. ] button.
Playback Controls
Storing Stations During Auto Tune
It is possible to store stations manually while the radio scans the FM band
for available stations.
1) Press and hold [ ] or [ ] to start the auto tune feature.
2) When coming across a station that you wish to store, quick press the
memory [ MEM. ] button twice. The frequency is stored and the radio
continues scanning for the next available station.
3) To stop the auto tune feature, gently rotate the [ TUNING ] knob.
Auto Tuning Storage (ATS)
Press and hold the [ FM ] button. The frequency starts running and available
FM stations are automatically stored into the memory.
Memory mode (VM): Memory preset indicator "xx ch" flashes after a quick
press of the [ FM ] button. Tip: If "P0--" is displayed, the memory contains
no preset frequencies; the device will automatically return to VF mode.
To stop scanning, quick press [ ] or [ ] .
Setting a Favorite Station
You can set one favorite station that can be accessed using the [ ] button.
Follow these steps to set a favorite station:
1) Tune into a frequency.
2) Press and hold the [ ] button. “ ” flashes on the display briefly,
indicating that your favorite station has been set.
To set a new station as your favorite, follow the above steps again.
FM Mono/Stereo
The speaker audio output is mono. When listening through headphones, the
device automatically switches to stereo output, indicated by the “ ” icon.
When using headphones, but the radio signal is broadcasted in mono, or
Recalling Stored Stations
1) Quick press the [ FM ] button to enter the memory (VM) mode.
The memory is entered when "xx Ch" flashes in the top right corner of the
display.
2) Quick press the [ ] or [ ] button repeatedly to change stations, or
quick press and then rotate the [ TUNING ] knob.
Tip: If "P0--" is displayed, it means the memory contains no preset
frequencies; the device will automatically return to VF mode.
Memory Scan
The device can auto scan all stored stations, staying on each station for
about 5 seconds before continuing.
1) Quick press the [ FM ] button to enter the memory (VM) mode.
The memory is entered when "xx Ch" flashes in the top right corner of the
display.
2) Press and hold the [ ] or [ ] button until "Ch" flashes in the upper
right corner of the display. The device starts to scan all stored stations.
When the frequency stops running, it means the ATS operation has been
completed. Rotate the [ TUNING ] knob to view all the stored stations.
broadcasted in stereo but the signal received is weak, the audio output is in
mono and “ ” is not displayed.
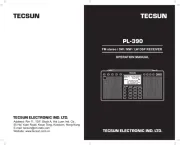
M-601
FM Radio Recorder Audio Player
User Manual
(Please read this manual before use)
3
This device is powered by a 3.7V rechargeable lithium (Li-ion) battery.
When the battery icon is displayed as “ ”, this indicates that battery power
is about to run out. Please charge it in time.
Use a suitable USB-C charging cable to connect the charging socket on the
right side of M-601 to a DC 5V charger. When charging, the charging time is
displayed at the top right corner of the display while the “Charge” indicator
flashes. When charging is complete, the battery symbol is displayed as “ ”
and the charging indicator "Charge" stops flashing.
Attention! Assure that your charger is appropriately certified and meets the
safety standards and other requirements in your region.
Notes:
Many smartphone and tablet chargers are DC 5V. If you own such a device,
check the specifications to find out if it is suitable for use with M-601.
Alternatively, charge M-601 by connecting it to the USB-port of a computer.
To extend battery life, when the lithium battery is fully charged but M-601 is
not used for more than 6 days, the device will enter a self-discharge state,
and the self-discharge will stop when the remaining battery power is about
70%.
●
●
Charging the Battery
: Record button
REC.: Recording library
: Music library
Display/ : Display mode / Keylock
: Favorite FM station / audio track
Mem./ : Store / Delete FM station or
audio track
Alarm set
Time set / A-B repeat
: Select frequency/audio track
Vol.+ / Vol.- : Adjust volume level
: Play/Pause audio track
M-601 at a Glance – Location of Controls
* Multifunctional tuning knob:
After using [ Vol.+ ] / [ Vol.- ], rotating the tuning knob will adjust the
volume level.
After using [ ] / [ ], rotating the tuning knob can be used to tune
the frequency or select an audio track.
Display / : Power switch / Sleep timer
FM: Tuning (VF), memory (VM), ATS
SD / : SD card / Repeat mode
BT / : Bluetooth audio / Handsfree
FM antenna / wrist strap
Microphone
MicroSD card slot
Tuning: Tuning knob
(* multifunctional)
: Stereo earphone socket (and
reset button)
USB-C Charging/Computer
audio input