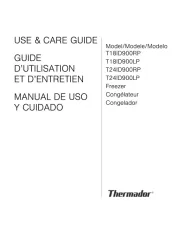
Thermador T24IF905SP Manual
Læs nedenfor 📖 manual på dansk for Thermador T24IF905SP (84 sider) i kategorien Fryser. Denne guide var nyttig for 45 personer og blev bedømt med 4.9 stjerner i gennemsnit af 23 brugere
Side 1/84

USE & CARE GUIDE
GUIDE
D’UTILISATION
ET D’ENTRETIEN
MANUAL DE USO
Y CUIDADO
Model/Modele/Modelo
T18IF905SP
T24IF905SP
T30IF905SP
T36IF905SP
Freezer
Congélateur
Congelador

en-us
2
en Table of contents
en I ns t r uc t i o n man ua l
(Important safety instructions . . . . . . . . . . . . 4
Definitions . . . . . . . . . . . . . . . . . . . . . . . . . . . . . . . . 4
About these instructions . . . . . . . . . . . . . . . . . . . . . 4
Introduction . . . . . . . . . . . . . . . . . . . . . . . . . . . . . . . 4
Restriction of user group. . . . . . . . . . . . . . . . . . . . . 4
Risk of explosion. . . . . . . . . . . . . . . . . . . . . . . . . . . 4
Risk of electric shock . . . . . . . . . . . . . . . . . . . . . . . 5
Risk of cold burns . . . . . . . . . . . . . . . . . . . . . . . . . . 5
Risk of injury . . . . . . . . . . . . . . . . . . . . . . . . . . . . . . 5
Fire hazard/Danger due to refrigerants . . . . . . . . . . 5
Risk of fire . . . . . . . . . . . . . . . . . . . . . . . . . . . . . . . . 5
Risk of suffocation. . . . . . . . . . . . . . . . . . . . . . . . . . 6
Damage . . . . . . . . . . . . . . . . . . . . . . . . . . . . . . . . . 6
Weight . . . . . . . . . . . . . . . . . . . . . . . . . . . . . . . . . . . 6
State of California Proposition 65 Warnings . . . . . . 6
8Intended use . . . . . . . . . . . . . . . . . . . . . . . . . . 7
7Environmental protection . . . . . . . . . . . . . . . 7
Packaging . . . . . . . . . . . . . . . . . . . . . . . . . . . . . . . . 7
Old appliances . . . . . . . . . . . . . . . . . . . . . . . . . . . . 7
5 Installation and connection . . . . . . . . . . . . . . 7
Contents of package . . . . . . . . . . . . . . . . . . . . . . . . 7
Technical data. . . . . . . . . . . . . . . . . . . . . . . . . . . . . 7
Installing the appliance . . . . . . . . . . . . . . . . . . . . . . 7
Check built-in cut-out. . . . . . . . . . . . . . . . . . . . . . . . 7
Side-by-side installation . . . . . . . . . . . . . . . . . . . . . . 7
Saving energy . . . . . . . . . . . . . . . . . . . . . . . . . . . . . 8
Before using for the first time . . . . . . . . . . . . . . . . . 9
Water connection . . . . . . . . . . . . . . . . . . . . . . . . . . 9
Electrical connection . . . . . . . . . . . . . . . . . . . . . . . . 9
*Getting to know your appliance . . . . . . . . . 10
Appliance . . . . . . . . . . . . . . . . . . . . . . . . . . . . . . . 10
Operating controls. . . . . . . . . . . . . . . . . . . . . . . . .11
Equipment . . . . . . . . . . . . . . . . . . . . . . . . . . . . . . . 12
1Operating the appliance. . . . . . . . . . . . . . . . 15
Switching the appliance on . . . . . . . . . . . . . . . . . . 15
Switching off and disconnecting the
appliance. . . . . . . . . . . . . . . . . . . . . . . . . . . . . . . . 15
Setting the language . . . . . . . . . . . . . . . . . . . . . . . 15
Setting the temperature unit . . . . . . . . . . . . . . . . . 15
Setting the temperature . . . . . . . . . . . . . . . . . . . . .15
Super freezing . . . . . . . . . . . . . . . . . . . . . . . . . . . . 15
Clean lock . . . . . . . . . . . . . . . . . . . . . . . . . . . . . . . 16
Switching ice cube production on or off . . . . . . . . 16
Reset water filter counter. . . . . . . . . . . . . . . . . . . . 16
Eco mode . . . . . . . . . . . . . . . . . . . . . . . . . . . . . . . 16
Self-test . . . . . . . . . . . . . . . . . . . . . . . . . . . . . . . . .16
Setting the brightness of the control panel . . . . . .16
Switching key press sound on or off . . . . . . . . . . . 17
Setting the key volume . . . . . . . . . . . . . . . . . . . . . 17
Setting the signal tone volume . . . . . . . . . . . . . . . 17
Automatic clean lock . . . . . . . . . . . . . . . . . . . . . . 17
Automatic door opening . . . . . . . . . . . . . . . . . . . . 17
Switching the water filter counter on and off. . . . . 18
Theater mode . . . . . . . . . . . . . . . . . . . . . . . . . . . . 18
Resetting to the factory settings . . . . . . . . . . . . . . 18
Switching demo mode on or off . . . . . . . . . . . . . . 18
Sabbath mode . . . . . . . . . . . . . . . . . . . . . . . . . . . 18
Home network . . . . . . . . . . . . . . . . . . . . . . . . . . . 18
MAlarm . . . . . . . . . . . . . . . . . . . . . . . . . . . . . . . 19
Door alarm . . . . . . . . . . . . . . . . . . . . . . . . . . . . . . 19
Temperature alarm . . . . . . . . . . . . . . . . . . . . . . . . 19
o Home Connect. . . . . . . . . . . . . . . . . . . . . . . . 20
Setting up a home network. . . . . . . . . . . . . . . . . . 20
Connecting the refrigerator to the
Home Connect app . . . . . . . . . . . . . . . . . . . . . . . 20
Installing updates for the Home
Connect software . . . . . . . . . . . . . . . . . . . . . . . . . 21
Customer Service access. . . . . . . . . . . . . . . . . . . 21
Deleting network settings . . . . . . . . . . . . . . . . . . . 21
Switch on or off the connection to the home
WLAN network (Wi-Fi). . . . . . . . . . . . . . . . . . . . . . 21
Information on data protection . . . . . . . . . . . . . . . 21
WFreezer compartment. . . . . . . . . . . . . . . . . . 22
Fully utilizing the freezer volume. . . . . . . . . . . . . . 22
Purchasing frozen food. . . . . . . . . . . . . . . . . . . . . 22
When loading products . . . . . . . . . . . . . . . . . . . . 22
Freezing fresh food. . . . . . . . . . . . . . . . . . . . . . . . 22
Thawing frozen food . . . . . . . . . . . . . . . . . . . . . . . 23
=Defrosting . . . . . . . . . . . . . . . . . . . . . . . . . . . 23
Freezer compartment . . . . . . . . . . . . . . . . . . . . . . 23
DCleaning . . . . . . . . . . . . . . . . . . . . . . . . . . . . 23
Cleaning the display . . . . . . . . . . . . . . . . . . . . . . . 23
Cleaning the appliance interior . . . . . . . . . . . . . . . 23
Cleaning the equipment . . . . . . . . . . . . . . . . . . . . 23
Care instructions for stainless steel surfaces . . . . 23
>Noises . . . . . . . . . . . . . . . . . . . . . . . . . . . . . . 24
Normal noises . . . . . . . . . . . . . . . . . . . . . . . . . . . 24
Preventing noises . . . . . . . . . . . . . . . . . . . . . . . . . 24
9Lighting. . . . . . . . . . . . . . . . . . . . . . . . . . . . . 24
3Faults – what to do? . . . . . . . . . . . . . . . . . . 25
Appliance . . . . . . . . . . . . . . . . . . . . . . . . . . . . . . . 25
Ice maker . . . . . . . . . . . . . . . . . . . . . . . . . . . . . . . 26

9Important safety instructions
READ INSTRUCTIONS - DO NOT DISCARD!
en-us Important safety instructions
4
(Important safety instructions
I mpo r t ant s af et y i ns t r uc t i on s
READ INSTRUCTIONS - DO NOT DISCARD!
Definitions
9WARNING
Non-observance of this warning could
result in death or serious injuries.
9CAUTION
Non-observance of this warning could
result in slight or moderately serious
injuries.
NOTICE: Non-observance of this
information could damage the appliance.
Note: This indicates important information
and/or tips.
About these instructions
■Read and follow the operating and
installation instructions. They contain
important information on how to install,
use and maintain the appliance.
■The manufacturer is not liable if you
disregard the instructions and warnings
in the operating and installation
instructions.
■Retain all documents for subsequent use
or for the next owner.
Introduction
■This appliance complies with the relevant
safety regulations for electrical
appliances.
■The refrigeration circuit has been
checked for leaks.
Restriction of user group
■Avoid placing children and vulnerable
persons at risk.
■This appliance may be used by children
and persons who have reduced physical,
sensory or mental abilities or inadequate
experience and/or knowledge, provided
they are supervised or have been
instructed on how to use the appliance
safely and have understood the resulting
dangers.
■Children should be supervised to ensure
that they do not play with the appliance.
Risk of explosion
■If the appliance's ventilation openings are
sealed, a leak in the refrigeration circuit
may result in a flammable mixture of gas
and air.
Keep ventilation openings in the
appliance enclosure or in the built-in
structure clear of obstruction.
■Never use electric devices inside the
appliance (e.g. heaters or electric ice
makers).
■Do not store products which contain
flammable propellants (e.g. spray cans)
or explosive substances in the appliance.
■Only store high-proof alcohol tightly
closed and upright.
■Do not use additional means to
accelerate the defrosting process other
than those recommended by the
manufacturer.

9Important safety instructions
READ INSTRUCTIONS - DO NOT DISCARD!
Important safety instructions en-us
5
Risk of electric shock
Improper installations or repairs may put the
user at considerable risk.
■When installing the appliance, make sure
that the power cord does not get jammed
or damaged.
■In order to avoid danger, if the power
cord is damaged, disconnect the
appliance from the power source
immediately. Have the power cord
replaced by the manufacturer, customer
service or a similarly qualified person.
■Do not use multiple outlets, extension
cords, or adapters.
■Before servicing the appliance or
carrying out installation work, disconnect
the appliance from the power source or
switch off the fuse.
Before cleaning the appliance, press the
main On/Off switch to switch the
appliance off.
Glass shelves and other fittings can be
moved without any risk while the
appliance is switched on.
■Never cut through or remove the power
cord's third conductor (grounding
conductor).
■Never defrost or clean the appliance
using a steam cleaner. The steam may
penetrate electrical parts and cause a
short circuit.
■The appliance, cord and accessories
should only be repaired or replaced by
the manufacturer or an authorized
service provider.
■Only use original parts supplied by the
manufacturer.
These parts come with a warranty from
the manufacturer that they satisfy the
safety requirements.
Risk of cold burns
■Never put frozen food straight from the
freezer compartment into your mouth.
■Avoid prolonged skin contact with frozen
food, ice or any other surface inside the
freezer compartment.
Risk of injury
■Containers with carbonated drinks may
burst.
■Do not store containers which contain
carbonated drinks in the freezer
compartment.
Fire hazard/Danger due to
refrigerants
The tubes of the refrigeration circuit contain
a small quantity of an environmentally
friendly but flammable refrigerant (R600a).
It does not damage the ozone layer and
does not add to the greenhouse effect. If
the refrigerant escapes, it may injure your
eyes or ignite.
■Do not damage the tubes.
If the tubes are damaged:
■Keep naked flames and ignition sources
away from the appliance.
■Ventilate the room.
■Switch off the appliance and unplug the
mains plug.
■Please contact customer service.
Risk of fire
Portable multi-outlet power strips and
portable power supplies may overheat,
causing a fire.
■Never leave portable multi-outlet power
strips or portable power supplies behind
the appliance.

9Important safety instructions
READ INSTRUCTIONS - DO NOT DISCARD!
en-us Important safety instructions
6
Risk of suffocation
■If the appliance features a door lock:
keep the key out of the reach of children.
■Keep children away from the packaging
and its parts.
Damage
To avoid damage:
■Do not stand or lean on the base,
runners or doors.
■Keep plastic parts and door seals free of
oil and grease.
■Pull the power plug – not the power cord.
Weight
The appliance is very heavy. The appliance
should always be transported and set up by
at least 2 people.
~ "Installing the appliance" on page 7
State of California Proposition 65
Warnings
This product may contain a chemical known
to the State of California, which can cause
cancer or reproductive harm. Therefore, the
packaging of your product may bear the
following label as required by California:

Intended use en-us
7
8Intended use
I nt ended us e
Use this appliance
■only for freezing food and making ice.
■only in the home and in the home environment.
■only according to these operating instructions.
This appliance is intended for use at an elevation of
no more than 2000 meters above sea level.
7Environmental protection
En v i r o n men t al pr ot ec t i on
Packaging
All materials are environmentally safe and
recyclable:
■Dispose of packaging in an environmentally
responsible manner.
■Please ask your dealer or inquire at your local
authority about current means of disposal.
Old appliances
Valuable raw materials can be reclaimed by
recycling old appliances.
9WARNING
CHILDREN MAY BECOME LOCKED IN THE
APPLIANCE AND SUFFOCATE!
Before disposing of your old appliance:
■Remove the door.
■Leave shelves and bins in the appliance to
prevent children from climbing in.
■Keep children away from the discarded
appliance.
9CAUTION
REFRIGERANT AND HARMFUL GASES MAY
ESCAPE.
Do not damage the tubes of the refrigeration
circuit and insulation.
1. Pull out the power plug.
2. Cut through the power cord.
3. Have the appliance disposed of properly.
5 Installation and
connection
I ns t al l at i o n an d c on nect i on
Contents of package
After unpacking all parts, check for any damage
during transport.
If you have any complaints, please contact the
dealer from whom you purchased the appliance or
our customer service.
~ "Customer service" on page 27
The delivery consists of the following parts:
■Built-in appliance
■Equipment (depending on model)
■Installation material
■Instruction manual
■Installation instructions
■Customer service booklet
■Warranty enclosure
■Information on the energy consumption and
noises
Technical data
Refrigerant, cubic capacity and further technical
specifications can be found on the rating plate.
~ "Getting to know your appliance" on page 10
Installing the appliance
Installation location
The weight of the appliance may be up to 460 kg
depending on the model. The base must be
sufficiently stable and should not give. If necessary,
reinforce the floor.
Check built-in cut-out
The cut-out must fulfill these criteria:
■Anti-tilt bracket must be fitted
■Cut-out depth min. 24” (610 mm), for flush
installation 25” (635 mm)
■rectangular
■stable – the side panels and the top must be min.
5/8" (16 mm) thick and securely attached to the
floor or wall
■Depth of shortest side panels min. 4” (100 mm)
Side-by-side installation
Observe the specifications in the installation
instructions for a side-by-side installation.
If a partition wall is required between the appliances
it must be at least 5/8" (16 mm) wide.

en-us Getting to know your appliance
10
*Getting to know your
appliance
Get t i ng t o k no w yo ur ap pl i a nce
Appliance
6XSHU)UHH]H
@
6HWWLQJV
+
3
;
K
C
-
( H ... Operating controls
P Main On/Off switch
X Door damper
` Ice maker
h Rating plate
)" Ice cube bin
)* Frozen food container
)2 Ventilation opening
): Automatic door opening
)J Water filter

Getting to know your appliance en-us
11
Operating controls
Settings menu
Press button to open the menu."
In the Settings menu you will find:
■Appliance settings
■Clean lock
■Ice cube production
■Water filter counter
■Eco mode
■Self-test
■Sabbath mode (if activated)
~ "Operating the appliance" on page 15
Appliance settings menu
This is how to navigate to the Appliance settings
menu:
1. Press " button.
2. Use button to move to the ( Appliance settings
menu.
3. Open the menu using 8 button.
In the menu you will find the Appliance settings
following sub-menus and setting options:
■Brightness
■Key press sound
■Key volume
■Signal tone volume
■Automatic clean lock
■Automatic door opening
■Water filter counter
■Theater mode
■Temperature unit
■Language
■Home network
■Factory settings
■Demo mode
■Sabbath mode
~ "Operating the appliance" on page 15
( Touch fields
There are sensors under the touch fields.
Touching the symbol calls up the respective
function.
0 Freezer compartment temperature display
Indicates the set temperature in °C/°F.
8A @/ buttons
Used to change the temperature.
@ " button
Opens the menu. Settings
~ "Settings menu" on page 11
H Super Freeze button
Switches Super Freeze on or off.
6XSHU)UHH]H
C
²
6H WWLQJV
#
+

en-us Getting to know your appliance
12
Equipment
(not all models)
Storage compartment
You can remove and adjust the height of the storage
compartments:
1. Lift up the storage compartment and remove.
2. When re-inserting, insert hooks on back of
storage compartment at same height to make it
level.
Note: Insert the storage compartment carefully to
avoid scratching the appliance.
Shelf
You can remove and adjust the shelf:
1. Lift shelf and remove.
2. When re-inserting, insert hooks on back of shelf
at same height to make it level.
Note: Insert shelf carefully to avoid scratching the
appliance.
Container
You can remove the container:
■Press container to the rear,
■lift the container at the rear and remove.
You can insert the bin:
■Pull out the telescopic rails all the way.
■Place the bin on the telescopic rails and push into
the appliance until it engages.

en-us Getting to know your appliance
14
Water filter
Change the water filter after 6 months at the latest.
If the ice tastes stale, discard the rest of the ice
cubes and the ones produced over the next
24 hours. If the ice still tastes stale, change the
water filter.
Note: If you use an external water filter system, you
can also operate the appliance without a water
filter.Replace the water filter with a bypass cartridge.
Switch off the water filter counter. There is no need
to change the bypass cartridge.
A new water filter or bypass cartridge can be
obtained from customer service or a specialist
dealer.
Exchange water filter or replace with bypass
cartridge
You can change the water filter, or replace it with a
bypass cartridge. The bypass cartridge can remain
in the appliance permanently: it does not need to be
changed.
Note: After installing a water filter or a bypass
cartridge, discard all ice cubes produced over the
first 24 hours.
1. Turn the cap of the water filter counter-clockwise.
2. Take the water filter out.
3. Remove the protective cap of the new water filter
or the new bypass cartridge.
4. Take off the cap of the used water filter and put it
on the new water filter or bypass cartridge.
5. Slide the new water filter or bypass cartridge to
the stop in the filter opening.
Note: The cap must be vertical here.
6. Turn the water filter or bypass cartridge clockwise
to the mark.
Note: If you do not turn the water filter or bypass
cartridge far enough, damage will be caused by
escaping water.
7. When installing a water filter: reset water filter
counter.
When installing a bypass cartridge: switch off
water filter counter.
8. Discard ice cubes produced over the first
24 hours.
9. Drain the water out of the used water filter.
Note: You can dispose of the used water filter with
your household garbage.

Operating the appliance en-us
17
Switching key press sound on or off
You can switch the sounds generated when pressing
keys off and back on again.
1. Press button to open the menu."Settings
2. Use ( button to move to the menu item Appliance
settings.
3. Press button to open the menu item.8
4. Press button to move to the menu item )Key
press sound.
5. Press button to open the menu item.:
6. Use buttons to select the required setting.( )
7. Press 8 button.
The setting is saved.
8. Press button to exit the menu.;
Setting the key volume
You can adjust the volume level of the sounds
generated when pressing keys.
1. Press button to open the menu."Settings
2. Use ( button to move to the menu item Appliance
settings.
3. Press button to open the menu item.8
4. Use button to move to the menu item )Key
volume.
5. Press button to open the menu item.:
6. Use buttons to select the required setting.( )
7. Press 8 button.
The setting is saved.
8. Press button to exit the menu.;
Setting the signal tone volume
You can adjust the volume level of the signal tones
generated e.g. with alarms.
1. Press button to open the menu."Settings
2. Use ( button to move to the menu item Appliance
settings.
3. Press button to open the menu item.8
4. Use button to move to the menu item )Signal
tone volume.
5. Press button to open the menu item.:
6. Use buttons to select the required setting.( )
7. Press 8 button.
The setting is saved.
8. Press button to exit the menu.;
Automatic clean lock
You can use this function to select whether the
automatic clean lock is switched on automatically
when the door is opened.
1. Press button to open the menu."Settings
2. Use ( button to move to the menu item Appliance
settings.
3. Press 8 button.
4. Press button to move to the menu )
item .Automatic clean lock
5. To change the setting, press : button.
Automatic door opening
The automatic door opening function supports you in
opening the door.
As soon as you activate this function, automatic door
opening moves out and supports you in opening the
door.
9CAUTION
Repeatedly closing the door too early will cause
automatic door opening to fail or wear out.
Do not close the door as long as automatic
door opening is still moved out.
If you have nevertheless closed the door, leave
it closed for 5 minutes. Automatic door opening
will re-adjust itself.
Open menu item Auto door opening:
1. Press button to open the main menu."
2. Use button to move to the (Appliance settings
menu.
3. Press button to open the menu.8
4. Press ) button to move the menu item Auto door
opening.
5. To change the setting, press : button.
Switching on Push-to-open system
In an installation situation without handles you can
select the Push-to-open system. Your appliance will
then open a crack if you press lightly on the door.
Note: Please note that automatic door opening is
disabled if Sabbath mode is activated.
1. Open menu item .Auto door opening
2. Select menu item Push-to-open system.
3. Press button to open the menu item.8
4. Select Opening force.Here you can select the
level of force required to activate automatic door
opening.
5. Select Opening duration.Here you can select
how long the door should remain open a crack
before it closes again automatically.
Note: If the door only remains open a crack, the
appliance checks once a second whether the door
is still ajar.After the selected opening duration
elapses, the appliance will close the door
automatically.
Switching on Pull-to-open system
In an installation situation with handles you can
select the Pull-to-open system. Your appliance will
support you in opening the door as soon as you pull
on the handle.
1. Open menu item .Auto door opening
2. Select menu item Pull-to-open system.
3. Press button to open the menu item.8
4. Select Opening force.Here you can select the
level of force required to activate automatic door
opening.
Switching off automatic door opening
1. Open menu item .Auto door opening
2. Select menu item Off.

Alarm en-us
19
MAlarm
Al ar m
Door alarm
If the appliance door is open for a long time, the
door alarm switches on. A message appears on the
control panel.
Switching off the door alarm
■Close the door.
Note: To mute the door alarm, you only have to
acknowledge the message on the control panel. If
the door remains opens a few more minutes, the
message will appear again.
Temperature alarm
If the freezer compartment becomes too warm, the
temperature alarm is switched on. A message
appears on the control panel. The message shows
the warmest temperature reached in the freezer
compartment.
9CAUTION
DURING THE THAWING PROCESS, BACTERIA
MAY DEVELOP AND SPOIL THE FROZEN
ITEMS.
Do not refreeze partly or completely thawed
food.
Refreeze food only after cooking. No longer
store the frozen items for the maximum storage
period.
Note: The alarm may be actuated without risk to the
food in the following cases:
■The appliance is put into service and does not yet
contain any food.
■Large quantities of fresh food are placed in the
appliance.
■The freezer compartment door has been open
too long.
Switching off the temperature alarm
1. Check that the cause of the temperature alarm
has been eliminated.
2. Press button to acknowledge the message.8
The message disappears. The control panel
again indicates the temperature selected.
From this time on the warmest temperature is
recalculated and saved.

Defrosting en-us
23
■Garbage bags and used grocery bags
Shelf life of frozen food at 0 °F (-18 °C)
Thawing frozen food
The thawing method must be adjusted to the food
and application in order to retain the best possible
product quality.
Thawing methods:
■In the refrigerator compartment (especially
suitable for animal-based foods such as fish,
meat, cheese)
■At room temperature (bread)
■In the microwave (food for immediate
consumption or immediate preparation)
■In the oven/cooker (food for immediate
consumption or immediate preparation)
9CAUTION
Do not refreeze partly or completely thawed
food.You can only refreeze food once it has
been cooked (boiled or fried).
The frozen food can no longer be stored for the
maximum duration.
=Defrosting
De f r o st i n g
Freezer compartment
The fully automatic NoFrost system ensures that the
freezer compartment remains frost-free. Defrosting is
no longer required.
DCleaning
Cl e an i ng
9CAUTION
AVOID DAMAGING THE APPLIANCE AND THE
EQUIPMENT.
■Do not use abrasive, chloride-based or acidic
cleaning agents or solvents.
■Do not use scouring or abrasive sponges.
The metallic surfaces may corrode.
■Never clean the shelves or bins in the
dishwasher.
The parts may become deformed.
Cleaning the display
The change in temperature and humidity can cause
the controls to steam up.
Switch the clean lock on before cleaning.
~ "Clean lock" on page 16
Use a clean micro-fiber cloth for cleaning.
Cleaning the appliance interior
Proceed as follows:
1. Press the .main On/Off switch
2. Take out food and store in a cool location.
Place ice pack (if available) on the food.
3. Clean the appliance with a soft cloth, lukewarm
water and a little pH-neutral washing-up liquid.
9CAUTION
The rinsing water must not run into the light
or through the drainage hole into the
evaporation area.
4. Wipe door seal with clear water and dry
thoroughly with a cloth.
5. Switch appliance back on and put in food.
Cleaning the equipment
To clean, take the removable parts out of the
appliance.
~ "Equipment" on page 12
Care instructions for stainless steel
surfaces
When taking care of and cleaning stainless steel
surfaces, use only cleaning agents suitable for
stainless steel and a stainless steel cleaning cloth.
You can purchase a suitable stainless steel cleaning
cloth from customer service.
To prevent visible scratches, clean the stainless
steel surface in the direction of the structure.
Fish, sausage, ready meals, and cakes
and pastries:
up to 6 months
Meat, poultry: up to 8 months
Vegetables, fruit: up to 12 months

en-us Noises
24
>Noises
Noi se s
Normal noises
Droning: A motor is running, e.g. refrigerating unit,
ventilator.
Bubbling, buzzing or gurgling: Refrigerant is
flowing through the tubes.
Clicking: Motor, switches or solenoid valves are
switching on or off.
Cracking: Automatic defrosting is running.
Preventing noises
Appliance is not level: Align appliance using a
water level. If required, place a little packing
underneath.
Bins, shelves or storage compartments wobble or
stick: Check the removable equipment and re-insert
if required.
9Lighting
Li g ht i n g
Your appliance features a maintenance-free LED
light.
Only customer service or authorized technicians may
repair the light.

Faults – what to do? en-us
25
3 Faults – what to do?
Fau l t s – wha t t o do ?
Before you call customer service, use this table to check whether you can rectify the fault yourself.
Appliance
--------
Temperature differs greatly from the set value.
Switch off appliance for 5 minutes.
~ "Switching off and disconnecting the appliance" on page 15
If the temperature is too warm, check temperature again after a cou-
ple of hours.
If the temperature is too cold, check temperature again on the follow-
ing day.
Displays do not light up.
The power plug has not been inserted properly. Connect the power plug.
The fuse has tripped. Check the fuses.
The power has failed. Check whether the power is on.
The refrigeration unit is switching on more frequently and for longer.
The appliance was opened frequently. Do not open the appliance unnecessarily.
The ventilation openings are covered up. Remove obstacles.
Large quantities of fresh food have been put in. Switch on super cooling promptly in advance.
Appliance is not cooling, display and lighting are lit.
Demo mode is switched on. Switch demo mode off.
~ "Switching demo mode on or off" on page 18
The door does not open when pressed.
A special mode has switched off automatic door opening. To open the door, reach from below underneath the bottom panel of
the unit or switch off special mode.
~ "Switching Sabbath mode on or off" on page 18
Pull-to-open is switched on. Switch the appliance to Push-to-open.
~ "Automatic door opening" on page 17
The opening force is set too high. Select a lower setting for the opening force.
~ "Automatic door opening" on page 17
The fuse has tripped. Check the fuses.
The power has failed. Check whether the power is on.

9Consignes de sécurité importantes
VEUILLEZ LIRE ET CONSERVER CES CONSIGNES!
Consignes de sécurité importantes fr-ca
31
Risque d’électrocution
Toute installation ou réparation incorrecte
peut engendrer des risques considérables
pour l’utilisateur.
■Veillez à ne pas coincer ou endommager
le câble d'alimentation en posant
l'appareil.
■Dans une optique préventive,
débranchez l'appareil dès que le câble
d'alimentation est endommagé. Faites
remplacer le câble secteur par le
fabricant, le service à la clientèle ou une
personne présentant une qualification
équivalente.
■N'utilisez pas de rallonge, de bloc
multiprise ou d'adaptateur.
■Débranchez la fiche de contact ou
ramenez le disjoncteur en position
éteinte avant d'effectuer l'entretien ou les
opérations de montage autorisées sur
l'appareil.
Avant de nettoyer l'appareil, actionnez
l'interrupteur principal Marche / Arrêt
pour éteindre l'appareil.
Les clayettes en verre et autres
équipements peuvent être déplacés sans
danger pendant que l'appareil est en
marche.
■Ne retirez ni sectionnez jamais le
troisième conducteur (conducteur de
mise à la terre) du cordon d'alimentation.
■Ne décongelez et ne nettoyez jamais
l’appareil avec un nettoyeur à vapeur. La
vapeur risque d’atteindre des pièces
électriques et de provoquer un court-
circuit.
■Ne confiez la réparation ou le
remplacement de l'appareil, du cordon et
des accessoires qu'au fabricant ou à un
technicien autorisé.
■N’utilisez que des pièces de rechange
d'origine venant du fabricant.
Le fabricant garantit que ces pièces
d'origine remplissent les exigences de
sécurité.
Risque d'engelures provoquées par le
froid
■Ne portez jamais des produits surgelés à
la bouche immédiatement après les avoir
sortis du compartiment congélateur.
■Évitez tout contact prolongé de la peau
avec le produit congelé, la glace et les
tubulures présents dans le compartiment
congélateur.
Risque de blessure
■Les récipients contenant des boissons
gazeuses risquent d'éclater.
■Ne rangez jamais de boissons gazeuses
dans le compartiment congélateur.
Risque d’incendie/risques dus au
fluide frigorigène
Dans les tubulures du circuit frigorifique
circule une petite quantité de R600a, un
fluide frigorigène écologique mais
combustible. Il n'abîme pas la couche
d'ozone et n'accroît pas l'effet de serre.
Le fluide frigorigène risque en fuyant de
blesser les yeux ou de s'enflammer.
■Ne pas endommager les tubulures.
Si les tubulures ont été endommagées :
■Eloignez l’appareil de toute flamme nue
ou source d’inflammation.
■Aérez la pièce.
■Éteignez l’appareil puis débranchez la
fiche de contact de la prise de courant.
■Appelez le service à la clientèle.
Risque d’incendie
Les blocs multiprises ou blocs
secteur portables peuvent surchauffer et
provoquer un incendie.
■N’utilisez pas de blocs multiprises ni de
blocs secteur portables derrière
l’appareil.

Bruits fr-ca
53
>Bruits
Br u i t s
Bruits normaux
Bourdonnement : Un moteur tourne, par exemple le
groupe frigorifique, un ventilateur.
Gargouillis, ronflement ou clapotis : Le fluide
frigorigène circule dans les tuyaux.
Cliquetis : Le moteur, les interrupteurs ou les
électrovannes s’allument / s’éteignent.
Craquement : Le dégivrage automatique est en
cours.
Prévenir les bruits
L’appareil ne repose pas d’aplomb : Ajustez
l’appareil à l’aide d’un niveau à bulle. Si nécessaire,
insérez quelque chose sous l'appareil.
Des récipients, clayettes ou rangements vacillent
ou se coincent : Vérifiez les pièces d'équipement
amovibles et replacez-les au besoin.
9Éclairage
Écl ai r age
Votre appareil est équipé d’un éclairage par LED ne
demandant pas d’entretien.
Seul le service à la clientèle ou des spécialistes
agréés sont autorisés à réparer l'éclairage.

fr-ca Que faire en cas de problème.
54
3Que faire en de problème.
Que f ai r e en c a s de p r o bl ème .
Avant d’appeler le service à la clientèle, veuillez vérifier si le tableau ci-dessous ne contient pas déjà la solution
qu'il vous faut.
Appareil
--------
La température réelle diffère fortement de la température réglée.
Éteindre l'appareil pendant 5 minutes.
~ "Arrêter et remiser l’appareil" à la page 42
Si la température est trop élevée, vérifiez-la à nouveau au bout de
quelques heures.
Si la température est trop basse, vérifiez-la à nouveau le jour suivant.
Aucun voyant ne s’allume.
Fiche mâle incorrectement branchée dans la prise de courant. Rebranchez la fiche de contact.
Fusible déclenché. Inspecter les fusibles.
Le courant est en panne. Vérifier la présence de courant.
Le groupe frigorifique s’enclenche de plus en plus souvent et longtemps.
L'appareil a été ouvert fréquemment. N’ouvrez pas l’appareil inutilement.
Les orifices de ventilation sont bouchés. Enlevez les obstacles.
L'appareil est rempli de grandes quantités de produits alimentaires
frais.
Activez la super-réfrigération suffisamment à l'avance.
L’appareil ne réfrigère pas, l’affichage et l’éclairage sont allumés.
Le mode démonstration est activé. Éteignez le mode Vacances.
~ "Activer ou désactiver le mode démo" à la page 45
La porte ne s'ouvre pas en appuyant dessus.
Un mode spécial a désactivé l'ouverture automatique de la porte. Ouvrez la porte en la saisissant par le bas, sous la plaque d'ameuble-
ment, ou désactivez le mode spécial.
~ "Activer ou désactiver le mode sabbat" à la page 46
Le mode Pull-to-open est activé. Réglez l'appareil en mode Push-to-open.
~ "Ouverture de porte automatique" à la page 44
La force nécessaire au déclenchement est trop élevée. Abaissez la force nécessaire au déclenchement.
~ "Ouverture de porte automatique" à la page 44
Fusible déclenché. Inspectez les fusibles.
Le courant est en panne. Vérifier la présence de courant.

9Indicaciones de seguridad importantes
¡LEER Y CONSERVAR ESTAS INDICACIONES!
Indicaciones de seguridad importantes es-mx
61
Peligro de asfixia
■En caso de disponer la unidad de una
cerradura, guardar la llave fuera del
alcance de los niños.
■No dejar el embalaje o sus partes a los
niños.
Daños materiales
Para evitar daños materiales:
■No pise, ni se apoye sobre el zócalo,
cajones o puertas.
■Mantenga las piezas de plástico y juntas
de goma limpias de aceites y grasas.
■Tirar del enchufe - no del cable de
conexión.
Peso
El aparato es muy pesado. Realizar la
instalación y el transporte del aparato
siempre con un mínimo de 2 personas.
~ "Instalar el aparato" en la página 62
Advertencias en virtud de la Proposición
65 del estado de California
Este producto puede contener un químico
que el Estado de California reconoce como
potencialmente cancerígeno o causante de
daños reproductivos. Por tanto, su producto
debe llevar en su embalaje la siguiente
etiqueta de conformidad con la legislación
de California:
Produkt Specifikationer
Mærke: | Thermador |
Kategori: | Fryser |
Model: | T24IF905SP |
Har du brug for hjælp?
Hvis du har brug for hjælp til Thermador T24IF905SP stil et spørgsmål nedenfor, og andre brugere vil svare dig
Fryser Thermador Manualer
21 August 2024

21 August 2024

21 August 2024

20 August 2024

20 August 2024

20 August 2024

20 August 2024

19 August 2024

19 August 2024

19 August 2024
Fryser Manualer
- Fryser Presto
- Fryser ECG
- Fryser Danby
- Fryser Corbero
- Fryser Zanker
- Fryser Avanti
- Fryser Brandt
- Fryser Sauber
- Fryser Acec
- Fryser Aconatic
- Fryser Frigor
- Fryser CRUX
- Fryser Bartscher
- Fryser SIBIR
- Fryser Domo
Nyeste Fryser Manualer

11 Juni 2025

11 Juni 2025

11 Juni 2025

11 Juni 2025

11 Juni 2025

11 Juni 2025

11 Juni 2025

11 Juni 2025

11 Juni 2025

11 Juni 2025