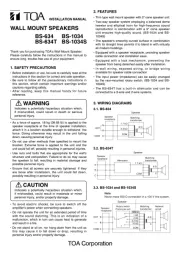
TOA BS-680U Manual

TOA Højttaler BS-680U

Læs gratis den danske manual til TOA BS-680U (4 sider) i kategorien Højttaler. Denne vejledning er vurderet som hjælpsom af 3 personer og har en gennemsnitlig bedømmelse på 4.8 stjerner ud af 2 anmeldelser. Har du et spørgsmål om TOA BS-680U, eller vil du spørge andre brugere om produktet?

Side 1/4
INSTALLATION MANUAL
WALL MOUNT SPEAKER 6W (UL) BS-680U
Thank you for purchasing TOA’s Wall Mount Speaker 6W (UL).
Please carefully follow the instructions in this manual to ensure long, trouble-free use of your equipment.
1. SAFETY PRECAUTIONS
• Beforeinstallationoruse,besuretocarefullyread
all the instructions in this section for correct and
safe operation.
• Besuretofollowalltheprecautionaryinstructions
in this section, which contain important warnings
and/orcautionsregardingsafety.
• After reading, keep this manual handy for future
reference.
Safety Symbol and Message Conventions
Safety symbols and messages described below
areusedinthismanualtopreventbodilyinjuryand
propertydamagewhichcouldresultfrommishandling.
Beforeoperatingyourproduct,readthismanualrst
and understand the safety symbols and messages
so you are thoroughly aware of the potential safety
hazards.
Indicatesapotentiallyhazardoussituationwhich,
if mishandled, could result in death or serious
personalinjury.
WARNING
Indicatesapotentiallyhazardoussituationwhich,
ifmishandled,couldresultinmoderateorminor
personalinjury,and/orpropertydamage.
CAUTION
WARNING
When Installing the Unit
• Installtheunitonlyinalocationthatcanstructurally
support the weight of the unit and the mounting
bracket. Doing otherwise may result in the unit
falling down and causing personal injury and/or
propertydamage.
• Donotuseothermethodsthanspeciedtomount
thebracket.Extremeforceisappliedtotheunitand
theunitcouldfalloff,possiblyresultinginpersonal
injuries.
• Tightenallscrewssecurely.Ifanyislooselyxed,
thismaycausethespeakercabinetorbafetofall,
resultinginpersonalinjury.
CAUTION
When Installing the Unit
• Toavoidelectricshocks,besuretoswitchoffthe
amplier'spowerwhenconnectingspeakers.
• Avoid touching the unit’s sharp metal edge to
preventinjury.
When the Unit is in Use
• Donotoperatetheunitfor anextendedperiodof
timewiththesounddistorting.Thisisanindication
of a malfunction, which in turn can cause heat to
generateandresultinare.
• Donotstandorsiton,norhangdownfromtheunit
asthismaycauseittofalldownordrop,resultingin
personalinjuryand/orpropertydamage.
2. FEATURES
• Constructedwithmetalcabinet,thespeakerisideal
foruseinavoicealarmsystem.
• Canbesurface-orush-mountedtothewall.
• Either concealed in-wall wiring or exposed wiring
canbeusedforspeakercableconnection.
• Thespeakerstructureofdirectwall-mountingwith
screws prevents the speaker from falling easily
evenifanoutwardforceisappliedto.
• The input impedance can be easily changed by
changing the tap position of the transformer.
• The built-in 16 cm (6") double cone speaker unit
delivershighqualitysound.
• The push-in type input connector makes cable
connectionseasyandallowsbridgewiring.
• The BS-680U is certied to UL 1480 UUMW and
ULC-S541standards,andforindooruseonly.
For Indoor Use Only
3. INSTALLATION
Notethatthemountingholesexcepthangingholesinthecabinetarecoveredwithtapewhenshippedfromthe
factory.Neverremovethetapeonyourownbeforeinstallation.
Note: Localcodesmayrequireotherinstallationmethods.Checkwithauthorityhavingjurisdictiontodetermine
acceptabilityofthemountingmethodsshownhere.
Step 1. Loosenoneeachofthescrewsonbothsides
ofthespeaker,thenremovethebafe.
You can remove the bafe by loosening the
screw without taking it out.
Step 2. Install the cabinet on the wall.
Thecabinethasknockoutholes(ø20.5mmorø0.81")forcablerouting.
Removethedesiredknockoutholedependingonthewiringmethod,androutecables.
2-1. (Recommended basic Way of Installation)
When installing the cabinet on the wall using
the hanging holes:
(1) Fix 2 supplied screws to the wall leaving
about5mm(0.2")stickingout.
(2)
Removethecabinet'sknockout,thenrunthe
cablesroutedfromthewallthroughthishole.
Inthecaseofexposedwiring,tthesupplied
rubber grommet into the knockout hole.
N
ote: Cut a hole in the grommet's thin
membrane to match the cable size.
(3) Hook the cabinet onto the stick-out screws,
then tighten the screws.
Tip: Owing to its shape, the hanging hole
will prevent the cabinet from falling
easily even if an outward force is
appliedto.
2-2. When installing the cabinet on the wall using
other holes than hanging holes:
(1) Removethe cabinet's knockout, then run the
cablesroutedfromthewallthroughthishole.
Inthecaseofexposedwiring,tthesupplied
rubber grommet into the knockout hole.
Note: Cut a hole in the grommet's thin
membrane to match the cable size.
(2) I
nstall the cabinet on the wall using the mounting
holes [a], [b] or [c] shown at right.
Notes
When the holes to use are covered with
tape, break through the tape with a ne-
tippedobjecttoexposetheholes.
Leavetheunusedholescoveredwithtape.
Inaddition,cover2hangingholeswiththe
supplied2piecesofspongetape.
•Since no mounting screws are supplied
with the speaker, separately prepare them
appropriatefortheconstructionofwalland
its thickness.
Loosen
Tighten
Baffle
Cabinet
Note: To remove, pull in the arrow
direction after
loosening screws.
Cabinet
83.5 mm (3.29")
About 5 mm (0.2")
Hanging hole
Wall
Tapping screw 4 x 16
(accessory)
Knockout hole (ø20.5mm or ø0.81")
Cabinet
Knockout hole: ø20.5 (0.81)
36 (1.42)
36
(1.42)
60 (2.36)
60 (2.36)
115 (4.53)
4-3.5 x 6.5 (0.14 x 0.26) [a]
2-5.5 x 10
(0.22 x 0.39) [c]
4-ø4.5 (0.18) [b]
Unit: mm (in)
(View at factory-preset) (View with tape removed)
Holes are covered with tape.


Produkt Specifikationer

Mærke: TOA
Kategori: Højttaler
Model: BS-680U

Har du brug for hjælp?

Hvis du har brug for hjælp til TOA BS-680U stil et spørgsmål nedenfor, og andre brugere vil svare dig


Højttaler TOA Manualer
TOA

TOA BS-680U Manual

7 Oktober 2025
TOA

TOA AT-025 AM Manual

7 Oktober 2025
TOA

TOA SR-S4LWP Manual

7 Oktober 2025
TOA

TOA HY-CM20W Manual

7 Oktober 2025
TOA

TOA F-08WT-WP-UE Manual

7 Oktober 2025
TOA

TOA SR-F08 Manual

7 Oktober 2025
TOA

TOA BS-680FC Manual

7 Oktober 2025
TOA

TOA SR-F04 Manual

7 Oktober 2025
TOA

TOA HY-CM10W Manual

7 Oktober 2025
TOA

TOA HY-F08W Manual

7 Oktober 2025

Højttaler Manualer

Nyeste Højttaler Manualer