Toshiba Regza 32E200U Manual
Toshiba
televisión
Regza 32E200U
Læs gratis den danske manual til Toshiba Regza 32E200U (62 sider) i kategorien televisión. Denne vejledning er vurderet som hjælpsom af 31 personer og har en gennemsnitlig bedømmelse på 5.0 stjerner ud af 16 anmeldelser. Har du et spørgsmål om Toshiba Regza 32E200U, eller vil du spørge andre brugere om produktet?
Side 1/62

For an over of steps for ing up your new TV, p e 10.view sett see ag
Not To disp y a High Definition p ure, the TV muste: la ict be receiving
a H h Definition signal (such over-the- r gh Definition ig as an ai Hi
TV broadcas a Hi Definition digt, gh ital cable program, or a High
Definitio digital sat ite program). Fo dn ell r etails, p e contact leas
your TV antenna installer, cable provider, or t sa elli e t provider.
© 2010 TOSHIBA CORPORATION
All Rights Reserved
O er’wn s Record
The mo l de number and serial number are the back on
of your TV. cord th e numbers in the sp below. Re es aces
Refer th eto es numbers whenever you communicate
w h your Tos ba dealer about is TV. it hi th
Model number:
Serial number:
HDA51C3701I
Ow r’s alne Manu
Integrated High Definition
HIGH-DEFIN ON TEL SI ONIT I EVI
LCD Television
32E200U
32E20U
37E200U
37E20U
40E200U
40E20U

2
Dear Customer,
Thank you for purchasing this Toshiba LCD TV. This
manual will help you use the many exciting features
of your new LCD TV. Before operating your LCD TV,
please read this manual completely, and keep it
nearby for future reference.
Safety Precautions
WARNING: TO REDUCE THE RISK OF FIRE
OR ELECTRIC SHOCK, DO NOT EXPOSE THIS
APPLIANCE TO RAIN OR MOISTURE.
WARNING
RISK OF ELECTRIC
SHOCK DO NOT OPEN.
WARNING: TO REDUCE THE RISK OF ELECTRIC
SHOCK, DO NOT REMOVE COVER (OR BACK).
NO USER-SERVICEABLE PARTS INSIDE.
REFER SERVICING TO QUALIFIED SERVICE
PERSONNEL.
The lightning flash with arrowhead symbol, within an
equilateral triangle, is intended to alert the user to the
presence of uninsulated “dangerous voltage” within the
product’s enclosure that may be of sufficient magnitude
to constitute a risk of electric shock to persons.
The exclamation point within an equilateral triangle is
intended to alert the user to the presence of important
operating and maintenance (servicing) instructions in
the literature accompanying the appliance.
WARNING
To prevent injury, this apparatus must be securely
attached to the floor/wall in accordance with the
installation instructions. See item 25 on page 4.
WARNING:
If you decide to wall mount this
television, always use a UL Listed wall bracket
appropriate for the size and weight of this television.
The use of any wall bracket other than a UL Listed
wall bracket appropriate for the size and weight of this
television for wall mounting this television could result
in serious bodily injury and/or property damage. See
“Removing the Pedestal Stand” ( page 6).
NOTE TO CATV INSTALLERS
This is a reminder to call the CATV system installer’s
attention to Article 820-40 of the U.S. NEC, which
provides guidelines for proper grounding and, in
particular, specifies that the cable ground shall be
connected to the grounding system of the building,
as close to the point of cable entry as practical. For
additional antenna grounding information, see items
32 and 33 on page 4.
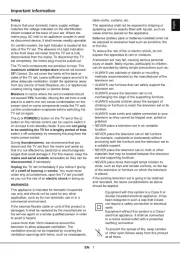
Congratulations on your purchase! As you enjoy your
new product, please keep these safety tips in mind:
The Issue
• The home theater entertainment experience is a growing trend
and larger flat panel displays are popular purchases. However,
flat panel displays are not always supported on the proper stands
or installed according to the manufacturer’s recommendations.
• Flat panel displays that are
inappropriately situated on dressers,
bookcases, shelves, desks,
speakers, chests or carts may fall
over and cause injury.
TOSHIBA Cares!
• The consumer electronics industry
is committed to making home
entertainment enjoyable and safe.
Tune Into Safety
•
One size does NOT fit all. Follow the manufacturer’s recommendations
for the safe installation and use of your flat panel display.
• Carefully read and understand all enclosed instructions for
proper use of this product.
• Don’t allow children to climb on or play with furniture and
television sets.
• Don’t place flat panel displays on
furniture that can easily be used as
steps, such as a chest of drawers.
• Remember that children can
become excited while watching a
program, especially on a “larger
than life” flat panel display. Care
should be taken to place or install
the display where it cannot be
pushed, pulled over, or knocked down.
• Care should be taken to route all cords and
cables connected to the flat panel display so that they cannot be
pulled or grabbed by curious children.
Wall Mounting: If you decide to wall mount your
flat panel display, always:
• Use a mount that has been recommended by the display
manufacturer and/or listed by an independent laboratory (such
as UL, CSA, ETL).
• Follow all instructions supplied by the display and wall mount
manufacturers.
• If you have any doubts about your ability to safely install your
flat panel display, contact your retailer about professional
installation.
• Make sure that the wall where you are mounting the display is
appropriate. Some wall mounts are not designed to be mounted
to walls with steel studs or old cinder block construction. If you
are unsure, contact a professional
installer.
• A minimum of two people are
required for installation. Flat panel
displays can be heavy.
CHILD SAFETY:
It Makes A Difference How and Where You Use Your Flat
Panel Display

20
Installing the remote control
batteries
1無
Remove the battery cover from the back of
the remote control.
Squeeze tab
and lift cover.
2無
Install two “AAA” size batteries, making
sure to match the + and – signs on the
batteries to the signs on the battery
compartment.
3無
Reinsert the battery cover in the remote
control until the tab snaps.
Caution: Batteries must not be exposed
to excessive heat such as sunshine, fire or
the like.
Note:
• Be sure to use AAA size batteries.
• Dispose of batteries in a designated disposal
area.
• Batteries should always be disposed of with
the environment in mind. Always dispose of
batteries in accordance with applicable laws
and regulations.
• If the remote control does not operate
correctly, or if the operating range becomes
reduced, replace batteries with new ones.
• When necessary to replace batteries in the
remote control, always replace both batteries
with new ones. Never mix battery types or use
new and used batteries in combination.
• Always remove batteries from the remote
control if they are dead or if the remote
control is not to be used for an extended
period of time. This will prevent battery acid
from leaking into the battery compartment.
Remote control effective range
For optimum performance, aim the remote control
directly at the TV and make sure there is no
obstruction between the remote control and the TV.
16.4 ft (5m)
Point remote control toward
remote sensor on front of TV.
Chapter 3: Using the remote control

Chapter 4: Menu layout and navigation
23
Setup/Installation menu layout
The Installation menu contains the Terrestrial and System Status menus.
To open the menu (illustrated below), press on the remote control or TV control panel, open the Installation
Setup Installation menu, select , and press .
Icon Item Option
Terrestrial Input Configuration [Opens the Input Configuration menu]
Channel Program [Start] [Scans for new channels on ANT/CABLE]
Channel Options [Opens the Skip / Lock Channel menu]
Channel Tuning Mode Standard / Auto / Digital
Time Zone
Eastern / Newfoundland / Atlantic / Hawaii / Alaska /
Pacific / Mountain / Central
Signal Meter [Opens the Signal Meter menu]
System Status
System Information [Opens the System Information screen]
Navigating the menu system
You can use the buttons on the remote control or TV
control panel to access and navigate your TV’s on-
screen menu system.
• Press to open the menu system.
• When a menu is open, use the up/down/left/right
arrow buttons ( ) on the remote control pqtu
or TV control panel to move in the corresponding
direction in the menu.
• Press to save your menu settings or select
a highlighted item. (A highlighted menu item
appears in a different color in the menu.)
• All menus close automatically if you do not make
a selection within 60 seconds, except the signal
meter menu, which closes automatically after
about 5 minutes.
• To close a menu instantly, press .
Note:
The menu background may sometimes appear
black, depending on the signal the TV is
receiving. This is not a sign of malfunction.

Chapter 6: Using the TV’s features
32
To tune to a channel or input in Select mode:
1無 While watching TV, press or to open the t u
Channel Browser™ and surf back to a previous item
or forward to the next item in the list.
In mode, when you stop on an item in the Select
Channel Browser™, it will be highlighted but you
must press to tune the TV to the highlighted
item.
2無 Press to tune the TV to the highlighted item.
3無 Press to close the Channel Browser™.
Adding and clearing channels and inputs
in the History List
Adding channels and inputs to the History
List:
As a channel or input is tuned, the Channel Browser™
adds it to the History List and displays it on the “right
side” of the Channel Browser™. Previously tuned
channels/inputs are “shifted” to the left, eventually
moving off the left side. Press t to surf backward
through the previously tuned channels/inputs. Any
channel or input that is tuned repeatedly will not be
repeated in the History List, but instead is moved to
the end of the list on the right side of the Channel
Browser™.
The Channel Browser™ will store the following
channels:
•All channels that are tuned using the numeric buttons
on the remote control.
•All channels that are tuned using or on the
remote control.
Note: Whenever an item is selected that cannot
be tuned (for various reasons), the TV will
automatically tune to the previously viewed
channel or input.
Clearing channels from the History List:
•Reconfiguring the input will clear the ANT/CABLE
History List.
Note: See page 24 for details on configuring
the antenna input.
•Once 32 channels or inputs are stored in the History
List, the oldest item will be removed from the list
when a new channel or input is tuned.
•Turning off the TV will clear the History List.
Setting the Channel Tuning Mode
This feature allows you to choose how tuning will be
handled for analog and digital channels when the TV
is in Antenna mode.
Note: To use this feature, the Input Configuration
must be set to Antenna ( page 24 ).
The channel tuning mode has three options.
Mode Description
Standard Both analog and digital channels can
be tuned normally
Auto
(default)
Digital channels will have priority when
manually entering a channel number
using the Channel Number (0-9) on the
remote control, analog channels can
still be tuned by
/
, if available
Digital Only digital channels can be tuned
Note: Digital mode will be most useful after
analog channels are shut down by the
government in 2009.
To set the Channel Tuning Mode:
1無 From the Setup menu, highlight Installation and
press . A new set of menu icons Installation
will appear.
2無 Open the Terrestrial Channel menu, highlight
Tuning Mode, and then press to select your u
desired mode.
Note:
•The Channel Options windows as well as
the Channel Browser ANT/CABLE list will be
updated automatically when you change the
mode. Also, the History List will be cleared, but
the Favorites List will be saved.
•Even if the Channel Tuning Mode is set to
Digital, analog channel 3 will still be the
default channel to prevent the initial case
where no digital channels have been found in
prior channel scans. (Channel Options will not
have anything listed until a scan is done.)

Chapter 6: Using the TV’s features
40
Using the Dolby
® Digital Dynamic
Range Control feature
This dynamic range control feature causes the ATSC
dynamic range to be further compressed, allowing
you to switch from ATSC to analog broadcasts at the
same dynamic range.
To use the Dolby Digital Dynamic Range
Control:
1無
Press and open the menu.Sound
2無
Highlight and press .Audio Setup
3無
In the field, Dolby Digital Dynamic Range Control
select . When is selected, Compressed Standard
the audio is output with minimal compression.
4無
To save the new settings, highlight and Done
press .
To revert to the factory defaults, highlight Reset
and press .
Note:
• This item will be grayed out for NTSC signals,
Video, ColorStream, and PC inputs.
• The Dolby Digital Dynamic Range Control will
function in relation to Optical Output Format
(PCM mode).
Using the Locks menu
The Locks menu includes the Enable Rating
Blocking, Edit Rating Limits, Input Lock, Front
(Control) Panel Lock, GameTimer, and New PIN
Code features. You can use these features after
entering the correct PIN code.
Entering the PIN code
1無
Press and highlight the menu icon.Locks
2無
Press , which displays the PIN code entry q
screen.
•The screen (below) appears if a Lock System
PIN code has not been stored. Press the Channel
Number buttons to enter a new four-digit code,
enter the code a second time to confirm, and
press .
•The screen appears if the PIN code Locks/Active
is already stored. Use the Number buttons to
enter your four-digit code and press .
If the wrong PIN code is entered, the message
“Incorrect PIN code, please try again!” appears.
Highlight and press . Enter the code again Retry
and press .
When the correct PIN code is entered, the Locks menu
opens.
Note:
PIN code cannot be set to “0000”.
If you cannot remember your PIN code
While the PIN code entering screen is displayed, press
four times within five seconds. The PIN code will
be cleared and you can enter a new PIN code.
Changing your PIN code
1無
Press and highlight the menu icon.Locks
2無
Press to display the PIN code entering screen.q
3無
Enter your four-digit PIN code and press .
4無
Press q to highlight New PIN Code and press .
5無
Press the Number buttons to enter a new four-
digit code. Reenter the PIN code to confirm it.
6無
Press . The new PIN code is now active.
Note:
PIN code cannot be set to “0000”.
Blocking TV programs and movies
by rating (V-Chip)
Some TV programs and movies include signals that
classify the content of the program (violence, sex,
dialog, language). The V-Chip feature in this TV
detects the signals and blocks the programs according
to the ratings you select. (For rating descriptions, see
the tables on the next page.)
(continued)
Produkt Specifikationer
Mærke: | Toshiba |
Kategori: | televisión |
Model: | Regza 32E200U |
Har du brug for hjælp?
Hvis du har brug for hjælp til Toshiba Regza 32E200U stil et spørgsmål nedenfor, og andre brugere vil svare dig
televisión Toshiba Manualer
2 Januar 2025
2 Januar 2025
2 Januar 2025
31 December 2025
31 December 2025
31 December 2025
31 December 2025
31 December 2025
31 December 2025
31 December 2025
televisión Manualer
- Fantec
- HKC
- Acer
- Bush
- Woxter
- Nedis
- ISymphony
- Premier
- Naxa
- BenQ
- Selfsat
- Salora
- Edenwood
- Blaupunkt
- Lenovo
Nyeste televisión Manualer
20 Februar 2025
19 Februar 2025
19 Februar 2025
10 Februar 2025
5 Februar 2025
30 Januar 2025
30 Januar 2025
15 Januar 2025
15 Januar 2025
15 Januar 2025