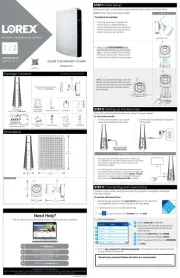
TP-Link VIGI C450 Manual


Læs gratis den danske manual til TP-Link VIGI C450 (2 sider) i kategorien Overvågningskamera. Denne vejledning er vurderet som hjælpsom af 69 personer og har en gennemsnitlig bedømmelse på 4.3 stjerner ud af 35 anmeldelser. Har du et spørgsmål om TP-Link VIGI C450, eller vil du spørge andre brugere om produktet?

Side 1/2
3. Secure the Camera
Route the cable through the side outlet. Insert anchors into the holes,
use screws to ax the camera base, and attach the camera to it.
Appearance
Camera Base
Speaker
7
IR LED
6
White LED
5
Built-in Microphone
1
2
Reset
3
Micro SD Card Slot
Insert a micro SD card for local
storage. Initialize the SD card via
VIGI app before recording videos.
Power Supply Interface
(12V DC) *
9
RJ45 Network Interface
(supports PoE) *
8
4
1
3
2
6
5
4
8
9
3. Secure the Camera
Route the cable through the wall/ceiling. Insert anchors into the holes,
use screws to ax the camera base, and attach the camera to it.
Stick the mounting template to the desired mounting place. Drill
3 screw holes and 1 cable hole according to the template.
1. Drill Holes
2. Open the Camera Case
Align the notch of the camera body with any score on the camera
base, and use a screwdriver to gently pry open the camera case.
Quick Start Guide
Option 1: Cable through the wall/ceiling
Stick the mounting template to the desired mounting place. Drill
3 screw holes according to the template.
1. Drill Holes
2. Open the Camera Case
Align the notch of the camera body with any score on the camera
base, and use a screwdriver to gently pry open the camera case.
Option 2: Cable through the side outlet
1Wall/Ceiling Mounting
4. Adjust the Surveillance Angle
Adjust the surveillance angle as needed. Make sure the lens is
positioned above the IR LED for normal viewing.
4. Adjust the Surveillance Angle
Adjust the surveillance angle as needed. Make sure the lens is
positioned above the IR LED for normal viewing.
Cable Hole
(For the cable through wall/ceiling)
Score of
camera base
Notch of
camera body
Score of
camera base
Notch of
camera body
Side Outlet
*Images may dier from actual products.
Tilt: 0° to 85°
Pan: 0° to 360°
Rotate: 0° to 360°
Mounting TemplateAnchors & ScrewsNetwork Camera Quick Start Guide
Quick
Start
Guide
Press for 5 seconds to reset the
camera to factory settings.
7
*
The camera’s standard power supply is 12V DC or PoE (802.3af/at). The power
source should comply with Power Source Class 2 ( PS2) or Limited Power
Source(LPS) of IEC 62368-1
.
Tilt: 0° to 85°
Pan: 0° to 360°
Rotate: 0° to 360°
More Management Methods
1. Download the on your VIGI Security Manager
computer at
https://www.tp-link.com/support/download/vigi-s
ecurity-manager/.
2. Install the and open it. VIGI Security Manager
3. Cameras on the same network as your computer
can be automatically discovered. Go to Settings >
Discovered Devices + Add, click to activate your
discovered cameras by setting passwords, and
follow the instructions to add your cameras.
Method 1: Via the VIGI Security Manager
(Windows only)
You can also access and manage your cameras via any of the methods below.
View live video and modify camera settings on
your computer.
Method 3: Via a Web Browser
View live video and modify camera settings via a
web browser.
1. Find the camera's IP address on your router’s client
page.
2. On your local computer, open a web browser and enter
https://camera's IP address (https://192.168.0.60 by
default).
3. Select your Country/Region and Time Zone.
4. Set a password to activate the camera.
Done. You can view the live video on the Preview page, and
go to the Settings page to change camera settings.
Method 2: Via the TP-Link VIGI App
Remotely view live video, manage cameras, and
get instant alerts.
1. Download and install the app.TP-Link VIGI
2. Open the app and log in with your TP-Link VIGI
TP-Link ID. If you don’t have an account, sign up rst.
3. Tap the + button on the top right and follow the app
instructions to activate and add your cameras.
or
2Use Your Camera with an NVR
VIGI NVR
Monitor
Network Device
(e.g., Switch or Router)
Network Camera
Network Camera
The camera works with an NVR for easier batch access and management.
*Here we use a VIGI NVR as an example.
Frequently Asked Questions (FAQ)
Q1: What can I do if no cameras are discovered?
• Refresh to discover your camera again.
• Make sure the camera is powered on.
• Make sure your camera and NVR/computer are in the same subnet. If
not, use the VIGI Security Manager to set camera’s network
parameters.
• Try to add your camera manually.
• For other NVR brands, make sure you have activated the camera by
setting a password via the or app. VIGI Security Manager TP-Link VIGI
Q2: How do I know the camera is powered on?
• The IR LED will turn on for 20 seconds once the camera is powered on. If
it’s o, you can cover the lens for several seconds and check if the IR LED
turns on.
• Check the Ethernet port LED status of the network device your camera is
connected to.
For more questions, please refer to
https://www.tp-link.com/support/faq/2850/
Step 2. Power On the Cameras
Power on your cameras with the PoE power supply or an
external power supply.
Note:
The camera’s standard power supply is 12V DC or PoE (802.3af/at). The
power source should comply with Power Source Class 2 ( PS2) or Limited
Power Source(LPS) of IEC 62368-1
.
Step 1. Connect the Hardware
Connect your cameras to the same network as your NVR
(as shown above).
Step 3. Add Cameras with the NVR
Before you start, make sure your NVR is working properly.
1. Right click on the Live View screen, and click . Add Camera
2. Select your camera and click + to add your camera directly.
If you have disabled Plug and Play on your NVR, create a
password or use a preset password for your camera.
Note: If you can’t nd your camera, refer to FAQ-Q1.
Done! You can now view live video and manage cameras.
Using your cameras with other NVR brands:
Step 1: Power on your cameras and connect them to the network.
Step 2: Activate the cameras using the app (refer to the next section).VIGI Security Manager TP-Link VIGI or
Step 3: Refer to the NVR’s User Manual to add cameras.
• Do not use any other chargers than those recommended.
• Do not use damaged charger or USB cable to charge the device.
• Do not attempt to disassemble, repair, or modify the device. If you need service,
please contact us.
• Adapter shall be installed near the equipment and shall be easily accessible.
• Keep the device away from water, fire, humidity or hot environments.
TP-Link hereby declares that the device is in compliance with the essential requirements and other relevant provisions of
directives 2014/30/EU, 2014/35/EU, 2011/65/EU and (EU)2015/863.
The original EU Declaration of Conformity may be found at https://www.tp-link.com/en/support/ce/
For technical support, replacement services, user guides, and more information,
please visit https://www.tp-link.com/support, or simply scan the QR code.
TP-Link hereby declares that the device is in compliance with the essential requirements and other relevant
provisions of the Electromagnetic Compatibility Regulations 2016 and Electrical Equipment (Safety)
Regulations 2016.
The original UK Declaration of Conformity may be found at https://www.tp-link.com/support/ukca


Produkt Specifikationer

Mærke: TP-Link
Kategori: Overvågningskamera
Model: VIGI C450
Type: IP-sikkerhedskamera
Højde: 84 mm
Vægt: 240 g
Produktfarve: Black, White
Indbygget lys: Ja
Pakkevægt: 400 g
Kompatible hukommelseskort: MicroSD (TransFlash)
Wi-Fi: Ingen
Bluetooth: Ingen
Formfaktor: Kuppel
Understøttede videotilstande: 720p, 1080p, 2560p, 2880p
Opbevaringstemperatur (T-T): -40 - 60 °C
Relativ luftfugtighed ved drift (H-H): 0 - 95 %
Relativ luftfugtighed ved opbevaring (H-H): 0 - 95 %
Ethernet LAN-porte (RJ-45): 1
Ethernet LAN: Ja
Understøttede videoformater: H.264, H.264+, H.265, H.265+
Driftstemperatur (T-T): -30 - 60 °C
Maksimal opløsning: 2880 x 1620 pixel
Husmateriale: Plast
Pakketype: Kasse
Understøttede grafikopløsninger: 1280 x 720 (HD 720),1920 x 1080 (HD 1080),2048 x 1280,2304 x 1296,2688 x 1520,2880 x 1620
Forbindelsesteknologi: Ledningsført
Certificering: CE, NTRA, VCCI, KC, BSMI, FCC, IC
Strømforbrug (maks.): 9 W
DC-in-stik: Ja
Understøttede netværksprotokoller: TCP/IP, UDP, ICMP, HTTP, HTTPS, DHCP, DNS, RTSP, NTP, UPnP UDP, SSL/TLS
Knap til nulstilling: Ja
Strømkilde type: DC
Monteringstype: Loft
Diameter: 123 mm
Indbygget HDD: Ingen
Videooptagelse: Ja
Understøttet placering: Indendørs
Indbygget mikrofon: Ja
Sensortype: CMOS
Samlet antal megapixels: 5 MP
Støjreduktion: Ja
Maksimal størrelse på hukommelseskort: 256 GB
Hældningsvinkelområde: 0 - 85 °
Progressiv scanning: Ja
Voice codecs: G.711
Dag/nat funktion: Ja
Infrarød (IR) cut-off filter: Ja
Minimumsbelysning: 0.005 Lux
Panoreringsområde: 0 - 360 °
Antal sensorer: 1
Optisk sensorstørrelse: 1/2.7 "
Maksimale blænderåbning tal: 1.6
Fast brændvidde: 2.8 mm
Nattesyn: Ja
Billedhastighed: 30 fps
Ethernet-grænsefladetype: Hurtigt ethernet
Antal kameraer: 1
Synsfelt vinkel (FOV): 128 °
Infrarød bølgelængde: 850 nm
Kameraets lukkerhastighed: 1/3 - 1/10000 sek./side
Signal/støjforhold: 52 dB
Videostreaming: Ja
Antal linser: 1
Nattesyn, afstand: 30 m
Dynamisk interval: 120 dB
Bit-rate: 256 Kbps - 6 Mbps
Prøvetagningshastighed: 8 kHz
Region of Interest (ROI) kodning: Ja
Kompensation for baggrundslys: Ja
Registringsafstand: 64 m
Objektivets synsvinkel, diagonal: 128 °
Objektivets synsvinkel, vandret: 109 °
Objektivets synsvinkel, lodret: 57 °
Highlight Compensation (HLC): Ja
Smart IR: Ja
Bitrate kontrol: Variabel bithastighed (VBR)
Observeringsafstand: 27 m
Genkendt afstand: 13 m
Identifikationsfstand: 6 m
Digital Wide Dynamic Range (DWDR) (panoramakamera): Ja
Antal områder med Privacy-maskering: 4

Har du brug for hjælp?

Hvis du har brug for hjælp til TP-Link VIGI C450 stil et spørgsmål nedenfor, og andre brugere vil svare dig


Overvågningskamera TP-Link Manualer

Overvågningskamera Manualer

Nyeste Overvågningskamera Manualer