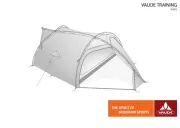
TENT PITCHING INSTRUCTIONS   XENON   (UK)  –2 
Flysheet First Pitching 
1. Assemble poles and lay them on the ground. 
2. Open  flysheet  on  ground  and  position  in  desired  direction.  Check  internal  TBS  cords  are  un-
tensioned and  flysheet door is closed. 
3. Locate pole sleeves on the flysheet and insert poles. The poles are colour coded to the pole sleeves. 
4. On one side, locate the end of each pole into the corresponding eyelets on pole anchor straps. 
5. On opposite side, push poles into an arch and locate pole ends into the corresponding eyelets on 
pole anchor straps. 
6. Tighten the flysheet by adjusting the tension straps at the base of the poles. 
7. Peg out adjustable anchor straps at the rear of the tent using pegs supplied. 
8. Pull  the  tent  forwards, away from  pegging  points, until tent  takes  shape,.  Peg  the  two  anchor 
straps at the front of the tent. 
9. Peg down pole anchor straps and remaining flysheet pegging points 
10. Peg out ALL guy lines. 
Inner Attachme  nt
1. Open out inner tent inside flysheet and position doorways to correspond with the living area 
2. Starting from  the rear  corners  of the  tent, attach the  elasticated hooks on  the groundsheet  to 
corresponding rings on the flysheet 
3. Suspend the inner by attaching elastic of inner tent to the clips on the inside of the flysheet 
Tension Band System 
1. Insert tension bands through corresponding access points in the inner tent (ceiling and sidewall). 
Connect the straps into the side-release buckles. 
2. Adjust the tension of the TBS straps until the slack is taken out 
3. DO NOT OVERTENSION. Excess tension will alter the shape of the tent 
4. Tension band pockets are provided for storage when not in use. 
………………………………………………………………… ……………………………………………………………………………………