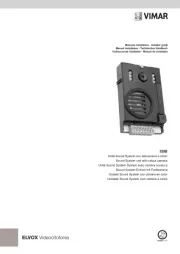
Vimar ELVOX 46212.036B.01 Manual

Vimar Kamera ELVOX 46212.036B.01

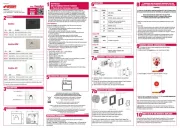
Læs gratis den danske manual til Vimar ELVOX 46212.036B.01 (5 sider) i kategorien Kamera. Denne vejledning er vurderet som hjælpsom af 62 personer og har en gennemsnitlig bedømmelse på 4.6 stjerner ud af 31.5 anmeldelser. Har du et spørgsmål om Vimar ELVOX 46212.036B.01, eller vil du spørge andre brugere om produktet?

Side 1/5
Viale Vicenza, 14
36063 Marostica VI - Italy
www.vimar.com
49401359A0 00 1902
46212.036B.01
Telecamera Bullet IP a colori Day & Night, sensore CMOS 1/2,7", risoluzione
2 Mpx (1920x1080), obiettivo fuoco fisso 3,6 mm, filtro IR meccanico, H.265 e
H.264 Multistream, alimentazione PoE o 12 Vdc, IR 20-30 m, funzioni WDR, ROI,
3DNR, HLC, BLC, Mask, Motion,Smart IR, RTSP, protocollo ONVIF, grado di pro-
tezione IP66. Dimensioni: Ø 87x219 mm. Peso 630 g.
Contenuto della confezione
Una volta ricevuto il dispositivo, controllare gli accessori indicati di seguito. Le illu-
strazioni sotto riportate hanno solo funzione di riferimento. Far riferimento all'appa-
recchiatura in dotazione.
Introduzione
Questa telecamera IP (abbreviato in IP-CAM) è stata progettata per fornire soluzioni
TVCC ad elevate prestazioni. Adotta chip di elaborazione video allo stato dell'arte.
Utilizza le tecnologie più avanzate, di codica e decodica video ed è conforme al
protocollo TCP/IP, SoC.(System on chip) ecc. per assicurare la stabilie l'a󰀩dabilità
del sistema. I manuali completi e i software CVM.exe, Iptool.exe e Diskcalculator.exe
sono disponibili nella scheda prodotto consultabile nel sito www.vimar.com.
Connessioni
Di seguito sono riportate le principali connessioni della telecamera.
ENIT
1 Cavo di rete / Network Cable
2 Cavo alimentazione / Power Cable
Installazione
Prima di iniziare, assicurarsi che la parete o il so󰀩tto siano su󰀩cientemente solidi
per sopportare tre volte il peso della telecamera. Installare e utilizzare la telecamera
in ambiente asciutto. Si consiglia di riposizionare il copriobiettivo entro 4 ore dalla
sua rimozione. La procedura di montaggio è la seguente:
1) Praticare i fori per le viti e per il cavo sulla parete utilizzando la dima di foratura.
2) Passare i cavi e collegare il cavo di alimentazione e il cavo di rete.
3) Fissare la base di montaggio della telecamera alla parete con le viti, come
descritto di seguito.
4) Regolazione della sta󰀨a. Prima della regolazione, visualizzare l’immagine della
telecamera su un monitor e quindi allentare la ghiera di ssaggio per regolare
l’angolo di visuale della telecamera.
3 4
Installation
Before start, please make sure that the wall or ceiling is strong enough to withstand
3 times the weight of the camera. Please install and use the camera in the dry en-
vironment. You’d better install back the lens cover less than 4 hours after removing
it. The mounting steps are as follows:
1) Drill the screw holes and the cable hole on the wall according to the drill template.
2) Route the cables and connect the power cable and video cable.
3) Secure the mounting base with camera to the wall with screws as shown below.
4) Bracket adjustment. Before adjustment, preview the image of the camera on a
monitor and then loosen the xed ring to adjust the view angle of the camera.
5) Rimuovere delicatamente la pellicola di protezione per completare l'installazione. 5) Remove the protective lm to complete the installation procedure.
1 - 2
Telecamera
Camera
Istruzioni per l’uso
Quick and start guide
Viti
Screws & spiles
Cappuccio impermeabile
Water-proof Cap
Gommino
Rubber plug
Dima di foraturaa
Drill template
4.6
25.1
82.0
72.2
120°
120°
62.5mm
18.1mm
36.1mm
Gommino
Rubber plug
Brandeggio
Pan
Inclinazione
Tilt
Introduction
This IP-camera (short for IP-CAM) is designed for high performance CCTV solutions.
It adopts state of the art video processing chips. It utilizes most advanced technolo-
gies, such as video encoding and decoding technology, complies with the TCP/IP
protocol, SoC (System on chip), etc to ensure this system more stable and reliable.
Complete manuals and CVM.exe, Iptool.exe e Diskcalculator.exe software are avai-
lable to download in the Product info sheet section of www.vimar.com website.
Connections
Here below the main connections of the camera.
IP Bullet Day&Night colour camera, CMOS 1/2.7" sensor, 2 Mpx (1920x1080)
resolution, 3.6 mm xed focus lens, mechanic IR lter, H.265 and H.264 Multist-
ream, PoE or 12 Vdc supply, IR 20-30 m, WDR, ROI, 3DNR, HLC, BLC, Mask,
Motion,Smart IR, RTSP functions, ONVIF protocol, IP66 protection degree. Dimen-
sions: Ø 87x219 mm. Weight 630 g.
Package content
After you receive your device, please check the following accessories.
The pictures here are for reference only.
Viale Vicenza, 14
36063 Marostica VI - Italy
www.vimar.com
49401359A0 00 1902
46212.036B.01
ENIT
5. Connessione alla rete Ethernet
Come esempio, accediamo alla telecamera IP attraverso la LAN. In una LAN è
possibile accedere in due modi:
1. Accesso tramite IP-Tool
2. Accesso diretto tramite Internet Explorer
5.1 Accesso alla telecamera tramite IP-Tool
1) Assicurarsi che la telecamera e il PC siano connessi alla LAN.
2) Eseguire il download di IP-Tool dalla sezione prodotto del sito http://www.vimar.
com e installarlo sul computer. Inne, avviare IP-Tool come mostrato di seguito.
3) Modicare l'indirizzo IP. L'indirizzo IP predenito di questa telecamera è
192.168.226.201. Fare click sulle informazioni della telecamera elencate nella
tabella sopra riportata per visualizzare le informazioni di rete sulla destra. Mo-
dicare l'indirizzo IP e il gateway della telecamera e assicurarsi che l'indirizzo
di rete si trovi nello stesso segmento della rete locale del computer. Modicare
l'indirizzo IP del dispositivo in base alla situazione specica.
Ad esempio, l'indirizzo IP del computer in uso è 192.168.1.4. Di conseguenza l'indi-
rizzo della telecamera deve essere cambiato in 192.168.1.X.
Dopo la modica inserire la password di amministratore e fare clic sul pulsante
"Modica" per modicare l'impostazione.
La password predenita dell'amministratore è 123456.
4) Fare doppio clic sull'indirizzo IP, il sistema aprirà Internet Explorer per collega-
re l'IP-CAM. Internet Explorer scarica automaticamente i controlli ActiveX. Dopo il
download viene visualizzata la nestra di accesso. Immettere User Name (Nome
utente) e Password per accedere.
Il Nome Utente predenito è admin, la Password è 123456
6.2 Accesso alla telecamera tramite Internet Explorer
Le impostazioni di rete predenite sono indicate di seguito:
- Indirizzo IP: 192.168.226.201 HTTP:80
- Subnet Mask: 255.255.255.0 Porta Dati:9008
- Gateway: 192.168.226.1
Il Nome Utente predenito è admin, la Password è 123456
Network Connections
Here we take accessing IP camera via LAN for example. In LAN, there
are two ways to access.
1. Access through IP-Tool
2. Directly Access through IE Browser
Access the camera through IP-Tool
1) Make sure that the camera and the PC are well connected to the LAN.
2) download IP-Tool Product info sheet section of www.vimar.com website and then
install it in the computer. After that, run the IP-Tool as shown below.
3) Modify the IP address. The default IP address of this camera is 192.168.226.201.
Click the information of the camera listed in the above table to show the net-
work information on the right hand. Modify the IP address and gateway of
the camera and make sure its network address is in the same local network
segment as the computer’s. Please modify the IP address of your device ac-
cording to the practical situation
For example, the IP address of your computer is 192.168.1.4. So the IP address of
the camera shall be changed to 192.168.1.X.
After modication, please input the password of the administrator and click “Modify”
button to modify the setting.
The default password of the administrator is 123456.
4) Double-click the IP address and then the system will pop up the IE browser to connect
IP-CAM.
IE browser will automatically download the Active X control.
After downloading, a login window will pop up. Input the user name and password to login.
The default password of the administrator is 123456.
6.2 Directly Access Through IE
The default network settings are as shown below:
IP address: 192.168.226.201 HTTP:80
Subnet Mask: 255.255.255.0 Data Port:9008
Gateway: 192.168.226.1
The default user is admin, password of the administrator is 123456.


Produkt Specifikationer

Mærke: Vimar
Kategori: Kamera
Model: ELVOX 46212.036B.01

Har du brug for hjælp?

Hvis du har brug for hjælp til Vimar ELVOX 46212.036B.01 stil et spørgsmål nedenfor, og andre brugere vil svare dig