Vollrath FTG9012 Manual


Læs gratis den danske manual til Vollrath FTG9012 (9 sider) i kategorien Grillplade. Denne vejledning er vurderet som hjælpsom af 4 personer og har en gennemsnitlig bedømmelse på 4.6 stjerner ud af 2.5 anmeldelser. Har du et spørgsmål om Vollrath FTG9012, eller vil du spørge andre brugere om produktet?

Side 1/9
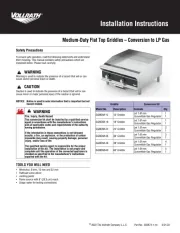
Installation Instructions
©
2022 The Vollrath Company L.L.C. Part No. 350674-1 ml 3/21/22
Medium-Duty Flat Top Griddles Conversion to LP Gas
Safety Precautions
To ensure safe operation, read the following statements and understand
their meaning. This manual contains safety precautions which are
explained below. Please read carefully.
Warning is used to indicate the presence of a hazard that will or can
cause severe personal injury or death.
Caution is used to indicate the presence of a hazard that will or can
cause minor or major personal injury if the caution is ignored.
NOTICE: Notice is used to note information that is important but not
hazard related.
TOOLS YOU WILL NEED
Wrenches: 8 mm, 13 mm and 22 mm
Flathead screw driver
Jointing paste
Flame source with 8" (20.3 cm) reach
Soapy water for testing connections
WARNING
CAUTION
WARNING
Fire, Injury, Death Hazard
This conversion kit shall be installed by a qualified service
agent in accordance with the manufacturer's instructions
and all applicable codes and requirements of the authority
having jurisdiction.
If the information in these instructions is not followed
exactly, a fire, an explosion, or the production of carbon
monoxide may result, causing property damage, personal
injury, and/or loss of life.
The qualified service agent is responsible for the proper
installation of this kit. The installation is not proper and
complete until the operation of the converted appliance is
checked as specified in the manufacturer's instructions
supplied with the kit.
Griddle Conversion Kit
Model No. Description Contents Qty.
GGMDM-12 12" Griddle
Jet 1.61mm
Convertible Gas Regulator
1
1
GGMDM-18 18" Griddle
Jet 1.61mm
Convertible Gas Regulator
1
1
GGMDM-24 24" Griddle
Jet 1.61mm
Convertible Gas Regulator
2
1
GGMDM-36 36" Griddle
Jet 1.61mm
Convertible Gas Regulator
3
1
GGMDM-48 48" Griddle
Jet 1.61mm
Convertible Gas Regulator
4
1
GGMDM-60 60" Griddle
Jet 1.61mm
Convertible Gas Regulator
5
1
2 Medium-Duty Flat Top Griddles Conversion to LP Gas Installation Instructions
CONVERSION
Remove the orifice from each main burner
1. Lift off the complete griddle plate assembly to expose the main
burners, burner control valves, and the pilot burners.
2. Use an 8 mm wrench to loosen the nut fastening the pilot burner to
the main burner. Detach the pilot burner from the main burner,
taking care not to move the pilot burner excessively.
3. Use an 8 mm wrench to loosen and remove the nut fastening the
main burner to the frame.
4. Lift the rear of the main burner and slide it backward, taking care not
to move the pilot burner excessively. Remove the main burner from
the griddle.
5. The brass orifice, located on the end of the burner control valve, will
now be exposed. Use a 13 mm wrench to remove the orifice
Install the new orifice on each main burner
NOTICE: Derate at altitudes above 2000 ft (610 m)
Ratings of gas utilization equipment are based upon
operation at sea level, and shall not be changed for
operation at elevations up to 2000 ft (600 m).
For operation at elevations above 2000 ft (600 m),
equipment ratings shall be reduced, at the rate of 4 percent
for each 1000 ft (300 m) above sea level, when calculating
how to select appropriately sized orifices.
1. Apply a small amount of jointing paste to the thread on the end of
the control valve.
2. Install and tighten the new orifice.
3. Replace the main burner by sliding the open end over the new orifice
and then passing the stud through the slot at the rear of the burner.
4. Secure the main burner to the frame by reinstalling the nut and
tightening it with the 8 mm wrench.
5. Secure the pilot burner to the appropriate main burner by replacing
and tightening the fastening nut using an 8 mm wrench.
Adjust the gas regulator
Follow the steps below to adjust the gas regulator to operate at 10" WC
for use with LP gas.
1. Use a 22 mm wrench to remove the conversion cap from the top of
the regulator.
2. Remove the regulator pin, invert, and reinsert.
3. Replace the conversion cap, taking care that the regulator pin and
the gasket are both properly seated.
TEST THE EQUIPMENT
Check the pressure of the incoming gas line
Before supplying gas to the regulator, check the pressure of the
incoming gas line.
The regulator can withstand a maximum pressure of 13.5" WC (1/2
PSI). If the line pressure is beyond this limit, a step-down regulator will
be required. The arrow on the regulator body shows gas flow direction
and should point toward the appliance.
Check for gas leaks
NOTICE: Matches, candle flame, or any other potential source of
ignition shall not be used for this purpose.
1. Turn the knob(s) for the main burner(s) to the OFF position.
2. Remove the main burner control knob(s).
3. Usea8mmwrench to remove the screws on the front panel.
Remove the front panel to access the pilot burner control valve(s).
4. Locate the pilot burner control valves for the pilot lights and turn
them OFF by turning the small forward-facing screw clockwise until
tight.
5. Connect the equipment to the gas supply.
6. Apply soapy water to each connection.
7. Turn ON the main supply valve.
8. Look for bubbles at the connections.
9. Adjust the connections as needed.
Light the pilot burners
1. Wait 5 minutes to allow any gas to dissipate.
2. To light the pilot burners, hold a flame source over the desired pilot
burner while slowly turning its control valve screw
counterclockwise, adjusting the flame to the desired intensity.
Repeat for all pilot burners.
Test the main burners
After lighting all of the pilot burners, ensure that each main burner
functions correctly.
Adjusting the air shutter
The air shutter of (charbroiler/hot plate/griddle) comes factory preset
for natural gas. The shutter should be preset about 50 percent open.
The air shutter may need to be adjusted after the unit is converted to LP
gas. The air shutter should be adjusted by a qualified service agent.
WARNING
Fire, Injury, Death Hazard
Before beginning the conversion, you must turn OFF the gas
supply valve at the manual shutoff and disconnect the
equipment from the supply line.
Conversion cap and regulator pin
Gasket
Regulator
Natural gas
L.P.


Produkt Specifikationer

Mærke: Vollrath
Kategori: Grillplade
Model: FTG9012

Har du brug for hjælp?

Hvis du har brug for hjælp til Vollrath FTG9012 stil et spørgsmål nedenfor, og andre brugere vil svare dig


Grillplade Vollrath Manualer

Vollrath

Vollrath FTG2036 Manual

8 Oktober 2025
Vollrath

Vollrath FTT2024 Manual

8 Oktober 2025
Vollrath

Vollrath FTG9016 Manual

8 Oktober 2025
Vollrath

Vollrath FTG9012 Manual

8 Oktober 2025
Vollrath

Vollrath FTG9024 Manual

7 Oktober 2025
Vollrath

Vollrath FTG9048 Manual

7 Oktober 2025
Vollrath

Vollrath GGHDT-36 Manual

2 Oktober 2025
Vollrath

Vollrath 948CG Manual

1 Oktober 2025
Vollrath

Vollrath GGHDT-48 Manual

1 Oktober 2025
Vollrath

Vollrath FTT2036 Manual

1 Oktober 2025

Grillplade Manualer

Nyeste Grillplade Manualer

Steba

Steba RC 180 Manual

8 Oktober 2025
Imperial

Imperial IGG-60 Manual

8 Oktober 2025
Imperial

Imperial IABR-60 Manual

8 Oktober 2025
Imperial

Imperial IABR-36 Manual

8 Oktober 2025
Imperial

Imperial IGG-48 Manual

8 Oktober 2025
Imperial

Imperial IGG-72 Manual

8 Oktober 2025
Imperial

Imperial IABS-36 Manual

8 Oktober 2025
Imperial

Imperial IRB-36 Manual

8 Oktober 2025
Imperial

Imperial ITG-72 Manual

8 Oktober 2025