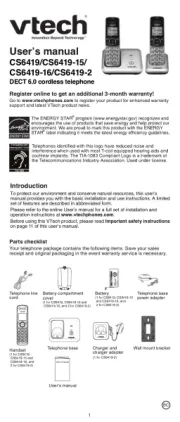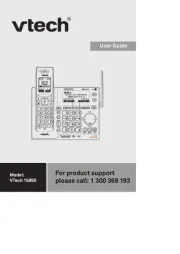
DECT 6.0 cordless telephone
Go to www.vtechphones.com to register your product
for enhanced warranty support and latest VTech
Go to phones.vtechcanada.com (Canada) for latest
For more support information
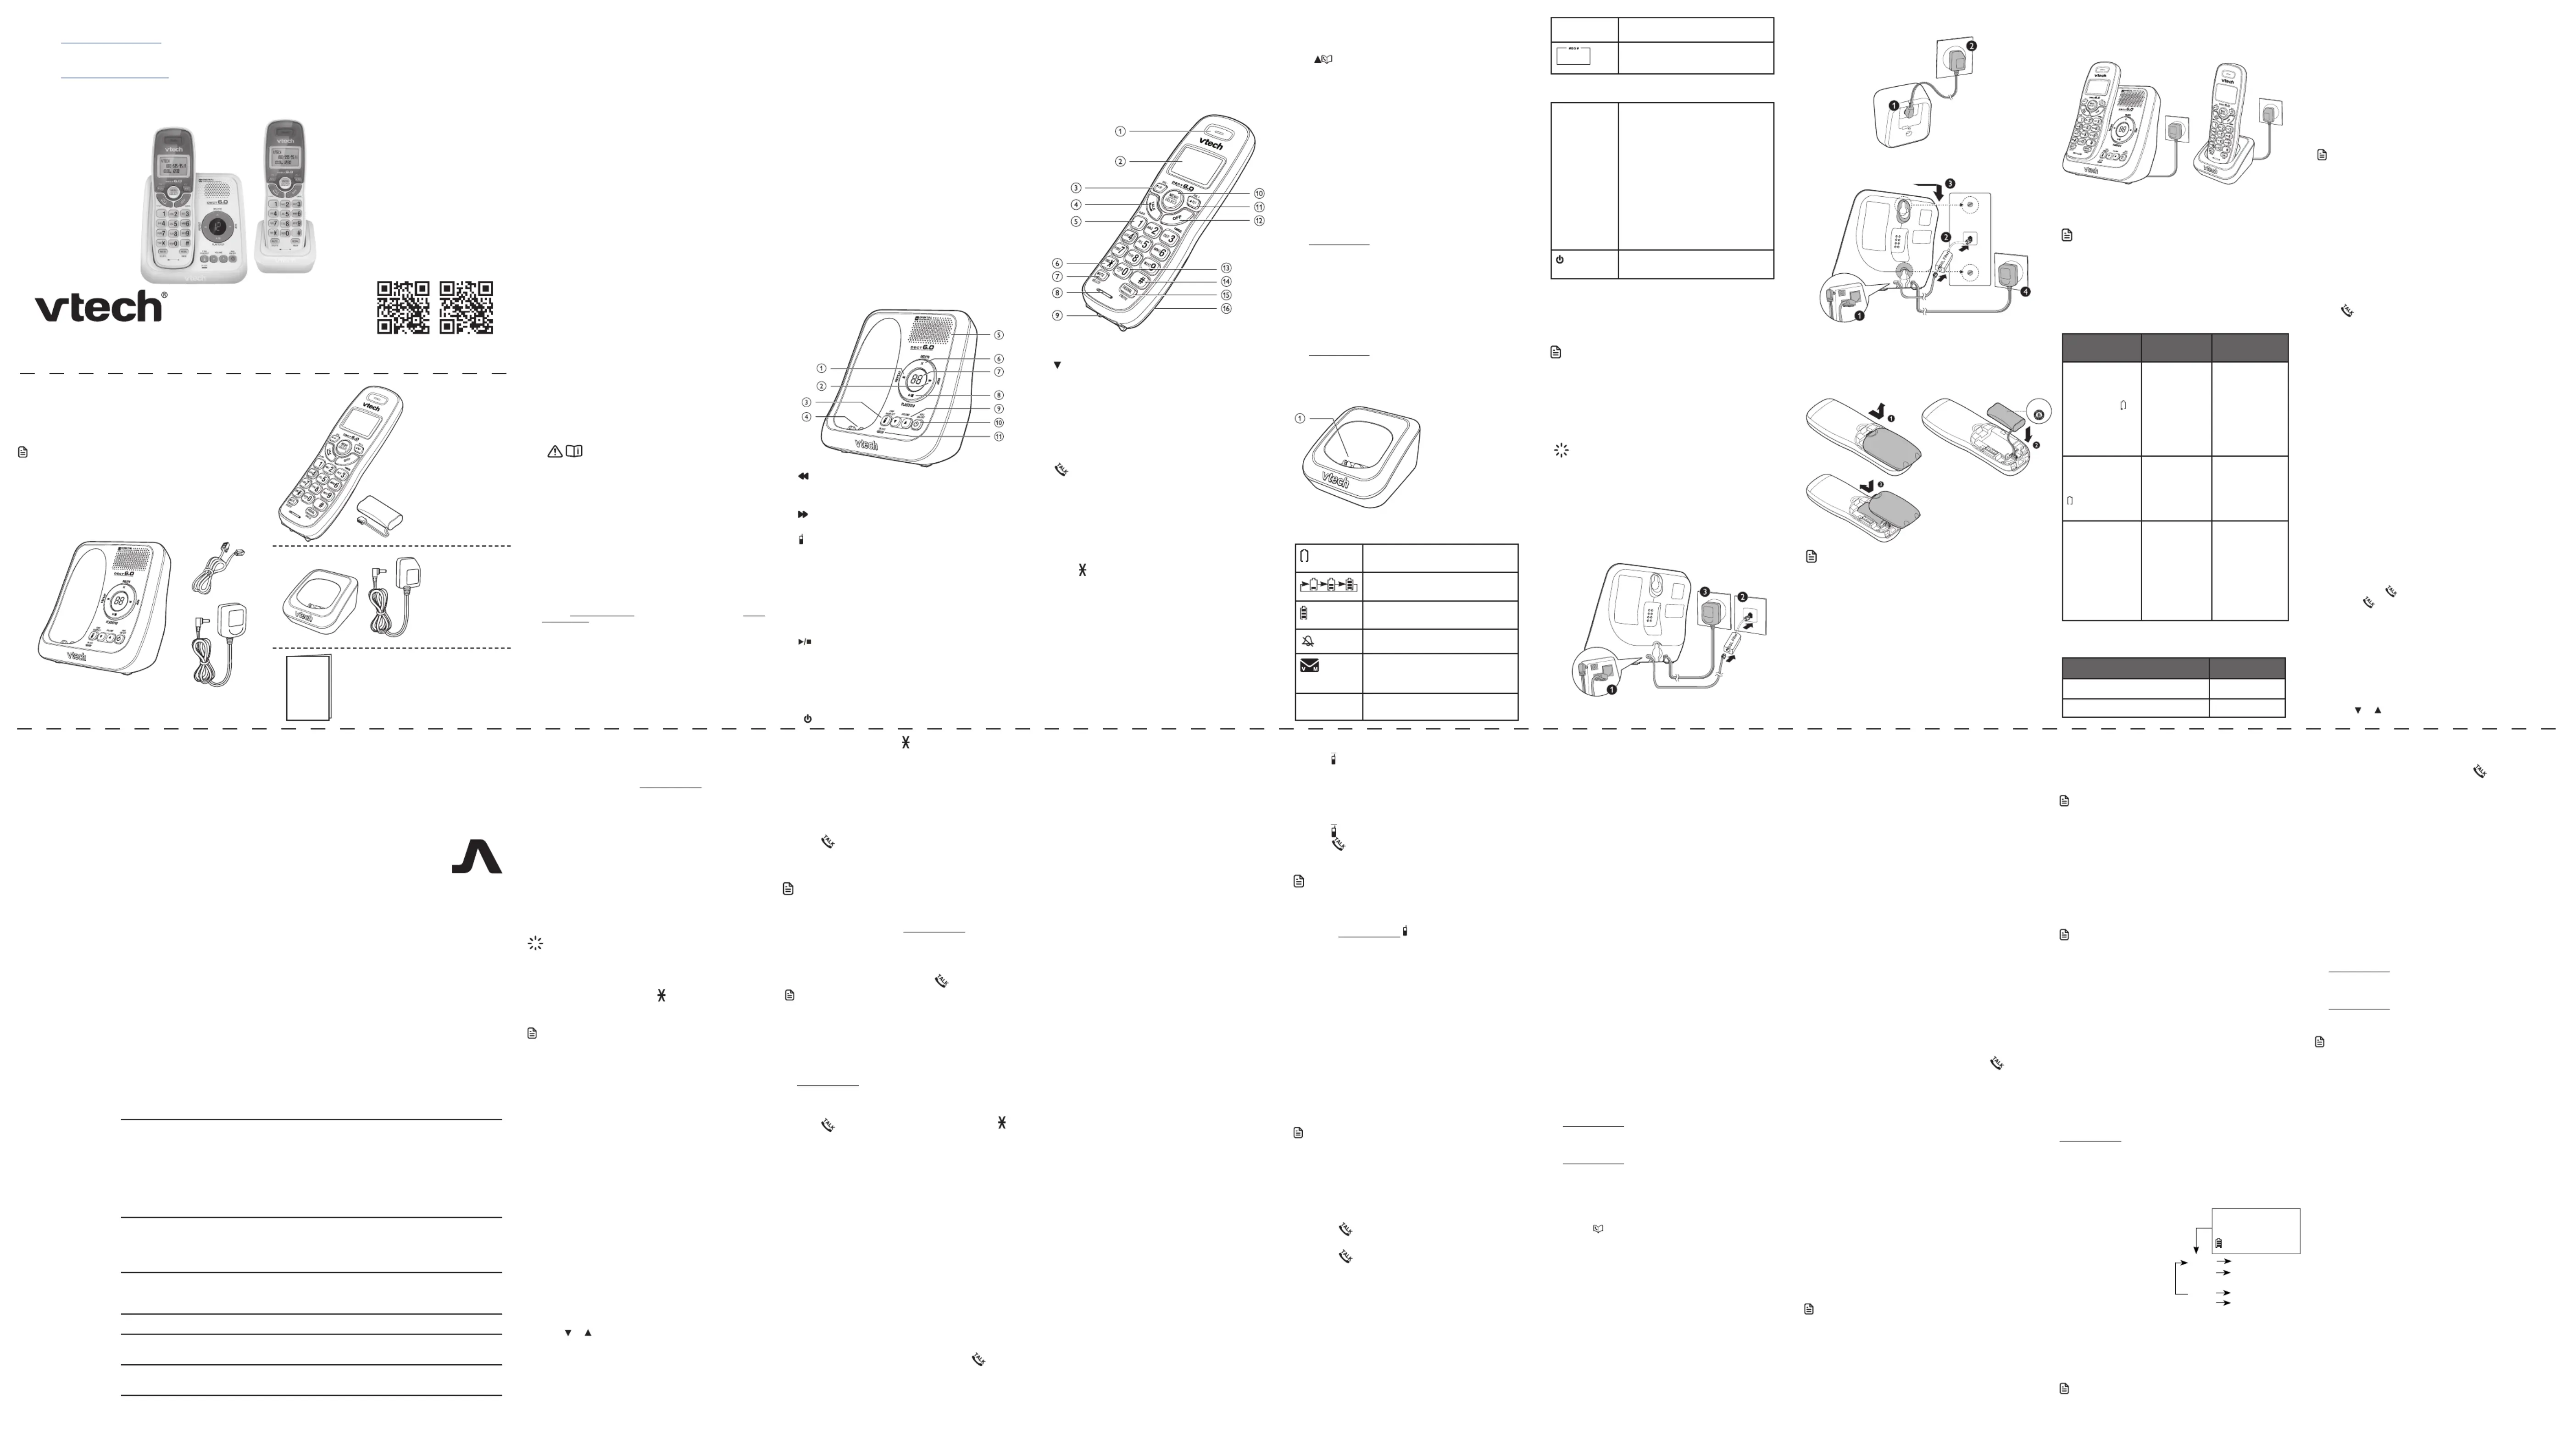
Your telephone package contains the following items.
Save your sales receipt and original packaging in the
event warranty service is necessary.
• To purchase a replacement battery or power adapter,
www.vtechphones.com or call
1 (800) 595-9511. In Canada, go to
phones.vtechcanada.com/ or call
1 set for CS6120-2/CS6120-31/
CS6124/CS6124-2/CS6124-31
1 set for CS6120-2/CS6120-31/
CS6124/CS6124-2/CS6124-31
VTech Communications, Inc.
A member of THE VTECH GROUP OF COMPANIES.
VTech is a registered trademark of VTech Holdings Limited.
Specifications are subject to change without notice.
© 2022 VTech Communications, Inc.
All rights reserved. 06/22. CS6124-X_US-CAN_CIB_v2.0_220609
Designed to fit your home.
Crystal controlled PLL synthesizer
Maximum power allowed by FCC and IC. Actual operating range
may vary according to environmental conditions at the time of use.
Handset: 2.4V Ni-MH battery
Disclaimer and Limitation of Liability
VTech Communications, Inc. and its suppliers assume no responsibility for any damage or loss resulting from the use of this user’s
manual. VTech Communications, Inc. and its suppliers assume no responsibility for any loss or claims by third parties that may arise
through the use of this product.
Company: VTech Communications, Inc.
Address: 9020 SW Washington Square Road - Ste 555 Tigard, OR 97223, United States
Phone: 1 (800) 595-9511 in the U.S. or 1 (800) 267-7377 in Canada
Important safety instructions
When using your telephone equipment, basic safety precautions should always be
followed to reduce the risk of fire, electric shock and injury, including the following:
1. Read and understand all instructions.
2. Follow all warnings and instructions marked on the product.
3. : Do not install the telephone base at a height above 2 meters.CAUTION
4. Unplug this product from the wall outlet before cleaning. Do not use liquid or aerosol
cleaners. Use a damp cloth for cleaning.
5. Do not use this product near water such as near a bath tub, wash bowl, kitchen sink,
laundry tub or a swimming pool, nor in a wet basement or shower.
6. Do not place this product on an unstable table, shelf, stand or other unstable surfaces.
7. Avoid placing the telephone system in places with extreme temperature, direct
sunlight, or other electrical devices. Protect your phone from moisture, dust, corrosive
8. Slots and openings in the back or bottom of the telephone base and handset are
provided for ventilation. To protect them from overheating, these openings must not
be blocked by placing the product on a soft surface such as a bed, sofa or rug. This
product should never be placed near or over a radiator or heat register. This product
should not be placed in any area where proper ventilation is not provided.
9. This product should be operated only from the type of power source indicated on the
marking label. If you are not sure of the type of power supply in your home or office,
consult your dealer or local power company.
10. Do not allow anything to rest on the power cord. Do not install this product where the
11. Never push objects of any kind into this product through the slots in the telephone
base or handset because they may touch dangerous voltage points or create a short
circuit. Never spill liquid of any kind on the product.
12. To reduce the risk of electric shock, do not disassemble this product, but take it to
an authorized service facility. Opening or removing parts of the telephone base or
handset other than specified access doors may expose you to dangerous voltages
or other risks. Incorrect reassembling can cause electric shock when the product is
13. Do not overload wall outlets and extension cords.
14. Unplug this product from the wall outlet and refer servicing to an authorized service
facility under the following conditions:
• When the power supply cord or plug is damaged or frayed.
• If liquid has been spilled onto the product.
• If the product has been exposed to rain or water.
• If the product does not operate normally by following the operating
instructions. Adjust only those controls that are covered by the operation
instructions. Improper adjustment of other controls may result in damage
and often requires extensive work by an authorized technician to restore the
product to normal operation.
• If the product has been dropped and the telephone base and/or handset has
• If the product exhibits a distinct change in performance.
15. Avoid using a telephone (other than cordless) during an electrical storm. There is a
remote risk of electric shock from lightning.
16. Do not use the telephone to report a gas leak in the vicinity of the leak. Under
certain circumstances, a spark may be created when the adapter is plugged into the
power outlet, or when the handset is replaced in its cradle. This is a common event
associated with the closing of any electrical circuit. The user should not plug the
phone into a power outlet, and should not put a charged handset into the cradle,
if the phone is located in an environment containing concentrations of flammable
or flame-supporting gases, unless there is adequate ventilation. A spark in such an
environment could create a fire or explosion. Such environments might include:
medical use of oxygen without adequate ventilation; industrial gases (cleaning
solvents; gasoline vapors; etc.); a leak of natural gas; etc.
17. Only put the handset of your telephone next to your ear when it is in normal talk
18. The power adapter is intended to be correctly oriented in a vertical or floor mount
position. The prongs are not designed to hold the plug in place if it is plugged into a
ceiling, under-the-table or cabinet outlet.
19. For pluggable equipment, the socket-outlet shall be installed near the equipment and
shall be easily accessible.
20. : Use only the batteries indicated in this manual. There CAUTION
may be a risk of explosion if a wrong type of battery is used for the
handset. Use only the supplied rechargeable batteries or
replacement batteries (BT162342/BT262342) for the handset. Do not dispose of
batteries in a fire. They may explode. Dispose of used battery according to the
instruction. Disconnect the telephone line from the equipment before open the
• Do not use the battery in following conditions:
» High or low extreme temperature during use, storage or transportation.
» Replacement of a battery with an incorrect type that can defeat a safeguard.
» Disposal of a battery into fire or a hot oven, or mechanically crushing or cutting of a
battery, that can result in an explosion.
» Leaving a battery in an extremely high temperature surrounding environment that
can result in an explosion or the leakage of flammable liquid or gas.
» A battery subjected to extremely low air pressure that can result in an explosion or
the leakage of flammable liquid or gas.
21. Use only the adapter included with this product. Incorrect adapter polarity or voltage
can seriously damage the product.
22. The applied nameplate is located at the bottom or near of the product.
• Use only the battery provided or equivalent. To order a replacement, visit our
website at www.vtechphones.com phones. or call 1 (800) 595-9511. In Canada, go to
vtechcanada.com or call 1 (800) 267-7377.
• Do not dispose of the battery in a fire. Check with local waste management codes for
special disposal instructions.
• Do not open or mutilate the battery. Released electrolyte is corrosive and may cause
burns or injury to the eyes or skin. The electrolyte may be toxic if swallowed.
• Exercise care in handling batteries in order not to create a short circuit with
• Charge the battery provided with this product only in accordance with the
instructions and limitations specified in this manual.
Precautions for users of implanted cardiac pacemakers
Cardiac pacemakers (applies only to digital cordless telephones):
Wireless Technology Research, LLC (WTR), an independent research entity, led a
multidisciplinary evaluation of the interference between portable wireless telephones
and implanted cardiac pacemakers. Supported by the U.S. Food and Drug Administration,
WTR recommends to physicians that:
• Should keep wireless telephones at least six inches from the pacemaker.
• Should NOT place wireless telephones directly over the pacemaker, such as in a
breast pocket, when it is turned ON.
• Should use the wireless telephone at the ear opposite the pacemaker.
WTR’s evaluation did not identify any risk to bystanders with pacemakers from other
persons using wireless telephones.
About cordless telephones
• Privacy: The same features that make a cordless telephone convenient create some
limitations. Telephone calls are transmitted between the telephone base and the
cordless handset by radio waves, so there is a possibility that the cordless telephone
conversations could be intercepted by radio receiving equipment within range of
the cordless handset. For this reason, you should not think of cordless telephone
conversations as being as private as those on corded telephones.
• Electrical power: The telephone base of this cordless telephone must be connected
to a working electrical outlet. The electrical outlet should not be controlled by a
wall switch. Calls cannot be made from the cordless handset if the telephone base is
unplugged, switched off or if the electrical power is interrupted.
• Potential TV interference: Some cordless telephones operate at frequencies
that may cause interference to televisions and VCRs. To minimize or prevent such
interference, do not place the telephone base of the cordless telephone near or on
top of a TV or VCR. If interference is experienced, moving the cordless telephone
farther away from the TV or VCR often reduces or eliminates the interference.
• Rechargeable batteries: Exercise care in handling batteries in order not to create a
short circuit with conducting material such as rings, bracelets and keys. The battery
or conductor may overheat and cause harm. Observe proper polarity between the
battery and the battery charger.
• Nickel-metal hydride rechargeable batteries: Dispose of these batteries in a safe
manner. Do not burn or puncture the battery. Like other batteries of this type, if
burned or punctured, they could release caustic material which could cause injury.
• Press twice to play the previous message.
• Skip to the next message.
• Page all system handsets.
• Delete the playing message.
• Press twice to delete all old messages.
• Adjust the listening volume.
• Adjust the telephone base ringer volume.
• Turn on or off the answering system.
• Flashes when there is an incoming call, or another
telephone sharing the same line is in use.
• On when the telephone is in use, or the answering
system is answering a call.
• Review the caller ID log when the telephone is not
• Scroll down while in a menu, or in the phonebook,
caller ID log or redial list.
• Move the cursor to the left when entering numbers
• Decrease the listening volume during a call or
• Answer an incoming call when you receive a call
• Press repeatedly to add or remove 1 in front of the
caller ID log entry before dialing or saving it to the
• Switch to tone dialing temporarily during a call.
• Mute the microphone during a call.
• Silence the handset ringer temporarily while the
• Delete the displayed entry while reviewing the
phonebook, caller ID log or redial list.
• Delete digits or characters when entering numbers
• While in a menu, press to select an item, or save an
• Review the phonebook when the phone is not in use.
• Scroll up while in a menu, or in the phonebook, caller
• Move the cursor to the right when entering numbers
• Increase the listening volume during a call or message
• Return to the previous menu or idle mode without
• Delete digits while predialing.
• Silence the handset ringer temporarily while the
• Press and hold to erase the missed call indicator while
the handset is not in use.
• Enter space character during text editing.
• Show other dialing options when reviewing a caller
• Review the redial list.
• Press and hold to insert a dialing pause while dialing
or entering numbers into the phonebook.
16 – Battery compartment cover
The battery icon flashes when the
battery is low and needs charging.
The battery icon animates when
The battery icon becomes solid
when the battery is fully charged.
The handset ringer is off.
There are new voicemail received
from your telephone service
NEW The entry you are reviewing is new
ANS ON The answering system is turned on.
The message number currently
Telephone base lights overview
IN USE • On when the telephone line is
• On when the answering system
• On when you are registering a
• Flashes quickly when there is an
• Flashes when another telephone
sharing the same line is in use.
deregistering all handsets.
On when the answering system is
You can choose to connect the telephone base for
desktop usage or wall mounting.
• Use only the adapters provided.
• Make sure the electrical outlets are not controlled by
• The adapters are intended to be correctly oriented
in a vertical or floor mount position. The prongs are
not designed to hold the plug in place if it is plugged
into a ceiling, under-the-table or cabinet outlet.
• If you subscribe to digital subscriber line (DSL)
high-speed Internet service through your telephone
line, make sure you install a DSL filter (not included)
between the telephone line cord and telephone
wall jack. Contact your DSL service provider for more
Connect the telephone base
Install and charge the battery
Install the battery as shown below.
• Use only supplied battery.
• Charge the battery provided with this product only
in accordance with the instructions and limitations
• If the handset will not be used for a long time,
disconnect and remove the battery to prevent
Place the handset in the telephone base or the charger
Once you have installed the battery, the handset LCD
display indicates the battery status (see the following
• For best performance, keep the handset in the
telephone base or charger when not in use.
• The battery is fully charged after 16 hours of
• If you place the handset in the telephone base or the
charger without plugging in the battery, the screen
When the battery is fully charged, you can expect the
While in use (talking*) Seven hours
While not in use (standby**) Five days
* Operating times vary depending on your actual use
and the age of the battery.
** Handset is not charging nor in use.
After you install your telephone or power returns
following a power outage and battery depletion, the
handset will prompt you to set the date and time, and to
configure the answering system through voice guide.
• Make sure you set the date and time including the
year correctly; otherwise the answering system does
not announce the correct day of the week for your
recorded messages time stamp.
1. Use the dialing keys ( ) to enter the month ( ), 0-9 MM
date ( ) and year ( .DD YY). Then press SELECT
2. Use the dialing keys ( ) to enter the hour ( ) and 0-9 HH
minute (MM). Then press q or p to choose AM or
Press . If you hear a dial tone, the installation is
If you do not hear a dial tone:
• Make sure the installation procedures described
• It may be a wiring problem. If you have changed
your telephone service to digital service from a cable
company or a VoIP service provider, the telephone
line may need to be rewired to allow all existing
telephone jacks to work. Contact your cable/VoIP
service provider for more information.
This cordless telephone operates with the maximum
power allowed by the Federal Communications
Commission (FCC). Even so, this handset and telephone
base can communicate over only a certain distance -
which can vary with the locations of the telephone base
and handset, the weather, and the layout of your home
When the handset is out of range, the handset displays
Out of range or no pwr at base.
If there is a call while the handset is out of range, it may
not ring, or if it does ring, the call may not connect well
when you press . Move closer to the telephone base,
then press to answer the call.
If the handset moves out of range during a telephone
conversation, there may be interference. To improve
reception, move closer to the telephone base.
1. Press when the phone is not in use.MENU
2. Press until the screen displays the desired or
• To return to the previous menu, press .CANCEL
• To return to idle mode, press and hold .CANCEL
The LCD language is preset to English. You can select
English, French or Spanish to be used in all screen
1. Press when the handset is not in use.MENU
2. Press and then press q or p to choose Settings
SELECT. Press and q or p to choose LCD language
3. Press , q or p to choose English Français Español or .
4. Press SELECT to save your setting. You hear a
• If you accidentally set the LCD language to Spanish
or French, you can change the LCD language back to
English while the telephone is not in use.
Press and then enter .MENU 364#
• Make sure you set the date and time including the
year correctly; otherwise the answering system does
not announce the correct day of the week for your
recorded messages time stamp.
1. Press on the handset when not in use.MENU
2. Press and then press q or p to choose Set date/time
3. Use the dialing keys ( ) to enter the month ( ), 0-9 MM
date ( ) and year ( .DD YY). Then press SELECT
4. Use the dialing keys ( ) to enter the hour ( ) and 0-9 HH
minute (MM). Then press q or p to choose AM or
5. Press SELECT to save your setting. Your hear a
The dial mode is preset to touch-tone dialing. If you have
pulse (rotary) service, you need to change the dial mode
to pulse dialing before using the telephone.
1. Press when the handset is not in use.MENU
2. Press , and then press q or p to choose Settings
3. Press q or p to choose Dial mode, then press
4. Press or to choose Touch-tone Pulse or , then
press to confirm your selection. You hear a SELECT
If you have pulse (rotary) service only, you can switch
from pulse to touch-tone dialing temporarily during a
call. This is useful if you need to send touch-tone signals
to access your telephone banking or long distance
1. During a call, press TONE .
2. Use the dialing keys to enter the number. The
telephone sends touch-tone signals. It automatically
returns to pulse dialing mode after you end the call.
1. Press , and then dial the telephone number.
2. When you hear a dial tone, dial the number.
• The handset displays Unable to call if the telephone
• The screen shows the elapsed time as you talk (in
hours, minutes and seconds).
• While entering numbers, press and hold PAUSE to
insert a dialing pause (a appears).p
• Enter the telephone number using
the dialing keys (0-9), then press to dial.
• The handset displays Unable to call if the telephone
• The screen shows the elapsed time as you talk (in
hours, minutes and seconds).
• When predialing (preview numbers before dialing),
press to backspace and delete; DELETE or CANCEL
press and hold PAUSE to insert a dialing pause (a p
• Press or any of the dialing keys ( ).0-9 or TONE
• Press or put the handset back in the telephone OFF
• During a call, press VOL- or VOL+ to adjust the
The mute function allows you to hear the other party but
the other party cannot hear you.
1. During a call, press . The handset displays MUTE
2. Press again to resume the conversation. The MUTE
handset displays briefly.Microphone on
You can use up to two system handsets at a time on an
• When a handset is already on a call, press on
another handset to join the call.
• Press or place the handset in the telephone base OFF
or handset charger to exit the call. The call continues
until all handsets hang up.
When you subscribe to call waiting service from your
telephone service provider, you hear an alert tone if there
is an incoming call while you are already on a call.
• Press to put the current call on hold and take FLASH
• Press at any time to switch back and forth FLASH
If you also subscribe to caller ID service, it will let you see
the name and telephone number of the caller during call
It may be necessary to change your telephone service to
use this feature. Contact your telephone service provide if:
• You have both caller ID and call waiting, but as
separate service (you may need to combine these
• You have only caller ID service, or only call waiting
• You do not subscribe to caller ID or call waiting
There are fees for caller ID services. In addition, services
may not be available in all areas.
Use this feature to initiate a dialing sequence from
numbers stored in the phonebook, caller ID log or redial
Chain dialing can be useful if you wish to access other
numbers (such as bank account numbers or access codes)
from the phonebook, caller ID log or redial list.
To access a number in the phonebook
1. Press MENU/SELECT twice to enter the phonebook.
2. Press q or p to scroll to the desired entry.
3. Press to dial the displayed number.SELECT
To access a number from the caller ID log
1. Press and then press MENU q or p to select Caller
2. Press and then press SELECT q or p to scroll to the
3. Press to dial the displayed number.SELECT
To access a number in the redial list while
2. Press , q p or REDIAL repeatedly to browse to the
3. Press to dial the displayed number.SELECT
Use this feature to find the system handset.
• Press /FIND HANDSET on the telephone base when
All idle handsets ring and display
• Press /FIND HANDSET at the telephone base;
• Press or any of the dialing keys on the handset;
• Place the handset in the telphone base or charger.
• Press to turn off the ringer of a handset MUTE
temporarily. Paging tone continues on the other
• Do not press and hold /FIND HANDSET for
more than four seconds. It may lead to handset
deregistration. If the handset displays To register
HS See manual and , refer to the Register a handset
section to register the handset back to the telephone
Each handset stores the last five telephone numbers
dialed. Entries are shown in reverse chronological order.
When there are already five entries, the oldest entry is
deleted to make room for the new entry.
Review a redial list entry
1. Press when the handset is not in use.REDIAL
2. Press , repeatedly until the desired q p or REDIAL
• You hear a double beep when you reach the
beginning or end of the redial list.
1. Press when the handset is not in use.REDIAL
2. Press , repeatedly until the desired q p or REDIAL
1. Press when the handset is not in use.
2. Press and then press , REDIAL q p or REDIAL
repeatedly until the desired entry displays.
Delete a redial list entry
1. Press when the handset is not in use.REDIAL
2. Press , q p or REDIAL repeatedly to browse to the
3. Press to delete the displayed number. You DELETE
The phonebook can store up to 30 entries, which are
shared by all handsets. Each entry may consist of a
telephone number up to 30 digits, and a name up to
If the telephone number in the phonebook exceeds
15 digits, a dash appears after the 14th digit and then
the remaining digits are shown beginning with a dash,
Enter the number when the phone is not in use.
Press when the phone is not in use, then MENU
press q or p to scroll to Phonebook and then
SELECT. Press again to choose SELECT Add new
4. When Enter number displays, use the dialing keys to
Copy a number from the redial list by pressing REDIAL
and then press q p, or REDIAL repeatedly to select a
number. Press SELECT to copy the number.
5. Press SELECT to move on to enter the name. The
handset displays .Enter name
6. Use the dialing keys to enter the name. Additional key
presses show other characters of that particular key.
The first character of every word is capitalized.
7. Press to save. The handset displays SELECT Saved and
then you hear a confirmation tone.
While entering names and numbers, you can:
• Press to backspace and erase a digit or DELETE
• Press and hold to erase all digits or entire DELETE
• Press to move the cursor to the left or right. q or p
• Press and hold PAUSE to insert a dialing pause (for
• Press to add a space (for entering names only).0
Entries are sorted alphabetically.
1. Press when the phone is not in use.
2. Press q or p to browse through the phonebook, or
use the dialing keys to start a name search.
1. Press when the handset is not in use.MENU
2. Press ,q or p to scroll to Phonebook and then press
3. Press q or p to scroll to Review and then press
• The handset displays the first phonebook entry.
4. Press q or p to browse.
1. Follow the steps in Review a phonebook entry
above to enter the phonebook.
2. Use the dialing keys to enter the letter associated
with the name. For example, if you have entries for
Jenny, Jessie, Kristen and Laura in your phonebook,
press (JKL) once to see Jenny (when 5 Jenny
displays, press q to see Jessie), twice to see Kristen,
or three times to see Laura. If there is no name entry
matching your search, the next closest match in
alphabetical order appears. If necessary, press q or
1. Search for the desired entry in the phonebook (see
Review a phonebook entry Alphabetical search or ).
2. When the desired entry appears, press DELETE. The
handset displays . Delete entry?
3. Press to confirm. The handset displays SELECT
Deleting .... You hear a confirmation tone.
1. Search for the desired entry in the phonebook (see
Review a phonebook entry Alphabetical search or ).
2. When the desired entry appears, press . SELECT
3. Use the dialing keys to edit the number, then press
4. Use the dialing keys to enter the name.
5. Press SELECT to save. You hear a confirmation tone.
1. Search for the desired entry in the phonebook (see
Review a phonebook entry Alphabetical search or ).
2. When the desired entry appears, press to dial.
If you subscribe to caller ID service, information about
each caller appears after the first or second ring. If you
answer a call before the caller information appears on the
screen, it will not be saved in the caller ID log.
The caller ID log stores up to 30 entries. Each entry has up
to 24 digits for the phone number and 15 characters for
If the telephone number has more that 15 digits, only the
If the name has more than 15 characters, only the first 15
characters are shown and saved in the caller ID log.
Entries appear in reverse chronological order. When the
caller ID log is full, the oldest entry is deleted to make
room for new incoming call information.
Caller ID log entries are shared by all system handsets (for
multiple handset models only). Any deletions made on
one handset are reflected on all other handsets.
• This product can provide information only if both
you and the caller are in areas offering caller ID
service and if both telephone service providers use
compatible equipment. The time and date are sent by
your telephone service provider along with the call
Review a caller ID log entry
1. Press when the phone is not in use.CID
2. Press to browse through the caller ID log.q or p
1. Press when the phone is not in use. Press MENU q
or p to select Caller ID log.
2. Press SELECT twice and then press q or p to
• You hear two beeps when you reach the beginning or
end of the caller ID log.
When the incoming telephone number matches the last
seven digits of a telephone number in your phonebook,
the screen displays the stored name of the phonebook
For example, if Linda Jones calls, her name appears as
Linda if this is how you entered it into your phonebook.
• The number shown in the caller ID log is in the
format sent by the telephone service provider. It
usually delivers 10-digit telephone numbers (area
code plus phone number). If the last seven digits of
the incoming telephone number does not match a
number in your phonebook, the name appears as it is
delivered by the telephone service provider.
When there are calls that have not been reviewed in the
caller ID log, the handset displays .XX missed calls
Each time you review a caller ID log entry marked , NEW
the number of missed calls decreases by one.
When you have reviewed all the missed calls, the missed
call indicator no longer displays.
If you do not want to review the missed calls one by one,
press and hold on the idle handset to erase the CANCEL
missed call indicator. All the entries are then considered
Although the caller ID log entries received have 10 digits
(the area code plus the seven-digit number), in some
the seven digits. You can
digits that you dial from or
While reviewing the caller
different dialing options
for local and long distance numbers before dialing or
saving the telephone number in the phonebook.
Press 1 repeatedly if you need to add or remove 1 in front
of the telephone number before dialing or saving it in the
• 7-digit local dialing will be invalid from October 2021
onwards. Press (pound key) repeatedly to select the #
appropriate dialing option.
Dial a caller ID log entry
When the desired caller ID log entry is shown (See
Review the Caller ID log entry), press to dial.
Save a caller ID log entry to the
1. When in the caller ID log, press q or p to browse.
2. When the desired caller ID log entry displays, press
3. Press SELECT to choose To Phonebook. Then, the
handset displays . Use the dialing Enter number
keys to modify the number, if necessary. Then press
SELECT. The handset displays Enter name.
4. Use the dialing keys to modify the name, if
necessary. Then press SELECT.
While entering names and numbers, you can:
• Press to backspace and erase a digit or DELETE
• Press and hold to erase all digits or the entire DELETE
• Press to move the cursor to the left or right. q or p
• Press and hold PAUSE to insert a dialing pause (for
• Press to add a space (for entering names only).0
• If you save an entry which already exists in the
phonebook, the handset displays Number repeated
and then returns to Enter number screen.
Delete the caller ID log entries
1. When in the caller ID log, press q or p to browse.
2. When the desired caller ID log entry displays, press
DELETE. The handset displays , and you Deleting...
To delete all caller ID log entries:
1. Press when the phone is not in use. MENU
2. Press and then press q or p to select Caller ID log
3. Press .q or p to select Delete all then press SELECT
4. The screen displays . Press Delete all? SELECT to
confirm. The handset displays Deleting... and then
you hear a confirmation tone.
You can turn the key tone on or off.
1. Press when the handset is not in use.MENU
2. Press and then press q or p to choose Settings
3. Press q or p to choose Key tone, then press
4. Press q or p to choose On or Off, then press
SELECT to save. You hear a confirmation tone.