Air King 9224 Manual


Læs gratis den danske manual til Air King 9224 (3 sider) i kategorien Ventilator. Denne vejledning er vurderet som hjælpsom af 2 personer og har en gennemsnitlig bedømmelse på 4.3 stjerner ud af 1.5 anmeldelser. Har du et spørgsmål om Air King 9224, eller vil du spørge andre brugere om produktet?

Side 1/3
Rev. K 5/08
4
5084028
Rev. K 5/08
1
5084028
SPECIFICATIONS
Motor .................................120V , 50/60 Hz
Blade diameter
...................24" (60,96 cm)
Speeds
...............................3
...............................Rotary Switch
Air flow distribution
...........190˚
Approvals
...........................ETL Listed. Close mesh fan guard
meets OSHA requirements.
DESCRIPTION
The Air Kin24" (60,96 cm) pivot/floor fan features 3-speed opera-
tion with a 3-paddle fan blade. The fan has an enclosed motor with
permanently lubricated ball bearings with a 10 ft (3,05 m) 18/3 cord
set, and is constructed of sturdy powder coated steel.
24" FLOOR FAN
24" (60,96 cm) MODEL 9224
OPERATING INSTRUCTIONS & PARTS MANUAL
MODELO 9224
UNPACKING
When unpacking the unit, inspect carefully for any damage that
may have occurred during transit. Check for loose, missing,
or damaged parts.
GENERAL SAFETY INFORMATION
1. Read all instructions before using Fan.
2. Make certain that the power source conforms to the electrical re-
quirements of the Fan.
3. Use this Fan only as described in this manual. Any other use not
recommended by the manufacturer may cause fire, electrical shock,
or injury to persons.
4. To reduce the risk of personal injury and electric shock, the Fan should not
be played with or placed where small children can reach it.
5. Unplug power cord before installing, servicing, or moving the Fan.
WARNING: DO NOT DEPEND UPON THE ON-OFF SWITCH
AS THE SOLE MEANS OF DISCONNECTING POWER WHEN
INSTALLING OR SERVICING THE FAN. ALWAYS UNPLUG THE
POWER CORD.
6. This Fan must NOT be used in potentially dangerous locations
such as flammable, explosive, chemical-laden or wet atmospheres.
7. DO NOT use Fan in or near a window. Rain may create an electrical
hazard.
8. Completely assemble Fan, according to instructions, before con-
necting to power supply.
9. The power cord is equipped with a three-prong grounded plug that
must be inserted into a matching receptacle. Under no circumstances
should the ground prong be cut off the plug. Where a two-prong wall
receptacle is encountered, it must be replaced with a properly grounded
three-prong receptacle installed in accordance with the National Elec-
trical Code (NEC) and all applicable local codes and ordinances. This
work must be done by a qualified electrician, using copper wires only.
WARNING: DO NOT USE A THREE-PRONG ADAPTER.
IMPROPER CONNECTION MAY CAUSE THIS RISK OF
ELECTRIC SHOCK. USE OF SUCH ADAPTERS IS NOT PERMIT-
TED IN CANADA.
WARNING: THIS PLUG IS A SAFETY FEATURE. TO REDUCE
THE RISK OF FIRE, ELECTRIC SHOCK AND PERSONAL INJURY,
DO NOT REMOVE, REPLACE, REPAIR OR TAMPER WITH
THE ORIGINALLY SUPPLIED PLUG. IF THE FAN DOES NOT
FUNCTION PROPERLY, IT MAY BE DUE TO THE SAFETY DEVICE
INCORPORATED IN THIS PLUG.
10. Where possible, avoid the use of extension cords. If they must be used,
minimize the risk of overheating by ensuring that they are UL listed.
Never use a single extension cord to operate more than one Fan.
11. Do not operate any Fan with a damaged cord or plug or after the Fan
malfunctions, has been dropped or damaged in any manner. Return Fan
to authorized service facility for examination, electrical or mechanical
adjustment or repair.
12. Do not insert or allow fingers or foreign objects to enter any ventilation
or exhaust opening as it may cause an electric shock or fire, or damage
the Fan. Do not block or tamper with the Fan in any manner while it is
in operation.
13. Always place the Fan on a stable, flat, level surface when operating, to
avoid the chance of the Fan overturning. Locate the Power Cord so
the Fan or other objects are not resting on it. Do not run Power Cord
under carpeting. Do not cover Power Cord with throw rugs, runners,
or the like. Arrange Power Cord away from room traffic and where it
will not be tripped over.
14.This Fan is not intended for use in wet or damp locations. Never locate
a Fan where it may fall into a bathtub or other water container.
15. Do not use Fan outdoors.
16. This Fan is not suitable for use in hazardous locations. Please refer to
National Electric Code (NEC) Article 500 or applicable state or local
codes or standards relating to electrical requirements for Hazardous
locations. THIS FAN DOES NOT MEET THE REQUIREMENTS OF NEC
ARTICLE 500 (2008).
WARNING: REDUCE THE RISK OF FIRE OR ELECTRIC SHOCK
DO NOT USE THIS FAN WITH ANY SOLID STATE SPEED
CONTROL DEVICES.
SAVE THESE INSTRUCTIONS
READ AND SAVE THESE INSTRUCTIONS
READ CAREFULLY BEFORE ATTEMPTING TO ASSEMBLE, INSTALL, OPERATE OR MAINTAIN THE PRODUCT DESCRIBED. PRO-
TECT YOURSELF AND OTHERS BY OBSERVING ALL SAFETY INFORMATION. FAILURE TO COMPLY WITH
INSTRUCTIONS COULD RESULT IN PERSONAL INJURY AND/OR PROPERTY DAMAGE!
RETAIN INSTRUCTIONS FOR FUTURE REFERENCE.
MANTENIMIENTO
ADVERTENCIA: SIEMBRE DESENCHUFE EL CABLE
ANTES DE MOVER O PROPORCIONAR SERVICIO AL
VENTILADOR.
ADVERTENCIA: ¡NO SUMERJA EL VENTILADOR EN
EL AGUA!
LIMPIEZA:
Utilice un paño suave humedecido con una solución
jabonosa liviana, tal como un detergente líquido para lavar platos.
Seque TODAS LAS PARTES POR COMPLETO antes de rearmar.
Después de dar mantenimiento o servicio, REARME POR COMPLETO
la unidad en la forma descrita en este manual de instrucciones,
antes de volver a conectarla a la fuente de poder.
ADVERTENCIA: No use gasolina, bencina, acetona,
limpiadores abrasivos, etc., puesto que dañarán el
Ventilador. NUNCA use ALCOHOL O SOLVENTES.
SERVICIO: Todos los demás servicios, con la excepción de
mantenimiento general por parte del usuario, deberán ser realizados
por un representante de servicio autorizado.
LUBRICACIÓN: Los cojinetes de precisión vienen sellados de por
vida en la fábrica y no precisarán ninguna lubricación adicional.
ALMACENAMIENTO: Guarde el Ventilador con estas instrucciones
en un lugar fresco y seco.
ARMADO DEL PEDESTAL (Figura 1)
1. Retire todos los contenidos de la caja.
2. Coloque el ventilador horizontalmente sobre el piso, con el Motor
orientado hacia el techo. Procure que el Panel de Control en la
parte superior del motor dé hacia delante. Oriente las mitades
del pedestal como se indica e instale (1) 1/4-20 X 1” Perno a
través del orificio superior del pedestal en ambas mitades del
mismo. Coloque un Espaciador de Hule entre las mitades del
pedestal y la ménsula oscilante de la parrilla posterior hacia la
izquierda del motor. Apriete el perno hasta dejarlo (Inserte A)
firme.
3. PROCURE QUE LA AGARRADERA HACIA FUERA Y SE
ENCUENTRE SOBRE EL COSTADO DERECHO DEL MOTOR.
Mientras sostiene la Agarradera en la posición que se indica,
instale (1) Perno de 1/4-20 X 1” a través de la Agarradera y las
mitades del pedestal superior. Coloque un espaciador de hule
entre las mitades del pedestal y la ménsula oscilante de la
parrilla posterior hacia la derecha del motor. (Inserte B) Apriete
el perno hasta dejarlo firme.
4. Instale (1) Perno de 1/4-20 X 1", (1) Tuerca Hexagonal de 1/4-20
y (1) arandela fijadora de 1/4" en los orificios inferiores restantes
en cada costado del Ventilado.
ARMADO DE RUEDAS (Figura 2)
ARME COMPLETAMENTE EL PEDESTAL ANTES DE
INSTALAR EL CONJUNTO DE RUEDAS
1. Coloque la Ménsula de Montaje en la parte inferior de las mitades
del pedestal, a la izquierda del motor, como se indica.
2. Instale dos tornillos #8 X 7/16 a través de la parte inferior del
pedestal, usando un Destornillador de Cabeza Phillips #2.
3. Deslice el Barra de Eje a través de la Ménsula de Montaje.
4. Instale las dos ruedas en el Barra de Eje y fíjelas con dos Tuercas
Ciegas de Eje. Apriete Tuerca Ciega de Eje en la Barra de Eje.
FUNCIONAMIENTO
1. Enchufe el ventilador a un tomacorriente para tres púas, con
tierra, de 120V CA.
2. Usando el interruptor rotatorio, fije la velocidad deseada del
ventilador (0) Apagado, (3) Alta, (2) Media, (1) Baja.
3. El cabezal permanecerá Para Ajustar el Ángulo del Cabezal:
estacionario cuando se le hace girar a la posición deseada.
Podría requerirse en ocasiones apretar los herrajes del pivote
después de reposicionar el cabezal varias veces.
Caja de
Control
Inserte 1B
Figura 1
Espaciador de
Hule
Inserte 1A
Espaciador de
Hule
Figura 2
Tuerca Ciega
de Eje
Tuerca Ciega
de Eje
Ménsula de
Montaje
Rueda
Rueda
Barra de Eje
Tornillos
#8 X 7/16”
Rev. K 5/08
2
5084028
Rev. K 5/08
3
5084028
MODEL 9224
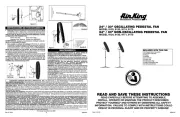
STAND ASSEMBLY (Figure 1)
1. Remove all contents from the carton.
2. Place Fan flat on the floor with the Motor facing towards the
ceiling. Make certain the Control Panel on the top of the motor
is facing forward. Orient stand halves as illustrated and install
(1) 1/4-20 X 1” Bolt through upper stand hole on both stand
halves. Place a Rubber Spacer between the stand halves and
the rear grill pivot bracket to left of motor. Secure the (Inset A)
bolt tightly.
3. MAKE CERTAIN HANDLE IS FACING OUTWARD AND IS ON
THE RIGHT SIDE OF THE MOTOR. While holding Handle in
position as shown, install (1) 1/4-20 X 1” Bolt through Handle
and upper stand halves. Place a rubber spacer between the
stand halves and the rear grill pivot bracket to right of motor.
(Inset B) Secure the bolt tightly.
4. Install (1) 1/4-20 X 1" Bolt, (1) 1/4-20 Hex Nut and (1) 1/4" Lock-
washer to the remaining lower holes on each side of the Fan.
WHEEL ASSEMBLY (Figure 2)
ASSEMBLE STAND COMPLETELY BEFORE INSTALLING
WHEEL ASSEMBLY
1. Place Mounting Bracket on the underside of the stand halves
to left of the motor as shown.
2. Install two #8 X 7/16" screws through the bottom of the stand
using a #2 Phillips Head Screwdriver.
3. Slide Axle Rod through Mounting Bracket.
4. Install the two wheels onto the Axle Rod and secure with
two Axle Cap Nuts. Press Axle Cap Nut onto Axle Rod.
OPERATION
1. Plug the fan into a properly grounded three-prong 120V AC
receptacle.
2. Using the rotary switch, set the desired fan speed: (0) Off, (3) High,
(2) Medium, (1) Low.
3. To Adjust Head Angle: Head will remain stationary when rotated
to desired position. Occasional tightening of pivot hardware may
be required after head is repositioned multiple times.
Inset 1A
Control
Box
Inset 1B
Figure 1
Rubber
Spacer
Rubber
Spacer
MAINTENANCE
WARNING: ALWAYS UNPLUG THE CORD BEFORE MOV-
ING OR SERVICING.
WARNING: DO NOT IMMERSE FAN IN WATER!
CLEANING: Use a soft cloth moistened with a mild soap solu-
tion, such as liquid dish washing detergent. Dry ALL PARTS COM-
PLETELY before reassembling. After any maintenance or servicing,
completely reassemble unit as described in this instruction manual
before reconnecting to the power supply.
CAUTION: Do not use gasoline, benzine, thinner, harsh
cleaners, etc. as they will damage the Fan. NEVER use
ALCOHOL OR SOLVENTS.
SERVICING: All other servicing, with the exception of general
user maintenance, should be performed by an authorized service
representative.
LUBRICATION: Precision bearings are sealed at the factory for
life and do not require further lubrication.
STORAGE: Store the Fan, with these instructions, in a clean and
dry place.
Figure 2
Axle Cap Nut
Axle Cap Nut
Mounting
Bracket
Wheel
Wheel
Axle Rod
#8 X 7/16"
Screws
VENTILADOR DE PISO
DE 24 PULG
24" (60,96cm) MODELO 9224
ESPECIFICACIONES
Motor .......................................120 V, 50/60 Hz
Tamaño de paletas
................. 24" (60,96 cm)
Velocidades
............................3
Control
.................................... Conjuntor rotatorio
Distribución del lujo de aire
...190°
Aprobaciones..........................Catalogación ETL. El protector de
malla cerrada del ventilador satisface las normas OSHA.
DESCRIPCIÓN
El ventilador pivotante/de piso Air King® de 24 pulg (60,96 cm)
ofrece 3 velocidades de funcionamiento y una hélice de 3 aspas.
El ventilador tiene un motor cerrado con cojinetes de bolas
permanentemente lubricados y un cordón eléctrico calibre 18
con puesta a tierra de 10 pies (3,05 m) de largo, y está fabricado
de acero duradero con acabado pulverizado.
MANUAL DE INSTRUCCIONES DE OPERACIÓN Y PARTES
LEA Y GUARDE ESTAS INSTRUCCIONES
LEA CUIDADOSAMENTE LAS INSTRUCCIONES ANTES DE INTENTAR ARMAR, INSTALAR, USAR O DAR
MANTENIMIENTO AL PRODUCTO DESCRITO.
PROTÉJASE A SÍ MISMO Y A LOS DEMÁS CUMPLIENDO CON TODA LA INFORMACIÓN DE SEGURIDAD. EL NO
SEGUIR LAS INSTRUCCIONES PODRÍA RESULTAR EN LESIONES PERSONALES Y/O DAÑOS A LA PROPIEDAD.
CONSERVE LAS INSTRUCCIONES COMO FUTURA REFERENCIA.
DESEMPACADO
Al desempacar la unidad, inspecciónela cuidadosamente para ver
si no sufrió algún daño durante el transporte. Verifique que no haya
partes flojas, faltantes o dañadas.
INFORMACIÓN GENERAL SOBRE SEGURIDAD
1. Lea todas las instrucciones antes de utilizar el Ventilador.
2. Cerciórese de que la fuente de poder sea compatible con las demandas
eléctricas del Ventilador.
3. Use este Ventilador lo en la forma que se describe en el manual. Cualquier
otro uso no recomendado por el fabricante podría ocasionar un incendio,
golpes de electricidad o lesiones a personas.
4. Para disminuir el riesgo de lesiones físicas y golpes de electricidad, no
debe jugarse con el ventilador no deberá éste ser ubicado al alcance
de los niños pequeños.
5. Desenchufe el cable eléctrico antes de instalar, proporcionar servicio
o mover el Ventilador.
ADVERTENCIA: NO DEPENDA DEL INTERRUPTOR DE
ENCENDIDO-APAGADO COMO EL ÚNICO MEDIO PARA
DESCONECTAR LA POTENCIA AL INSTALAR O PROPORCIONARLE
SERVICIO AL VENTILADOR. DESENCHUFE SIEMPRE EL CABLE
ELÉCTRICO.
6. Este Ventilador NO debe usarse en ubicaciones potencialmente
peligrosas, tales como en ambientes inflamables, explosivos, cargados
de sustancias químicas o húmedos.
7. NO use el ventilador ante una ventana, pues la lluvia podría presentar
riesgos eléctricos.
8. Vuelva a armar el ventilador por completo, siguiendo las instrucciones,
antes de reconectarse a la fuente de poder.
9. El cable eléctrico está equipado con un enchufe para tierra con tres
espigas que debe insertarse en un tomacorriente adecuado. Bajo
ninguna circunstancia debe cortarse la espiga de tierra del enchufe.
En caso de haber tomacorrientes de pared para dos espigas, deben
reemplazarse con tomacorrientes para tierra con tres espigas, de
acuerdo con el Código Nacional de Electricidad de los EUA (NEC) y con
todos los códigos y ordenanzas locales. Este trabajo debe ser realizado
por un electricista calificado, usando exclusivamente alambres de
cobre.
ADVERTENCIA: NO USE UN ADAPTADOR DE TRES ESPIGAS.
CONEXIONES INDEBIDAS PUEDEN CREAR EL RIESGO DE UN
CORTO CIRCUITO O UNA DESCARGA ELECTRICA. EL USO DE
TAL ADAPTADOR ESTA PROHIBIDO EN CANADA.
ADVERTENCIA: ESTE ENCHUFE ES UNA MEDIDA DE
SEGURIDAD. PARA REDUCIR EL RIESGO DE INCENDIO,
CHOQUE ELÉCTRICO Y LESIONES PERSONALES, NO QUITE,
NI REEMPLACE, NI REPARE O ALTERE EL ENCHUFE QUE SE
PROVEE ORIGINALMENTE. SI EL VENTILADOR NO FUNCIONA
CORRECTAMENTE, PUEDE DEBERSE AL DISPOSITIVO DE
SEGURIDAD INCORPORADO EN ESTE ENCHUFE.
10.De ser posible, evite el uso de cables de extensión. Si debieran usarse,
minimice el riesgo de sobrecalentamiento procurando que estén
aprobados por UL. Nunca use un solo cable de extensión para hacer
funcionar más de un Ventilador.
11.No haga funcionar ningún Ventilador con un cable o enchufe dañado o
después de que el ventilador presente algún desperfecto o haya sido
dejado caer o sufriera cualquier tipo de daño. Regrese el Ventilador a un
servicio de reparación autorizado para examinar el Ventilador, efectuarle
ajustes eléctricos o mecánicos o repararlo.
12.No introduzca ni permita que se introduzcan dedos u objetos extraños
en ninguna abertura de ventilación o escape, puesto que podría
provocar un golpe de electricidad, incendio, o daños al ventilador. No
bloquee ni manipule el Ventilador de ninguna manera mientras esté en
funcionamiento.
13.Ubique el cable eléctrico de tal modo que el ventilador u otros objetos no
descansen sobre él. No disponga el cable eléctrico debajo de alfombras.
No cubra el cable eléctrico con tapetes, alfombras continuas u objetos
similares. Coloque el cable eléctrico fuera del paso de las personas y
donde nadie se tropiece con el mismo.
14.Este Ventilador no ha sido diseñado para usarse en lugares mojados o
húmedos. Nunca coloque un Ventilador donde quepa la posibilidad de
que caiga en una bañera u otro recipiente con agua.
15.No use el Ventilador en exteriores.
16.Este Ventilador no es adecuado para usar en lugares peligrosos. Por
favor consulte el Artículo 500 del Código Eléctrico Nacional (NEC), o
los códigos o normas estatales o locales aplicables con relación a los
requisitos eléctricos para lugares peligrosos. ESTE VENTILADOR NO
CUMPLE CON LOS REQUISITOS DEL ARTICULO 500 (2008).
ADVERTENCIA: DISMINUYA EL RIESGO DE INCENDIO O
GOLPES DE ELECTRICIDAD NO USE ESTE VENTILADOR
CON ARTEFACTOS DE CONTROL DE VELOCIDAD EN ESTADO
SÓLIDO.
CONSERVE ESTAS
INSTRUCCIONES


Produkt Specifikationer

Mærke: Air King
Kategori: Ventilator
Model: 9224

Har du brug for hjælp?

Hvis du har brug for hjælp til Air King 9224 stil et spørgsmål nedenfor, og andre brugere vil svare dig


Ventilator Air King Manualer
Air King

Air King 9701 Manual

28 August 2025
Air King

Air King AK200LS Manual

28 August 2025
Air King

Air King MFAS Manual

28 August 2025
Air King

Air King 9318 Manual

28 August 2025
Air King

Air King 9174 Manual

28 August 2025
Air King

Air King DRLC701 Manual

27 August 2025
Air King

Air King E80DG Manual

27 August 2025
Air King

Air King AK863L Manual

27 August 2025
Air King

Air King 9670 Manual

27 August 2025
Air King

Air King 9119 Manual

27 August 2025

Ventilator Manualer

Nyeste Ventilator Manualer

Orbegozo

Orbegozo HF 2100 Manual

30 September 2025
ElectriQ

ElectriQ TF29OSCT8RW Manual

30 September 2025
Heller

Heller HTFE35WF Manual

30 September 2025
ElectriQ

ElectriQ TF44OSCT8RW Manual

30 September 2025
Heller

Heller HVF50B Manual

30 September 2025
Heller

Heller HHDF30S Manual

30 September 2025
DeepCool

DeepCool FL12 SE Manual

30 September 2025
Heller

Heller HMTF40 Manual

30 September 2025
Heller

Heller HWF40P Manual

30 September 2025